

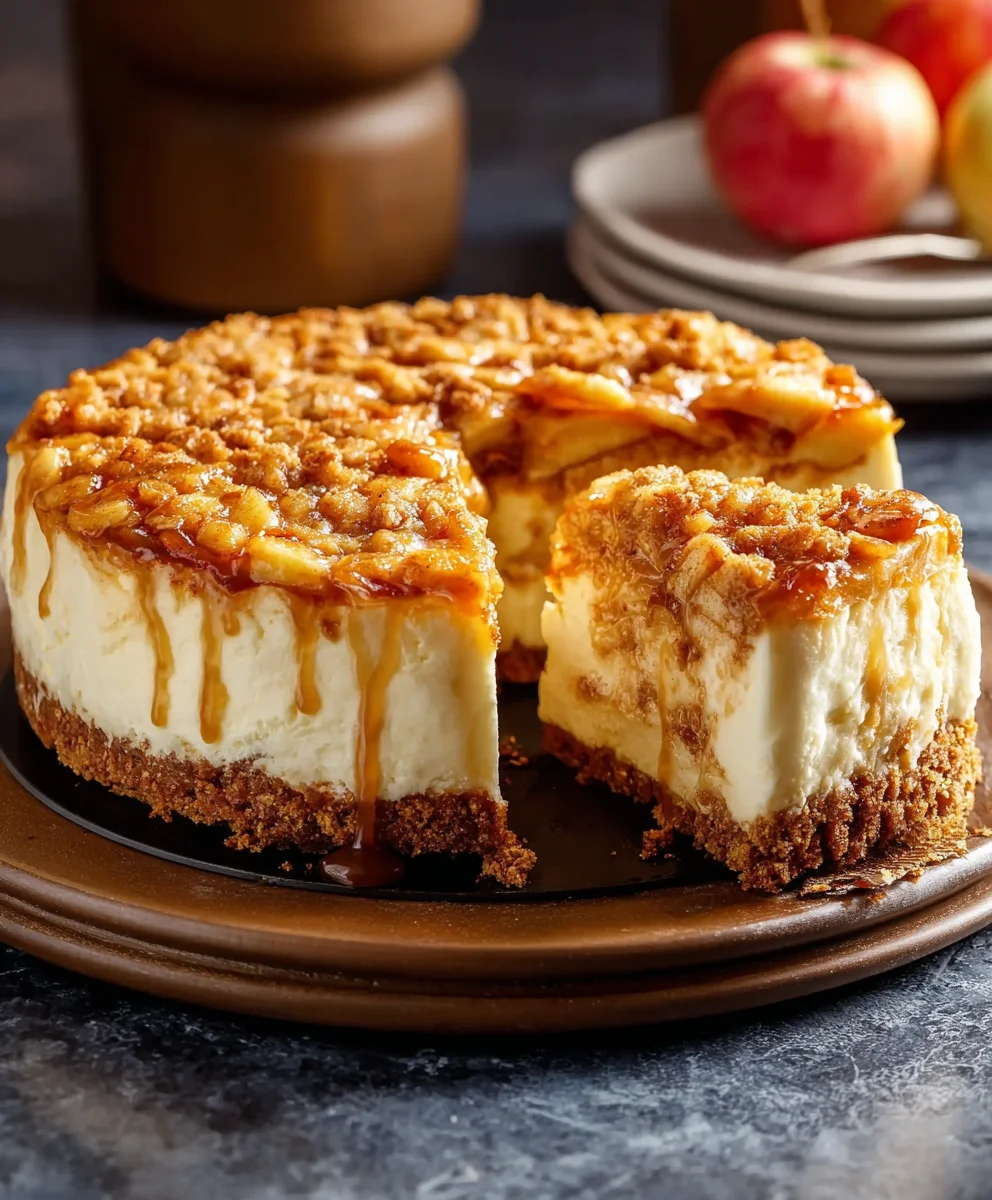
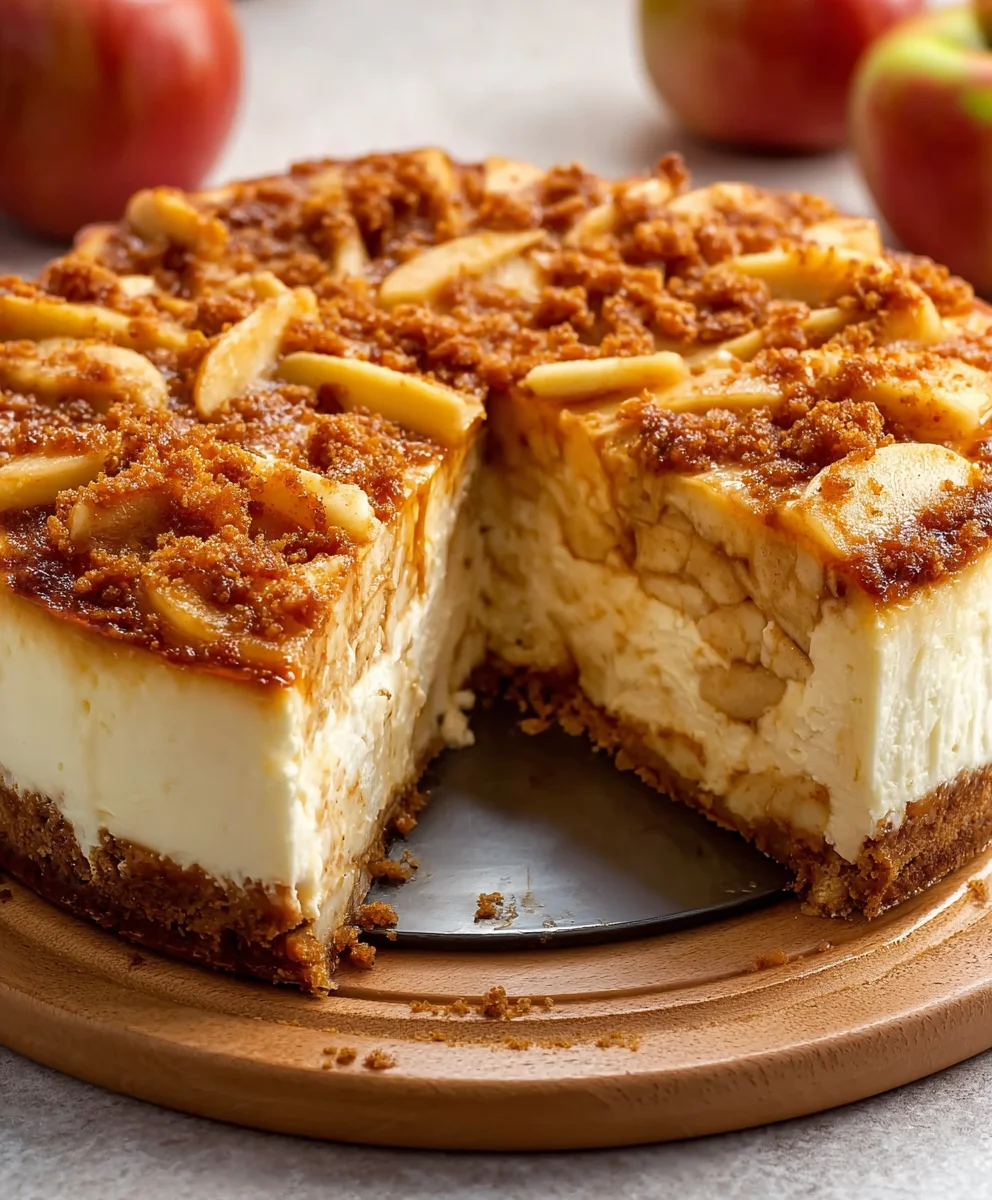
Irresistible Apple Crumble Cheesecake Recipe You’ll Crave Again – does that not paint a picture of dessert perfection in your mind? I’m truly thrilled to share with you a recipe that expertly marries two beloved classics into one extraordinary creation. Imagine sinking your fork into a dessert that offers the creamy, tangy delight of a baked cheesecake, topped with a comforting layer of tender, spiced apples, all crowned with a golden, buttery crumble. It’s a culinary dream, delivering a symphony of textures and flavors that promises to captivate your taste buds from the very first bite.
While cheesecake boasts a storied history stretching back to ancient Greece and apple crumble is a quintessential British comfort food, their elegant combination in this particular recipe represents a modern triumph. It beautifully bridges centuries of dessert tradition with contemporary indulgence. People absolutely adore this dish not just for its stunning presentation, but for the incredible experience it delivers. The velvety smoothness of the cheesecake provides a perfect counterpoint to the soft, warm apples, while the crisp, sweet crumble adds an essential textural crunch that elevates every mouthful. It’s the perfect balance of sweet, tart, and spiced, making it an ideal treat for any occasion. Truly, once you bake this Irresistible Apple Crumble Cheesecake Recipe You’ll Crave Again, it will quickly become a cherished favorite in your repertoire.

Ingredients:
- For the Graham Cracker Crust:
- 2 cups (about 18-20 full sheets) finely ground graham cracker crumbs
- 1/4 cup granulated sugar
- 1/2 teaspoon ground cinnamon (optional, but I love the warmth it adds!)
- 1/2 cup (1 stick) unsalted butter, melted
- For the Creamy Cheesecake Filling:
- 32 ounces (four 8-ounce blocks) full-fat cream cheese, softened to room temperature – this is absolutely crucial for a smooth filling!
- 1 1/2 cups granulated sugar
- 1/2 cup full-fat sour cream, also at room temperature
- 2 teaspoons pure vanilla extract
- 1 tablespoon fresh lemon zest (from about 1 large lemon) – adds a lovely brightness!
- 1/4 teaspoon salt
- 4 large eggs, also at room temperature
- For the Apple Crumble Topping:
- 3 medium-sized firm, sweet-tart apples (like Honeycrisp, Granny Smith, or Gala), peeled, cored, and finely diced into 1/4-inch pieces
- 1 tablespoon fresh lemon juice (to prevent apples from browning)
- 1/2 cup all-purpose flour
- 1/2 cup packed light brown sugar
- 1/2 cup old-fashioned rolled oats (not instant oats)
- 1 teaspoon ground cinnamon
- 1/4 teaspoon ground nutmeg
- 1/4 cup (1/2 stick) cold unsalted butter, cut into small cubes
- For the Caramel Drizzle (Optional, but highly recommended for an extra touch of indulgence!):
- 1/2 cup good quality store-bought or homemade caramel sauce, warmed slightly for drizzling
Preparing the Graham Cracker Crust
- Preheat and Prep Your Pan: First things first, preheat your oven to 350°F (175°C). Then, grab a 9-inch springform pan. I always like to line the bottom of my pan with a circle of parchment paper for easy removal – just trace the bottom and cut it out. Secure the springform sides around it. For the crucial water bath later, you’ll want to wrap the entire outside of your springform pan tightly with two layers of heavy-duty aluminum foil. This creates a protective barrier to prevent any water from seeping into your crust during baking. Trust me, a soggy crust is no fun, so take your time with this step!
- Combine the Crust Ingredients: In a medium bowl, combine the finely ground graham cracker crumbs, granulated sugar, and ground cinnamon (if you’re using it, which I highly recommend for that warm, inviting aroma!). Give these dry ingredients a good stir to ensure they are evenly distributed.
- Add the Butter: Pour in the melted unsalted butter. Use a fork or your hands to mix everything together until the crumbs are thoroughly moistened and resemble wet sand. Every crumb should be coated in that delicious buttery goodness.
- Form the Crust: Now, pour the crumb mixture into your prepared springform pan. Using the bottom of a flat-bottomed glass or your clean fingers, press the mixture firmly and evenly onto the bottom of the pan. Make sure it’s packed tightly, creating a solid, uniform layer. A well-compacted crust is key to preventing it from crumbling too much when sliced.
- Pre-Bake the Crust: Place the pan in your preheated oven and bake for 8-10 minutes. This pre-baking step is super important as it helps to set the crust and prevents it from becoming soggy once the cheesecake filling is added. When it’s done, it should smell wonderfully fragrant and be lightly golden.
- Cool the Crust: Once baked, remove the crust from the oven and set it aside on a wire rack to cool completely while you prepare the filling. Cooling ensures the hot crust doesn’t interact negatively with the creamy filling.
Crafting the Creamy Cheesecake Filling
- Beat the Cream Cheese: In the bowl of a stand mixer fitted with the paddle attachment, or using a large bowl with an electric hand mixer, beat the softened full-fat cream cheese on medium-low speed for about 3-4 minutes. You’re looking for it to become incredibly smooth and creamy, with no lumps whatsoever. This step is paramount for a perfectly smooth cheesecake texture. If your cream cheese isn’t soft enough, it will be lumpy, and no amount of subsequent mixing will fix it. Scrape down the sides of the bowl with a rubber spatula frequently to ensure everything is incorporated.
- Incorporate Sugar and Flavors: Gradually add the granulated sugar to the cream cheese, beating on medium-low speed for another 2-3 minutes until it’s well combined and the mixture is light and fluffy. Again, scrape down the bowl. Then, add the sour cream, vanilla extract, fresh lemon zest, and salt. Mix on low speed until just combined. The sour cream adds a beautiful tang and contributes to that signature creamy, velvety texture we all adore in a cheesecake.
- Add Eggs – Gently: This is a critical step where patience truly pays off. Add the eggs one at a time, mixing on the absolute lowest speed possible just until each egg is incorporated before adding the next. Stop mixing as soon as the yolk disappears. Do not overmix the batter once the eggs are added! Overmixing incorporates too much air into the filling, which can cause your cheesecake to puff up too much during baking and then dramatically crack as it cools. We want a smooth, unblemished surface!
- Final Scrape and Check: Give the entire batter one last gentle scrape down with your spatula to ensure everything from the bottom and sides of the bowl is fully mixed in. The batter should be incredibly smooth, thick, and luscious.
Prepping the Apple Crumble Topping
- Prepare the Apples: In a medium bowl, combine your finely diced apples with the tablespoon of fresh lemon juice. Toss them gently to coat. The lemon juice helps prevent the apples from browning and adds a little brightness to their flavor. Set aside.
- Mix Dry Crumble Ingredients: In another medium bowl, whisk together the all-purpose flour, packed light brown sugar, old-fashioned rolled oats, ground cinnamon, and ground nutmeg. Make sure there are no lumps of brown sugar.
- Cut in the Butter: Add the cold unsalted butter cubes to the dry crumble mixture. Using your fingertips or a pastry blender, cut the butter into the flour mixture until it resembles coarse crumbs with some pea-sized pieces of butter still visible. Using cold butter is essential here, as it will create pockets of steam during baking, resulting in a wonderfully crisp and crumbly topping. Overworking it will melt the butter and lead to a less desirable texture.
Assembling and Baking the Cheesecake
- Pour the Filling: Carefully pour the prepared cheesecake filling over the cooled graham cracker crust in your foil-wrapped springform pan. Gently tap the pan on your counter a few times to release any large air bubbles.
- Arrange Apples and Crumble: Evenly scatter the lemon-tossed diced apples over the cheesecake filling. Try to distribute them as uniformly as possible. Then, sprinkle the prepared crumble topping generously over the layer of apples. Make sure you get good coverage for that full crumble experience.
- Prepare the Water Bath: Place your foil-wrapped springform pan inside a larger roasting pan. Carefully pour boiling water into the roasting pan, making sure the water comes about halfway up the sides of the springform pan. The water bath is your cheesecake’s best friend! It provides a moist baking environment, which helps the cheesecake bake evenly, prevents cracks, and yields that incredibly creamy texture we’re aiming for.
- Bake the Cheesecake: Carefully transfer the roasting pan with the cheesecake into your preheated 350°F (175°C) oven. Bake for 15 minutes, then reduce the oven temperature to 325°F (160°C) and continue to bake for another 60-75 minutes, or until the edges are set and lightly puffed, but the center still has a slight jiggle (like firm jello) when you gently tap the side of the roasting pan. This slight wobble is normal and indicates a perfectly baked, creamy cheesecake.
- Slow Cooling in the Oven: Once baked, turn off the oven but leave the cheesecake inside with the oven door propped open a few inches. Let it cool in the gradually decreasing heat for at least 1 hour. This slow cooling process is another secret weapon against cracks! It prevents a sudden temperature shock that can cause the cheesecake to contract too quickly.
- Cool Completely: After the hour, carefully remove the springform pan from the water bath and the roasting pan. Remove the foil wrap. Place the cheesecake on a wire rack to cool completely to room temperature, which will take another 2-3 hours.
The Chilling and Finishing Touches
- Chill, Chill, Chill!: Once the cheesecake has reached room temperature, cover it loosely with plastic wrap and transfer it to the refrigerator. Chill for a minimum of 6-8 hours, or ideally, overnight. This chilling time is non-negotiable! It allows the cheesecake to fully set, firm up, and develop its rich, complex flavors and ultra-creamy texture. Trying to slice it before it’s properly chilled will result in a messy disaster.
- Unmolding Your Masterpiece: After proper chilling, carefully remove the plastic wrap. Run a thin, sharp knife around the perimeter of the cheesecake, between the crust and the springform pan sides, before releasing the springform clamp. Gently remove the sides of the pan. If you used parchment paper on the bottom, slide the cheesecake off the base onto a serving plate, or simply leave it on the metal base.
- Caramel Drizzle (Optional): If you’re using the caramel drizzle, warm your caramel sauce slightly so it’s pourable. Just before serving, generously drizzle it over the top of the chilled cheesecake. This adds an extra layer of sweetness and a beautiful visual appeal, making your “Irresistible Apple Crumble Cheesecake Recipe You’ll Crave Again” even more enticing.
Serving Your Masterpiece
- Slice and Serve: For the cleanest slices, use a very sharp knife. Dip the knife in hot water and wipe it clean between each slice. This will give you those picture-perfect pieces of your amazing cheesecake.
- Storage: Store any leftover cheesecake covered tightly in the refrigerator for up to 4-5 days. It tastes even better the next day as the flavors continue to meld!
- Enjoy!: Prepare yourself and your loved ones for an unparalleled dessert experience. Each bite delivers a delightful blend of crisp, buttery graham cracker crust, a velvety smooth and tangy cream cheese filling, tender spiced apples, and a perfectly crumbly oat topping, all elevated by that optional luscious caramel. This truly is an Irresistible Apple Crumble Cheesecake Recipe You’ll Crave Again and again!
Conclusion:
If you’ve followed along with this delightful baking journey, then you already have a sense of the magic that awaits you. But let me truly underscore why this isn’t just another dessert – it’s an experience, a celebration of flavor and texture that will undoubtedly earn you rave reviews. We’re talking about a symphony where the smooth, tangy richness of classic cheesecake meets the comforting warmth of perfectly spiced, tender apples, all crowned with a buttery, golden, and wonderfully crisp crumble. It’s truly an elevated take on two beloved classics, creating something far greater and more satisfying than the sum of its individual parts. Each component plays its role flawlessly, from the sturdy, sweet biscuit base to the creamy, velvety cheesecake layer, culminating in that irresistible crumble topping that provides the perfect textural contrast, making every mouthful an absolute delight.
This isn’t merely a recipe; it’s an invitation to create joy, to fill your kitchen with the most enchanting aromas, and to present a dessert that looks as impressive as it tastes. The moment you pull this golden-brown masterpiece from your oven, the fragrant mix of cinnamon, vanilla, and sweet apple will envelop your home, promising pure indulgence. Imagine the anticipation as you slice into it, revealing those distinct, beautiful layers – the golden brown crumble, the tender apple filling, and the pale, creamy cheesecake, all resting on a perfectly set biscuit base. Then, the first forkful: the delicate crunch of the crumble giving way to the soft, cinnamon-kissed apples, perfectly balanced between sweet and tart, before sinking into that utterly smooth, cool, and tangy cream cheese layer. It’s pure bliss, a moment of culinary delight that you’ll want to savor, and then immediately reach for another bite. And that, my friends, is precisely why I wholeheartedly recommend this as the Irresistible Apple Crumble Cheesecake Recipe You’ll Crave Again. It’s a guaranteed crowd-pleaser, perfect for any occasion, from a festive holiday gathering to a cozy Sunday evening treat that simply melts in your mouth.
Elevate Your Dessert Experience: Serving Suggestions
While this cheesecake is absolutely divine on its own, a complete star in its own right, there are a few wonderful ways to elevate your dessert experience even further, transforming it into an even more memorable moment. I personally adore it served slightly warm, allowing the apple filling to gently release its fragrant spices and the crumble to maintain a hint of its initial crispness, providing a delightful textural contrast with the cool, creamy cheesecake. This warmth brings out the best of the apple and cinnamon notes, making it incredibly comforting. A simple dollop of freshly whipped cream, perhaps lightly sweetened with a touch of vanilla extract or a dash of maple syrup, is a classic pairing that adds an extra layer of luxuriousness without overwhelming the intricate flavors of the cheesecake. It’s like a cloud on top of a dream! For those who enjoy a little extra decadence and a playful contrast, a scoop of premium vanilla bean ice cream melting softly alongside a warm slice creates an incredible hot-and-cold sensation that is simply unforgettable – think warm apples, cool ice cream, and creamy cheesecake all in one glorious, harmonious bite. Alternatively, for a touch of rustic charm and added richness, a generous drizzle of warm homemade caramel sauce over the top can beautifully complement the apple and cinnamon notes, adding a rich, buttery depth that makes each bite even more satisfying and visually appealing. Don’t underestimate the power of a sprinkle of extra cinnamon or a few toasted pecan pieces for both an elegant visual appeal and an added textural dimension, providing that extra ‘wow’ factor.
Unleash Your Inner Baker: Creative Variations
One of the most exciting and rewarding aspects of home baking is the opportunity for personalization and creative experimentation, and I’m thrilled to tell you that this recipe is wonderfully adaptable! While apples are traditional and undeniably perfect in this context, feel absolutely free to experiment with other fruits based on seasonality or your personal preference. Firm pears, sweet peaches (especially delightful in the summer months), or even a vibrant mix of berries like raspberries and blackberries could make fantastic substitutions for the apple layer. Just be sure to adjust the sugar levels in the fruit filling if your chosen fruit is particularly sweet or tart, ensuring the perfect balance. For the crumble topping, consider adding finely chopped nuts like walnuts, pecans, or slivered almonds for an extra layer of crunch, a deeper, nutty flavor, and even more complexity – toasted coconut flakes could also be a fun addition! A pinch of ground ginger, nutmeg, or even a hint of allspice or cardamom alongside the cinnamon in the apple filling can also introduce new dimensions of warmth and spice, truly making the dessert your own signature creation. If you’re feeling extra adventurous, a swirl of homemade salted caramel or a sprinkle of mini dark chocolate chips into the cheesecake batter before baking could transform this dessert into something entirely new and equally delightful, catering to different cravings and taste preferences. The robust and forgiving base of this recipe truly welcomes creativity – don’t be afraid to make it uniquely yours and put your signature spin on it! You might just discover your next favorite variation.
Your Culinary Triumph Awaits!
I genuinely hope that after reading through this, you feel incredibly inspired and eager to try this recipe in your own kitchen. There’s something profoundly satisfying and incredibly empowering about creating a dessert that looks this impressive and tastes even better. It’s absolutely perfect for special occasions, serving as a magnificent centerpiece for family gatherings, or simply as a luxurious treat to elevate and brighten an ordinary weeknight when you need a little indulgence. Imagine the smiles, the oohs and aahs, and the sheer delight on the faces of your loved ones when you present this masterpiece! It might seem like a project, but I promise you, the effort involved is incredibly rewarding, and the spectacular results truly speak for themselves, making every minute worthwhile. This is more than just a dessert; it’s a moment of culinary triumph waiting to happen for you, a chance to create something truly memorable and utterly delicious that everyone will adore.
Once you’ve embarked on this delicious adventure and brought your own version of this apple crumble cheesecake to life, I would absolutely love to hear about your experience! Did you stick to the original recipe, or did you put your own unique spin on it with different fruits or spices? What was your favorite part of the process, and more importantly, what did your family and friends think of your creation? Please don’t hesitate to share your photos, your baking triumphs, and even any clever tips or modifications you discovered along the way. Your feedback truly inspires me and helps to foster our growing community of enthusiastic home bakers, creating a space where we can all learn and share together. Drop a comment below or share your experience with me – let’s celebrate the joy of baking and delicious food together! Happy baking, and may you enjoy every single delightful, crave-worthy bite!
Irresistible Apple Crumble Cheesecake Recipe You’ll Crave Again
Experience the ultimate dessert fusion: a creamy, tangy baked cheesecake base topped with tender, spiced apples and a sweet cinnamon-sugar-flour topping. This extraordinary creation offers a symphony of textures and flavors, making it a truly unforgettable treat for any occasion.
Ingredients
-
2 cups (200g) graham cracker crumbs
-
½ cup (115g) unsalted butter, melted
-
2 tbsp granulated sugar
-
24 oz (680g) cream cheese, softened
-
1 cup (200g) granulated sugar
-
1 tsp vanilla extract
-
3 large eggs, room temperature
-
1 cup (240ml) sour cream, room temperature
-
3 medium apples, peeled, diced
-
⅓ cup (70g) brown sugar
-
1 tsp cinnamon
-
2 tbsp cornstarch
-
2 tbsp water
-
1 tbsp lemon juice
-
¾ cup (95g) all-purpose flour
Instructions
-
Step 1
Preheat oven to 350°F (175°C). Line a 9-inch springform pan with parchment paper on the bottom and wrap the outside tightly with two layers of heavy-duty aluminum foil for a water bath. -
Step 2
In a bowl, combine graham cracker crumbs, 2 tbsp granulated sugar. Stir in melted butter until crumbs are moistened. -
Step 3
Press crumb mixture firmly onto the bottom of the prepared pan. Bake for 8-10 minutes until lightly golden. Cool completely on a wire rack. -
Step 4
Beat softened cream cheese on medium-low speed for 3-4 minutes until smooth. Gradually add 1 cup granulated sugar, beating for 2-3 minutes. Add sour cream and vanilla extract; mix until just combined. -
Step 5
Add eggs one at a time, mixing on the lowest speed just until each egg is incorporated. Do not overmix. -
Step 6
In a medium bowl, toss diced apples with 1 tbsp lemon juice, cornstarch, and water. In a separate bowl, whisk together all-purpose flour, brown sugar, and 1 tsp cinnamon. -
Step 7
Pour cheesecake filling over the cooled crust. Gently tap pan to release air bubbles. Evenly scatter the apple mixture over the filling, then sprinkle the flour-sugar-cinnamon topping generously over the apples. -
Step 8
Place foil-wrapped springform pan into a larger roasting pan. Pour boiling water into the roasting pan, halfway up the sides of the springform. Bake at 350°F (175°C) for 15 minutes, then reduce oven to 325°F (160°C) and bake for another 60-75 minutes, until edges are set with a slight center jiggle. -
Step 9
Turn off oven, prop door open a few inches, and let cheesecake cool in the oven for 1 hour. Remove from water bath, unwrap foil, and cool completely on a wire rack to room temperature (2-3 hours). -
Step 10
Cover loosely and refrigerate for a minimum of 6-8 hours, ideally overnight, for best setting and flavor. -
Step 11
Run a thin knife around the perimeter before releasing springform. Slice with a hot, clean knife between cuts. Store leftovers covered in the refrigerator for up to 4-5 days.
Important Information
Nutrition Facts (Per Serving)
It is important to consider this information as approximate and not to use it as definitive health advice.
Allergy Information
Please check ingredients for potential allergens and consult a health professional if in doubt.

Leave a Comment