

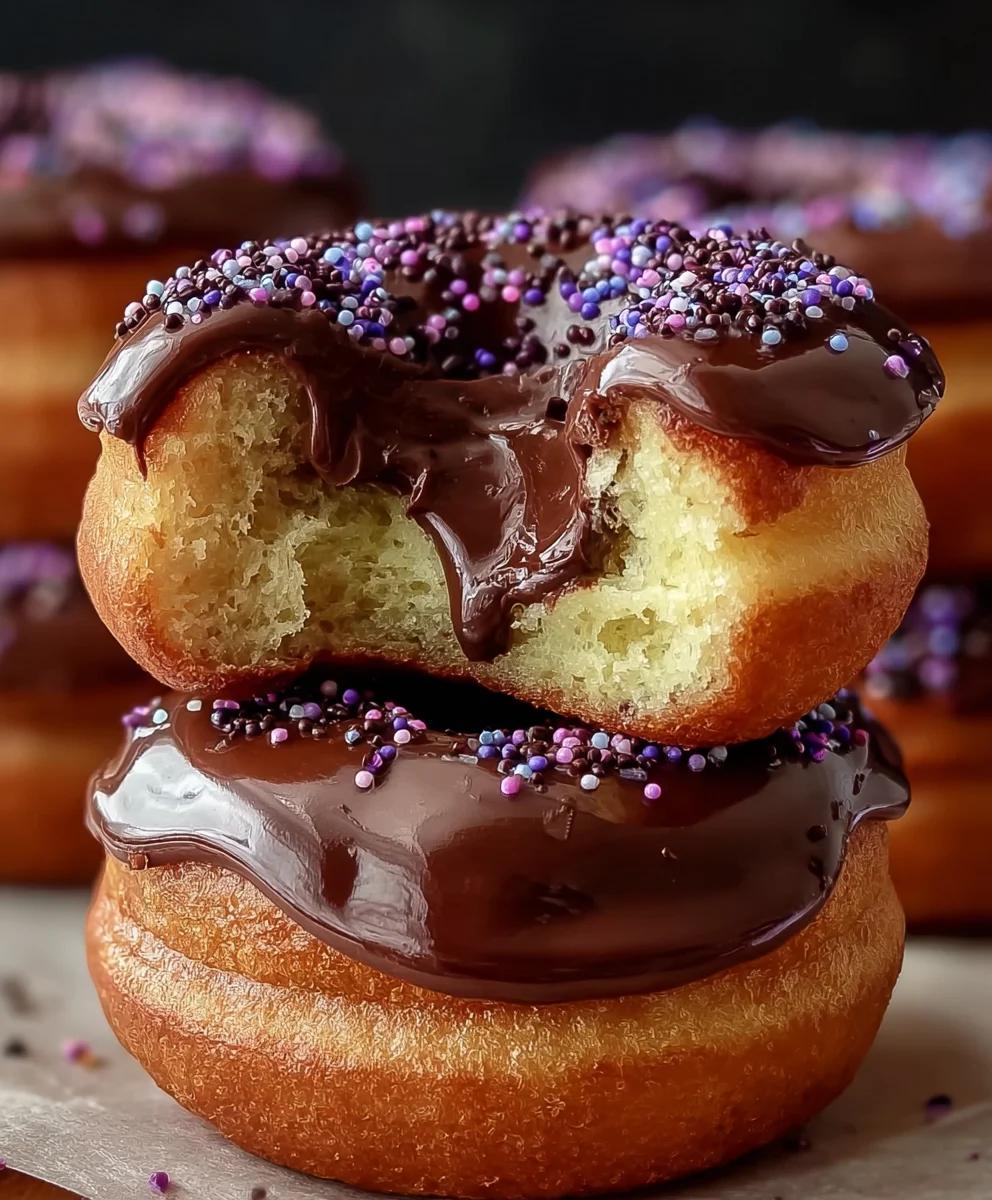
Chocolate Custard Donuts truly represent a pinnacle of dessert innovation, offering an irresistible combination that tantalizes every palate. Imagine sinking your teeth into a light, airy donut, perfectly golden and delicately sugared, only to be met with a luxurious burst of rich, velvety chocolate custard. It’s an experience that transcends the ordinary, transforming a simple pastry into an exquisite indulgence that feels both nostalgic and utterly gourmet.
A Sweet History of Comfort
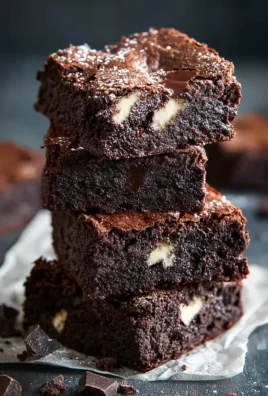
While the humble donut boasts a fascinating history, evolving from basic fried dough into the myriad of gourmet creations we adore today, the fusion of creamy custard and decadent chocolate elevates it to an unparalleled art form. This delightful pairing isn’t just about individual components; it’s about the symphony they create together. People absolutely adore these Chocolate Custard Donuts not merely for their stunning visual appeal, but for the incredible interplay of textures – the subtle crispness of the exterior giving way to a pillow-soft interior, overflowing with that smooth, luscious chocolate custard. It’s a perfect balance of sweetness and richness, a comforting treat that promises pure joy with every single bite. I am genuinely thrilled to share my cherished recipe, empowering you to create these culinary masterpieces in your own kitchen.

Ingredients:
-
For the Chocolate Custard Donuts Dough:
- Active Dry Yeast: 2 ¼ teaspoons (one standard packet)
- Warm Milk: 1 cup (240ml), whole milk preferred, warmed to 105-115°F (40-46°C)
- Granulated Sugar: ½ cup (100g)
- Large Eggs: 2, at room temperature
- Unsalted Butter: ½ cup (113g or 1 stick), melted and cooled slightly
- All-Purpose Flour: 4 ½ to 5 cups (540-600g), plus more for dusting
- Salt: 1 teaspoon
- Vanilla Extract: 1 teaspoon
-
For the Rich Chocolate Custard Filling:
- Whole Milk: 2 cups (480ml)
- Heavy Cream: ½ cup (120ml)
- Granulated Sugar: ½ cup (100g), divided
- Large Egg Yolks: 4
- Cornstarch: ¼ cup (30g)
- Unsalted Butter: 2 tablespoons (28g), cut into small pieces
- Vanilla Extract: 1 teaspoon
- Semi-Sweet Chocolate: 4 ounces (113g), finely chopped or good quality chocolate chips
- Pinch of Salt: Enhances flavor
-
For Frying:
- Vegetable Oil or Canola Oil: 6-8 cups (about 1.5-2 liters), or enough to fill your pot to 3-4 inches deep
-
For the Glaze/Topping (Optional, but highly recommended for Chocolate Custard Donuts!):
- Powdered Sugar: 2 cups (240g)
- Milk or Heavy Cream: 3-4 tablespoons
- Vanilla Extract: ½ teaspoon
- Cocoa Powder: 2 tablespoons (for a chocolate glaze variation)
- Additional Granulated Sugar: For rolling warm donuts, if not glazing
For the Chocolate Custard Donuts Dough:
- Activate the Yeast: In the bowl of a stand mixer fitted with the dough hook attachment, or a large mixing bowl if you’re kneading by hand, pour in your warm milk. Sprinkle the active dry yeast over the milk and add about 1 tablespoon of the granulated sugar from the dough ingredients. Give it a gentle stir and let it sit for 5-10 minutes. You’ll know it’s active when it becomes foamy and bubbly on top – this tells us our yeast is alive and ready to work its magic, helping our Chocolate Custard Donuts rise beautifully. If it doesn’t foam, your yeast might be old or your milk too hot/cold, and it’s best to start again.
- Combine Wet Ingredients: To the activated yeast mixture, add the remaining granulated sugar, the two room temperature large eggs, the slightly cooled melted butter, and the vanilla extract. Whisk these ingredients together until they are well combined. The mixture will look a bit cloudy, but ensure all the liquid components are evenly distributed. This forms the flavorful base for our fluffy donut dough.
- Add Dry Ingredients Gradually: In a separate medium bowl, whisk together 4 ½ cups of the all-purpose flour and the salt. With the mixer on low speed (or gradually by hand), begin adding the flour mixture to the wet ingredients, about a cup at a time. Mix until just combined after each addition. Once all the flour is in, the dough will look shaggy.
- Knead the Dough: Increase the mixer speed to medium-low and knead for about 8-10 minutes. If kneading by hand, turn the dough out onto a lightly floured surface and knead for 10-15 minutes. The dough should become smooth, elastic, and pull away from the sides of the bowl. It might be slightly sticky, but it shouldn’t be overly wet. If it’s too sticky to handle, add the remaining ½ cup of flour, one tablespoon at a time, until it reaches the right consistency. A good test is the “windowpane test”: you should be able to stretch a small piece of dough thin enough to see light through it without it tearing. This extensive kneading develops the gluten, which is essential for the soft, airy texture we want for our ultimate Chocolate Custard Donuts.
- First Rise (Bulk Fermentation): Lightly grease a large bowl with a little vegetable oil or cooking spray. Transfer the kneaded dough to the bowl, turning it once to coat the entire surface with oil. Cover the bowl tightly with plastic wrap or a clean kitchen towel. Place the bowl in a warm, draft-free spot. An oven with just the light on, or a sunny spot, works wonderfully. Let the dough rise for 1 to 1 ½ hours, or until it has doubled in size. This slow rise allows the yeast to produce gases, creating air pockets and developing deep flavors in the dough.
- Punch Down and Chill (Optional but Recommended): Once the dough has doubled, gently punch it down to release the air. At this point, you can cover it again and refrigerate it for at least 1 hour, or even overnight. Chilling the dough makes it much easier to handle, roll out, and cut. It also helps to slow down the fermentation, deepening the flavor even further. If you’re in a hurry, you can proceed directly to the next step, but I really find the chilling step improves the overall texture of the Chocolate Custard Donuts.
- Roll and Cut the Donuts: Turn the chilled (or unchilled) dough out onto a lightly floured surface. Using a rolling pin, gently roll the dough out to about ½ inch (1.25 cm) thickness. Try to keep the thickness consistent for even frying. Using a 3-inch round biscuit cutter or a donut cutter, cut out as many donut shapes as you can. Gather the scraps, gently re-roll them, and cut out more donuts. Avoid overworking the scraps, as this can make the donuts tough. Place the cut donuts on parchment-lined baking sheets, leaving a couple of inches between each one.
- Second Rise (Proofing): Loosely cover the baking sheets with plastic wrap or a clean kitchen towel. Place them again in a warm, draft-free spot and let the donuts rise for another 30-45 minutes, or until they look visibly puffy and light. They won’t quite double in size again, but they should feel light and airy when gently poked. This second proof is crucial for achieving that characteristic soft, fluffy interior of the best Chocolate Custard Donuts.
For the Rich Chocolate Custard Filling:
- Heat Milk and Cream: In a medium saucepan, combine the whole milk and heavy cream. Heat over medium heat until the mixture is simmering gently, with small bubbles forming around the edges. Do not boil. Remove from heat immediately.
- Whisk Egg Yolks and Sugar: In a separate medium bowl, whisk the egg yolks with ½ cup of granulated sugar until the mixture is pale yellow and slightly thickened. This process is called “ribboning.”
- Add Cornstarch: Sift the cornstarch into the egg yolk mixture and whisk until completely smooth. Make sure there are no lumps; a smooth mixture is key to a silky custard for our Chocolate Custard Donuts.
- Temper the Egg Yolks: This is a crucial step! Slowly, gradually, and while continuously whisking, pour about half of the hot milk mixture into the egg yolk mixture. Whisk vigorously to prevent the eggs from scrambling. This slowly brings the temperature of the egg yolks up without cooking them. Then, pour the tempered egg yolk mixture back into the saucepan with the remaining hot milk mixture.
- Cook the Custard: Return the saucepan to medium-low heat. Cook, stirring constantly with a whisk or a wooden spoon, for about 5-7 minutes. The custard will thicken considerably. It should be thick enough to coat the back of a spoon. When you draw your finger across the spoon, the line should remain clear. It’s important to keep stirring to prevent scorching and ensure an even consistency.
- Add Chocolate and Butter: Remove the saucepan from the heat. Stir in the finely chopped semi-sweet chocolate and the small pieces of unsalted butter until both are completely melted and incorporated, creating a rich, glossy chocolate custard. Add the vanilla extract and a pinch of salt, stir well. The aroma at this stage is absolutely divine!
- Chill the Custard: Pour the hot chocolate custard into a clean bowl. Press a piece of plastic wrap directly onto the surface of the custard to prevent a skin from forming. Refrigerate for at least 4 hours, or preferably overnight, until thoroughly chilled and firm. A well-chilled custard will be much easier to pipe into your Chocolate Custard Donuts.
Frying the Chocolate Custard Donuts:
- Prepare Frying Station: Line a large baking sheet with several layers of paper towels. Set up a wire rack over another baking sheet. Have a slotted spoon or spider ready. Ensure your prepared dough is puffy and ready for frying.
- Heat the Oil: Pour the vegetable or canola oil into a large, heavy-bottomed pot or Dutch oven. You’ll need enough oil to reach a depth of 3-4 inches (7-10 cm). Attach a deep-fry thermometer to the side of the pot. Heat the oil over medium heat until it reaches a consistent temperature of 350°F (175°C). Maintaining this temperature is absolutely critical for perfectly fried Chocolate Custard Donuts – too low and they’ll be greasy, too high and they’ll burn outside before cooking inside.
- Fry the Donuts: Carefully lower 2-3 donuts into the hot oil using your slotted spoon or by gently sliding them in. Do not overcrowd the pot, as this will lower the oil temperature and lead to uneven cooking. Fry for about 1-2 minutes per side, or until they are golden brown and puffed up. Use your slotted spoon to flip them gently. You’ll notice a beautiful “white ring” around the middle of the donut when it’s perfectly cooked.
- Drain the Donuts: Once golden brown on both sides, carefully remove the donuts from the oil with your slotted spoon or spider. Transfer them immediately to the paper towel-lined baking sheet to drain off excess oil.
- Repeat and Maintain Temperature: Continue frying the remaining donuts in batches, making sure to let the oil come back up to 350°F (175°C) between batches. Adjust the heat as needed to maintain a consistent temperature. If the oil gets too hot, lower the heat slightly; if it cools down, increase it. This attention to detail will ensure all your Chocolate Custard Donuts are equally delicious.
- Cool Completely: After draining, transfer the donuts to the wire rack to cool completely. They must be entirely cool before filling, otherwise, the custard will melt and run out. This cooling process is essential for the structure and stability of your finished Chocolate Custard Donuts.
Assembling and Finishing Your Chocolate Custard Donuts:
- Prepare for Filling: Once your donuts are completely cool and your chocolate custard is thoroughly chilled and firm, you are ready for the exciting part – filling! Take your chilled chocolate custard out of the refrigerator. Give it a quick whisk to ensure it’s smooth and pliable. Spoon the custard into a piping bag fitted with a long, thin, round piping tip (like an Ateco 800 or similar). If you don’t have a special donut filling tip, a regular round tip works, or you can just snip off a small corner of the piping bag.
- Fill the Donuts: Pick up a cooled donut. On one side, or preferably at a slight angle towards the bottom, gently insert the tip of your piping bag into the side of the donut. Squeeze the piping bag, filling the donut until you feel it plump up and get slightly heavy, or until you see a little bit of custard starting to peek out from the hole. Be careful not to overfill, as this can cause the donut to burst. Aim for a generous but not excessive amount of that luscious chocolate custard. Repeat this process for all the fried donuts. This step truly transforms them into proper Chocolate Custard Donuts!
- Prepare the Glaze (Optional): If you’re opting for a glaze, in a medium bowl, whisk together the powdered sugar, 3 tablespoons of milk/cream, and vanilla extract until smooth. If you desire a thicker glaze, add more powdered sugar; for a thinner glaze, add a tiny bit more liquid. For chocolate glazed Chocolate Custard Donuts, whisk in 2 tablespoons of cocoa powder at this stage.
-
Glaze or Sugar the Donuts:
- For Glazed Chocolate Custard Donuts: Dip the top half of each filled donut into the prepared glaze, letting any excess drip off. Place the glazed donuts back onto the wire rack to allow the glaze to set. You can also drizzle extra glaze decoratively if you wish.
- For Sugared Chocolate Custard Donuts: If you prefer a simpler finish, you can roll the still-warm (but not hot) unfilled donuts in granulated sugar immediately after frying, then fill them once cool. Or, if you forgot to sugar them warm, you can lightly dust the filled, cooled donuts with powdered sugar. However, for true sugared donuts, rolling while still warm ensures the sugar adheres best.
- Serve Immediately or Store: These Chocolate Custard Donuts are absolutely best enjoyed fresh, ideally within a few hours of filling. The freshness of the donut combined with the creamy, rich chocolate custard is simply unparalleled. If you must store them, keep them in an airtight container in the refrigerator for up to 2-3 days. Bring them to room temperature before serving for the best flavor and texture.
- Enjoy Your Hard Work: Take a moment to admire your beautiful homemade Chocolate Custard Donuts before diving in. The effort is truly worth it for this incredible treat!
Conclusion:
And there you have it, my friends! We’ve reached the sweet culmination of our journey together, and I truly hope you’re feeling inspired to roll up your sleeves and dive into the pure bliss of creating these extraordinary treats. This recipe for homemade Chocolate Custard Donuts isn’t just another dessert; it’s an experience, a moment of culinary magic that promises to elevate your baking prowess and delight anyone lucky enough to take a bite. What makes them an absolute must-try, you ask? It’s the impeccable harmony of textures and flavors. Imagine: a cloud-like, perfectly fried donut, golden and tender, yielding to a luscious, velvety smooth chocolate custard filling that oozes with every bite. The rich, deep cocoa notes of the custard are perfectly balanced, never overly sweet, creating an indulgent, sophisticated taste that lingers beautifully on your palate. It’s a comfort food elevated, a familiar favorite reimagined with a gourmet touch that makes it truly unforgettable. Trust me when I say, the effort is unequivocally worth the reward, and the expressions of pure joy on the faces of those who try them will be all the validation you need.
Now, while these Chocolate Custard Donuts are absolutely phenomenal served just as they are – perhaps still slightly warm from the fryer, dusted generously with a cloud of powdered sugar – don’t be afraid to get creative with your presentation and variations! For an extra touch of elegance, I sometimes like to sprinkle a pinch of flaky sea salt over the finished donuts; it really enhances the chocolate’s depth. Another wonderful serving suggestion is alongside a steaming mug of strong, dark coffee or a chilled glass of milk, making them the perfect companion for a lazy weekend morning or a well-deserved afternoon treat. If you’re feeling adventurous, consider a few delightful variations. You could infuse your custard with a hint of orange zest or a touch of espresso powder for a different flavor profile. For the donut itself, try glazing some with a rich chocolate ganache instead of powdered sugar, or even a simple vanilla bean glaze for a beautiful contrast. During the holidays, a sprinkle of festive colored sprinkles or crushed peppermint candy could transform them into seasonal delights. You could also experiment with making mini versions, perfect for sharing platters or for when you just want a small, concentrated burst of flavor. Don’t be shy about playing with different types of chocolate for the custard – a darker chocolate will yield a more intense, sophisticated flavor, while milk chocolate might appeal to those with a sweeter tooth. The possibilities are truly endless, and each variation offers a chance to make this incredible recipe uniquely yours, adapting it to suit any occasion or personal preference.
So, what are you waiting for? This is your invitation, a gentle nudge, to step into your kitchen and embark on this incredibly rewarding baking adventure. I promise you, the process of making these homemade treats, from kneading the dough to filling them with that dreamy chocolate custard, is incredibly satisfying, and the end result is nothing short of spectacular. There’s a unique joy that comes from creating something so delicious and beautiful from scratch, and these donuts encapsulate that feeling perfectly. Once you’ve had a chance to whip up your own batch of these incredible Chocolate Custard Donuts, I would absolutely love to hear all about your experience! Did you stick to the original recipe, or did you put your own creative spin on things? What were your favorite serving suggestions? Please, don’t hesitate to share your triumphs, your tips, and even any fun anecdotes from your baking journey. Take photos of your beautiful creations and share them with our little community! Your feedback and shared experiences inspire not only me but countless other home bakers looking for their next delicious challenge. Let’s celebrate the joy of homemade indulgence together! Happy baking!
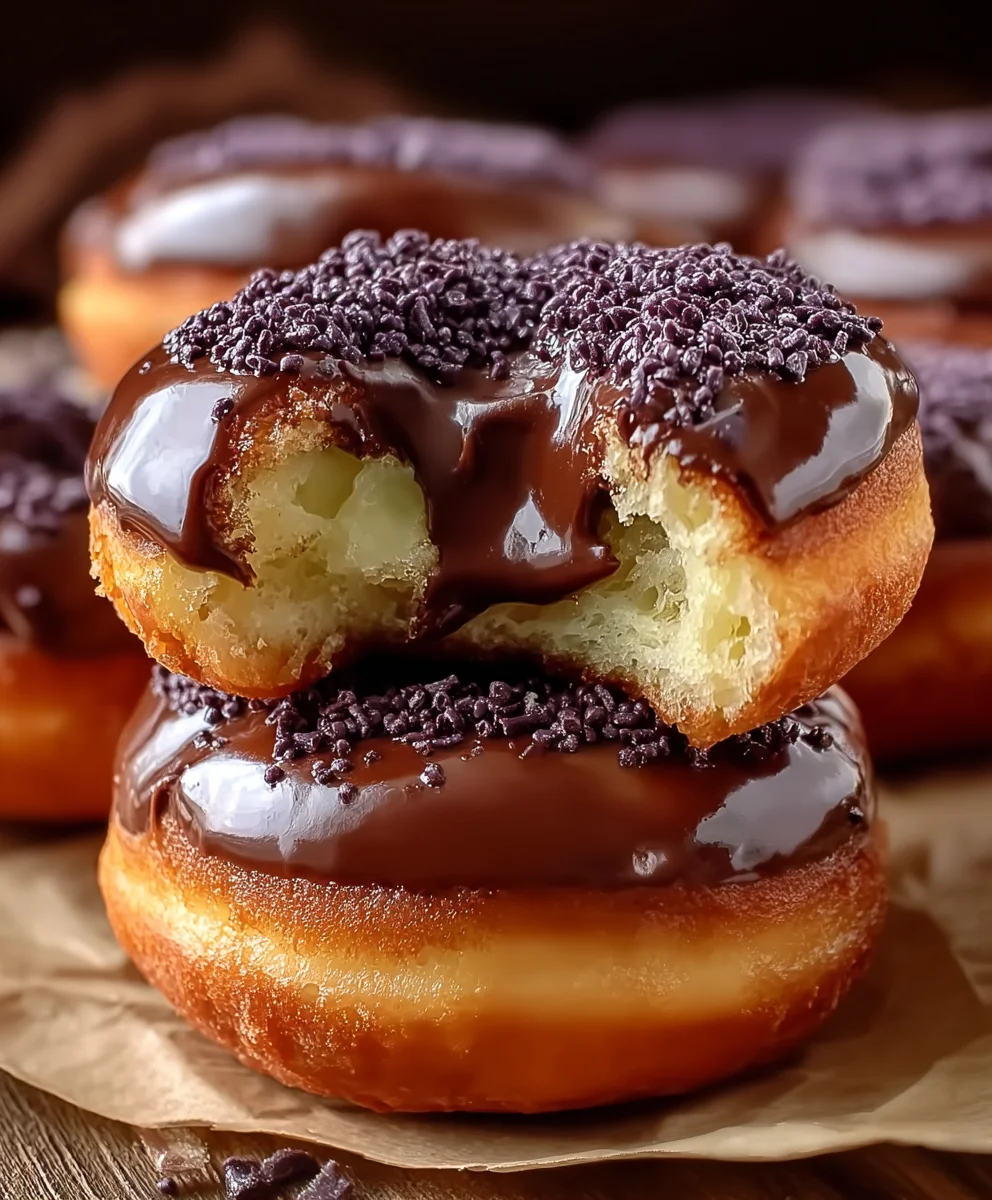
Chocolate Custard Donuts
These Chocolate Custard Filled Donuts are a luxurious treat with rich, homemade chocolate filling and a slightly crunchy sugar coating. Easy to prepare with basic ingredients, they make any occasion extra special, from holiday mornings to cozy evenings.
Ingredients
-
2 ¼ teaspoons active dry yeast
-
1 cup (240ml) warm whole milk
-
½ cup (100g) granulated sugar (dough)
-
2 large eggs
-
½ cup (113g) unsalted butter, melted
-
4 ½ to 5 cups (540-600g) all-purpose flour
-
1 teaspoon salt (dough)
-
1 teaspoon vanilla extract (dough)
-
2 cups (480ml) whole milk (custard)
-
½ cup (120ml) heavy cream
-
½ cup (100g) granulated sugar (custard)
-
4 large egg yolks
-
¼ cup (30g) cornstarch
-
2 tablespoons (28g) unsalted butter (custard)
-
1 teaspoon vanilla extract (custard)
-
4 ounces (113g) semi-sweet chocolate, chopped
-
Pinch of salt (custard)
-
6-8 cups (1.5-2 liters) vegetable or canola oil, for frying
-
2 cups (240g) powdered sugar (for glaze)
-
3-4 tablespoons milk or heavy cream (for glaze)
-
½ teaspoon vanilla extract (for glaze)
-
2 tablespoons cocoa powder (optional, for chocolate glaze)
-
Additional granulated sugar (optional, for rolling)
Instructions
-
Step 1
In a mixer bowl, combine 1 cup warm milk, 2 ¼ tsp active dry yeast, and 1 tbsp granulated sugar. Let sit 5-10 minutes until foamy. -
Step 2
Add remaining ½ cup granulated sugar, 2 large eggs, ½ cup melted butter, and 1 tsp vanilla extract (dough) to the yeast mixture. Whisk well. -
Step 3
Whisk 4 ½ cups all-purpose flour and 1 tsp salt. Gradually add to wet ingredients on low speed until combined. Increase speed to medium-low; knead 8-10 mins (10-15 by hand) until smooth and elastic. Add up to ½ cup more flour if needed. -
Step 4
Lightly grease a bowl, transfer dough, turn to coat. Cover and let rise in a warm spot for 1 to 1 ½ hours until doubled. -
Step 5
Gently punch down dough. Cover and refrigerate 1 hour or overnight for easier handling and improved flavor. -
Step 6
On a lightly floured surface, roll dough to ½ inch thick. Cut out donuts with a 3-inch round cutter. Re-roll scraps once. Place on parchment-lined baking sheets. -
Step 7
Loosely cover donuts and let rise in a warm spot for 30-45 minutes until puffy. -
Step 8
In a saucepan, heat 2 cups whole milk and ½ cup heavy cream until simmering. Remove from heat. In a separate bowl, whisk 4 large egg yolks with ½ cup granulated sugar until pale. Sift in ¼ cup cornstarch and whisk smooth. -
Step 9
Slowly pour half of the hot milk into the egg yolk mixture, whisking vigorously. Pour tempered mixture back into the saucepan. Return to medium-low heat; cook, stirring constantly, 5-7 minutes until thickened. -
Step 10
Remove from heat. Stir in 4 oz chopped semi-sweet chocolate, 2 tbsp unsalted butter (custard), 1 tsp vanilla extract (custard), and a pinch of salt until melted and smooth. Pour into a clean bowl. Press plastic wrap directly onto surface. Refrigerate at least 4 hours or overnight until thoroughly chilled and firm. -
Step 11
Line a baking sheet with paper towels, set a wire rack over another. Heat 6-8 cups vegetable/canola oil in a heavy pot to 350°F (175°C). -
Step 12
Carefully lower 2-3 donuts into hot oil. Fry 1-2 minutes per side until golden brown and puffed. Remove to paper towel-lined sheet. Repeat for all donuts, maintaining oil temperature. -
Step 13
Transfer fried donuts to a wire rack to cool completely before filling. -
Step 14
Once donuts are cool and custard chilled, whisk custard smooth. Spoon into a piping bag with a long, thin tip. Insert tip into side of each donut and fill until plump. -
Step 15
For glaze, whisk 2 cups powdered sugar, 3-4 tbsp milk/cream, and ½ tsp vanilla (and 2 tbsp cocoa for chocolate glaze) until smooth. Dip donut tops, then place on wire rack to set. For sugared donuts, roll warm unfilled donuts in granulated sugar immediately after frying, then fill once cool, or dust cooled, filled donuts with powdered sugar. -
Step 16
Best enjoyed fresh. Store in an airtight container in the refrigerator for up to 2-3 days; bring to room temperature before serving.
Important Information
Nutrition Facts (Per Serving)
It is important to consider this information as approximate and not to use it as definitive health advice.
Allergy Information
Please check ingredients for potential allergens and consult a health professional if in doubt.
Leave a Comment