

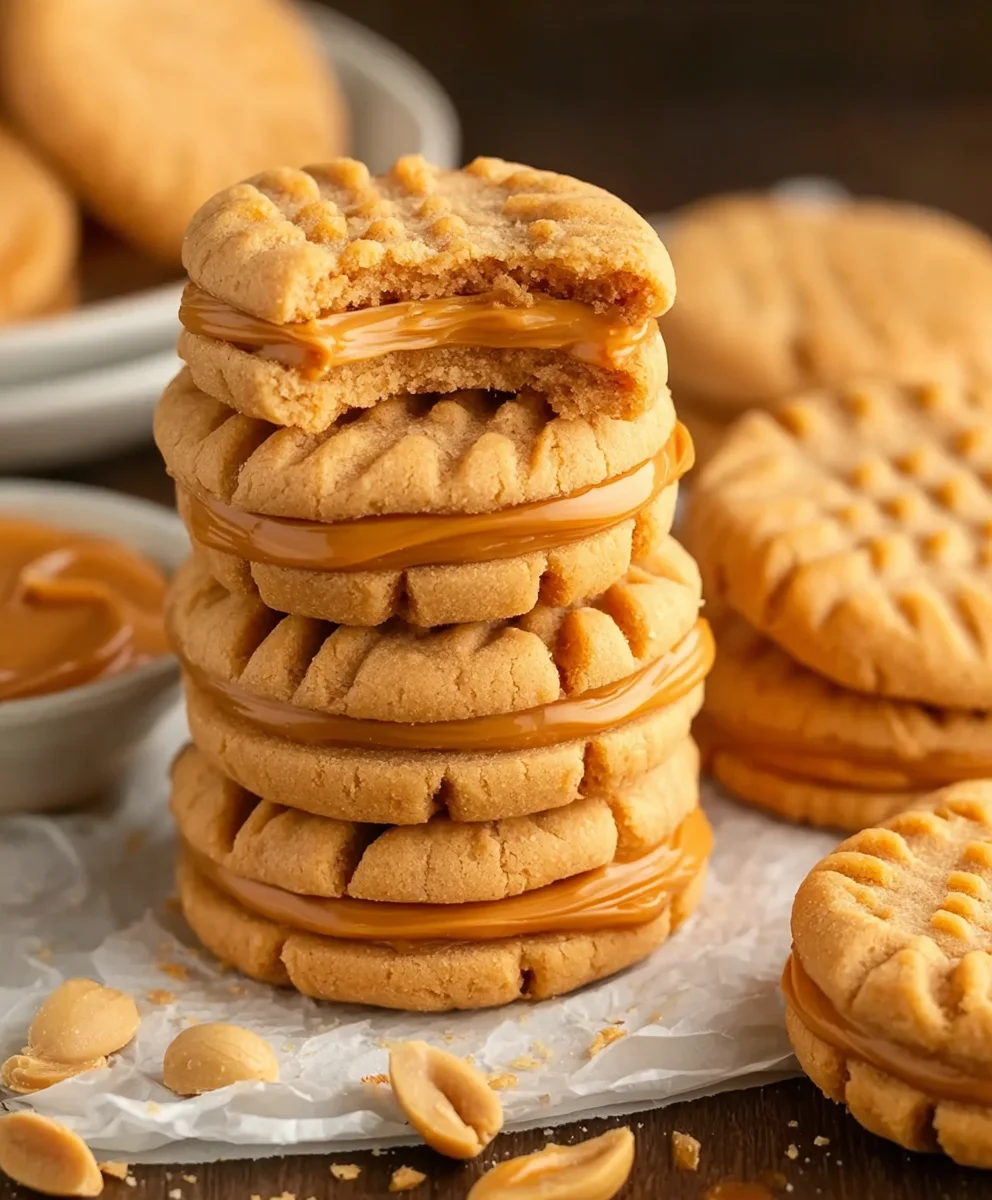
Homemade Copycat Nutter Butters are not merely a snack; they are a delightful journey back to the carefree days of childhood, a crunchy, creamy ode to one of America’s most beloved flavor combinations. Few treats evoke such profound nostalgia as the iconic peanut butter sandwich cookie, with its distinct shape and irresistible aroma.
Since their introduction in 1969, the original Nutter Butters have held a special place in our hearts and lunchboxes, evolving into a timeless classic enjoyed by generations. Their enduring appeal lies in that perfect symphony of flavors and textures: the wonderfully crisp yet tender peanut butter cookie that crumbles delicately with each bite, perfectly complemented by a rich, luscious peanut butter cream filling. That unmistakable balance of sweet and salty, paired with the ingenious texture, makes it truly unforgettable.
I am absolutely thrilled to share with you our meticulously developed recipe, allowing you to recreate this cherished treat with unparalleled freshness and flavor.
Imagine biting into a cookie that boasts an even more intense peanut butter essence, crafted with your own hands using the finest ingredients. Our goal was to capture that quintessential Nutter Butter magic, and I truly believe we have achieved it. Get ready to impress your family and friends, or simply indulge yourself, with these incredible Homemade Copycat Nutter Butters that promise pure peanut butter bliss.

Ingredients:
- For the Cookies:
- 1 cup (2 sticks) unsalted butter, softened to room temperature
- 1 cup creamy peanut butter (I like to use a classic, shelf-stable brand for that authentic Nutter Butter taste, not natural or ‘stir’ style, which can alter the texture of your Homemade Copycat Nutter Butters)
- 1 cup granulated sugar
- 1 cup packed light brown sugar
- 2 large eggs, at room temperature
- 1 teaspoon pure vanilla extract
- 3 cups all-purpose flour, sifted
- 2 teaspoons baking soda
- 1 teaspoon salt
- Optional: extra granulated sugar for rolling (about 1/4 cup)
- For the Peanut Butter Filling:
- 1 cup (2 sticks) unsalted butter, softened to room temperature
- 1 ½ cups creamy peanut butter (again, stick to a shelf-stable variety for best results, as the oil separation in natural peanut butter can affect the filling’s consistency)
- 4 cups powdered sugar, sifted (also known as confectioners’ sugar)
- ¼ cup whole milk or heavy cream, plus more if needed
- 1 teaspoon pure vanilla extract
- ¼ teaspoon salt (to balance the sweetness and enhance the peanut flavor)
Preparing the Dough for Your Homemade Copycat Nutter Butters
- Creaming the Butter, Peanut Butter, and Sugars: In the bowl of a stand mixer fitted with the paddle attachment, or with a large bowl and a handheld electric mixer, combine the softened unsalted butter and the creamy peanut butter. Beat them together on medium speed until the mixture is light, fluffy, and well-combined, usually about 2-3 minutes. This initial creaming is crucial for creating that tender, melt-in-your-mouth texture in your Homemade Copycat Nutter Butters. Scrape down the sides of the bowl as needed to ensure everything is incorporated evenly. Next, add the granulated sugar and the packed light brown sugar to the mixture. Continue to beat on medium speed for another 3-4 minutes, until the mixture is very light and fluffy. The sugars should be fully incorporated, and the mixture should appear pale. This extended creaming process vigorously incorporates air into the butter and sugar, which will contribute significantly to the cookies’ wonderfully light and airy texture once baked, preventing them from becoming too dense.
- Adding Wet Ingredients: With the mixer on low speed, add the two large room temperature eggs, one at a time, beating well after each addition. Ensure each egg is fully incorporated before adding the next. Using room temperature eggs is important because they emulsify better with the butter mixture, leading to a smoother, more cohesive dough that holds together beautifully. Once the eggs are mixed in, add the pure vanilla extract. Beat for about 30 seconds more until just combined. Be careful not to overmix at this stage; we just want everything to come together smoothly without overdeveloping the gluten.
- Combining Dry Ingredients: In a separate medium bowl, whisk together the sifted all-purpose flour, baking soda, and salt. Sifting the flour is an important preparatory step as it helps prevent any lumps from forming in your dough and ensures a lighter, more uniform texture in your finished cookies. The baking soda will provide the necessary lift, contributing to the signature chewiness and slight crispness that’s characteristic of these delightful Homemade Copycat Nutter Butters, while the salt balances the sweetness.
- Incorporating Dry into Wet: Gradually add the dry ingredient mixture to the wet ingredients in the stand mixer, mixing on low speed until just combined. It’s paramount to be very careful not to overmix the dough once the flour has been added. Overmixing can develop the gluten in the flour too much, which will result in tough, dry cookies instead of the soft, crumbly texture we’re aiming for with our Homemade Copycat Nutter Butters. Stop mixing as soon as no streaks of flour are visible. The dough will be quite thick and somewhat sticky at this point.
- Chilling the Dough: This step is absolutely non-negotiable for achieving the perfect Homemade Copycat Nutter Butters! Cover the bowl tightly with plastic wrap and refrigerate the dough for at least 1 hour, or preferably 2-3 hours. Chilling helps the dough firm up significantly, making it much easier to handle and shape into those distinct peanut-like forms without sticking to your hands. Furthermore, chilling allows the flavors to meld and prevents the cookies from spreading too much during baking, ensuring they hold their iconic shape and maintain a thick, chewy texture. If you’re in a hurry, you can put it in the freezer for about 30 minutes, but keep a close eye on it to ensure it doesn’t freeze solid.
Baking Your Homemade Copycat Nutter Butters
- Preheat and Prepare: While the dough is chilling its final moments in the refrigerator, preheat your oven to 350°F (175°C). Line several baking sheets with parchment paper or silicone baking mats. This preparation step is vital as it will prevent the cookies from sticking to the trays and makes for remarkably easy cleanup, which is always a welcome bonus after a baking session! Having multiple prepared sheets means you can transition smoothly between batches.
- Shaping the Cookies: This is where the magic of creating the Nutter Butter shape truly comes alive! Remove the chilled dough from the refrigerator. Take about 1 tablespoon of dough and roll it into a smooth ball between your palms. Then, gently roll this ball into an oval or log shape, about 1 ½ to 2 inches long. This will be the foundational base for our signature peanut shape. To create the iconic “peanut” indentation in the middle, gently pinch the center of the oval dough ball with your thumb and forefinger, or use the blunt side of a skewer or a chopstick. You want to create a subtle, defined indentation, not a deep cut that might cause the cookie to break. If desired, you can lightly roll each shaped cookie in granulated sugar before placing it on the prepared baking sheets, leaving about 2 inches between cookies to allow for slight spreading. The extra sugar will give the cookies a lovely sparkly finish, a pleasant textural contrast, and a bit of extra sweetness. Remember to re-chill any dough you aren’t immediately baking, especially if your kitchen is warm, to maintain its firmness and prevent excessive spreading.
- Baking the Cookies: Bake the cookies for 9-12 minutes, or until the edges are lightly golden brown and the centers are just set. The exact baking time will depend largely on your specific oven’s calibration and the precise size of your shaped cookies. It’s crucial to keep a close eye on them during this stage; you don’t want them to get too dark or overly crispy. They might still look a little soft in the very center when you pull them out, but they will continue to set and firm up as they cool on the hot baking sheet. For the authentic, desired Nutter Butter texture, it is paramount to avoid overbaking. These cookies are meant to be soft, tender, and delightfully chewy, not hard or brittle.
- Cooling the Cookies: Once baked, carefully remove the baking sheets from the oven. Let the cookies cool undisturbed on the baking sheets for 5-7 minutes before attempting to transfer them. This initial cooling period on the hot sheet helps them set and firm up sufficiently, preventing them from breaking apart when you move them. After this brief cooling, gently transfer them to a wire rack to cool completely. It’s absolutely essential that the cookies are completely cool to the touch before you attempt to fill them, otherwise, your beautifully crafted peanut butter filling will melt and slide right off, creating a messy situation! Patience here will ensure the perfect assembly of your Homemade Copycat Nutter Butters.
Crafting the Creamy Peanut Butter Filling
- Creaming Butter and Peanut Butter: In a clean bowl of a stand mixer with the paddle attachment, or using a handheld electric mixer, combine the softened unsalted butter and the creamy peanut butter. Beat on medium speed for 2-3 minutes until the mixture is very light and wonderfully fluffy. This step is quite similar to the initial creaming for the cookie dough and ensures a remarkably smooth, airy, and luscious base for your filling. Make sure to scrape down the sides of the bowl periodically with a spatula to ensure all ingredients are thoroughly incorporated and no unmixed butter or peanut butter remains.
- Adding Powdered Sugar: Gradually add the sifted powdered sugar, about 1 cup at a time, beating on low speed until each addition is fully incorporated before adding the next. Powdered sugar is crucial for the filling’s texture, giving it that characteristic smooth, creamy, and slightly dense consistency that makes Homemade Copycat Nutter Butters so irresistible. If you were to add it all at once, you’d likely end up with a rather spectacular, but inconvenient, cloud of sugar dust across your kitchen! Once all the powdered sugar is incorporated, increase the speed to medium and beat for another 1-2 minutes until the mixture is truly light and fluffy, resembling a thick, peanut buttery frosting.
- Incorporating Liquid and Flavor: Add the pure vanilla extract, the pinch of salt, and the initial ¼ cup of whole milk or heavy cream to the mixture. Beat on medium-high speed for 2-3 minutes until the filling is wonderfully light, supremely fluffy, and perfectly smooth. The small addition of salt plays a critical role here, helping to cut through the sweetness of the sugar and significantly enhance the rich, savory peanut butter flavor, creating a perfect balance. The milk or cream contributes to a rich, spreadable consistency that’s easy to work with. If, after beating, the filling still seems too thick or stiff for your liking, you can add an additional tablespoon of milk or cream at a time, beating after each addition, until you reach your desired consistency. You want it to be firm enough to hold its shape when piped or spread but soft enough to be pleasant to eat and easy to work with.
Assembling Your Irresistible Homemade Copycat Nutter Butters
- Pairing the Cookies: Once all your cookies are completely cool to the touch, which is essential for a clean assembly, gently match them up into pairs of similar size and shape. Taking a moment to do this will make the assembly process much smoother and ensure that each of your finished Homemade Copycat Nutter Butter sandwiches looks consistent, neat, and professionally appealing.
-
Filling the Cookies: You have a couple of wonderful options here, depending on your preference for presentation and ease of application!
- Piping Method (for a neater, more uniform look): If you desire a clean and precise finish, transfer the creamy peanut butter filling to a piping bag fitted with a large round or star tip. Pipe a generous dollop or a decorative swirl of filling onto the flat side of one cookie half. You can pipe along the entire outline of the cookie, or just a substantial blob in the center, whatever aesthetic you prefer. The piping method often yields a cleaner, more consistent appearance, wonderfully mimicking the store-bought version perfectly.
- Spreading Method (for simplicity and speed): Alternatively, if you don’t have a piping bag or simply prefer a quicker, more straightforward approach, use a small offset spatula or a butter knife to spread a generous amount of filling onto the flat side of one cookie half. Make sure to spread it evenly to the edges, ensuring every bite will be filled with that delicious peanut butter goodness.
The key here is to use enough filling to create a satisfyingly thick sandwich without it squishing out excessively when you press the top cookie on.
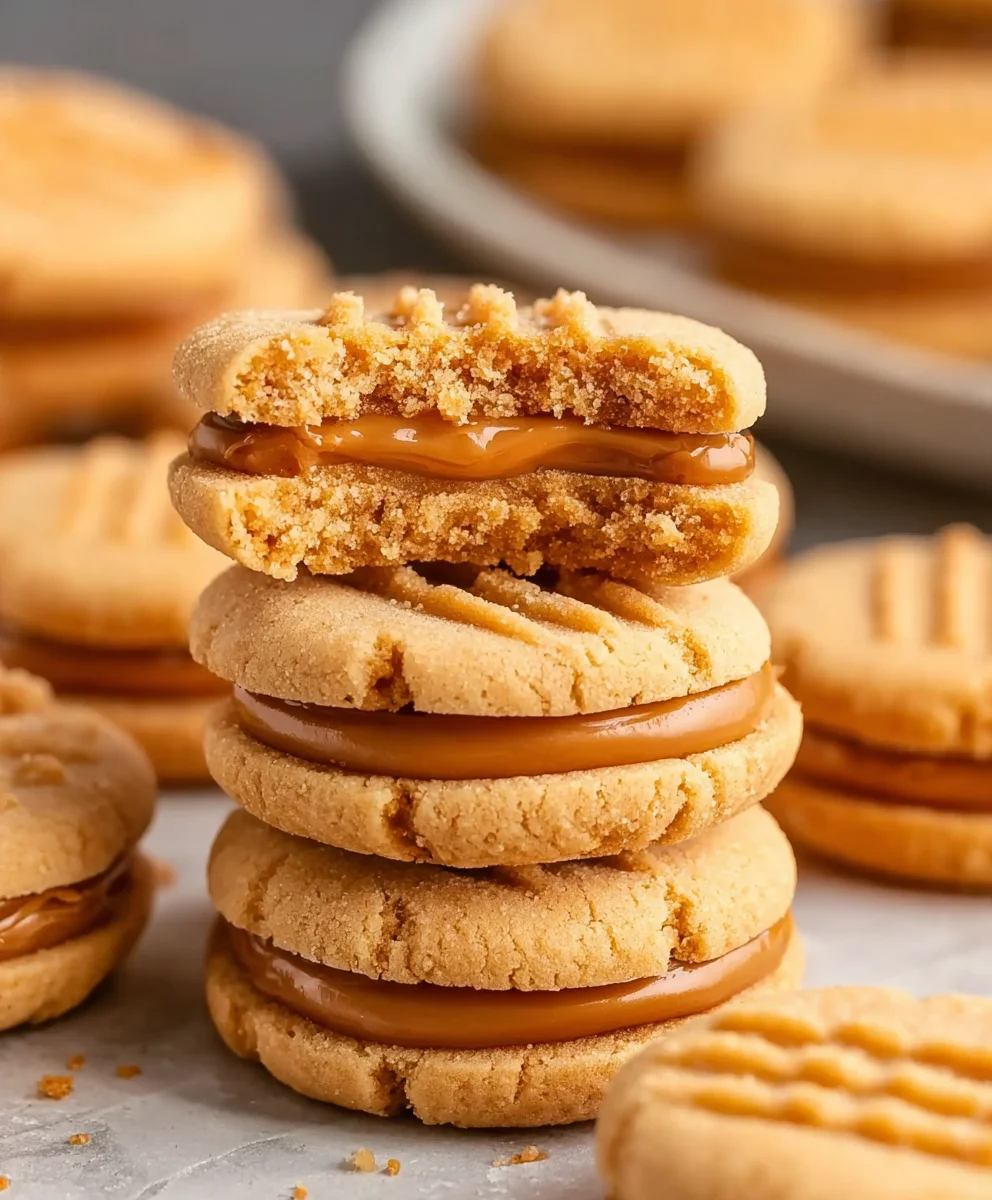
- Creating the Sandwich: Carefully place the second matching cookie half directly on top of the filling, with its flat side down. Gently but firmly press down on the top cookie until the filling spreads almost to the edges, creating a beautiful and cohesive sandwich. Be gentle enough so you don’t accidentally break the delicate cookies, but firm enough to ensure a good bond. You’ll instantly see your Homemade Copycat Nutter Butters come to life, ready for enjoyment!
- Final Touch and Storage: Repeat the filling and sandwiching process with all of the remaining cookies and the glorious peanut butter filling until every cookie has found its delicious partner. Once all your Homemade Copycat Nutter Butters are assembled, you can serve them immediately for a fresh-from-the-kitchen experience. For an even firmer filling and to allow the flavors to meld further, you can place the finished cookies in the refrigerator for about 30 minutes to an hour; this also makes them a bit less messy to eat. Store your Homemade Copycat Nutter Butters in an airtight container at room temperature for up to 3-4 days, maintaining their soft texture. For longer storage, they hold up wonderfully in the refrigerator for up to a week, or you can even freeze them beautifully for several weeks; just thaw them at room temperature for about 30 minutes before enjoying. You’ve just created a batch of truly incredible, nostalgic Homemade Copycat Nutter Butters that are sure to impress everyone with their authentic taste and homemade charm! Enjoy every single delicious, peanut buttery bite!
Conclusion:
And so, we arrive at the culmination of our delicious journey! I truly hope you’ve enjoyed exploring the process behind these incredibly satisfying treats. What we’ve created together isn’t just a cookie; it’s a little piece of edible nostalgia, elevated by the love and care that only Homemade Copycat Nutter Butters can provide. This isn’t merely about replicating a store-bought favorite; it’s about surpassing it in every possible way – from the rich, deep peanut flavor of fresh, quality ingredients to the perfectly crumbly yet tender texture that simply melts in your mouth. Forget those preservative-laden versions; these are pure, unadulterated joy, crafted right in your own kitchen.
Why is this recipe an absolute must-try? For starters, the flavor profile is leagues beyond anything you’ll find in a package. The combination of real peanut butter in both the cookie and the creamy filling ensures an intense, authentic taste that will transport you straight back to childhood, but with a grown-up appreciation for quality. Then there’s the texture – that delightful balance of a crisp edge giving way to a soft, yielding interior, perfectly complemented by the smooth, luscious peanut butter cream sandwiched within. It’s an experience, not just a bite. Plus, there’s an immense sense of accomplishment that comes with baking something so iconic from scratch, knowing exactly what ingredients went into it. You control the sweetness, the saltiness, and the richness, tailoring it precisely to your preference. It’s a project that brings warmth to your home and a smile to everyone who tastes it.
Serving Suggestions & Creative Variations:
While these cookies are undeniably perfect straight off the cooling rack, perhaps with a tall, frosty glass of milk – a classic pairing that simply can’t be beaten – their versatility doesn’t end there. Imagine them as the star of your next dessert platter, nestled amongst fresh berries and perhaps a few delicate chocolate truffles. For a truly indulgent experience, crumble a couple over a scoop of vanilla bean ice cream, letting the peanut buttery goodness mingle with the creamy coldness. They also make an unexpected but delightful addition to a simple fruit salad, adding a crunchy, nutty dimension. Or, for the coffee lovers out there, pair one with your morning brew or an afternoon espresso; the robust coffee notes beautifully complement the rich peanut butter.
But let’s not stop at simple pairings. The beauty of baking from scratch lies in the freedom to experiment! Why not try dipping half of each finished cookie in melted dark chocolate? The slight bitterness of the chocolate would be a magnificent contrast to the sweet and salty peanut butter. Or, for an extra layer of texture, you could gently press a few mini chocolate chips into the creamy filling before capping them with the top cookie. Feeling adventurous? Consider adding a pinch of cinnamon or a tiny dash of smoked paprika to your cookie dough for a surprisingly sophisticated twist. For those with nut allergies, swapping out traditional peanut butter for sunflower seed butter (SunButter) can yield a fantastic alternative, allowing everyone to enjoy this delightful treat. You could also experiment with other nut butters, like almond or cashew, though the classic peanut flavor is undeniably special. For a gourmet touch, a sprinkle of flaky sea salt on top of the finished cookies before the filling sets can elevate the entire experience, enhancing that irresistible sweet and salty dynamic we all adore. You could even incorporate finely chopped roasted peanuts into the cookie dough itself for an even more intense nutty crunch.
My biggest encouragement to you now is to simply roll up your sleeves and give these a try! Don’t be intimidated; the process is incredibly rewarding, and the results speak for themselves. There’s a unique joy in filling your kitchen with the aroma of freshly baked cookies, a joy that store-bought treats simply cannot replicate. Once you experience the homemade version, I promise you, you’ll never look back. When you do bake them, please don’t keep the magic to yourself! I would absolutely love to hear about your experience. Did you stick to the original recipe, or did you venture into your own creative variations? What was your favorite part of the process, or the most surprising discovery? Share your triumphs, your photos, and your tasting notes. Let’s build a community of enthusiastic bakers who appreciate the simple pleasure of a perfectly crafted cookie. Happy baking, my friends, and prepare to fall in love with these exceptional, truly unforgettable peanut butter delights!
Homemade Copycat Nutter Butters
Recreate the beloved classic with this recipe for homemade Nutter Butter cookies! Enjoy crunchy peanut butter cookies filled with a rich, creamy peanut butter frosting, perfect for a delightful journey back to childhood.
Ingredients
-
1/2 cup unsalted butter, softened (for cookies)
-
1/2 cup creamy peanut butter (for cookies)
-
1/2 cup granulated sugar
-
1/2 cup brown sugar, packed
-
1 large egg, room temperature
-
1 teaspoon vanilla extract (for cookies)
-
1 1/4 cups all-purpose flour, sifted
-
3/4 teaspoon baking soda
-
1/4 teaspoon salt (for cookies)
-
Extra granulated sugar for rolling (optional)
-
1/2 cup creamy peanut butter (for filling)
-
1/4 cup unsalted butter, softened (for filling)
-
1 cup powdered sugar, sifted
-
1 teaspoon vanilla extract (for filling)
-
1-2 tablespoons whole milk or heavy cream
Instructions
-
Step 1
In a mixer, beat 1/2 cup softened unsalted butter and 1/2 cup creamy peanut butter until light and fluffy (2-3 mins). Add granulated sugar and brown sugar; beat until very light and fluffy (3-4 mins). Beat in the egg (one at a time) and 1 tsp vanilla extract until just combined. -
Step 2
In a separate bowl, whisk together 1 1/4 cups sifted all-purpose flour, 3/4 tsp baking soda, and 1/4 tsp salt. -
Step 3
Gradually add dry ingredients to wet, mixing on low speed until just combined; do not overmix. Cover and refrigerate dough for at least 1 hour (preferably 2-3 hours) to firm up and prevent spreading. -
Step 4
Preheat oven to 350°F (175°C). Line baking sheets with parchment. Roll 1 tbsp dough into a 1.5-2 inch oval, then gently pinch the center to create a peanut shape. Optionally, roll in extra granulated sugar. Bake for 9-12 minutes, or until edges are lightly golden and centers are just set. Avoid overbaking. -
Step 5
Let cookies cool on baking sheets for 5-7 minutes, then transfer to a wire rack to cool completely. Ensure cookies are fully cool before filling. -
Step 6
In a clean mixer bowl, beat 1/4 cup softened unsalted butter and 1/2 cup creamy peanut butter until light and fluffy (2-3 mins). Gradually add 1 cup sifted powdered sugar, beating on low until fully incorporated. Add 1 tsp vanilla extract and 1-2 tbsp whole milk or heavy cream; beat on medium-high for 2-3 minutes until light, fluffy, and smooth. Adjust milk/cream for desired consistency. -
Step 7
Once cookies are cool, match them into pairs of similar size. Pipe or spread a generous amount of peanut butter filling onto the flat side of one cookie. Place the second matching cookie on top, flat side down, and gently press until the filling spreads to the edges. -
Step 8
Serve immediately or chill assembled cookies for 30-60 minutes for a firmer filling. Store in an airtight container at room temperature for 3-4 days, or refrigerate for up to a week. For longer storage, freeze and thaw at room temperature before enjoying.
Important Information
Nutrition Facts (Per Serving)
It is important to consider this information as approximate and not to use it as definitive health advice.
Allergy Information
Please check ingredients for potential allergens and consult a health professional if in doubt.


Leave a Comment