

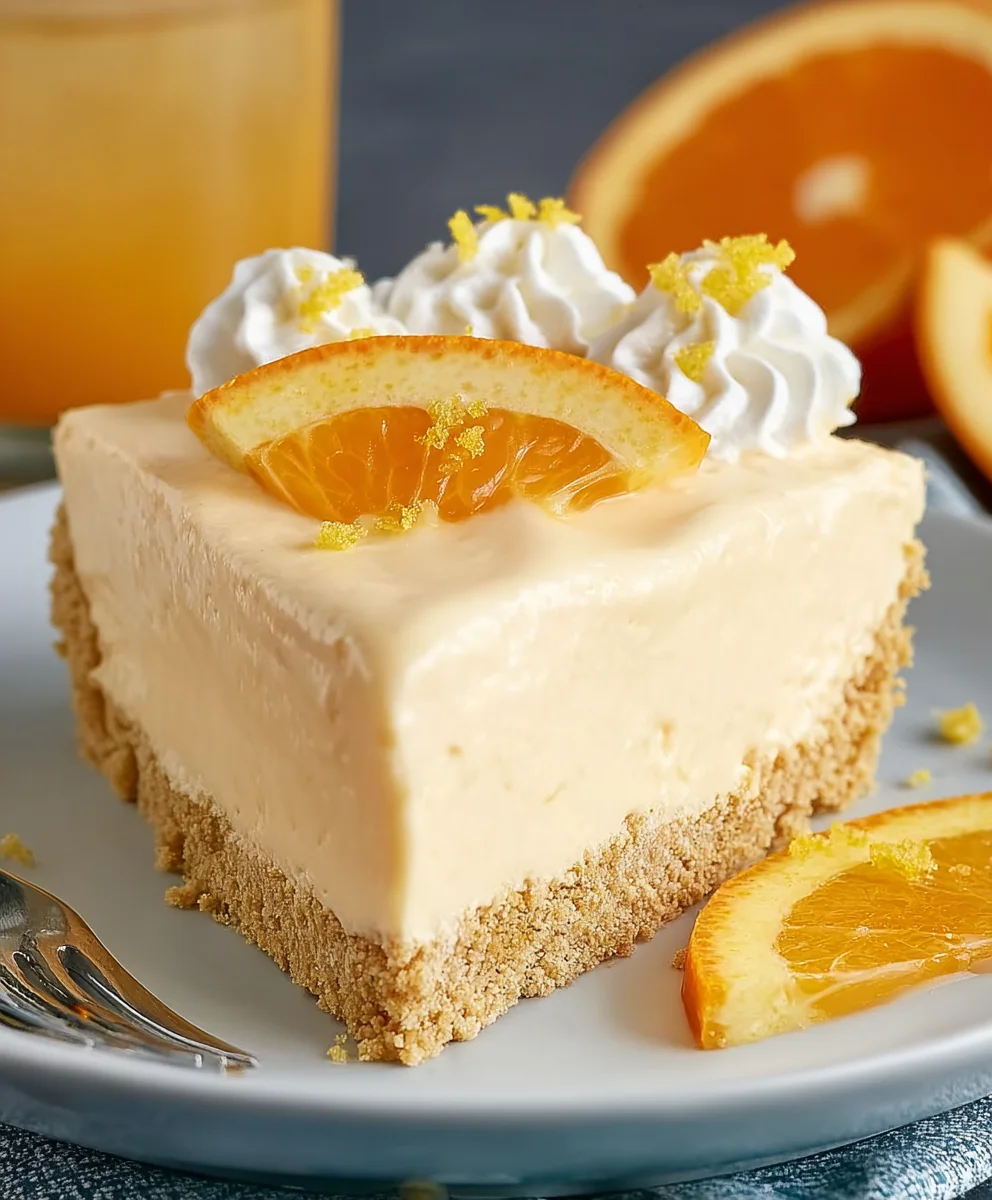
Orange Creamsicle Pie instantly evokes cherished childhood memories for many of us, transforming a beloved frozen treat into a sophisticated, yet delightfully simple, dessert. Imagine the quintessential taste of summer – that bright, zesty orange mingling with a velvety vanilla cream, all transformed into a decadent pie. It’s more than just a dessert; it’s a journey back to simpler times, capturing the iconic flavor profile of the classic orange creamsicle ice cream bar in every luscious bite.
While not a centuries-old tradition, this modern classic has quickly become a beloved staple in countless homes, offering a sophisticated twist on a truly nostalgic treat. People adore this dish for its unparalleled combination of tangy citrus brightness and smooth, sweet creaminess, often nestled in a delightful, easy-to-make crust. The refreshing burst of orange perfectly complements the comforting, rich cream, making it an ideal choice for any occasion, from casual family gatherings to elegant dinner parties.
This incredible Orange Creamsicle Pie is truly a showstopper.
Its vibrant flavor profile and irresistible, silky-smooth texture make it an instant favorite, appealing to both the young and the young at heart. It’s a dessert that promises to refresh and delight, leaving a lasting impression with its perfect balance of sweet and tart.

Ingredients:
-
For the Golden Graham Cracker Crust:
- 1 ½ cups (approximately 150g) finely crushed graham cracker crumbs. For a truly smooth crust, I like to use a food processor to get them perfectly fine.
- ¼ cup (50g) granulated sugar. This adds a lovely touch of sweetness to balance the salty butter and ensures a cohesive crust.
- 6 tablespoons (85g) unsalted butter, melted. I always melt mine gently in a small saucepan or microwave, being careful not to brown it.
-
For the Velvety Orange Creamsicle Filling:
- 2 (8-ounce) packages (450g total) full-fat cream cheese, softened to room temperature. This is crucial for a smooth, lump-free filling, so plan ahead and take it out of the fridge at least an hour before you begin.
- 1 cup (200g) granulated sugar. This sweetens our delightful Orange Creamsicle Pie filling perfectly.
- 2 tablespoons freshly grated orange zest (from 2-3 medium oranges). Don’t skip this! The zest provides an intense orange aroma and flavor that really makes our “Orange Creamsicle Pie” shine.
- ½ cup (120ml) fresh orange juice, pulp-free. I recommend juicing your own oranges for the best, brightest flavor.
- 1 tablespoon unflavored gelatin powder. This is our secret weapon for a stable, yet creamy, filling.
- ¼ cup (60ml) cold water. Used to bloom the gelatin before incorporating it into the filling.
- 1 teaspoon pure vanilla extract. A touch of vanilla enhances the “creamsicle” flavor profile beautifully.
- Pinch of salt. A tiny bit of salt balances the sweetness and brings out all the other flavors.
- 2 cups (480ml) heavy cream, chilled. This will be whipped and folded into our cream cheese mixture for that light, airy texture.
- Optional: A few drops of orange food coloring. If you want a more vibrant, “creamsicle” orange hue for your pie, a little food coloring can achieve that without affecting the taste.
-
For the Dreamy Whipped Topping (Highly Recommended):
- 1 cup (240ml) heavy cream, chilled.
- ¼ cup (30g) powdered sugar (confectioners’ sugar).
- ½ teaspoon pure vanilla extract.
-
For Garnish (Optional, but adds a lovely touch):
- Thinly sliced fresh orange segments or finely grated orange zest.
Preparing the Crust for Your Orange Creamsicle Pie
- Preheat and Prepare: Start by preheating your oven to 350°F (175°C). While the oven is warming up, gather your ingredients for the crust. I find that a good crust is the foundation of any fantastic pie, and for our “Orange Creamsicle Pie,” we want something sturdy yet tender.
- Crush the Graham Crackers: Place your graham cracker squares into a food processor and pulse until very fine crumbs form. Alternatively, you can put them in a large zip-top bag and crush them with a rolling pin. Aim for a consistently fine texture, as this ensures the crust holds together well and isn’t too crumbly. I always check for any larger pieces and give them an extra crush.
- Combine Dry Ingredients: In a medium bowl, combine the finely crushed graham cracker crumbs and the granulated sugar. Whisk them together thoroughly with a fork until they are evenly distributed. This ensures every bite of our Orange Creamsicle Pie crust has a balanced sweetness.
- Add Melted Butter: Pour the melted butter over the crumb mixture. Using the same fork or a rubber spatula, mix until all the crumbs are moistened and resemble wet sand. It’s important that every crumb is coated; this is what allows the crust to press together firmly and bake into a solid base. If your crumbs still look dry in spots, you might need to add just a tiny bit more melted butter, but be careful not to overdo it, or the crust could become greasy.
- Press into Pie Plate: Transfer the moistened crumbs into a 9-inch pie plate. Using the back of a spoon or your clean fingers, press the mixture firmly and evenly onto the bottom and up the sides of the pie plate. I like to use a flat-bottomed measuring cup to really get it packed down tightly, especially along the edges, to create a neat and strong rim. This firm pressing is key to preventing the crust from crumbling when you slice your “Orange Creamsicle Pie.”
- Bake the Crust: Place the pie plate with the pressed crust into your preheated oven. Bake for 8-10 minutes, or until the crust is lightly golden brown and fragrant. Baking the crust briefly helps to set it, making it less prone to becoming soggy once the filling is added. Keep a close eye on it, as graham cracker crusts can brown quickly.
- Cool Completely: Once baked, remove the pie crust from the oven and set it on a wire rack to cool completely. This step is critical! The crust must be fully cooled before you add the creamy filling, otherwise, the residual heat can cause your filling to melt and lose its set. I usually let it cool for at least 30-45 minutes, or even pop it in the fridge for a quick chill if I’m in a hurry.
Crafting the Luscious Orange Creamsicle Filling
- Bloom the Gelatin: In a small bowl, sprinkle the unflavored gelatin powder over the ¼ cup of cold water. Let it sit for 5-10 minutes, or until the gelatin has absorbed the water and blossomed into a soft, jelly-like consistency. This is called “blooming” the gelatin and it’s an essential step to ensure it dissolves smoothly later.
- Prepare the Orange Infusion: While the gelatin is blooming, warm the ½ cup of fresh orange juice in a small saucepan over low heat, or in a microwave-safe bowl for about 30-45 seconds. It doesn’t need to be boiling, just warm enough to fully dissolve the gelatin. Once warm, add the bloomed gelatin to the warm orange juice and stir constantly until the gelatin is completely dissolved and no granules remain. This usually takes a minute or two. Set this mixture aside to cool slightly, but ensure it remains liquid. If it starts to set, you can gently rewarm it.
- Cream the Cream Cheese: In a large mixing bowl, using an electric mixer (either a stand mixer with the paddle attachment or a hand mixer), beat the softened cream cheese on medium speed until it is light, fluffy, and completely smooth. This can take 2-3 minutes. It is absolutely vital that your cream cheese is at room temperature to achieve this silky-smooth texture; otherwise, you’ll end up with lumps in your “Orange Creamsicle Pie” filling. Scrape down the sides of the bowl frequently to ensure even mixing.
- Add Sugar and Zest: Gradually add the granulated sugar to the cream cheese, beating on medium-low speed until well combined and the mixture is smooth. Then, stir in the fresh orange zest, vanilla extract, and the pinch of salt. Beat for another minute to fully incorporate these wonderful flavors. The orange zest brings such an incredible perfume and brightens the entire Orange Creamsicle Pie.
- Incorporate Orange Gelatin Mixture: With the mixer on low speed, slowly pour the slightly cooled orange juice and gelatin mixture into the cream cheese mixture. Continue to beat until it is fully incorporated and the filling is smooth and uniform. At this point, if you’re using orange food coloring, add a few drops and mix until you reach your desired “creamsicle” hue. I like a subtle, pale orange, but you can go bolder if you wish!
- Whip the Heavy Cream: In a separate, very clean and cold large mixing bowl, pour the 2 cups of chilled heavy cream. Using an electric mixer (with whisk attachment if available), beat the cream on medium-high speed until stiff peaks form. This means when you lift the beaters, the cream stands up firmly without collapsing. Be careful not to over-whip, or it will become grainy.
- Fold in Whipped Cream: This is a delicate step! Gently fold about one-third of the whipped cream into the orange cream cheese mixture using a rubber spatula. This lightens the cream cheese base, making it easier to incorporate the remaining whipped cream without deflating it. Once partially combined, gently fold in the remaining whipped cream until no streaks of white cream are visible and the mixture is uniformly light and airy. The key here is gentle folding to maintain the volume of the whipped cream, which gives our “Orange Creamsicle Pie” its signature light and fluffy texture. Avoid overmixing.
Assembling Your Delightful Orange Creamsicle Pie
- Pour into Crust: Carefully pour the luscious orange creamsicle filling into the completely cooled graham cracker crust. Use a spatula to gently spread the filling evenly across the crust, creating a smooth and appealing surface.
- Chill, Chill, Chill: This is arguably the most important step for a perfectly set “Orange Creamsicle Pie.” Cover the pie loosely with plastic wrap, ensuring the plastic doesn’t touch the surface of the filling, and refrigerate for a minimum of 4-6 hours, or preferably overnight. The longer it chills, the firmer and more stable your pie will be, making for cleaner slices and a superior texture. I always aim for an overnight chill if time allows.
Preparing the Dreamy Whipped Topping (Optional, but highly recommended for an authentic Orange Creamsicle Pie experience)
- Chill Your Equipment: For the best whipped cream, I always recommend chilling your mixing bowl and whisk attachment (if using a stand mixer) in the freezer for 10-15 minutes before you start. This helps the cream whip up faster and hold its volume better.
- Whip the Cream: Pour the 1 cup of chilled heavy cream into your cold mixing bowl. Begin whipping on medium-low speed, gradually increasing to medium-high as the cream starts to thicken.
- Add Sweetener and Vanilla: Once the cream begins to hold soft peaks, sprinkle in the powdered sugar and add the vanilla extract. Continue beating on medium-high speed until medium-firm peaks form. You want it to be light and fluffy, but still smooth. Be careful not to over-whip, as it can quickly turn grainy or even into butter.
Finishing Touches and Serving Your Perfect Orange Creamsicle Pie
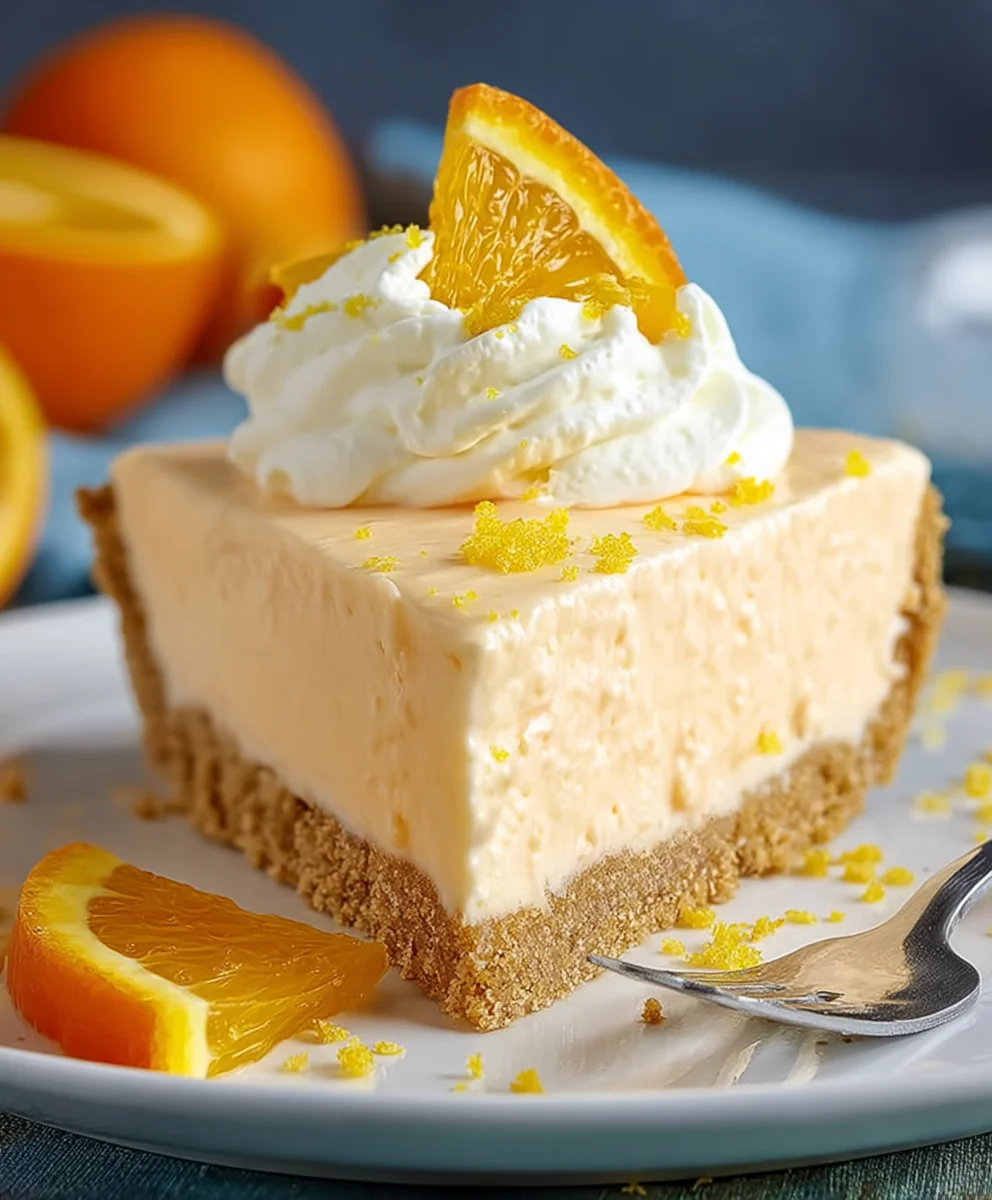
- Top and Garnish: Once your “Orange Creamsicle Pie” is thoroughly chilled and set, remove it from the refrigerator. You can now spread the prepared whipped topping over the entire surface of the pie or pipe decorative swirls using a piping bag fitted with a star tip.
- Add Optional Garnish: For an extra special touch and a burst of fresh flavor, arrange thin slices of fresh orange on top of the whipped cream, or sprinkle with a bit of finely grated orange zest. This not only looks beautiful but also reinforces the vibrant orange theme of our “Orange Creamsicle Pie.”
- Slice and Serve: To achieve clean slices, use a sharp knife that has been dipped in hot water and wiped clean between each cut. This will help the knife glide through the creamy filling without dragging. Serve immediately.
- Storage: Any leftover slices of this delightful Orange Creamsicle Pie should be stored covered in the refrigerator. It will remain fresh and delicious for 3-4 days. This pie is a fantastic make-ahead dessert, perfect for gatherings, or just to have on hand for a sweet treat. The flavors actually meld and deepen beautifully after a day in the fridge, making it even more enjoyable.
Enjoy your homemade Orange Creamsicle Pie – a true taste of sunshine and nostalgia!
Conclusion:
If there’s one recipe I’ve shared that truly captures the essence of pure, unadulterated joy and effortless elegance, it’s this magnificent Orange Creamsicle Pie. We’ve journeyed through the simple steps to create a dessert that is not just a treat for the taste buds but a nostalgic trip back to childhood summer days, all wrapped up in a creamy, dreamy, and perfectly citrusy package. This isn’t just another pie; it’s a celebration of flavor, a testament to how simple ingredients can come together to create something truly extraordinary. I truly believe that once you take that first bite, you’ll understand why I’m so passionate about it. The harmonious blend of zesty orange and velvety, sweet cream is simply unparalleled, offering a refreshing and comforting experience simultaneously. It’s light enough to enjoy after a hearty meal, yet rich enough to feel like a decadent indulgence. Furthermore, its no-bake nature makes it an absolute hero in the kitchen, especially during warmer months or when you simply want to minimize oven time. It’s the kind of dessert that looks impressive with minimal effort, making you look like a culinary genius without breaking a sweat.
Serving Suggestions and Creative Twists to Elevate Your Pie Experience
While this pie is absolutely stellar on its own, served perfectly chilled straight from the refrigerator, there are countless ways to enhance its presentation and flavor profile, making it even more special for various occasions. For a touch of classic elegance, I often recommend a light dusting of powdered sugar just before serving, or a delicate swirl of freshly whipped cream. If you’re feeling a bit more adventurous, consider grating some fresh orange zest over the top to intensify that vibrant citrus aroma and add a beautiful splash of color. For a truly gourmet touch, candied orange slices or segments can be arranged artfully on each slice, creating a stunning visual appeal that is sure to impress your guests.
Don’t be afraid to experiment with the crust either! While a graham cracker crust offers that delightful, buttery crunch that complements the creamy filling perfectly, you could also try a vanilla wafer crust for a slightly sweeter, more delicate base. For those who love a bit of chocolate, a thin layer of melted white chocolate brushed onto the baked and cooled crust before adding the filling can introduce a subtle, delightful contrast. Think about serving individual mini pies or tartlets in ramekins or muffin tins; these are wonderful for portion control and make for an adorable presentation at parties or brunches. For a fun, deconstructed approach, layer the filling and crumbled crust in clear glasses or mason jars for delightful parfaits – perfect for a picnic or a casual gathering. You could even introduce other fruits; a few fresh raspberries or blueberries artfully placed around the slices can add both color and a slight tartness that brightens the whole dessert.
Remember, this Orange Creamsicle Pie is remarkably forgiving and adaptable. If you want to play with the filling’s texture, a very thin layer of orange marmalade swirled into the top before chilling can add an extra layer of flavor and a beautiful visual marble effect. For those who enjoy a hint of spice, a tiny pinch of cardamom or ginger in the filling can introduce an unexpected warmth that beautifully complements the citrus. And for a truly adult twist, a tablespoon of orange liqueur, like Grand Marnier or Cointreau, can be incorporated into the filling for an added layer of sophistication. The possibilities are truly endless, allowing you to personalize this already fantastic recipe to your heart’s content.
Your Culinary Adventure Awaits! Share Your Creations With Me!
Now, my friends, it’s your turn to experience the magic of this pie. I truly hope you’ll carve out some time in your kitchen soon to whip up this irresistible dessert. Whether you’re making it for a special occasion, a family gathering, or simply to treat yourself to something truly delicious, I promise you won’t be disappointed. It’s a recipe that delivers on its promise of flavor, ease, and sheer enjoyment. I firmly believe that the best recipes are those that bring people together, evoke fond memories, and create new ones, and this pie does exactly that.
I’m genuinely excited to see and hear about your creations. Once you’ve made your Orange Creamsicle Pie, please don’t hesitate to share your experience. Did you stick to the original recipe, or did you put your own unique spin on it with some of the variations I suggested? What did your family and friends think? Did it bring back any fond memories for you? I truly love hearing from you all and seeing your culinary adventures come to life. Your feedback and photos not only make my day but also inspire others in our wonderful cooking community to try new things and find joy in the kitchen. So, go forth, create, and most importantly, enjoy every single creamy, dreamy bite! I can’t wait to hear all about it. Happy baking – or rather, happy no-baking!
Orange Creamsicle Pie
Orange Creamsicle Pie transforms a beloved frozen treat into a sophisticated, yet delightfully simple, dessert. This easy and delicious no-bake treat captures the iconic flavor profile of the classic orange creamsicle ice cream bar with bright, zesty orange mingling with velvety vanilla cream. It’s a modern classic adored for its unparalleled combination of tangy citrus brightness and smooth, sweet creaminess, ideal for any occasion. This pie is a perfect make-ahead dessert; it can be stored in the refrigerator for up to 3 days or frozen for up to 2 weeks.
Ingredients
-
1 ½ cups (150g) finely crushed graham cracker crumbs
-
¼ cup (50g) granulated sugar
-
6 tablespoons (85g) unsalted butter, melted
-
2 (8-ounce) packages (450g total) full-fat cream cheese, softened
-
1 cup (200g) granulated sugar
-
2 tablespoons freshly grated orange zest (from 2-3 medium oranges)
-
½ cup (120ml) fresh orange juice, pulp-free
-
1 tablespoon unflavored gelatin powder
-
¼ cup (60ml) cold water
-
1 teaspoon pure vanilla extract
-
Pinch of salt
-
2 cups (480ml) heavy cream, chilled
-
Optional: A few drops of orange food coloring
-
1 cup (240ml) heavy cream, chilled (for topping)
-
¼ cup (30g) powdered sugar (for topping)
-
½ teaspoon pure vanilla extract (for topping)
-
Optional: Thinly sliced fresh orange segments or finely grated orange zest (for garnish)
Instructions
-
Step 1
Preheat oven to 350°F (175°C). Finely crush graham crackers; combine with ¼ cup granulated sugar in a medium bowl. Add melted butter and mix until crumbs are moistened. Press mixture firmly into a 9-inch pie plate. Bake for 8-10 minutes until lightly golden. Cool crust completely on a wire rack for at least 30-45 minutes. -
Step 2
In a small bowl, sprinkle gelatin powder over ¼ cup cold water. Let sit for 5-10 minutes until bloomed. Warm ½ cup fresh orange juice (don’t boil), then stir in bloomed gelatin until completely dissolved. Set aside to cool slightly, ensuring it remains liquid. -
Step 3
In a large mixing bowl, beat softened cream cheese on medium speed until light, fluffy, and smooth (2-3 minutes). Gradually add 1 cup granulated sugar, beating until well combined. Stir in orange zest, 1 teaspoon vanilla extract, and a pinch of salt. Beat for another minute. -
Step 4
With the mixer on low speed, slowly pour the slightly cooled orange juice and gelatin mixture into the cream cheese mixture, beating until fully incorporated and smooth. If desired, add a few drops of orange food coloring and mix to achieve your preferred hue. -
Step 5
In a separate, clean, and cold large mixing bowl, pour 2 cups chilled heavy cream. Beat on medium-high speed until stiff peaks form. Be careful not to over-whip. -
Step 6
Gently fold about one-third of the whipped cream into the orange cream cheese mixture to lighten it. Then, gently fold in the remaining whipped cream until no streaks are visible and the mixture is uniformly light and airy. Avoid overmixing to maintain volume. -
Step 7
Carefully pour the orange creamsicle filling into the completely cooled graham cracker crust. Spread evenly. Cover loosely with plastic wrap and refrigerate for a minimum of 4-6 hours, or preferably overnight, until thoroughly chilled and set. -
Step 8
For best results, chill a mixing bowl and whisk in the freezer for 10-15 minutes. Pour 1 cup chilled heavy cream into the cold bowl. Whip on medium-low speed, gradually increasing to medium-high. Once soft peaks form, add powdered sugar and ½ teaspoon vanilla extract. Continue beating until medium-firm peaks form; do not over-whip. -
Step 9
Once the pie is set, spread or pipe the prepared whipped topping over the surface. Garnish with thin slices of fresh orange or grated orange zest, if desired. Use a sharp knife (dipped in hot water and wiped clean between cuts) to slice and serve immediately. Store leftover pie covered in the refrigerator for 3-4 days. For longer storage, freeze for up to 2 weeks. When serving from frozen, allow to sit at room temperature for about 10 minutes before slicing.
Important Information
Nutrition Facts (Per Serving)
It is important to consider this information as approximate and not to use it as definitive health advice.
Allergy Information
Please check ingredients for potential allergens and consult a health professional if in doubt.
Leave a Comment