

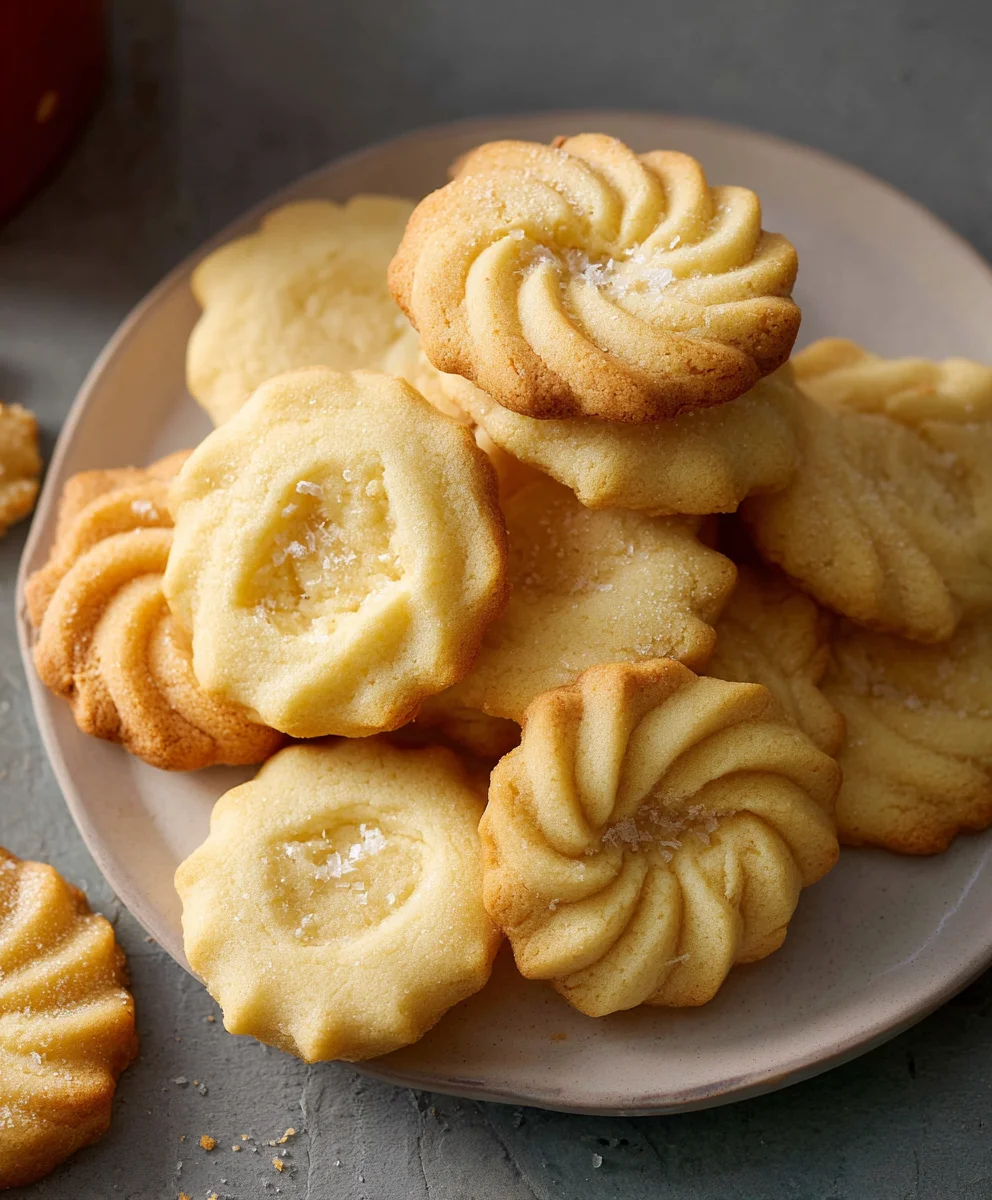
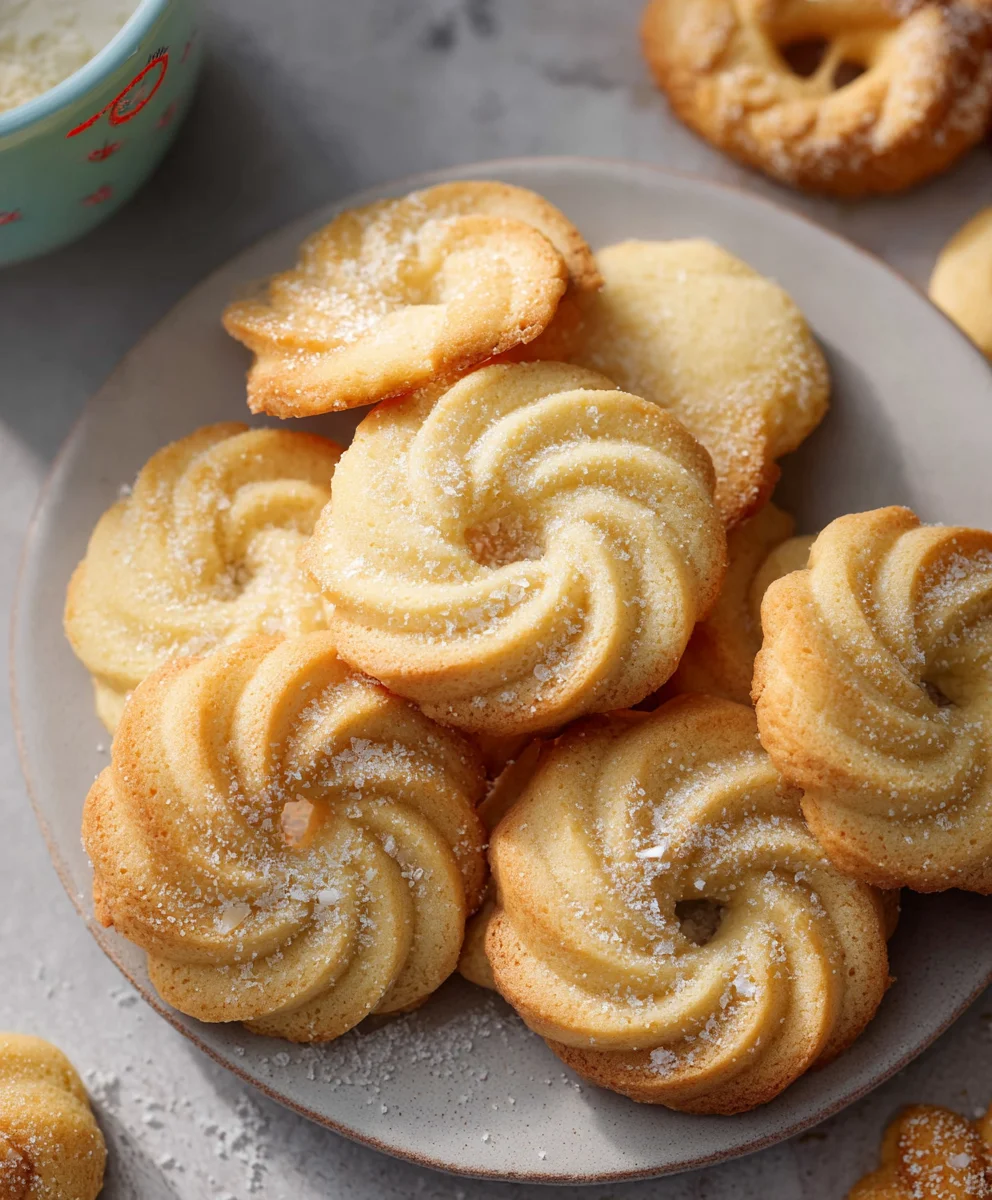
Danish Butter Cookies (Melt in your mouth) are more than just a simple treat; they are a nostalgic journey back to childhood, a comforting aroma filling the kitchen, and the sheer joy of that first perfect bite. We all remember those iconic blue tins, a treasure trove of golden, delicate cookies that promised pure indulgence. What is it about these humble butter cookies that makes them so universally adored? It’s their exquisite simplicity, the way a few high-quality ingredients – butter, sugar, flour, and a hint of vanilla – transform into something truly magical. They possess an almost ethereal texture, crisp yet tender, dissolving on your tongue in a symphony of buttery goodness. This recipe aims to capture that authentic, melt-in-your-mouth magic, allowing you to recreate these beloved Danish Butter Cookies (Melt in your mouth) in your own home, bringing that special touch of Scandinavian sweetness to your table.

Ingredients:
- 1 cup (227 g) European salted butter, softened to room temperature
- 1/2 cup (100 g) granulated sugar
- 1/8 teaspoon salt
- 2 large egg yolks
- 2 teaspoons (10 g) pure vanilla extract
- 1 tablespoon (15 g) whole milk, plus a little more if needed to soften the dough
- 2 cups (220 g) all-purpose flour
- 1/2 cup (50 g) cake flour
- Coarse sugar, for sprinkling
Creaming the Butter and Sugar
The foundation of any great cookie, especially these melt-in-your-mouth Danish butter cookies, is properly creamed butter and sugar. This step incorporates air into the mixture, which is crucial for a light and tender texture. Begin by placing the softened European salted butter into a large mixing bowl. Ensure your butter is truly at room temperature – it should yield slightly when gently pressed but not be melted. Cold butter won’t cream properly, and overly soft butter can lead to greasy cookies. Add the granulated sugar and the 1/8 teaspoon of salt to the bowl with the butter. The salt not only enhances the flavor but also balances the sweetness. Using an electric mixer (either a stand mixer with a paddle attachment or a hand mixer), start beating the butter, sugar, and salt on medium speed. Continue to mix for about 3 to 5 minutes, or until the mixture becomes light in color and fluffy in texture. It should look like pale yellow whipped cream. Scrape down the sides and bottom of the bowl a couple of times during this process to ensure everything is evenly incorporated. This thorough creaming is what gives these cookies their characteristic delicate crumb and rich flavor. Don’t rush this step; it’s worth the extra few minutes!
Incorporating Wet Ingredients
Once the butter and sugar have achieved that beautiful fluffy consistency, it’s time to add the egg yolks and vanilla extract. Add the two large egg yolks to the creamed butter mixture. Egg yolks contribute richness and help bind the dough, adding to the melt-in-your-mouth quality. Next, add the pure vanilla extract. For Danish butter cookies, good quality vanilla extract is key to achieving that classic, comforting flavor. Mix on low speed until just combined. Overmixing at this stage can develop the gluten in the flour too much, leading to tougher cookies. You’ll notice the mixture might look a little curdled at first; this is completely normal. After the egg yolks and vanilla are incorporated, add the 1 tablespoon of whole milk. The milk helps to further soften the dough and make it easier to handle. Mix on low speed again until everything is just blended. If the dough feels excessively stiff or crumbly at this point, you can add another teaspoon or two of whole milk, one teaspoon at a time, until it reaches a workable consistency. The goal is a smooth, cohesive, but still firm dough.
Adding the Flours
Now we’ll introduce the dry ingredients, which will transform our wet mixture into a cookie dough. In a separate medium bowl, whisk together the 2 cups of all-purpose flour and the 1/2 cup of cake flour. Cake flour has a lower protein content than all-purpose flour, which results in a more tender and delicate crumb. Combining the two flours provides the perfect balance of structure and tenderness for these cookies. Gradually add the flour mixture to the wet ingredients in two or three additions, mixing on the lowest speed of your mixer (or by hand with a spatula) until just combined. Be very careful not to overmix the dough once the flour is added. Overmixing will develop the gluten in the flour, which can make your cookies tough and less “melt-in-your-mouth.” You want to mix just until you no longer see streaks of dry flour. The dough will be quite soft and may seem a little sticky, but it should hold together when you squeeze it.
Chilling and Shaping the Dough
Properly chilling cookie dough is often an unsung hero in achieving the best cookie texture. It allows the fats to firm up, which prevents excessive spreading during baking, and also allows the flour to fully hydrate, contributing to a more tender cookie. At this point, wrap the dough tightly in plastic wrap, ensuring there are no air pockets. Flatten the dough into a disc before wrapping, as this will make it easier to roll out later. Refrigerate the dough for at least 1 hour, or up to 2 days. The longer it chills, the firmer it will become, making it easier to handle. Once chilled, you can proceed with shaping. Lightly flour a clean work surface and your rolling pin. Roll out the dough to about 1/4-inch thickness. You want it thin enough to be delicate but not so thin that it burns easily. Using your favorite cookie cutters, cut out the desired shapes. For classic Danish butter cookies, simple rounds, ovals, or even decorative shapes work beautifully. Gather the scraps, re-roll them gently, and cut out more shapes. Try not to overwork the dough when re-rolling, as this can toughen it. Carefully place the cut-out cookies onto baking sheets lined with parchment paper, leaving about 1-inch of space between them.
Baking and Finishing Touches
Preheat your oven to 350°F (175°C) before you start baking. This ensures the oven is at the perfect temperature when the cookies are ready to go in. Once your cookies are shaped and on the baking sheets, it’s time for the final flourish before baking. If you’re using them, lightly brush the tops of the cookies with a tiny bit of milk or an extra egg wash (if you have any leftover egg from the yolks) and then generously sprinkle them with coarse sugar. The coarse sugar adds a lovely sparkle and a satisfying crunch to the finished cookies. Place the baking sheets in the preheated oven. Bake for 10-12 minutes, or until the edges of the cookies are lightly golden brown and the centers are set. Keep a close eye on them, as oven temperatures can vary, and these delicate cookies can go from perfectly baked to slightly overdone quite quickly. The goal is a pale golden hue, not dark brown. Once baked, remove the cookies from the oven and let them cool on the baking sheets for 5 minutes before carefully transferring them to a wire rack to cool completely. This resting period on the baking sheet allows them to firm up further. Once completely cool, you can store them in an airtight container at room temperature for up to a week. Enjoy these delicate, buttery treats that truly melt in your mouth!
Conclusion:
And there you have it! With these simple steps, you’re well on your way to creating a batch of exquisite Danish Butter Cookies (Melt in your mouth). These delicate, buttery delights are perfect for any occasion, from a simple afternoon tea to a sophisticated gathering. Their signature crisp exterior and incredibly tender, melt-in-your-mouth texture are truly addictive. I encourage you to give this recipe a try; you won’t be disappointed by the delightful aroma and even more delightful taste that fills your kitchen. Don’t be afraid to experiment with the flavorings to make them uniquely yours! Enjoy sharing these homemade treasures with loved ones, or savoring them all to yourself. They’re a little piece of heaven in every bite!
For serving, these cookies are wonderful on their own with a cup of coffee or tea. They also make a beautiful addition to a cookie platter or as a sweet accompaniment to a fruit salad. Looking for variations? Consider adding a touch of almond extract along with the vanilla, or perhaps a sprinkle of finely chopped nuts like almonds or pistachios before baking. You could also dip half of the cooled cookies in melted dark or white chocolate for an extra touch of indulgence. The possibilities are endless for personalizing these classic treats.
Frequently Asked Questions about Danish Butter Cookies:
Q: My cookies spread too much. What did I do wrong?
A: Overworking the dough or using softened butter that is too warm can cause excessive spreading. Ensure your butter is cool but pliable. Also, chilling the dough for at least 30 minutes before shaping can help maintain their form. Make sure your oven temperature is accurate as well.
Q: Can I make these cookies ahead of time?
A: Absolutely! Danish Butter Cookies store wonderfully. Once completely cooled, keep them in an airtight container at room temperature. They will remain fresh and delicious for up to a week, retaining their delightful melt-in-your-mouth quality.
Melt-in-Your-Mouth Danish Butter Cookies Recipe
Classic Danish butter cookies that are tender, buttery, and practically melt in your mouth. Perfect for any occasion.
Ingredients
-
1 cup (227 g) European salted butter, softened to room temperature
-
1/2 cup (100 g) granulated sugar
-
1/8 teaspoon salt
-
2 large egg yolks
-
2 teaspoons (10 g) pure vanilla extract
-
1 tablespoon (15 g) whole milk, plus a little more if needed to soften the dough
-
2 cups (220 g) all-purpose flour
-
1/2 cup (50 g) cake flour
-
Coarse sugar, for sprinkling
Instructions
-
Step 1
Cream together the softened butter, granulated sugar, and salt in a large bowl using an electric mixer on medium speed for 3-5 minutes until light, fluffy, and pale yellow. Scrape down the sides of the bowl as needed. -
Step 2
Add the egg yolks and vanilla extract to the creamed mixture and mix on low speed until just combined. Add the milk and mix again on low speed until just blended. Add more milk, a teaspoon at a time, if the dough is too stiff. -
Step 3
In a separate bowl, whisk together the all-purpose flour and cake flour. Gradually add the flour mixture to the wet ingredients in two or three additions, mixing on the lowest speed until just combined. Do not overmix. -
Step 4
Wrap the dough tightly in plastic wrap, flatten into a disc, and refrigerate for at least 1 hour, or up to 2 days. Once chilled, roll out the dough on a lightly floured surface to about 1/4-inch thickness and cut out shapes with cookie cutters. -
Step 5
Preheat oven to 350°F (175°C). Place cookies on parchment-lined baking sheets. Lightly brush tops with milk or egg wash and sprinkle generously with coarse sugar. Bake for 10-12 minutes, or until edges are lightly golden brown. -
Step 6
Let cookies cool on baking sheets for 5 minutes before transferring to a wire rack to cool completely. Store in an airtight container at room temperature for up to a week.
Important Information
Nutrition Facts (Per Serving)
It is important to consider this information as approximate and not to use it as definitive health advice.
Allergy Information
Please check ingredients for potential allergens and consult a health professional if in doubt.


Leave a Comment