

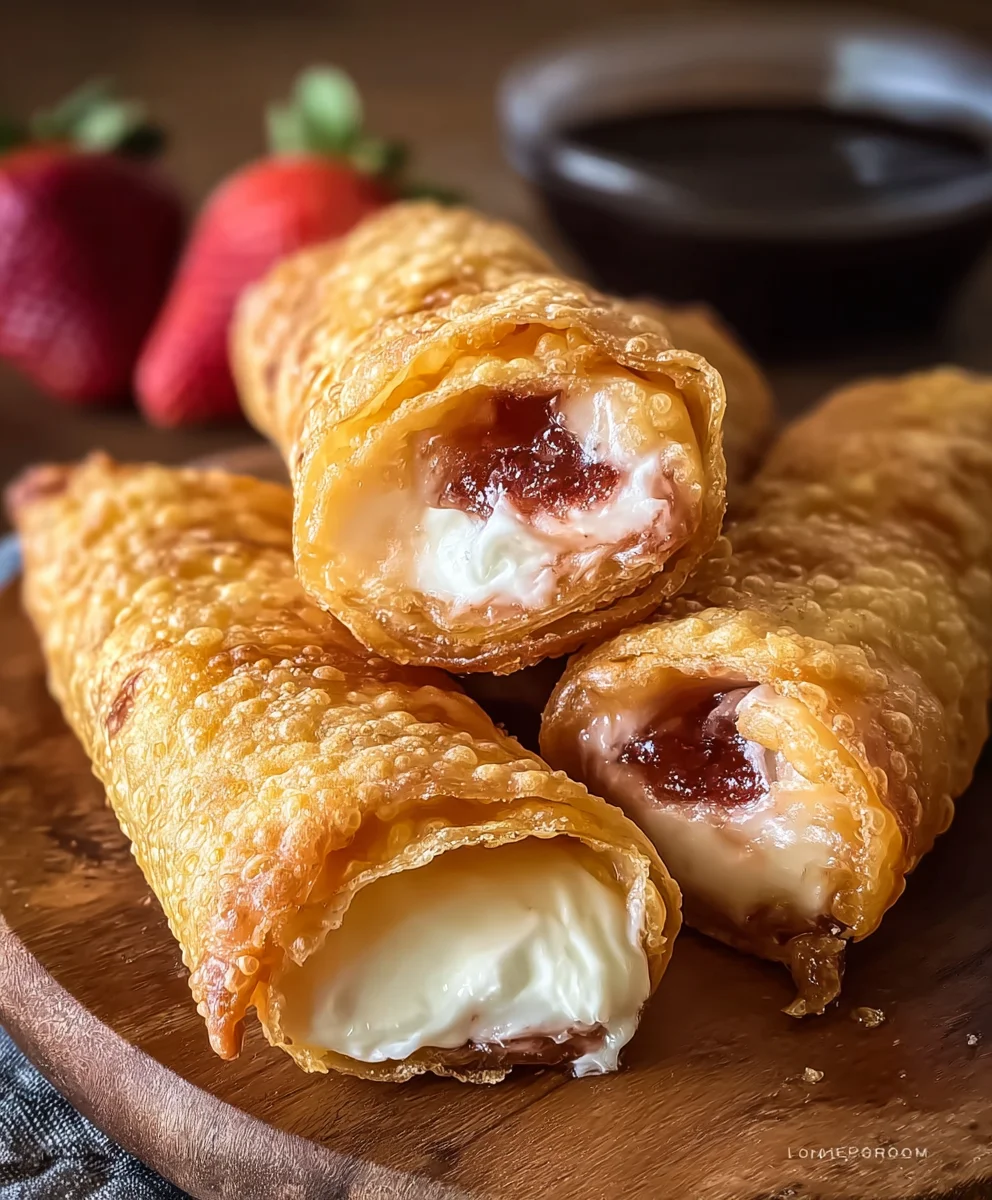
Cheesecake Eggrolls – prepare to embark on a culinary adventure that marries two beloved worlds into one irresistible treat. I’m absolutely thrilled to share with you a recipe that has consistently stolen the spotlight at every gathering I’ve hosted. This isn’t just any dessert; it’s a testament to the magic that happens when classic American indulgence meets the delightful crispiness of Asian-inspired street food. While traditional cheesecake boasts a rich history dating back to ancient Greece, and the humble eggroll has roots deep in East Asian culinary traditions, their fusion into Cheesecake Eggrolls is a modern marvel that captures the best of both worlds.
What makes this particular creation so universally adored? It’s the exquisite textural contrast: the satisfying crunch of a perfectly fried wrapper giving way to a warm, velvety smooth, and subtly tangy cheesecake filling. It’s the perfect handheld dessert, offering all the decadent flavor of a slice of cheesecake without the need for a fork.
Imagine the delight on your guests’ faces!
These delightful parcels are not only incredibly fun to eat but also surprisingly simple to prepare, making them an ideal choice for impressive entertaining or a truly special family treat. Get ready to elevate your dessert game with this unique and unforgettable dish!

Ingredients:
- For the Cheesecake Filling:
- 2 (8-ounce) packages full-fat cream cheese, softened at room temperature for at least 30 minutes
- 1/2 cup granulated sugar
- 1 large egg yolk (optional, but highly recommended for a richer, more stable filling)
- 1 teaspoon pure vanilla extract
- 1 tablespoon fresh lemon zest (from about 1 medium lemon), optional but adds a bright, authentic cheesecake flavor
- For the Eggrolls and Frying:
- 1 (18-count) package square egg roll wrappers (typically found in the refrigerated section near tofu or produce)
- 4-6 cups vegetable oil, canola oil, or peanut oil, for deep frying (enough to submerge the eggrolls halfway or more)
- 2 tablespoons water, in a small bowl, for sealing the egg roll wrappers
- For Garnish and Dipping (Optional):
- 1/4 cup powdered sugar, for dusting
- 1/2 cup fruit pie filling (such as cherry, strawberry, or blueberry), warmed slightly
- 1/4 cup caramel sauce or chocolate syrup, warmed slightly
- Fresh berries (strawberries, raspberries, blueberries) for an elegant presentation
Preparing the Cheesecake Filling
- Soften the Cream Cheese Properly: Before you even think about mixing, ensure your cream cheese is thoroughly softened. I usually take it out of the fridge at least an hour before I plan to start, or if I’m short on time, I’ll unwrap it and microwave it on low power (30% or less) in 15-second bursts, flipping it between each burst, until it’s pliable and smooth. This step is crucial for preventing lumps in your filling.
- Combine Cream Cheese and Sugar: In a medium-sized mixing bowl, place the softened cream cheese. Using an electric hand mixer or a stand mixer fitted with the paddle attachment, beat the cream cheese on medium speed for about 1-2 minutes until it becomes light, fluffy, and completely smooth. Gradually add the granulated sugar, beating until it is fully incorporated and the mixture is well-combined, scraping down the sides of the bowl as needed to ensure everything is mixed evenly. You’ll want this mixture to be silky smooth with no gritty sugar granules remaining.
- Incorporate Flavorings: Add the egg yolk (if using), vanilla extract, and lemon zest (if using) to the cream cheese mixture. Beat on low speed until just combined. Overmixing at this stage can incorporate too much air, which isn’t ideal for a dense cheesecake filling. The egg yolk contributes to a richer flavor and helps the filling set a bit firmer when cooled, preventing it from being too runny after frying. If you omit it, the filling will still be delicious but might have a slightly softer consistency. Once mixed, give the bowl a final scrape-down to ensure uniformity.
- Chill the Filling (Optional but Recommended): For easier handling and to help the filling hold its shape better during assembly, I often recommend chilling the cheesecake mixture for about 20-30 minutes in the refrigerator. This isn’t strictly necessary, but it makes the next step a little less messy and can lead to more uniformly filled eggrolls. Cover the bowl with plastic wrap before chilling.
Assembling the Eggrolls
- Prepare Your Workspace: Set up your assembly line. You’ll need your egg roll wrappers, the cheesecake filling, a small bowl of water for sealing, and a clean baking sheet lined with parchment paper or wax paper to place the assembled eggrolls. Keep the stack of egg roll wrappers covered with a damp paper towel or a clean, slightly damp kitchen towel to prevent them from drying out, which can make them brittle and difficult to work with.
- Portion the Filling: Using a tablespoon or a small cookie scoop, portion out approximately 1 ½ to 2 tablespoons of cheesecake filling onto the center of each egg roll wrapper. Remember, less is often more here. Overfilling can make the eggrolls difficult to roll neatly and can cause them to burst during frying. Aim for consistency in your portions for even cooking.
- Position the Wrapper: Place one egg roll wrapper on your clean, dry work surface so it looks like a diamond (one corner pointing towards you). This orientation is key for the classic egg roll wrap.
-
Fold and Roll the Eggroll:
- Take the bottom corner (the one closest to you) and fold it up and over the cheesecake filling, tucking the tip snugly under the filling. You want to create a tight little package here, so press gently to eliminate any air pockets around the filling.
- Next, fold in the left and right corners towards the center, overlapping them slightly, similar to how you would fold an envelope. Ensure these folds are also snug against the filling.
- Lightly moisten the remaining top corner of the wrapper with a bit of water using your fingertip. This creates a seal.
- Finally, starting from the bottom (where you made your first fold), tightly roll the entire egg roll upwards towards the moistened top corner. Roll it as tightly as you can without tearing the wrapper. A tight roll helps prevent oil from seeping in during frying and keeps the filling secure.
- Seal Thoroughly: Once rolled, gently press down along the seam to ensure it’s completely sealed. A poorly sealed eggroll is prone to unraveling or leaking during frying, which can be messy and dangerous. Repeat this process with the remaining wrappers and cheesecake filling. If you’re working with a large batch, you might want to ask for an extra set of hands!
- Prepare for Frying: As you finish assembling each eggroll, place it seam-side down on your prepared baking sheet. It’s best to fry them immediately after assembly for the crispest results, but if you need to wait a short while, cover them loosely with plastic wrap to prevent them from drying out. Avoid stacking them, as they can stick together. If you’re making them in advance, you can freeze them un-fried and then fry them from frozen, adding a few extra minutes to the cooking time.
Frying the Cheesecake Eggrolls
- Set Up for Frying: In a large, heavy-bottomed pot or Dutch oven, pour in enough vegetable, canola, or peanut oil to reach a depth of about 2-3 inches. Attach a deep-fry thermometer to the side of the pot, ensuring the bulb is submerged in the oil but not touching the bottom. This thermometer is your best friend for successful deep-frying!
- Heat the Oil: Heat the oil over medium-high heat until it reaches a consistent temperature of 350°F (175°C). Maintaining the correct oil temperature is paramount. If the oil is too cool, the eggrolls will absorb too much oil and become greasy. If it’s too hot, the wrappers will burn before the filling can heat through. Be patient and let the oil come up to temperature slowly and steadily.
- Fry in Batches: Carefully lower 2-4 cheesecake eggrolls into the hot oil using tongs. Do not overcrowd the pot, as this will drop the oil temperature significantly and lead to soggy eggrolls. Give them enough space to fry evenly.
- Cook to Golden Perfection: Fry the eggrolls for about 2-4 minutes, or until they are a beautiful golden brown and crispy on all sides. You may need to gently turn them with tongs to ensure even browning. Keep an eye on them, as they can brown quickly! The internal cheesecake filling will also warm up during this process, becoming wonderfully creamy.
- Drain Excess Oil: Once golden brown, carefully remove the fried eggrolls from the oil using tongs and transfer them to a wire rack set over a baking sheet lined with paper towels. This setup allows excess oil to drain away, keeping the eggrolls crisp. Resist the urge to just place them directly on paper towels, as this can steam the bottom and make them less crispy.
- Maintain Oil Temperature and Repeat: Allow the oil to return to 350°F (175°C) between batches. This might mean increasing the heat slightly or giving it a moment to recover. Repeat the frying process with the remaining cheesecake eggrolls until all of them are perfectly golden and crispy.
Serving Suggestions and Variations
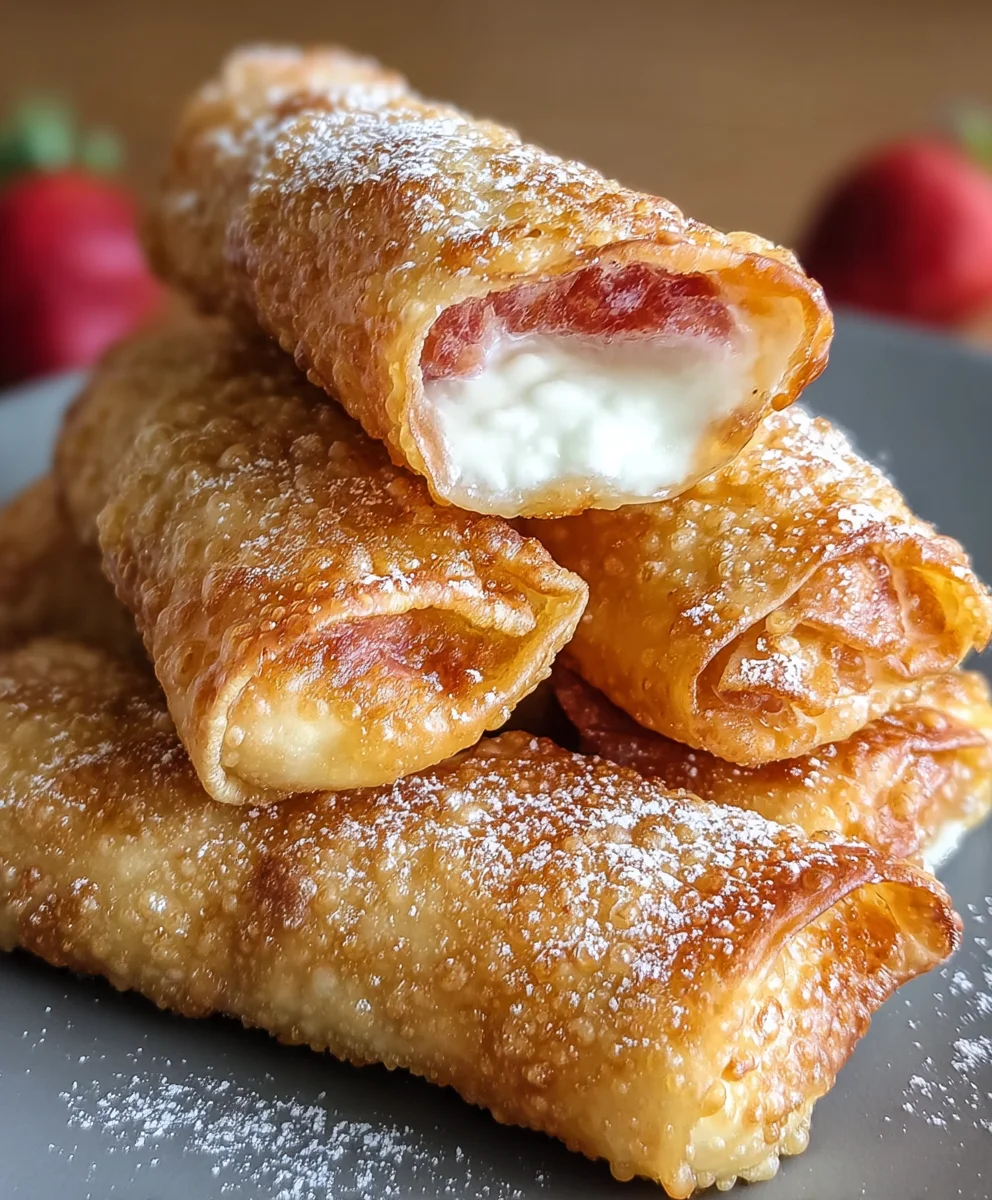
- Dust with Powdered Sugar: For a classic finish, once the cheesecake eggrolls have cooled slightly (they’re best served warm, but not piping hot!), dust them generously with powdered sugar using a fine-mesh sieve. This adds a touch of sweetness and an elegant visual appeal.
- Dipping Delights: These cheesecake eggrolls are phenomenal on their own, but they truly shine when paired with dipping sauces. I love serving them with warm fruit pie filling (cherry and strawberry are personal favorites), a drizzle of rich caramel sauce, or a decadent chocolate syrup. You can warm these sauces gently in the microwave or a small saucepan for a more luxurious experience. For a lighter, fresher option, a dollop of whipped cream and some fresh berries are also fantastic.
-
Flavor Variations:
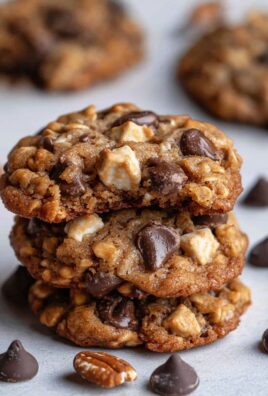
- Chocolate Chip: Fold 1/4 cup mini chocolate chips into the cheesecake filling for a classic chocolate chip cheesecake experience.
- S’mores: After assembling, before rolling, add a few mini marshmallows and a tiny piece of a graham cracker to the filling. Be careful not to overfill.
- Oreo: Crush about 1/2 cup of Oreo cookies (without the cream filling) and fold them into your cheesecake mixture.
- Pumpkin Spice: During the fall, add 1-2 teaspoons of pumpkin pie spice to the filling for a seasonal twist.
- Baking Option (for a lighter alternative): If you prefer not to deep-fry, you can bake these cheesecake eggrolls. Preheat your oven to 400°F (200°C). Brush the assembled eggrolls lightly with melted butter or a neutral oil. Bake for 15-20 minutes, flipping halfway through, until golden brown and crispy. While still delicious, they won’t achieve the same deep-fried crispness and texture. I usually opt for frying, but baking is a good compromise for a slightly lighter version.
-
Freezing and Reheating:
- Unfried: Assemble the eggrolls and place them in a single layer on a parchment-lined baking sheet. Freeze until solid, then transfer them to a freezer-safe bag or airtight container for up to 1 month. Fry from frozen, adding a few extra minutes to the cooking time (about 5-7 minutes per batch).
- Fried: Once fried and cooled, store leftover cheesecake eggrolls in an airtight container in the refrigerator for up to 3 days. To reheat, place them on a baking sheet and warm in a preheated oven at 350°F (175°C) for 8-10 minutes, or until crispy and heated through. An air fryer also works wonderfully for reheating, bringing back that delightful crispness in just a few minutes.
- Safety First: When deep-frying, always be mindful of hot oil. Use appropriate tongs, never leave hot oil unattended, and have a lid nearby in case of a grease fire. Ensure your workspace is clear and dry. This recipe yields a truly decadent and impressive dessert that’s perfect for parties, family gatherings, or just a special treat. Enjoy the delightful crunch and creamy, tangy filling of your homemade cheesecake eggrolls!
Conclusion:
And there you have it, friends! We’ve journeyed together through the simple yet utterly magical process of creating something truly extraordinary: Cheesecake Eggrolls. This isn’t just another dessert recipe; it’s a culinary revelation, a delightful fusion that takes the beloved creamy tang of cheesecake and marries it with the irresistible crunch of a perfectly fried eggroll wrapper. If you’ve been searching for that one dessert that stands out, impresses guests, and satisfies even the most discerning sweet tooth, then your quest ends right here. I genuinely believe this recipe is an absolute must-try for everyone, from seasoned bakers looking for a fun new project to enthusiastic novices eager to whip up something spectacular without a fuss.
What makes these Cheesecake Eggrolls so incredibly special? It’s the captivating contrast in textures and temperatures. Imagine biting through that golden, shatteringly crisp exterior, giving way to a warm, velvety smooth, and wonderfully sweet cream cheese filling. It’s a symphony for your senses! Plus, the beauty of this recipe lies in its remarkable simplicity. You don’t need a pastry degree or a complicated array of specialized equipment. Just a handful of readily available ingredients and a little bit of love are all it takes to bring these show-stopping treats to life. They’re quick enough for a spontaneous dessert craving but elegant enough to serve at your next dinner party, holiday gathering, or even as a unique game day snack. Trust me, the moment you unveil a platter of these, you’ll be met with oohs and aahs of delight.
Elevate Your Cheesecake Eggroll Experience with These Serving Suggestions!
Now, let’s talk about taking your Cheesecake Eggrolls from amazing to absolutely unforgettable. While they are undeniably divine on their own, a little embellishment can truly elevate the experience. My go-to is a simple dusting of powdered sugar, which adds a touch of elegance and an extra hint of sweetness. But don’t stop there! Consider serving them alongside a vibrant raspberry or strawberry sauce for a burst of fruity freshness that cuts through the richness beautifully. A drizzle of warm chocolate ganache or a luscious caramel sauce can turn them into an even more decadent affair. For those who adore texture, a dollop of fresh whipped cream and a sprinkle of toasted nuts like pecans or walnuts can add another layer of complexity. You could even create a fun dipping station with various sauces and toppings, letting your guests customize their own eggroll masterpiece!
Unleash Your Creativity: Exciting Variations to Try
Beyond serving suggestions, this recipe is incredibly versatile, inviting you to unleash your inner chef and experiment with different flavor profiles. Imagine a lemon cheesecake filling for a brighter, zestier bite, or a key lime version for a tropical twist. For the chocolate lovers, folding in some mini chocolate chips or a swirl of Nutella into the cream cheese mixture before rolling will be a dream come true. You could even add a few finely diced fruits like berries or peaches directly into the filling for an extra burst of flavor and texture. Think seasonal! Pumpkin spice cheesecake eggrolls for autumn, or peppermint bark inspired ones for the holidays. The possibilities are truly endless, and each variation promises a new adventure for your taste buds. Don’t be afraid to play around with different extracts too – almond, vanilla bean paste, or even a hint of rum extract can add intriguing depths of flavor.
So, what are you waiting for? Take this recipe as your invitation to create something truly special and incredibly delicious. I promise you, making these Cheesecake Eggrolls is not just about the outcome, but also about the fun and satisfaction of creating something so unique and delicious with your own hands. I am absolutely confident that once you try these, they will quickly become a cherished favorite in your dessert repertoire. Please, I implore you, give this recipe a whirl! And when you do, don’t keep the deliciousness to yourself. Snap a photo, share your experience in the comments below, and let me know what incredible variations you came up with. I can’t wait to hear about your culinary adventures!
FAQs
Can I make Cheesecake Eggrolls ahead of time?
Absolutely! You can prepare the cheesecake filling and even assemble the eggrolls up to a day in advance. Simply cover them tightly with plastic wrap and store them in the refrigerator. When you’re ready to serve, just fry them up fresh for that perfect crispy exterior and warm, gooey interior. This makes them an excellent option for entertaining, as you can do most of the prep work beforehand!
How do I store leftover Cheesecake Eggrolls?
If by some miracle you have any leftovers (they tend to disappear quickly!), store them in an airtight container in the refrigerator for up to 2-3 days. For the best texture, I recommend reheating them in an oven at 350°F (175°C) or in an air fryer for a few minutes until they are crispy again. Microwaving them will make them soft, so avoid that if you want to maintain the crunch!
Can I bake or air fry these instead of deep frying?
Yes, you certainly can! For a lighter version, you can bake or air fry your Cheesecake Eggrolls. To bake, brush them lightly with oil or melted butter, then bake in a preheated oven at 375°F (190°C) for 15-20 minutes, or until golden brown and crispy, flipping halfway. For air frying, brush with oil and cook at 350°F (175°C) for 8-12 minutes, flipping halfway, until beautifully golden and crisp. Results may vary slightly, but they’ll still be delicious!
What kind of wrappers should I use for Cheesecake Eggrolls?
Standard egg roll wrappers, typically found in the refrigerated section of your grocery store near the produce, are the best choice for this recipe. They provide the perfect thickness and crispness when fried. Spring roll wrappers can also be used for a slightly thinner, more delicate crunch, but ensure they are the larger, square kind suitable for rolling.
My eggrolls aren’t crispy enough, what went wrong?
The most common reasons for less-than-crispy eggrolls are oil temperature and overcrowding the pan. Ensure your oil is hot enough, ideally between 350-375°F (175-190°C), before you add the eggrolls. If the oil isn’t hot enough, they’ll absorb too much oil and become greasy rather than crispy. Also, avoid overcrowding the frying pan, as this lowers the oil temperature significantly. Fry in small batches to maintain consistent heat and achieve that perfect golden crunch every time!
What are some flavor variations I can try with the filling?
The beauty of this recipe is its adaptability! You can easily customize the cheesecake filling. Try adding 1/4 cup of mini chocolate chips, a teaspoon of lemon zest and juice for a citrusy twist, or a swirl of hazelnut spread like Nutella. A tablespoon of fruit puree (like raspberry or blueberry) can also add a delightful flavor. Don’t be afraid to experiment with different extracts like almond, rum, or even a hint of orange blossom water for a unique spin on your Cheesecake Eggrolls!
Cheesecake Eggrolls: Crispy, Creamy Dessert Perfection!
Crispy on the outside, with a warm, creamy, and tangy cheesecake filling on the inside, these cheesecake eggrolls are a delightful dessert that’s perfect for any occasion. Easy to make and incredibly satisfying.
Ingredients
-
2 (8-ounce) packages full-fat cream cheese, softened
-
1/2 cup granulated sugar
-
1 large egg yolk (optional)
-
1 teaspoon pure vanilla extract
-
1 tablespoon fresh lemon zest (optional)
-
1 (18-count) package square egg roll wrappers
-
4-6 cups vegetable oil (or canola/peanut oil), for deep frying
-
2 tablespoons water, for sealing
-
1/4 cup powdered sugar, for dusting (optional)
-
1/2 cup fruit pie filling (e.g., cherry, strawberry), warmed (optional)
-
1/4 cup caramel sauce or chocolate syrup, warmed (optional)
-
Fresh berries, for garnish (optional)
Instructions
-
Step 1
Soften cream cheese. Beat cream cheese in a bowl until light and smooth (1-2 min). Gradually add sugar, beating until fully incorporated and silky smooth. Add egg yolk (if using), vanilla extract, and lemon zest (if using); beat on low until just combined. For easier handling, chill the filling for 20-30 minutes. -
Step 2
Set up your workspace with wrappers (covered with a damp towel), filling, water, and a parchment-lined baking sheet. Place a wrapper in a diamond orientation. Scoop 1 ½ to 2 tablespoons of cheesecake filling onto the center of each wrapper. -
Step 3
Fold the bottom corner over the filling, tucking snugly. Fold in the left and right corners towards the center, overlapping slightly. Lightly moisten the remaining top corner with water. Tightly roll the entire egg roll upwards towards the moistened corner, ensuring a secure seal along the seam. Place seam-side down on the baking sheet. Repeat for all wrappers and filling. -
Step 4
In a large, heavy-bottomed pot, pour oil to a depth of 2-3 inches. Heat oil over medium-high heat to 350°F (175°C), using a deep-fry thermometer to monitor temperature. -
Step 5
Carefully lower 2-4 eggrolls into the hot oil. Fry for 2-4 minutes, turning occasionally, until golden brown and crispy on all sides. Do not overcrowd the pot. Remove fried eggrolls with tongs and transfer to a wire rack set over paper towels to drain excess oil. Allow oil to return to 350°F between batches. Repeat with remaining eggrolls. -
Step 6
Serve warm. Dust generously with powdered sugar. Serve with warm fruit pie filling, caramel sauce, chocolate syrup, or fresh berries for dipping. -
Step 7
Preheat oven to 400°F (200°C). Brush assembled eggrolls with melted butter or oil. Bake for 15-20 minutes, flipping halfway, until golden and crispy. -
Step 8
Unfried: Freeze assembled eggrolls on a parchment-lined sheet, then transfer to an airtight container (up to 1 month). Fry from frozen (5-7 min). Fried: Store leftovers in the refrigerator (up to 3 days). Reheat in a 350°F (175°C) oven for 8-10 minutes or in an air fryer until crispy and heated through.
Important Information
Nutrition Facts (Per Serving)
It is important to consider this information as approximate and not to use it as definitive health advice.
Allergy Information
Please check ingredients for potential allergens and consult a health professional if in doubt.


Leave a Comment