

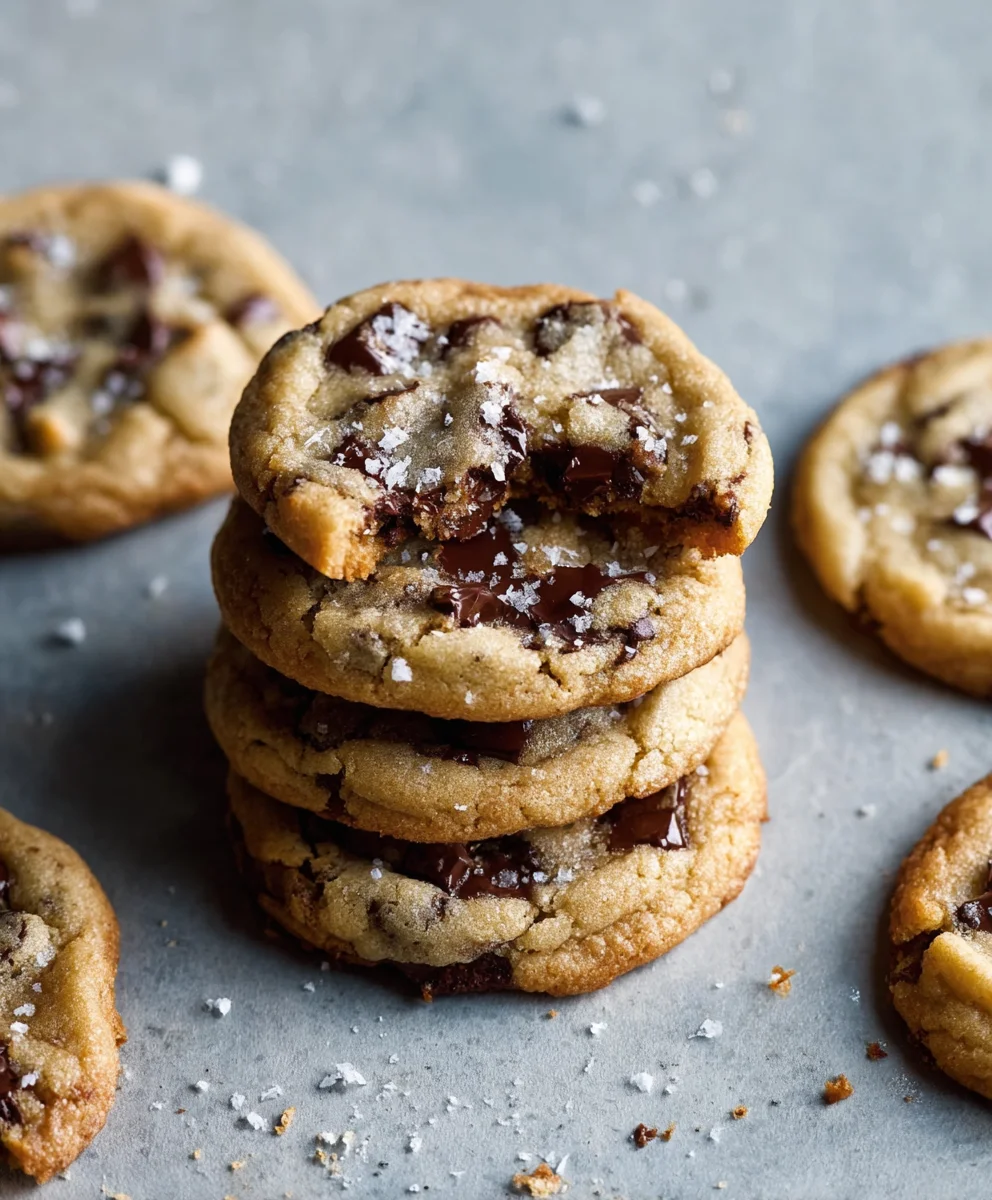
Chocolate Chip Cookies are more than just a dessert; they are a timeless emblem of comfort, joy, and home. Is there anything quite as comforting as the aroma of freshly baked cookies wafting through your kitchen, promising that perfect bite of gooey chocolate and golden-brown perfection? For generations, these delightful treats have graced our tables, and their origin story is as charming as the cookies themselves. Born out of a stroke of genius by Ruth Graves Wakefield at the Toll House Inn in the 1930s, the original “Toll House Crunch Cookies” quickly captivated hearts, evolving into the beloved classic we know today. Their enduring appeal lies in their irresistible blend of textures — that crisp edge yielding to a soft, chewy center, studded with pockets of melted, rich chocolate. Whether you prefer them warm from the oven with a glass of milk, or slightly cooled with a cup of coffee, Chocolate Chip Cookies offer a universal sense of happiness and nostalgia that few other sweets can match.

Ingredients:
- 2 ¼ cups (270g) All-Purpose Flour: I always make sure to spoon and level my flour to avoid a dense cookie. Too much flour can make your cookies dry and crumbly, so this step is super important!
- 1 teaspoon Baking Soda: This is our leavening agent, helping the cookies spread just right and giving them that signature chewy texture.
- 1 teaspoon Salt: A crucial ingredient that enhances all the other flavors, especially the chocolate. Don’t skip it!
- 1 cup (226g) Unsalted Butter: Make sure this is at room temperature. Softened, but not melted. This is key for creaming properly with the sugars, which creates air pockets for a lighter texture in our Chocolate Chip Cookies.
- ¾ cup (150g) Granulated Sugar: For sweetness and a bit of crispness on the edges.
- ¾ cup (150g) Packed Light Brown Sugar: This adds moisture, chewiness, and a lovely caramel note that is essential for classic Chocolate Chip Cookies. Make sure it’s packed tightly in your measuring cup!
- 2 Large Eggs: Also at room temperature. Room temperature eggs emulsify better with the butter and sugar, leading to a smoother, more uniform dough.
- 1 teaspoon Pure Vanilla Extract: Use good quality vanilla! It makes a huge difference in the overall flavor of your Chocolate Chip Cookies.
- 1 ½ cups (255g) Chocolate Chips: I usually go for semi-sweet, but feel free to use milk chocolate, dark chocolate, or even a mix! Chocolate chunks work wonderfully too, providing those glorious melty pools. For an extra special touch, you could even chop up a good quality chocolate bar.
Preparing the Dough for Your Perfect Chocolate Chip Cookies
Get ready to embark on the journey of creating the most amazing Chocolate Chip Cookies you’ve ever tasted! The foundation of a great cookie lies in how you prepare the dough, so let’s take our time and enjoy each step.
Getting Started: The Foundation of Flavor
- Whisk the Dry Ingredients: In a medium bowl, whisk together the 2 ¼ cups of all-purpose flour, 1 teaspoon of baking soda, and 1 teaspoon of salt. I like to use a balloon whisk to ensure everything is thoroughly combined and there are no lumps of baking soda or salt. This ensures that the leavening and seasoning are evenly distributed throughout every single one of your Chocolate Chip Cookies, guaranteeing consistent texture and flavor. Set this bowl aside for a moment.
- Cream the Butter and Sugars: In a large mixing bowl, using an electric mixer (either a stand mixer with the paddle attachment or a hand mixer), beat the 1 cup (226g) of softened unsalted butter on medium speed until creamy, which usually takes about 1-2 minutes. Then, add the ¾ cup (150g) of granulated sugar and the ¾ cup (150g) of packed light brown sugar. Continue beating on medium-high speed for a good 2-3 minutes, or until the mixture is light in color and fluffy. This creaming process is crucial because it incorporates air into the butter and sugar, which gives our Chocolate Chip Cookies their tender texture and helps them spread beautifully in the oven. You’ll notice the texture becoming visibly aerated and lighter. Don’t rush this step; it’s the secret to a really great cookie!
- Add Eggs and Vanilla: Reduce the mixer speed to low. Add one large egg at a time, beating well after each addition until just combined. Scrape down the sides of the bowl with a rubber spatula after the first egg to ensure everything is incorporated evenly. Once both eggs are in and just mixed, stir in the 1 teaspoon of pure vanilla extract. Beat for another 30 seconds until the mixture is smooth and glossy. Overmixing at this stage can develop too much gluten, so mix only until just combined.
Combining Dry and Wet: Building the Structure
- Gradually Incorporate Dry Ingredients: With the mixer on low speed, gradually add the dry ingredient mixture (flour, baking soda, and salt) to the wet ingredients. Add about a third of the dry mixture at a time, mixing until just combined before adding the next portion. It’s incredibly important to mix only until the flour streaks have just disappeared. Do not overmix! Overmixing develops gluten, which can lead to tough, dense Chocolate Chip Cookies instead of the wonderfully chewy ones we’re aiming for. A few small streaks of flour are fine; they’ll disappear as you fold in the chocolate chips.
The Star of the Show: Adding the Chocolate Chips
- Fold in the Chocolate Chips: Remove the bowl from the mixer and, using your rubber spatula, gently fold in the 1 ½ cups of chocolate chips. I like to distribute them evenly throughout the dough so that every bite of your Chocolate Chip Cookies has a perfect ratio of dough to chocolate. If you’re feeling adventurous, you can also add a handful of chopped nuts like walnuts or pecans at this stage for an extra layer of flavor and texture.
- Chill the Dough (Highly Recommended!): This step is often overlooked, but it truly elevates your Chocolate Chip Cookies to another level. Cover the bowl with plastic wrap and refrigerate the dough for at least 30 minutes, or even better, 2-24 hours. Chilling the dough allows the flavors to meld and deepen, and it also solidifies the butter, which prevents the cookies from spreading too much in the oven, resulting in thicker, chewier Chocolate Chip Cookies. If you’re short on time, even 30 minutes will make a noticeable difference! You can also prepare the dough, roll it into balls, and freeze them for later.
Baking Your Delicious Chocolate Chip Cookies
The moment of truth is approaching! Baking these Chocolate Chip Cookies perfectly is the final step to achieving cookie nirvana.
Preheating and Preparing for Perfection
- Preheat Oven and Prepare Baking Sheets: About 15-20 minutes before you plan to bake, preheat your oven to 375°F (190°C). Line two large baking sheets with parchment paper or silicone baking mats. I highly recommend parchment paper or silicone mats because they prevent sticking and promote even baking, making cleanup a breeze. Plus, they help achieve that slightly crispy bottom while keeping the centers wonderfully chewy.
Forming and Baking: Watch Them Transform
- Scoop the Dough: Using a 1.5-tablespoon cookie scoop (or just two spoons), drop rounded balls of dough onto the prepared baking sheets. Space them about 2 inches apart to allow for proper spreading. I usually fit about 12 Chocolate Chip Cookies on a standard baking sheet. If you want larger, bakery-style cookies, use a larger scoop, but remember to adjust the baking time accordingly. For an extra-pretty cookie, you can press a few extra chocolate chips into the tops of the dough balls before baking.
- Bake Until Golden: Bake one sheet at a time in the preheated oven for 9-12 minutes, or until the edges are lightly golden brown and the centers still look slightly soft and underbaked. This is the secret to a perfectly chewy Chocolate Chip Cookie. If you bake them until they are fully set and golden all over, they will likely be crispy once cooled. If you notice one side of your cookies browning faster, rotate the baking sheet halfway through baking. Ovens can vary, so keep a close eye on your first batch to determine the perfect timing for your kitchen.
Cooling and Enjoying Your Homemade Chocolate Chip Cookies
Almost there! The cooling process is just as important as the baking process for achieving that ideal Chocolate Chip Cookie texture.
The Final Touch: Achieving That Irresistible Chewiness
- Cool on the Baking Sheet: Once out of the oven, let the Chocolate Chip Cookies cool on the baking sheet for 5-10 minutes. They will continue to set and firm up during this time. Trying to move them too soon will result in them falling apart, as they are still very delicate when warm. This initial cooling on the hot sheet also helps create that delightful slightly crisp edge while keeping the inside beautifully soft.
- Transfer to a Wire Rack: After the initial cooling period on the baking sheet, carefully transfer the cookies to a wire rack to cool completely. Cooling on a wire rack allows air to circulate around all sides of the Chocolate Chip Cookies, preventing them from becoming soggy on the bottom from residual heat and ensuring they maintain their texture.
- Store and Enjoy: Once completely cool, store your homemade Chocolate Chip Cookies in an airtight container at room temperature for up to 3-4 days. They rarely last that long in my house, though! For a truly decadent experience, enjoy them warm with a glass of cold milk or a scoop of vanilla ice cream. You’ve earned it!
Pro Tips for the Ultimate Chocolate Chip Cookies Experience
I’ve made countless batches of Chocolate Chip Cookies over the years, and I’ve picked up a few tricks that I love to share to help you achieve absolute perfection every time. These little details can make a world of difference!
Mastering the Art: Details That Make a Difference
- Room Temperature Ingredients are Non-Negotiable: I cannot stress this enough! Softened butter (not melted!) and room temperature eggs are vital. They cream together much more effectively, creating a smooth, emulsified mixture that traps air. This trapped air is what gives your Chocolate Chip Cookies their light, fluffy, and tender crumb. If your butter is too cold, it won’t cream properly; if it’s too warm, your dough will be greasy and your cookies will spread too much.
- Measure Flour Correctly: For the most accurate measurement, always spoon your flour into the measuring cup and then level it off with the back of a knife. Scooping directly from the bag can compact the flour, leading to adding too much, which results in dry, dense Chocolate Chip Cookies.
- Don’t Overmix the Dough: Once you add the flour, mix only until the dry ingredients are just incorporated. Overmixing develops gluten, making your cookies tough instead of tender and chewy. A few streaks of flour are okay; they’ll disappear when you fold in the chocolate chips.
- The Power of Chilling: While it requires patience, chilling the dough is a game-changer for Chocolate Chip Cookies. It allows the flour to fully hydrate, the flavors to meld and intensify, and the butter to firm up. This leads to less spread, thicker cookies, and a much more complex flavor profile. Even 30 minutes makes a difference, but an hour or more is even better.
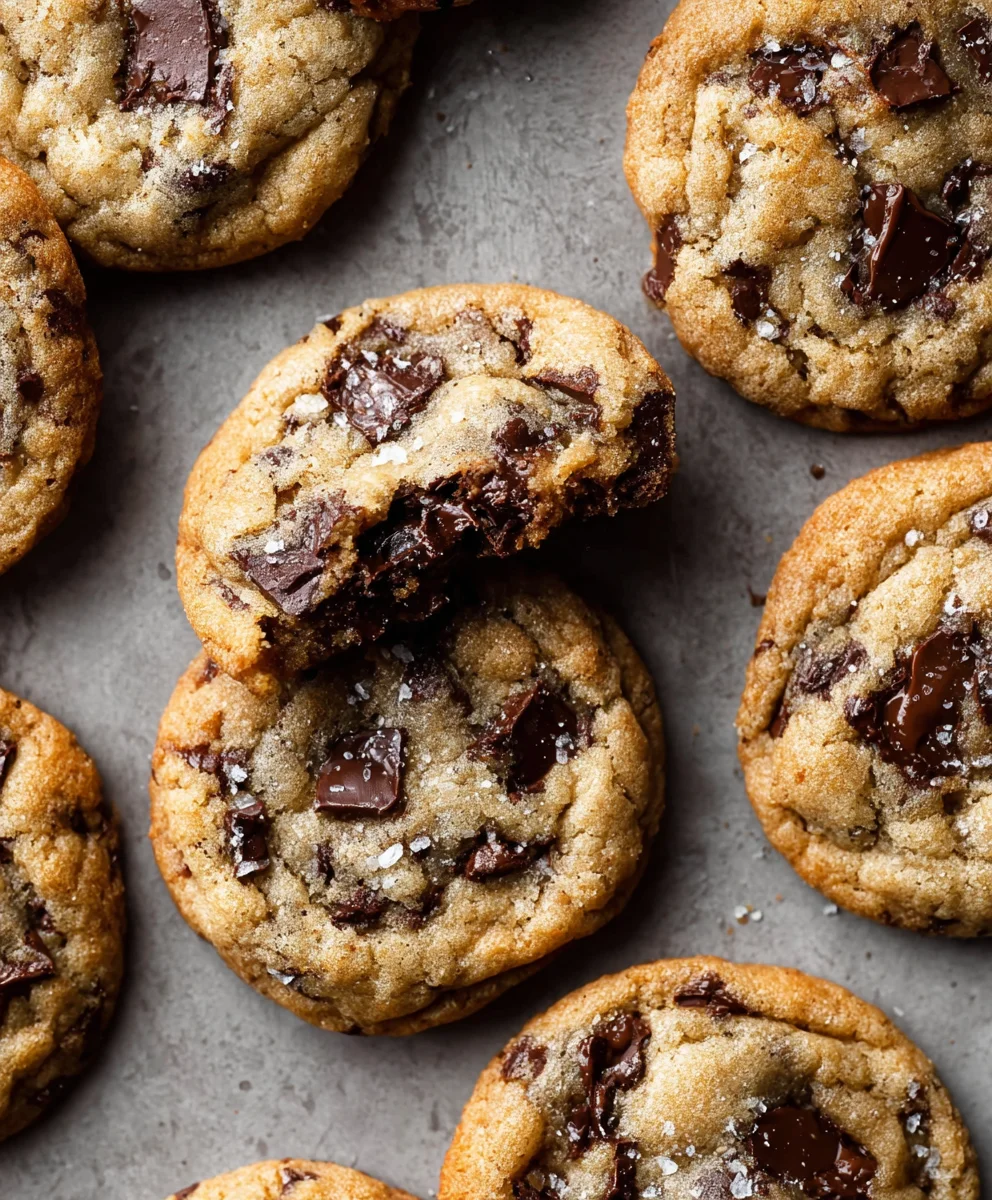
- Customizing Your Chocolate: Don’t be afraid to experiment with different types of chocolate! A mix of semi-sweet, milk, and dark chocolate chips or chunks can add layers of flavor. For a truly gourmet cookie, chop up a high-quality chocolate bar – the irregular sizes create incredible pockets of melted chocolate. Sprinkle a little flaky sea salt on top of your Chocolate Chip Cookies right after they come out of the oven for a wonderful sweet and salty contrast.
- Salt Balance is Key: The teaspoon of salt in the recipe is important not just for flavor, but for balancing the sweetness. It prevents the Chocolate Chip Cookies from being overwhelmingly sweet and actually enhances the chocolate flavor.
- Use Parchment Paper or Silicone Mats: These not only prevent sticking but also ensure even baking and easy cleanup. They also contribute to a slightly crisper bottom while keeping the interior soft.
- Know Your Oven: Ovens can vary wildly in temperature. Investing in an inexpensive oven thermometer can help you ensure your oven is truly at the temperature you set. This can significantly impact the baking time and final texture of your Chocolate Chip Cookies.
- Achieving Different Textures:
- For Chewier Cookies: Use a higher ratio of brown sugar to white sugar, and don’t overbake them! Pull them from the oven when the edges are set but the centers still look a little soft. Chilling the dough also contributes to chewiness.
- For Crispier Cookies: Increase the granulated sugar slightly, and bake them a minute or two longer until they are golden brown all over. Using melted butter instead of softened butter can also lead to a crispier cookie that spreads more.
- High Altitude Adjustments: If you live at a high altitude, you might need to make slight adjustments. Often, this involves reducing baking soda/powder slightly, increasing liquid, and/or increasing flour slightly to prevent excessive spreading.
With these tips, you’re not just baking Chocolate Chip Cookies; you’re crafting an experience. Enjoy the process and the delicious results!
<h2>Conclusion:</h2>
<p>And there you have it, my dear fellow bakers! We’ve journeyed through the simple yet profound process of creating what I genuinely believe are some of the most delightful <strong>Chocolate Chip Cookies</strong> you will ever have the pleasure of baking and devouring. This isn’t just another recipe; it’s a meticulously crafted guide to achieving that perfect cookie equilibrium – crisp, golden edges that yield to a wonderfully chewy, soft center, studded generously with pools of melted, decadent chocolate. The aroma alone, as they bake to perfection in your oven, is enough to transport you to a state of pure comfort and bliss, a fragrant promise of the treat that awaits. It’s a sensory experience from start to finish, culminating in a taste that is both nostalgic and utterly irresistible. This recipe is a must-try because it consistently delivers on its promise: a batch of homemade cookies that will undoubtedly become a treasured favorite in your household, bringing smiles and warmth with every single bite. I’m confident that once you experience the magic of these cookies, you’ll understand why they’re so special to me.</p>
<p>What makes these particular <strong>Chocolate Chip Cookies</strong> stand out, you ask? It’s the careful balance of ingredients, the technique that ensures optimal chewiness, and the sheer joy that radiates from a tray of freshly baked goodies. They’re forgiving enough for a novice baker, yet sophisticated enough to impress even the most discerning cookie connoisseur. They embody everything a good cookie should be: comforting, satisfying, and utterly delicious. Whether you’re baking for a special occasion, a quiet evening at home, or simply to fill your kitchen with an intoxicating aroma, this recipe will not disappoint. It’s a testament to the fact that sometimes, the simplest pleasures are truly the best, especially when they involve rich chocolate and a perfectly baked golden exterior. Trust me, your taste buds will thank you.</p>
<h4>Elevate Your Chocolate Chip Cookie Experience:</h4>
<p>While these <strong>Chocolate Chip Cookies</strong> are absolutely divine straight from the cooling rack, still warm and gooey, don’t hesitate to get creative with your serving! Imagine them alongside a tall, frosty glass of milk – a classic pairing that simply can’t be beaten. For a more decadent dessert, transform them into irresistible ice cream sandwiches by sandwiching a scoop of your favorite vanilla or coffee ice cream between two freshly baked cookies. Crumbled over a bowl of yogurt or a scoop of gelato, they add a delightful textural contrast and an explosion of flavor. You could even serve them with a dollop of fresh whipped cream and a sprinkle of sea salt for an extra touch of sophistication. And for those thoughtful gestures, these cookies make incredible homemade gifts. Stack them in a cute jar or box, tied with a ribbon, and you’ve got a present that speaks volumes about your care and culinary prowess. They also hold up wonderfully when cooled, making them perfect for lunchboxes or a quick snack on the go, though I doubt they’ll last very long once people discover them!</p>
<h4>Unleash Your Inner Baker: Creative Variations</h4>
<p>This recipe provides a fantastic foundation, but don’t be afraid to experiment and make it your own. You can introduce a delightful crunch by adding a handful of chopped walnuts or pecans to the dough. Elevate the chocolate experience by using a mix of different chocolate chips – semi-sweet, dark, milk, or even white chocolate chunks for visual appeal and varied flavor profiles. A sprinkle of flaky sea salt on top of the cookies right before baking will beautifully enhance the chocolate’s richness, creating a gourmet touch. For an extra layer of depth, try adding a teaspoon of espresso powder to the dry ingredients; it won’t make your cookies taste like coffee, but it will intensify the chocolate flavor in the most wonderful way. Seasonal variations are also a fantastic idea! A pinch of cinnamon and nutmeg can bring a cozy, autumnal feel, while a hint of peppermint extract (and perhaps some crushed candy canes) transforms them into festive holiday treats. You could even swap out half of the vanilla extract for almond extract for a subtle, nutty undertone. The possibilities are truly endless, allowing you to continually rediscover the joy of baking <strong>Chocolate Chip Cookies</strong> with your own unique twist. Each variation offers a fresh perspective on this beloved classic, inviting you to explore new flavors and textures.</p>
<h4>Your Turn to Bake and Share!</h4>
<p>Now that you have all the tips, tricks, and encouragement you need, it’s time to preheat your oven and embark on your own cookie-baking adventure! I promise you, the effort is minimal, and the rewards are absolutely enormous. There’s a special kind of satisfaction that comes from pulling a tray of perfectly golden, aromatic homemade cookies from the oven, knowing you created something truly delicious from scratch. Don’t hesitate, don’t second-guess – just dive in! I’m absolutely positive that you’ll be thrilled with the results, and these <strong>Chocolate Chip Cookies</strong> will quickly earn a coveted spot in your personal recipe collection. They are designed for success, for joy, and for sharing.</p>
<p>I would be absolutely delighted to hear about your experience. Did you try any variations? What did your family and friends think? Please, feel free to share your baking journey, your pictures, and any ingenious twists you come up with in the comments or on social media. Your feedback and creativity inspire me, and I love seeing how you make these recipes your own. Baking is a wonderful way to connect, to create, and to spread a little happiness, one delicious cookie at a time. So go forth, bake with passion, and enjoy every single delightful crumb of these fantastic <strong>Chocolate Chip Cookies</strong>! Happy baking, everyone!</p>
Ultimate Chocolate Chip Cookies: Easy, Chewy & Delicious!
Chocolate Chip Cookies are more than just a dessert; they are a timeless emblem of comfort, joy, and home. Their enduring appeal lies in their irresistible blend of textures — a crisp edge yielding to a soft, chewy center, studded with pockets of melted, rich chocolate. These cookies offer a universal sense of happiness and nostalgia.
Ingredients
-
1/2 cup unsalted butter, melted
-
3/4 cup packed brown sugar
-
1/2 cup granulated sugar
-
1 large egg
-
1 teaspoon vanilla extract
-
1 1/3 cup all-purpose flour
-
1/2 teaspoon baking soda
-
Pinch of salt
-
1 cup chopped dark chocolate
-
Flaky sea salt for garnish (optional)
Instructions
-
Step 1
Whisk together all-purpose flour, baking soda, and salt in a medium bowl. Set aside. -
Step 2
In a large mixing bowl, combine the melted unsalted butter, packed brown sugar, and granulated sugar. Beat until well combined. Then, beat in the large egg and pure vanilla extract until the mixture is smooth. -
Step 3
Gradually add the dry ingredient mixture to the wet ingredients, mixing on low speed until just combined and flour streaks have nearly disappeared. Do not overmix. -
Step 4
Remove the bowl from the mixer and gently fold in the chopped dark chocolate using a rubber spatula, ensuring even distribution. -
Step 5
Cover the dough with plastic wrap and refrigerate for at least 30 minutes, or ideally 2-24 hours, to allow flavors to meld and prevent excessive spreading. -
Step 6
Preheat your oven to 375°F (190°C) about 15-20 minutes before baking. Line two large baking sheets with parchment paper or silicone baking mats. -
Step 7
Using a 1.5-tablespoon cookie scoop, drop rounded balls of dough onto the prepared baking sheets, spacing them about 2 inches apart. Optionally, press extra chocolate chips into the tops of the dough balls. -
Step 8
Bake one sheet at a time for 9-12 minutes, or until the edges are lightly golden brown and the centers still look slightly soft and underbaked. If desired, sprinkle with flaky sea salt immediately after removing from the oven. -
Step 9
Let the cookies cool on the baking sheet for 5-10 minutes to set, then carefully transfer them to a wire rack to cool completely. Store in an airtight container at room temperature.
Important Information
Nutrition Facts (Per Serving)
It is important to consider this information as approximate and not to use it as definitive health advice.
Allergy Information
Please check ingredients for potential allergens and consult a health professional if in doubt.


Leave a Comment