

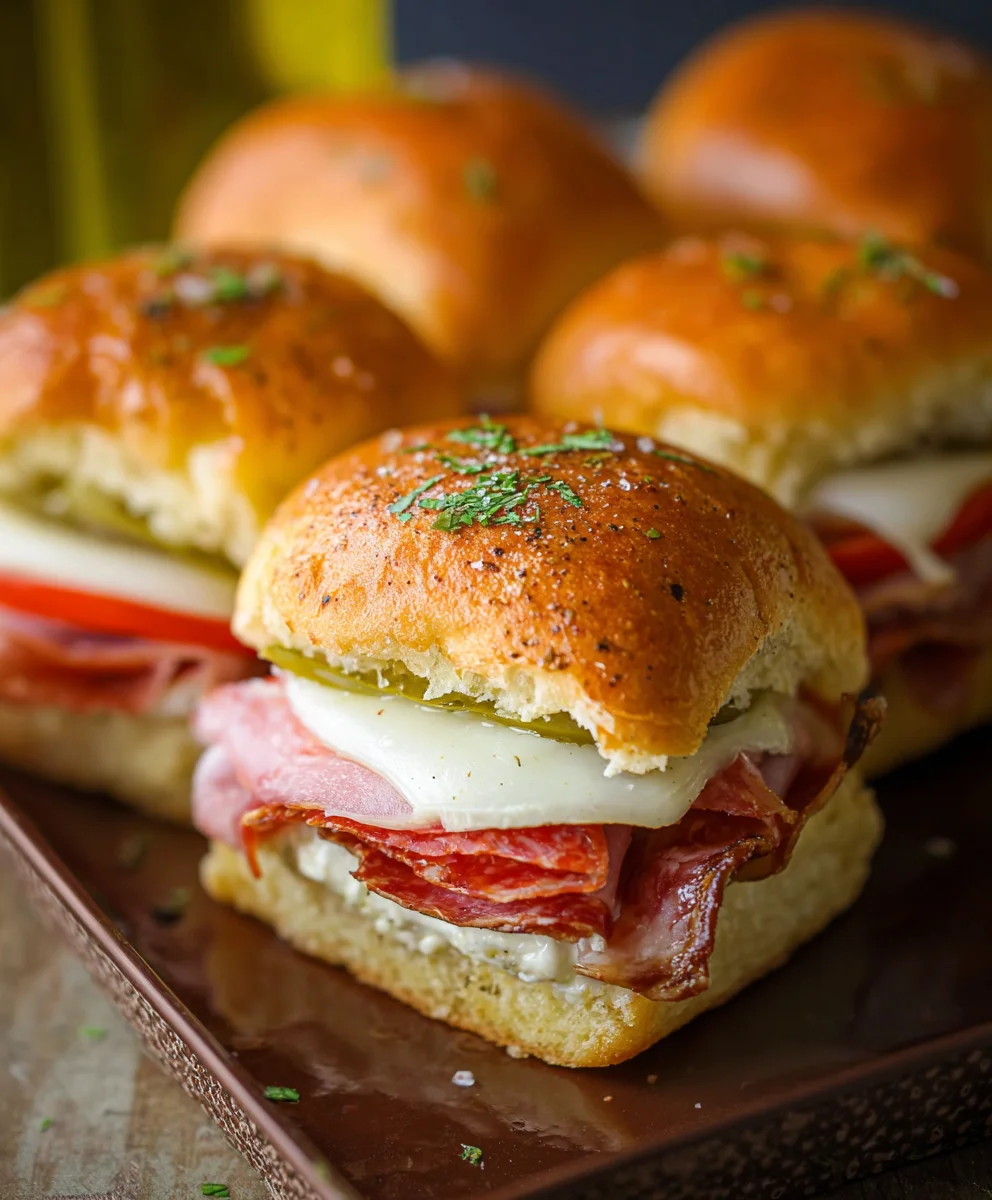
Hot Italian Sub Sliders are more than just a mini sandwich; they’re a flavor explosion packed into a perfectly portioned bite. Imagin extracte the savory goodness of classic Italian deli meats, melted cheese, and tangy peppers, all nestled between soft, fluffy slider buns. It’s no wonder these delightful creations have become a go-to for parties, game days, or simply when you crave a satisfying and intensely flavorful treat. What truly sets these Hot Italian Sub Sliders apart is the irresistible combination of textures and tastes: the slight chew of the bread, the melty embrace of the cheese, the zesty kick of the peppers, and the robust, satisfying bite of the cured meats. They’re incredibly customizable, allowing you to tailor the fillings to your exact preferences, making each bite a personal celebration of Italian-inspired deliciousness.

Ingredients:
- 12 pack rolls (Kings Hawaiian rolls recommended), halved lengthwise
- 6 oz package of thinly sliced beef beef ham
- 5 oz package of thinly sliced beef beef salami
- 5 oz package of thinly sliced beef beef pepperoni
- 9 slices provolone cheese
- 1/3 cup sliced pepperoncini
- 1/3 cup sliced pickled hot cherry peppers
- 1/4 cup melted salted butter
- 1 tsp Italian seasoning
- 2 cloves garlic, crushed (fresh is recommended)
- 1 cup marinara sauce
Preparation and Assembly
Building the Base Layers
This is where the magic of our Hot Italian Sub Sliders truly begin extracts – layering all those delicious flavors into those soft, sweet rolls. First things first, get your rolls ready. Since you’re using a 12-pack, carefully slice them in half horizontally. It’s best to keep them intact as a whole if possible, creating one giant sandwich that you’ll slice later. This makes assembly much neater and ensures even distribution of fillings. If the rolls are sticking together a bit too much, a gentle pull apart should do the trick. Lay the bottom halves of the rolls on a large baking sheet, cut-side up. This is going to be the foundation of our sliders.
Layering the Meats
Now, let’s pile on the savory goodness. We’re going to create a rich, multi-layered meat experience. Start by evenly distributing the thinly sliced beef hamf ham over the bottom halves of the rolls. Don’t be shy; make sure you get a good amount on each slider. Next, we’ll add the beef salamialami. Again, spread it out as evenly as you can. The goal here is to have a satisfying amount of each meat in every bite. Finallybeef salamithe salami with the thinly sliced beef pepperoniebeef pepperoni pepperoni will add a little bit of spice and that characteristic slightly greasy, delicious flavor that’s essential for a great Italian sub. Having three types of beef ensures a complex and satisfying meaty profile.
Adding the Cheese and Peppers
With the meats nicely arranged, it’s time to introduce the cheese and a hint of spicy tang. We’re using provolone cheese for its classic Italian flavor and its excellent melting properties. Carefully place 9 slices of provolone cheese over the layers of meat. Aim to cover the meat as much as possible, as this will help hold everything together once it melts. Now for the pickled elements! Sprinkle the sliced pepperoncini evenly over the cheese. These will bring a bright, vinegary tang and a mild heat. Following that, add the sliced pickled hot cherry peppers. These pack a bit more punch and add a wonderful, spicy kick that complements the richness of the meats and cheese beautifully. Distribute them so you get a burst of flavor in most of the sliders.
Preparing the Flavorful Butter and Sauce
While our sliders are prepped and ready for the oven, we need to elevate their flavor profile with a garlic butter and marinara sauce. In a small bowl, combine the melted salted butter with the crushed garlic cloves. The fresh garlic is key here for an intense aroma and flavor. Stir in the Italian seasoning. This blend of herbs like oregano, basil, and thyme is quintessential to Italian cooking and will infuse the butter with incredible fragrance. Mix everything thoroughly to ensure the garlic and seasonings are evenly dispersed in the butter. On a separate spot on your baking sheet, or in a small saucepan, gently warm the marinara sauce. You don’t need to cook it, just warm it through so it’s ready to pour over the sliders.
Baking and Finishing
Butter, Sauce, and Baking Instructions
This is the final assembly before we bake these beauties to golden perfection. Take the garlic-herb butter mixture and generously brush it all over the top halves of the rolls. This will give them a beautiful golden-brown color and a wonderfully savory crust. Make sure to get into all the nooks and crannies. Now, carefully spoon the warmed marinara sauce over the entire layered bottom half of the sub rolls. Don’t overload it, but ensure there’s enough to create a delicious sauce layer that will mingle with the cheese and meats. Once the buttered tops are on, cover the entire baking sheet tightly with aluminum foil. Preheat your oven to 350°F (175°C). Place the foil-wrapped baking sheet in the preheated oven and bake for 15 minutes. This initial baking time allows the flavors to meld and the cheegin extractto begin melting.
Melting the Cheese and Browning the Tops
After the initial 15 minutes of baking, carefully remove the aluminum foil from the baking sheet. Be cautious of the steam that will escape. At this point, the cheese should be starting to melt beautifully. Return the uncovered sliders to the oven and bake for another 10-15 minutes, or until the cheese is fully melted and bubbly, and the tops of the rolls are golden brown and slightly toasted. Keep a close eye on them during this stage to prevent the rolls from burning. The goal is a perfectly melted, gooey interior encased in a warm, slightly crisp bun. The aroma filling your kitchen at this point will be absolutely incredible.
Cooling and Serving the Sliders
Once they’re out of the oven, resist the urge to dive in immediately! Let the Hot Italian Sub Sliders rest on the baking sheet for about 5-10 minutes. This crucial resting period allows the cheese to set slightly and prevents everything from sliding out when you cut them. It also allows the internal temperature to become more manageable for eating. After resting, use a serrated knife to carefully slice the entire assembled sub into individual sliders. Serve them warm, perhaps with a side of extra marinara for dipping, or a simple green salad. These are perfect for game days, parties, or just a delicious and easy weeknight meal. Enjoy the explosion of Italian flavors in every bite!
Conclusion:
And there you have it – the ultimate guide to crafting irresistible Hot Italian Sub Sliders! We’ve walked through each simple step, from preparing the savory fillings to assembling these handheld delights that are guaranteed to be a hit at any gathering. These sliders are more than just a snack; they’re a burst of authentic Italian flavor, perfectly portioned and incredibly satisfying.
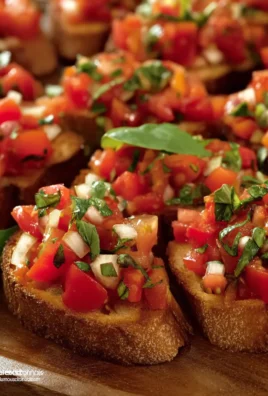
For serving suggestions, I love to present these Hot Italian Sub Sliders warm, straight from the oven. They pair beautifully with a simple side salad dressed with a balsamic vinaigrette, or a bowl of crispy potato chips. For a more substantial meal, consider serving them alongside a hearty tomato soup.
Don’t be afraid to get creative with variations! You can easily swap out the meats for your favorites, like adding spicy capicola or beef prosciutto. For a vegetarian twist, consider using roasted red peppers, grilled zucchini, and provolone cheese. The possibilities are endless, and I encourage you to experiment and make these sliders your own. Enjoy the delicious journey of making and sharing these fantastic Hot Italian Sub Sliders!
Frequently Asked Questions:
Can I make the Hot Italian Sub Sliders ahead of time?
Yes, you can assemble the sliders ahead of time, but it’s best to bake them just before serving for optimal freshness and crispiness. You can prepare the filling ingredients and layer them in the slider buns, cover them tightly, and refrigerate for up to 24 hours. When ready to bake, remove them from the refrigerator about 20-30 minutes before baking to allow them to come closer to room temperature.
What kind of bread is best for Hot Italian Sub Sliders?
Slider buns or Hawaiian sweet rolls work wonderfully for these Hot Italian Sub Sliders as they offer a soft, slightly sweet texture that complements the savory fillings. You can also use small, individual dinner rolls. The key is to find something that holds up well to the fillings and can be easily cut or served individually.

Spicy Beef Italian Sub Sliders – Flavorful Bites
Experience explosive Italian flavors with these savory and spicy beef Italian sub sliders. Featuring layers of thinly sliced beef ham, salami, and pepperoni, melted provolone cheese, and a kick of pickled peppers, all nestled in soft Hawaiian rolls and brushed with a garlic-herb butter and marinara.
Ingredients
-
12 pack rolls, halved lengthwise
-
6 oz package of beef ham, thinly sliced
-
5 oz package of beef salami, thinly sliced
-
5 oz package of beef pepperoni, thinly sliced
-
9 slices provolone cheese
-
1/3 cup pepperoncini, sliced
-
1/3 cup pickled hot cherry peppers, sliced
-
1/4 cup salted butter, melted
-
1 tsp Italian seasoning
-
2 cloves garlic, crushed
-
1 cup marinara sauce
Instructions
-
Step 1
Slice the 12-pack of rolls in half horizontally, keeping them intact as one large piece if possible. Place the bottom halves, cut-side up, on a large baking sheet. -
Step 2
Layer the thinly sliced beef ham evenly over the bottom halves of the rolls, followed by the thinly sliced beef salami, and then the thinly sliced beef pepperoni. -
Step 3
Arrange 9 slices of provolone cheese over the meat layers. Sprinkle the sliced pepperoncini and sliced pickled hot cherry peppers evenly over the cheese. -
Step 4
In a small bowl, combine the melted salted butter with the crushed garlic and Italian seasoning. Stir well. Gently warm the marinara sauce in a separate small saucepan or on the baking sheet. -
Step 5
Generously brush the garlic-herb butter mixture over the top halves of the rolls. Spoon the warmed marinara sauce over the layered bottom half of the sub rolls. Place the buttered top halves onto the sauced bottom halves. -
Step 6
Cover the baking sheet tightly with aluminum foil and preheat your oven to 350°F (175°C). Bake for 15 minutes. -
Step 7
Carefully remove the aluminum foil. Return the uncovered sliders to the oven and bake for an additional 10-15 minutes, or until the cheese is fully melted and bubbly, and the tops of the rolls are golden brown. -
Step 8
Let the sliders rest for 5-10 minutes after removing them from the oven. Slice the assembled sub into individual sliders using a serrated knife and serve warm.
Important Information
Nutrition Facts (Per Serving)
It is important to consider this information as approximate and not to use it as definitive health advice.
Allergy Information
Please check ingredients for potential allergens and consult a health professional if in doubt.


Leave a Comment