

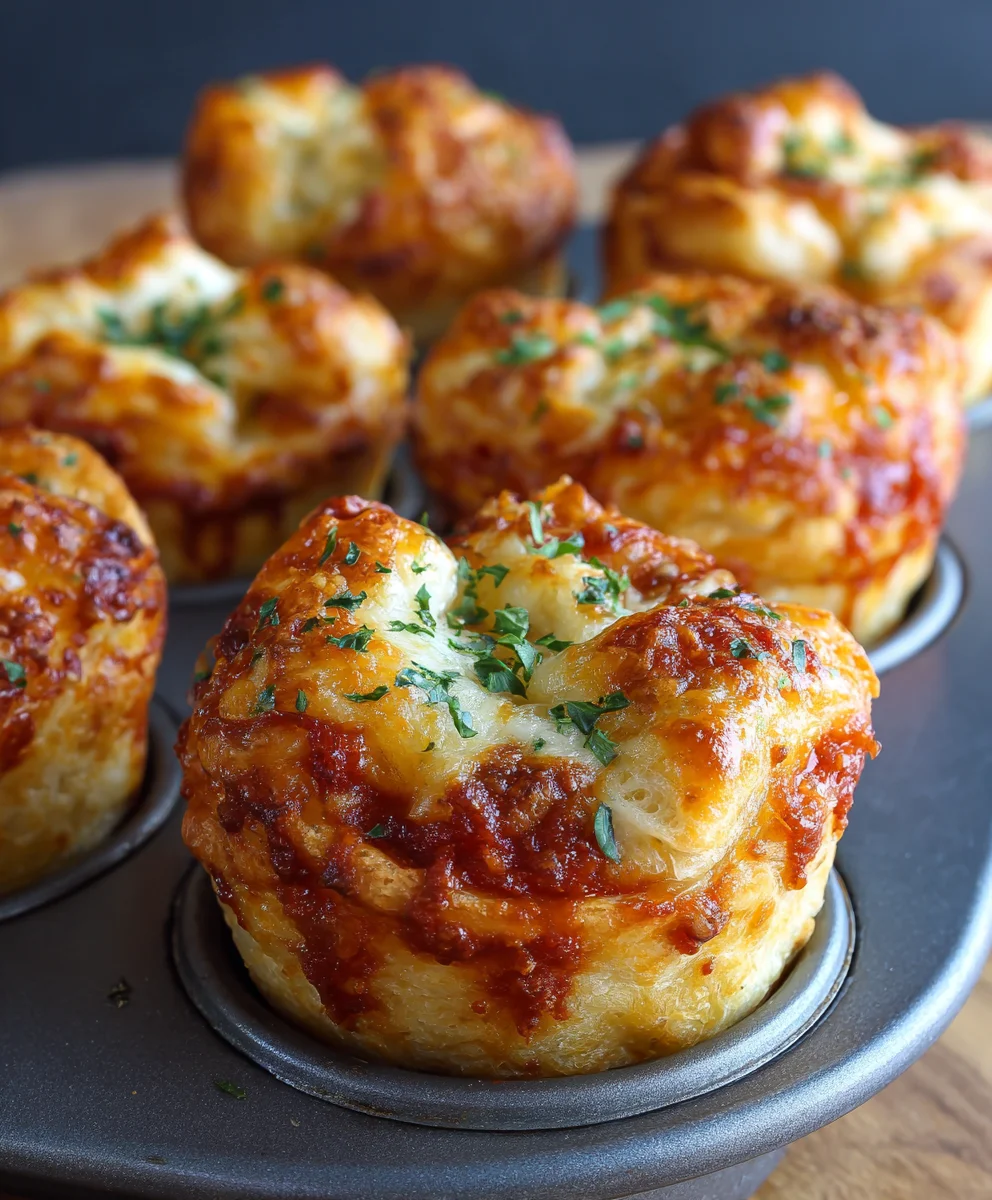
Pizza Puff Cups are not just a snack; they are a culinary revelation, transforming the beloved classic into an effortlessly enjoyable, bite-sized sensation perfect for any occasion. Imagine the irresistible flavors of your favorite pizza – the tangy sauce, the gooey cheese, the savory toppings – all encased in a golden, flaky pastry shell, perfectly portioned and ready for eager hands. While traditional pizza boasts a rich history stretching back centuries to the bustling streets of Naples, this modern interpretation offers a delightfully convenient and equally satisfying way to enjoy those universally cherished tastes. I am absolutely thrilled to share a recipe that promises to become a cherished staple in your kitchen, offering both incredible flavor and remarkable simplicity.
People adore these delightful Pizza Puff Cups for countless reasons, making them an instant hit with both adults and children. They offer the ultimate convenience for busy weeknights, serve as an unbeatable appetizer for game days, or even make a fun, customizable treat for lunchboxes. The contrasting textures, from the wonderfully crispy exterior to the warm, soft, and cheesy interior, create an addictively satisfying experience with every single bite. It’s the ultimate comfort food, brilliantly reimagined for ease and shared enjoyment, proving that incredible taste doesn’t always require hours in the kitchen. Prepare to experience the magic!

Ingredients:
- Pillsbury Refrigerated Crescent Roll Dough: Two (2) 8-ounce cans. I find that the classic crescent roll dough works absolutely perfectly for these Pizza Puff Cups, providing a flaky, buttery base that holds up wonderfully to all the delicious fillings. Make sure they are chilled until you’re ready to use them, as cold dough is much easier to work with and shape.
- Pizza Sauce: Approximately 1/2 to 3/4 cup. You can use your favorite brand of marinara or pizza sauce here. I often opt for a robust, slightly sweet sauce, but if you prefer something with a little more spice or a simpler tomato base, go for it! Having a good quality sauce is key to truly capturing that classic pizza flavor in our Pizza Puff Cups.
- Shredded Low-Moisture Part-Skim Mozzarella Cheese: 1 1/2 cups, divided. While pre-shredded cheese is convenient, I often recommend shredding your own from a block of mozzarella for superior melt and flavor. It makes a significant difference in the gooeyness and texture of the finished Pizza Puff Cups. We’ll use some for the initial layer and some for a beautiful cheesy top.
- Mini Pepperoni: 1/2 cup. The mini size is fantastic for these Pizza Puff Cups because they distribute more evenly throughout each small cup, ensuring every bite has a burst of savory, slightly spicy pepperoni flavor. If you can’t find mini pepperoni, you can chop regular-sized pepperoni into smaller pieces.
- Optional Toppings: 1/4 cup total, finely diced. This is where you can really customize your Pizza Puff Cups! Think about your favorite pizza toppings. Here are some ideas:
- Cooked and crumbled sausage or bacon bits.
- Finely diced bell peppers (red, green, or yellow).
- Drained canned mushrooms, finely chopped.
- Sliced black olives, halved or quartered.
- Diced onions, sautéed slightly to soften their bite.
- Sun-dried tomatoes, packed in oil and finely chopped.
Just remember to keep the pieces small so they fit neatly into the cups and cook evenly.
- Grated Parmesan Cheese: 2 tablespoons. This will be used for sprinkling over the tops of our Pizza Puff Cups right before baking, adding an extra layer of salty, umami flavor and a beautiful golden crust.
- Olive Oil: 1 tablespoon. For brushing the edges of our dough cups. This helps them achieve a lovely golden brown color and a slight crispness, enhancing the overall texture of your Pizza Puff Cups.
- Garlic Powder: 1/2 teaspoon. A little sprinkle on the dough edges for an aromatic boost.
- Italian Seasoning: 1/2 teaspoon. This blend of herbs perfectly complements the pizza flavors and adds an authentic touch to your Pizza Puff Cups.
Preparation of the Dough Cups
-
Preheat Your Oven and Prepare Your Muffin Tin: First things first, let’s get that oven ready! You’ll want to preheat your oven to 375°F (190°C). An accurately preheated oven is crucial for achieving that perfectly golden, flaky crust on your Pizza Puff Cups. While the oven is warming up, grab a 12-cup standard muffin tin. Using a non-stick cooking spray, generously coat each muffin cup. Don’t skimp on this step, as it’s vital for ensuring your delightful Pizza Puff Cups pop out easily once they’re baked and cooled slightly. Alternatively, you can brush each cup with a little melted butter or olive oil. I always find that a well-greased tin saves a lot of heartache later when it’s time to serve these amazing treats.
-
Unroll and Prepare the Crescent Roll Dough: Carefully unroll one can of the chilled Pillsbury crescent roll dough on a clean, lightly floured surface or a piece of parchment paper. The dough will typically come in a rectangular sheet with perforations. Avoid separating it into individual triangles at this stage. Instead, gently press together any perforations that might already be open, forming a more solid, unified rectangle of dough. We’re looking for a relatively smooth canvas to work with. Repeat this process with the second can of crescent roll dough. Having two sheets ready makes the next step much more efficient and ensures you have enough dough for all 12 of your Pizza Puff Cups.
-
Cut the Dough into Squares: Now, using a sharp knife or a pizza cutter, carefully cut each large rectangle of dough into six even squares. To do this, I usually cut the rectangle in half lengthwise, and then cut each of those halves into three equal squares crosswise. This will give you a total of 12 squares from the two cans of dough – one square for each of your muffin cups. Aim for squares that are roughly 3×3 inches, give or take a little. Don’t worry if they aren’t perfectly uniform; a little rustic charm just adds to the homemade appeal of these Pizza Puff Cups! The key here is to handle the dough as little as possible to keep it cold and prevent it from becoming too sticky or tough.
-
Shape the Dough into Muffin Cups: Take one of your dough squares and gently press it into the bottom and up the sides of one of your prepared muffin cups. You want to create a little cup or well within the tin. The corners of the square will naturally create small folds or pleats along the sides, which is perfectly fine and actually adds to the visual appeal and structure of your Pizza Puff Cups. Try to ensure the dough comes up high enough on the sides to create a good barrier for your fillings but doesn’t completely spill over the top edge of the muffin cup. Repeat this process for all 12 dough squares and muffin cups. Take your time to gently mold each one, making sure the bottom is secure so your fillings don’t leak out during baking.
Assembling the Pizza Puff Cups
-
Layer 1: The Pizza Sauce Base: Now for the fun part – filling our Pizza Puff Cups! Start by adding about 1 teaspoon of your favorite pizza sauce to the bottom of each dough-lined muffin cup. Use the back of the spoon to gently spread the sauce evenly over the bottom of the dough. You don’t want to overload it, as too much sauce can make the dough soggy, but you want enough to provide that essential tangy pizza flavor. Think of it as the foundation for all the deliciousness that’s about to go into your Pizza Puff Cups. This initial layer is crucial for moisture and flavor distribution throughout the cup.
-
Layer 2: The First Cheese Layer: Next, sprinkle about 1 tablespoon of the shredded mozzarella cheese over the sauce in each cup. This first layer of cheese acts as a barrier, further preventing the dough from becoming too wet from the sauce, and it also contributes to a wonderfully gooey, cheesy center in your Pizza Puff Cups. I always advocate for two layers of cheese when making pizza-inspired dishes because it truly enhances the overall experience. This cheese will melt down beautifully around your toppings.
-
Layer 3: Your Chosen Toppings: This is where your creativity shines! Divide the mini pepperoni evenly among the 12 cups, placing them over the first layer of cheese. If you’re using any of the optional toppings (like finely diced bell peppers, cooked sausage, or mushrooms), add a small amount of those now, distributing them as evenly as possible. Remember, because these are small “cups,” less is often more when it comes to toppings. Overfilling can lead to spills and uneven cooking. I usually aim for a total of 1 to 2 tablespoons of toppings per cup, including the pepperoni. This ensures each of your Pizza Puff Cups is bursting with flavor without being unmanageable.
-
Layer 4: The Final Cheese Blanket: To cap off our magnificent creations, sprinkle the remaining shredded mozzarella cheese over the toppings in each cup. This will be the beautiful, golden-brown, bubbly top layer of cheese that everyone loves on a good pizza. It seals in the flavors and creates that irresistible “cheese pull” when you bite into one of these warm Pizza Puff Cups. Don’t be shy with this layer; it’s the crowning glory of your assembly process.
-
Season and Brush the Dough Edges: In a small bowl, combine the olive oil, garlic powder, and Italian seasoning. Use a pastry brush to lightly brush this seasoned oil mixture onto the exposed edges of the crescent roll dough in each muffin cup. This step is a small detail that makes a big impact. Not only does it help the dough achieve a gorgeous golden-brown color and a slightly crispy texture, but the garlic powder and Italian seasoning infuse those edges with incredible aromatic flavor. It elevates the entire Pizza Puff Cups experience, transforming a simple crust into something truly special and flavorful. Make sure to get all the exposed dough, ensuring even browning and seasoning.
Baking the Pizza Puff Cups
-
Bake to Golden Perfection: Carefully transfer your muffin tin, laden with its delicious contents, into the preheated 375°F (190°C) oven. Bake for approximately 12 to 15 minutes. Baking time can vary slightly depending on your oven, so keep a close eye on them, especially towards the end. What you’re looking for is dough that is puffed up and beautifully golden brown, and cheese that is thoroughly melted, bubbly, and slightly browned around the edges. The aroma filling your kitchen will be absolutely incredible – that’s often my first clue that these Pizza Puff Cups are nearly ready! If your oven tends to bake unevenly, you might rotate the muffin tin halfway through the baking time to ensure all the cups brown consistently.
-
Check for Doneness: To ensure your Pizza Puff Cups are perfectly cooked, visually inspect them. The dough should not look pale or undercooked, especially around the base and sides. The cheese should be fully melted and have a lovely light golden-brown hue in spots. You can even gently lift one of the cups with a small offset spatula or butter knife to check the bottom of the dough; it should be firm and golden. If they seem a little too pale after the suggested time, give them another 2-3 minutes, checking frequently. Undercooked dough can be gummy, and we want nothing but flaky, tender crusts for these delightful Pizza Puff Cups!
-
Cooling in the Tin: Once your Pizza Puff Cups are baked to perfection, carefully remove the muffin tin from the oven. Resist the urge to immediately try to pull them out! It’s important to let them cool in the muffin tin for about 5 to 10 minutes. This cooling period serves a couple of crucial purposes. First, it allows the cheese and fillings to set up slightly, making them less prone to falling apart when you remove them. Second, it makes the Pizza Puff Cups much easier to handle without burning your fingers, and it helps them release cleanly from the non-stick muffin tin. Patience truly is a virtue here, leading to perfectly intact and presentable cups.
Finishing Touches and Serving
-
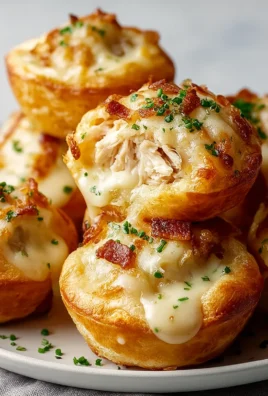
Removing and Garnishing: After the brief cooling period, gently loosen the edges of each Pizza Puff Cup with a small butter knife or an offset spatula. Then, carefully lift each one out of the muffin tin and transfer them to a serving platter. As they emerge, they’ll reveal their perfectly formed, golden crusts. For an extra touch of flavor and visual appeal, sprinkle the remaining 2 tablespoons of grated Parmesan cheese over the warm Pizza Puff Cups. The heat will slightly melt the Parmesan, infusing them with its sharp, salty goodness. If you have any fresh parsley or basil on hand, a light sprinkle of finely chopped herbs can add a beautiful pop of color and freshness. These small garnishing steps truly elevate the presentation of your homemade Pizza Puff Cups.
-
Serving Suggestions: Your Pizza Puff Cups are best served warm, shortly after they’ve come out of the oven. They make an absolutely fantastic appetizer for parties, a fun and easy weeknight dinner, or a delightful snack any time of day. For an authentic pizza experience, I love serving them with a small bowl of extra warm pizza sauce or marinara sauce on the side for dipping. Guests (and family!) love having the option to dunk their savory treats. A sprinkle of red pepper flakes is also a popular addition for those who enjoy a little extra kick. They are truly versatile and incredibly satisfying!
-
Storing Leftovers: If, by some miracle, you have any leftover Pizza Puff Cups, they can be stored in an airtight container in the refrigerator for up to 3 days. To reheat, you can pop them back into a preheated oven at 350°F (175°C) for about 5-8 minutes, or warm them in a toaster oven until heated through and the cheese is bubbly again. Microwaving is an option, but it might make the crust a little soft, so I always recommend the oven for the best texture retention. These Pizza Puff Cups are so delicious, though, that I rarely find myself with any leftovers!
Conclusion:
Well, friends, we’ve journeyed through the creation of what I truly believe will become your new go-to snack, appetizer, or even a super fun weeknight dinner. These Pizza Puff Cups are more than just a recipe; they’re a testament to how simple ingredients, a little creativity, and minimal effort can yield absolutely spectacular results. If you’re looking for a crowd-pleaser that delivers on flavor, convenience, and sheer delight, then this is unequivocally the recipe you need in your repertoire. I’ve seen firsthand the joy these bring – from the wide-eyed wonder of kids at a birthday party to the grateful sighs of adults enjoying a stress-free game night snack. They hit all the right notes: crispy on the outside, delightfully soft and cheesy on the inside, bursting with all those classic pizza flavors we adore. This isn’t just another dish; it’s a guaranteed smile-inducer, a fuss-free solution to countless meal dilemmas, and an absolute triumph of snack engineering. You simply must experience the magic for yourself.
What I love most about these incredible little bites is their chameleon-like ability to fit into almost any scenario. Picture this: a plate full of warm, golden Pizza Puff Cups sitting pretty on your coffee table during a movie marathon. Or imagine them as the undisputed star of your next potluck, disappearing faster than you can say “extra cheese.” They’re perfect for school lunches (just make sure they’ve cooled!), brilliant for tailgating events, and an excellent way to use up those lingering bits and bobs in your fridge. Think about your next family game night; instead of ordering takeout, whip up a batch of these – the interactive element of everyone grabbing their own warm, cheesy cup adds an extra layer of fun to the evening. They truly transform any casual gathering into a memorable feast, proving that sophisticated flavor doesn’t have to mean complicated cooking.
Now, let’s talk about taking these already amazing bites to the next level. While they are undeniably delicious straight out of the oven, a few clever serving suggestions can elevate the experience even further. Think dipping sauces! A classic marinara is always a winner, of course, but don’t stop there. A creamy ranch dressing offers a delightful tangy contrast, a garlicky aioli adds a gourmet touch, or even a spicy sriracha mayo for those who like a little kick. For a lighter touch, a fresh basil pesto drizzled over the top just before serving can add a vibrant herbaceous note. Consider serving them alongside a simple green salad dressed with a zesty vinaigrette – suddenly, your snack becomes a well-rounded meal. Or, for a truly indulgent treat, pair them with some crispy baked potato wedges. The possibilities are truly endless, limited only by your imagination and what’s in your pantry.
And speaking of endless possibilities, one of the greatest strengths of this recipe is its incredible adaptability. While the core concept of savory puffs in a muffin tin remains, the filling is your canvas! Feeling adventurous? Swap out the pepperoni for cooked crumbled sausage, diced ham, or even some shredded chicken. For a vegetarian twist, load them up with finely diced bell peppers, mushrooms, onions, or spinach – just make sure to sauté any high-moisture veggies first to avoid a soggy bottom. Want a healthier option? Use whole wheat crescent dough and load up on the veggies. For those who adore heat, a pinch of red pepper flakes mixed into the filling or a few slices of jalapeño will do the trick. If you’re catering to different tastes, you can even make a few distinct batches in one go: half pepperoni, half veggie, a few with olives – everyone gets exactly what they love. This recipe truly encourages you to experiment and make it your own, ensuring that it never gets boring.
So, there you have it. My heartfelt plea for you to give these fantastic, versatile, and utterly irresistible Pizza Puff Cups a try. I promise you won’t regret it. They’re quick, they’re easy, and they deliver big on flavor, making them an indispensable addition to your culinary repertoire. Don’t just read about how good they are; experience it for yourself. When you do, I would absolutely love to hear about your culinary adventures! What variations did you try? Who did you share them with? What dipping sauces stole the show? Please, share your stories and photos with me. Let’s create a community of Pizza Puff Cup enthusiasts! Happy baking, and get ready to be amazed.
Frequently Asked Questions About Pizza Puff Cups
Can I prepare the Pizza Puff Cups ahead of time?
How do I store leftover Pizza Puff Cups?
Can I freeze Pizza Puff Cups?
What kind of dough can I use if I don’t have crescent rolls?
Are these Pizza Puff Cups suitable for picky eaters?
What are some gluten-free or vegetarian variations for Pizza Puff Cups?

Homemade Pizza Puff Cups: Cheesy Beef & Marinara Bites
These Homemade Pizza Puff Cups transform pizza dough into individual cups filled with layers of marinara, cheese, and savory mini beef pepperoni. Each bite combines soft, garlic-buttered dough with classic pizza toppings for the perfect snack, appetizer, or quick meal. They’re deliciously cheesy, delightfully convenient, and baked until golden for an irresistible bite.
Ingredients
-
2 (8-ounce) cans Pillsbury Refrigerated Crescent Roll Dough
-
1/2 to 3/4 cup Pizza Sauce
-
1 1/2 cups Shredded Low-Moisture Part-Skim Mozzarella Cheese, divided
-
1/2 cup Mini Beef Pepperoni
-
1/4 cup finely diced Optional Toppings (e.g., cooked & crumbled beef sausage, finely diced bell peppers, chopped drained mushrooms, sliced black olives)
-
2 tablespoons Grated Parmesan Cheese
-
1 tablespoon Olive Oil
-
1/2 teaspoon Garlic Powder (for dough edges)
-
1/2 teaspoon Italian Seasoning
-
1 tablespoon Unsalted Butter, melted (for tin)
-
1/4 teaspoon Garlic Powder (for tin)
Instructions
-
Step 1
Preheat oven to 375°F (190°C). Melt 1 tablespoon unsalted butter and mix with 1/4 teaspoon garlic powder. Generously brush a 12-cup standard muffin tin with this garlic butter. -
Step 2
Unroll the crescent roll dough from both cans. Gently press together any perforations to form two solid rectangular sheets. Cut each rectangle into six equal squares, yielding 12 squares in total. -
Step 3
Press each dough square into a prepared muffin cup, gently molding it to form a well or cup shape. -
Step 4
Fill each dough cup with about 1 teaspoon of pizza sauce, followed by 1 tablespoon of shredded mozzarella cheese. Add mini beef pepperoni and any chosen optional toppings. Top with the remaining shredded mozzarella cheese. -
Step 5
In a small bowl, combine 1 tablespoon olive oil, 1/2 teaspoon garlic powder, and 1/2 teaspoon Italian seasoning. Brush this mixture onto the exposed edges of the crescent roll dough in each muffin cup. -
Step 6
Carefully transfer the muffin tin to the preheated oven. Bake for approximately 12 to 15 minutes, or until the dough is beautifully golden brown and the cheese is thoroughly melted and bubbly. -
Step 7
Once baked, remove the muffin tin from the oven and let the Pizza Puff Cups cool in the tin for 5 to 10 minutes. This allows the fillings to set and makes them easier to remove. -
Step 8
Gently loosen the edges and lift each Pizza Puff Cup from the tin. Transfer to a serving platter. Sprinkle with the grated Parmesan cheese and fresh chopped herbs (like parsley or basil) if desired. Serve warm. -
Step 9
Serve warm with extra pizza or marinara sauce on the side for dipping. Leftovers can be stored in an airtight container in the refrigerator for up to 3 days. Reheat in a preheated oven at 350°F (175°C) for 5-8 minutes for best texture.
Important Information
Nutrition Facts (Per Serving)
It is important to consider this information as approximate and not to use it as definitive health advice.
Allergy Information
Please check ingredients for potential allergens and consult a health professional if in doubt.


Leave a Comment