

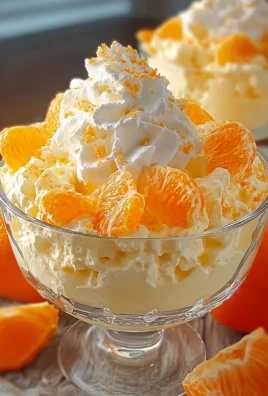
Cotton Candy Swirl Candy Apples are not just a treat; they are a whimsical journey back to the most joyful moments of childhood fairs and vibrant carnivals. Imagine biting into the crisp, tartness of a fresh apple, immediately followed by a delightful crunch of a sugary coating, all infused with the ethereal sweetness and vibrant hues of classic cotton candy. This isn’t your average candy apple; it’s an edible work of art that promises an unforgettable sensory experience, merging two iconic sweets into one spectacular creation.
For generations, candy apples have been a staple of autumnal festivities and summer fairs, holding a special place in our hearts as symbols of celebration and simple pleasures. The innovative addition of a cotton candy swirl elevates this beloved classic to an entirely new level, marrying the nostalgic charm of both traditional candy apples and the airy delight of spun sugar. People adore this dish not only for its stunning visual appeal—each apple a unique masterpiece of swirling colors that beg to be photographed—but also for the incredible interplay of textures and flavors. The firm snap of the apple contrasts beautifully with the hard, sweet candy shell, which then subtly melts into the airy, sugary essence of cotton candy on your palate. It’s an irresistible combination that evokes pure happiness with every single bite.
I’m thrilled to guide you through creating these spectacular Cotton Candy Swirl Candy Apples right in your own kitchen, bringing that magical fairground excitement directly to your home. Get ready to impress your family and friends with a dessert that’s as enchanting to look at as it is delicious to devour!

Ingredients:
- 6-8 medium-sized crisp apples (such as Granny Smith, Honeycrisp, or Fuji), washed thoroughly
- 6-8 sturdy lollipop or candy apple sticks
- 2 cups granulated sugar
- ½ cup light corn syrup
- ¾ cup water
- 1 teaspoon flavor extract (such as vanilla, raspberry, or cotton candy flavor)
- Gel food coloring (pink or blue work wonderfully to enhance the cotton candy theme)
- Approximately 6-8 ounces of pre-made cotton candy, in your desired colors (pink and blue often look fantastic for the swirl effect)
Equipment You’ll Need:
- Heavy-bottomed saucepan (at least 3-quart capacity)
- Candy thermometer (a digital one with an alarm is incredibly helpful)
- Baking sheet(s)
- Parchment paper or a silicone baking mat
- Silicone spatula or wooden spoon
- Pastry brush (optional, but useful for preventing sugar crystals)
- Measuring cups and spoons
- Small, deep bowl or mug for dipping (wide enough to accommodate an apple)
Getting Started: Preparing Your Workspace and Apples
Creating beautiful Cotton Candy Swirl Candy Apples is an art, and like any art, it starts with careful preparation. Trust me, a little prep work now will save you a lot of headache later!
- Prepare Your Apples: First things first, we need impeccably clean apples. Waxy residue is the enemy of a smooth candy coating. I like to wash my apples thoroughly with warm, soapy water and then scrub them gently with a vegetable brush to remove any waxy coating. Some people even blanch them quickly in boiling water for 10 seconds, but vigorous scrubbing usually does the trick.
- Dry, Dry, Dry: This step is critical! After washing, dry each apple meticulously. I mean, absolutely bone dry. Any moisture on the apple’s surface will prevent the candy coating from adhering properly, leading to frustrating pooling at the bottom or an uneven finish. I use a clean kitchen towel and then let them air dry for an additional 15-20 minutes, just to be sure.
- Insert the Sticks: Once your apples are perfectly dry, carefully insert a lollipop or candy apple stick into the stem end of each apple. Push the stick about halfway to two-thirds of the way through the apple, ensuring it’s secure and won’t wobble. This will be your handle for dipping and enjoying your beautiful creation.
- Prepare Your Cooling Station: Line a baking sheet (or two, depending on the number of apples) with parchment paper or a silicone baking mat. You want to make sure you have enough space between each apple so they don’t touch as they cool. This prepared surface will be where your newly dipped apples will set without sticking.
- Set Up Your Dipping Area: Before you even start cooking the sugar, make sure your work area is organized. Have your prepared apples, cooling sheet, candy thermometer, and all your measured ingredients within easy reach. The candy-making process moves quickly, so you won’t have time to scramble for items once the sugar starts boiling.
Crafting the Cotton Candy Candy Coating
This is where the magic truly begins for our Cotton Candy Swirl Candy Apples. Making the candy coating requires precision and a little patience, but the results are so worth it!
- Combine Ingredients: In your heavy-bottomed saucepan, combine the granulated sugar, light corn syrup, and water. Give it a gentle stir just to moisten all the sugar. Avoid scraping down the sides of the pan at this point, as stray sugar crystals can lead to crystallization later.
- Begin Heating: Place the saucepan over medium-high heat. Attach your candy thermometer to the side of the pan, ensuring the tip doesn’t touch the bottom.
- Dissolve Sugar and Prevent Crystallization: As the mixture heats, the sugar will dissolve. Resist the urge to stir once the mixture begins to boil vigorously. Stirring can introduce sugar crystals back into the solution, which can cause your entire batch to crystalize and become grainy. If you see any sugar crystals forming on the sides of the pan, dip a clean pastry brush in a little warm water and gently brush down the sides. This dissolves the crystals and prevents them from falling back into the syrup.
- Bring to Temperature: Allow the syrup to boil undisturbed until it reaches 300°F (149°C), which is the hard crack stage. This temperature is crucial for the candy to become brittle and firm when cooled. Do not rush this process. A good candy thermometer is your best friend here. It can take 15-20 minutes, sometimes longer, depending on your stove and pan.
- Add Color and Flavor: Once the syrup reaches exactly 300°F (149°C), immediately remove the pan from the heat. Carefully stir in your chosen flavor extract and a few drops of gel food coloring. I love using a vibrant pink or a sky blue for a true cotton candy vibe. Be quick but careful, as the hot sugar will be very active. Stir just enough to incorporate the color and flavor evenly.
- Allow to Stabilize (Crucial Step): This is a tip I swear by! Instead of dipping immediately, let the hot candy mixture sit for a minute or two. This allows any air bubbles incorporated during stirring to dissipate and the temperature to drop ever so slightly. Ideally, you want to dip when the candy is around 285-295°F (140-146°C). If it’s too hot, the coating will be too thin and run off the apple. If it’s too cool, it will be too thick and difficult to work with. Transferring the candy mixture to a small, deep, heat-safe bowl (like a measuring cup or mug) that is wide enough to accommodate an apple can also help manage the temperature and make dipping easier.
Dipping and Cooling Your Cotton Candy Swirl Candy Apples
Now comes the exciting part – transforming your apples into the foundation for our magnificent Cotton Candy Swirl Candy Apples!
- Get Ready to Dip: Hold an apple by its stick. You’ll want to work quickly but deliberately. If your candy coating has cooled too much, you can gently warm it on very low heat for a moment, but be cautious not to burn it or re-boil it.
- The Perfect Dip: Tilt your bowl or saucepan slightly to pool the candy coating. Dip the apple into the hot candy mixture, rotating it to coat the entire surface evenly. Ensure the coating reaches just below where the stick enters the apple, but don’t submerge the stick itself.
- Allow Excess to Drip: Lift the apple out of the candy. Hold it above the bowl, rotating it gently to allow any excess candy to drip back into the pan. You want a smooth, relatively thin, and even coating. If the coating is too thick, it can become overly brittle and prone to cracking. A light tap on the side of the pan can help remove excess drips.
- Place on Cooling Sheet: Immediately place the dipped apple onto your prepared parchment-lined baking sheet. Leave a little space around each apple. Repeat this process with the remaining apples.
- Initial Cooling: Allow the candy apples to cool and set on the parchment paper for approximately 10-15 minutes. They should still be slightly warm and just a touch tacky to the touch. This slight tackiness is absolutely crucial for the cotton candy to adhere beautifully later on. If they become completely hard and cold, the cotton candy won’t stick, or you’ll have to gently warm them, which can be tricky.
Adding the Magical Cotton Candy Swirl
This is where our Cotton Candy Swirl Candy Apples truly get their name and their unique, whimsical appearance. It’s a fun, hands-on step!
- Prepare Your Cotton Candy: While your candy apples are doing their initial set, gently pull apart small, wispy pieces of your pre-made cotton candy. You don’t want dense clumps; rather, aim for delicate, airy strands. You can use different colors for a vibrant swirl – pink and blue are my favorites for this theme!
- The Swirl Technique: Once your candy apples are cool enough to handle but still slightly tacky (you should be able to touch the candy coating without it sticking completely to your finger, but it shouldn’t feel bone dry), it’s time to apply the cotton candy. Take a small, wispy piece of cotton candy and gently press and twist it around the base of the candy apple, working your way up.
- Creating the Swirl: The key is to be gentle. The warmth and slight tackiness of the candy coating will cause the cotton candy to adhere and slightly melt onto the surface, creating that beautiful, ethereal swirl effect. You can layer different colors by adding pink, then a little blue, twisting and pressing as you go. Don’t overdo it with one section; remember, we’re going for a delicate swirl, not a thick blanket.
- Covering the Apple: Continue this process, taking small amounts of cotton candy and artfully swirling them around the entire apple. You might find it easier to hold the apple by its stick and rotate it as you press on the cotton candy. The less you handle the cotton candy directly with your fingers, the better, as the oils and moisture from your hands can cause it to dissolve.
- Experiment with Design: Feel free to get creative with your swirl. You can cover the entire apple, or leave parts of the hard candy coating exposed for contrast. Some like a dense swirl, others prefer a more delicate, sparse look. The beauty of these Cotton Candy Swirl Candy Apples is their customizable charm!
Final Touches and Storage for Your Cotton Candy Swirl Candy Apples
You’re almost there! Just a few more steps to ensure your beautiful Cotton Candy Swirl Candy Apples are perfect and ready to impress.
- Allow to Fully Set: Once you’ve applied all the cotton candy swirls, return your candy apples to the parchment-lined baking sheet. Let them sit at room temperature for at least 30 minutes, or until the candy coating is completely hard and the cotton candy has fully adhered and set into its swirled pattern.
- Optimal Conditions: Humidity is the enemy of candy apples. If your kitchen is very humid, the candy coating might remain slightly sticky or “sweat.” If this is the case, a quick stint in a cool, dry room or even briefly in the refrigerator can help, but avoid prolonged refrigeration as it can also cause condensation.
- To Wrap or Not to Wrap: For best results and to maintain the integrity of both the hard candy and the cotton candy, I recommend enjoying your Cotton Candy Swirl Candy Apples within a few hours of making them. If you must store them, individually wrap each apple loosely in clear cellophane bags, tying them at the stick. This helps protect the cotton candy from environmental moisture and keeps it from deflating too much.
- Storage Duration: While they are best enjoyed fresh, properly stored candy apples can last for 1-2 days at room temperature in a cool, dry place. The cotton candy swirl might slightly diminish in fluffiness over time, but the flavor will still be delightful. Avoid direct sunlight or warm environments, as this will cause both the hard candy and the cotton candy to melt and become sticky.
- Troubleshooting Sticky Apples: If your apples seem too sticky after setting, it could be due to humidity, not reaching the hard crack stage (300°F/149°C) during cooking, or too much moisture on the apples initially. Ensure all these factors are meticulously controlled for the best outcome next time.
- Serving Suggestion: These delightful Cotton Candy Swirl Candy Apples are perfect for parties, special treats, or just a fun baking project. They’re visually stunning and offer a wonderful textural contrast between the crisp apple, the crunchy sweet candy, and the ethereal cotton candy.
- Enjoy Your Creation: Step back and admire your beautiful, whimsical creations! You’ve put in the effort, and now it’s time to savor every sweet, crunchy, and airy bite.

Conclusion:
So, there you have it! We’ve journeyed through the delightful process of creating something truly spectacular – a confection that transcends the ordinary and transports you straight back to the most joyful moments of childhood fairs and carnivals. These aren’t just any candied apples; they are an explosion of vibrant color and whimsical flavor, a true feast for both the eyes and the palate. I truly believe that mastering these Cotton Candy Swirl Candy Apples is an absolute must-try for anyone who loves to bring a little extra magic into their kitchen and share it with others. What makes them so irresistible? It’s that perfect blend of tart, crisp apple with the impossibly sweet, melt-in-your-mouth allure of cotton candy, all encased in a glossy, hard candy shell. The visual impact alone is enough to turn heads – those dreamy, pastel swirls are nothing short of art. Imagine the gasps of delight when you present these at your next gathering! It’s not just a recipe; it’s an opportunity to create edible works of art that are as delicious as they are beautiful. The process itself, while requiring a touch of patience, is incredibly rewarding. There’s a special satisfaction in watching those colors come together, transforming simple apples into something truly extraordinary. You’ll be amazed at what you can create!
Serving Suggestions & Creative Twists
Once your incredible batch of Cotton Candy Swirl Candy Apples is complete, the fun doesn’t have to stop there! Serving them is an event in itself. I love to arrange them on a beautiful platter, perhaps with a scattering of edible glitter or tiny star sprinkles around the base for an extra touch of sparkle. They make the ultimate showstopper for birthday parties, baby showers, or any event where you want to add a vibrant, whimsical touch. For a more casual setting, simply displaying them upright in a jar or a rustic bucket can be charming, allowing each individual apple to truly shine. Think about themed parties – these apples would be an absolute hit at a carnival-themed birthday or a whimsical garden party!
But why stop at just one perfect rendition? This recipe is a fantastic springboard for your own creative culinary adventures! While the cotton candy swirl is undeniably enchanting, you could experiment with other flavor and color combinations for your candy coating. Imagine a ‘Mermaid Swirl’ with blues and greens, or a ‘Sunset Swirl’ using warm reds and oranges. You could even infuse a subtle flavor into the candy coating itself, perhaps a drop of raspberry extract for a berry twist, or even a hint of vanilla for a classic touch. As for the apples themselves, I’ve found that crisp, tart varieties like Granny Smith provide a wonderful contrast to the sweet coating, but feel free to experiment with Fuji or Honeycrisp if you prefer a sweeter apple base. And for those seeking a bite-sized treat, why not try using smaller apples or even crabapples? They make for adorable mini versions that are perfect for little hands or for creating a diverse dessert spread. Another delightful idea is to add a textural element; while the classic Cotton Candy Swirl Candy Apples are smooth, a light dusting of finely crushed edible glitter just after the coating sets but before it hardens completely can add an extra dimension of shimmer. Or, for those who love a bit of crunch, perhaps a very fine sprinkle of freeze-dried fruit powder for a tangy counterpoint to the sweetness. Remember, the kitchen is your playground, and these beautiful apples are just waiting for your personal stamp. Let your imagination run wild!
Your Turn to Create & Share!
My dearest readers, I truly hope this recipe has inspired you to grab your ingredients and embark on this incredibly fun and rewarding culinary journey. There’s nothing quite like the satisfaction of creating something beautiful and delicious with your own hands, especially when it brings such joy to those you share it with. So, please, don’t hesitate! Give these incredible Cotton Candy Swirl Candy Apples a try in your own kitchen. I promise you, the smiles they’ll bring are absolutely priceless. And once you’ve crafted your masterpieces, I would absolutely love to hear about your experience! Did you try a fun new color combination? Did your kids help you swirl the colors? What was the reaction when you served them? Your insights, your tips, and especially your photos are so incredibly valuable and inspiring to me and to our entire community of enthusiastic home bakers and confectioners. Share your triumphs, your learning moments, and any brilliant variations you come up with. Let’s celebrate the magic of homemade treats together! Tag me, leave a comment, or send a message – I’m eagerly waiting to see your beautiful creations and hear all about your adventures with these delightful, whimsical treats. Happy candy apple making!

Cotton Candy Swirl Candy Apples
Cotton Candy Swirl Candy Apples are a whimsical journey back to childhood fairs. This edible work of art combines the crispness of a fresh apple with a crunchy sugary coating and the ethereal sweetness of classic cotton candy, offering an unforgettable sensory experience.
Ingredients
-
6-8 medium crisp apples (e.g., Granny Smith, Honeycrisp)
-
6-8 sturdy lollipop or candy apple sticks
-
2 cups granulated sugar
-
½ cup light corn syrup
-
¾ cup water
-
1 tsp flavor extract (e.g., vanilla, raspberry, cotton candy)
-
Gel food coloring (pink or blue)
-
6-8 oz pre-made cotton candy, assorted colors
Instructions
-
Step 1
Wash apples thoroughly to remove wax, then dry meticulously. Insert a lollipop stick securely into the stem end of each apple. -
Step 2
Line a baking sheet with parchment paper. Have all candy-making ingredients and equipment (including a candy thermometer) ready and within easy reach. -
Step 3
In a heavy-bottomed saucepan, combine granulated sugar, light corn syrup, and water. Stir gently to moisten all sugar. Attach a candy thermometer to the side of the pan. -
Step 4
Heat the mixture over medium-high heat. Do not stir once it begins to boil vigorously; if sugar crystals form on the sides, gently brush them down with a wet pastry brush. Continue boiling until the syrup reaches exactly 300°F (149°C) (hard crack stage). -
Step 5
Immediately remove the pan from heat. Carefully stir in the flavor extract and a few drops of gel food coloring until evenly combined. Let the mixture sit for 1-2 minutes to stabilize; the ideal dipping temperature is 285-295°F (140-146°C). For easier dipping, transfer the candy mixture to a small, deep, heat-safe bowl. -
Step 6
Hold an apple by its stick. Tilt the bowl slightly and quickly dip the apple into the hot candy mixture, rotating to coat the entire surface evenly. Lift the apple and hold it over the bowl, rotating gently to allow any excess candy to drip back into the pan. -
Step 7
Place each dipped apple onto the prepared parchment-lined baking sheet, leaving space between them. Allow the candy apples to cool and set for approximately 10-15 minutes until they are slightly warm and just tacky to the touch. This tackiness is crucial for the cotton candy to adhere. -
Step 8
While apples are initially cooling, gently pull apart small, wispy pieces of pre-made cotton candy. Once the apples are slightly tacky, take a small piece of cotton candy and gently press and twist it around the base of a candy apple, working your way up. Layer different colors (like pink and blue) for a vibrant swirl effect, handling the cotton candy minimally with your fingers. -
Step 9
Return the swirled candy apples to the parchment-lined baking sheet. Let them sit at room temperature for at least 30 minutes, or until the candy coating is completely hard and the cotton candy has fully adhered. For best results, enjoy fresh within a few hours. If storing, individually wrap each apple loosely in clear cellophane bags and keep in a cool, dry place for 1-2 days. Avoid humidity and warm environments.
Important Information
Nutrition Facts (Per Serving)
It is important to consider this information as approximate and not to use it as definitive health advice.
Allergy Information
Please check ingredients for potential allergens and consult a health professional if in doubt.

Leave a Comment