

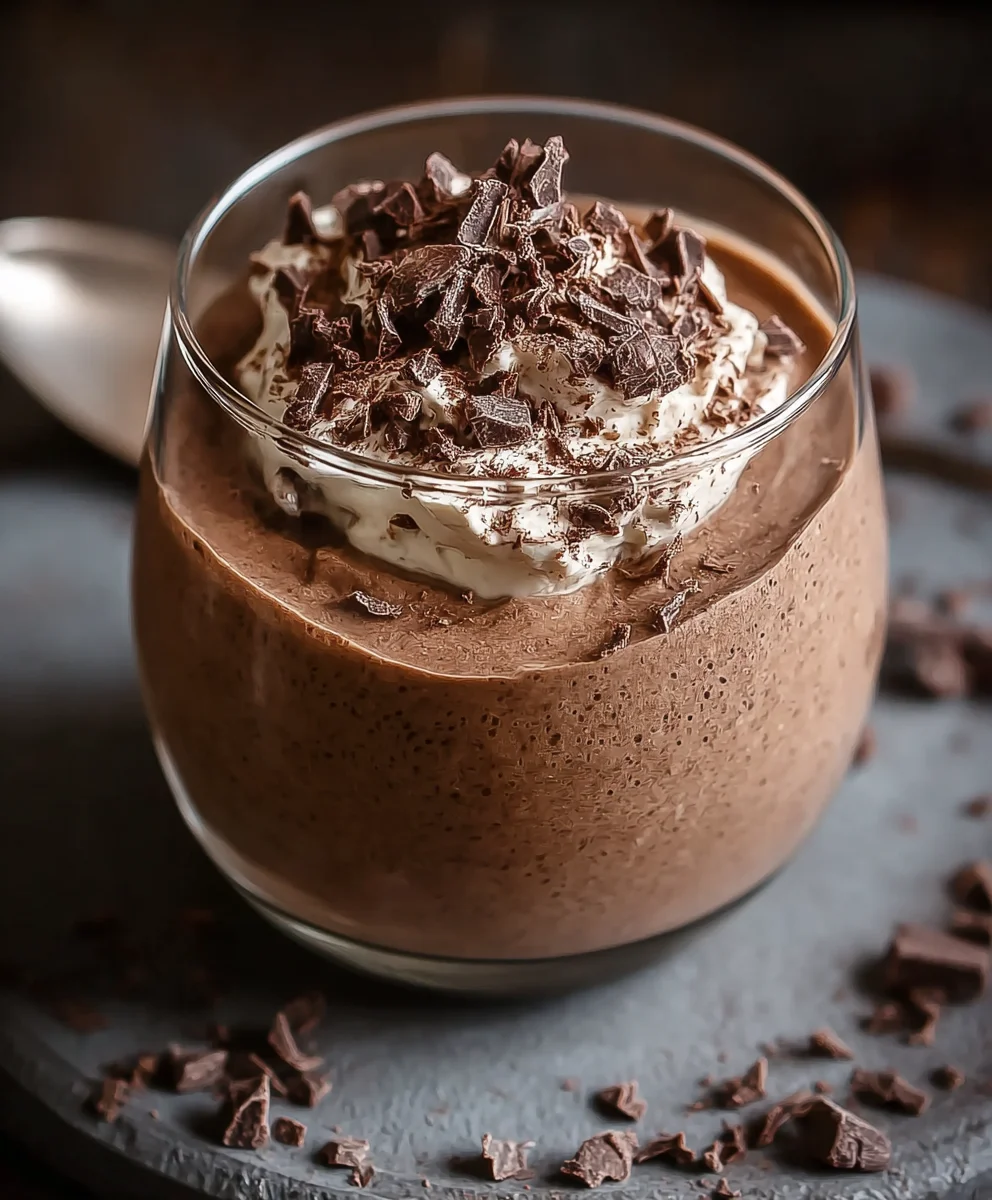
Protein Pudding isn’t just a trendy snack; it’s a delicious revolution in guilt-free indulgence. If you’ve ever craved something sweet and satisfying without derailing your health goals, then you’ve landed in the right place. We all know that post-workout hunger or that mid-afternoon slump can lead to questionable snack choices, but with this incredible Protein Pudding, those days are over. What makes it so beloved? It’s the unbelievably creamy texture, the rich flavor that tricks your taste buds into thinking you’re having dessert, and of course, the substantial protein boost that keeps you feeling full and energized. This isn’t your average chalky protein shake; it’s a truly decadent experience that nourishes your body and delights your senses. Get ready to discover your new favorite way to fuel up!

Ingredients:
- 1 cup (250g) Greek yogurt, low fat or full fat
- ½ cup (40g) protein powder, chocolate or vanilla flavored
- 1 tablespoon cocoa powder
- 1-2 tablespoons maple syrup, to taste
- Milk of choice, as needed for consistency
Preparation
Step 1: Combine the Base Ingredients
Begin extract by gathering a medium-sized mixing bowl. Into this bowl, spoon the Greek yogurt. Whether you choose low-fat or full-fat is entirely up to your preference and dietary goals. Full-fat yogurt will lend a richer, creamier texture to your Protein Pudding, while low-fat will result in a lighter dish. Next, add the protein powder. For this recipe, you can opt for either chocolate or vanilla flavored protein powder. Chocolate will naturally deepen the pudding’s flavor profile, especially when paired with the cocoa powder, while vanilla provides a more neutral and versatile base that allows other flavors to shine. Ensure your protein powder is well-dissolved and lump-free for the smoothest pudding. If you’re using a scoop that’s slightly larger or smaller than the standard ½ cup, adjust accordingly; consistency is key, but precision isn’t paramount here.
Step 2: Incorporate the Cocoa Powder and Sweetener
Once the Greek yogurt and protein powder are in the bowl, it’s time to add the flavor enhancers. Sprinkle in the 1 tablespoon of cocoa powder. If you’re a serious chocolate enthusiast, you might even be tempted to add a little more, but start with one tablespoon to ensure it doesn’t overpower the other flavors. Next, add the maple syrup. The amount of maple syrup is really a matter of personal taste. I recommend starting with 1 tablespoon and then tasting and adjusting later. This natural sweetener adds a lovely subtle sweetness and a hint of its characteristic flavor. If you prefer a sweeter pudding, you can add the second tablespoon now, or save it to adjust after the pudding has reached its final consistency.
Stgin extract3: Begin Mixing and Achieving Initial Consistency
Now, it’s tigin extractto start bringing everything together. Using a whigin extractor a sturdy spoon, begin to gently stir and combine the ingredients. At this stage, the mixture will likely be quite thick, almost like a paste, due to the density of the Greek yogurt and protein powder. Don’t be discouraged by this initial thickness. Continue mixing, making sure to scrape down the sides and bottom of the bowl to incorporate all the dry ingredients. The goal here is to break down any clumps of protein powder and to get a homogenous mixture as much as possible before adding any liquid.
Step 4: Gradually Add Milk for Desired Texture
This is where you’ll transform the thick paste into a smooth, spoogin extractle Protein Pudding. Slowly begin to add your milk of choice, starting with just a tablespoon or two at a time. I recommend using a milk that you enjoy the taste of, as it will contribute to the overall flavor. Common choices include almond milk, soy milk, oat milk, or even dairy milk. As you add the milk, continue to whisk or stir vigorously. You’re looking for a consistency that is similar to a traditional pudding – thick enough to hold its shape on a spoon but still smooth and flowing. Keep adding milk incrementally, stirring after each addition, until you reach your desired pudding texture. Be mindful not to add too much liquid too quickly, as it’s easier to thin out a pudding than to thicken it back up.
Step 5: Taste and Adjust Sweetness and Consistency
Once you have achieved a pleasing pudding-like consistency, it’s crucial to taste your creation. Use a clean spoon to sample the Protein Pudding. This is your chance to fine-tune the flavor and texture. If you find it not sweet enough, now is the time to add that second tablespoon of maple syrup (or even a little more, if you dare!). If you decide you’d prefer a slightly thicker pudding, you can let it sit for a few minutes to allow the protein powder to absorb more moisture, or you could even stir in a tiny bit more protein powder, though be cautious not to make it too chalky. Conversely, if you find it too thick after it has rested, you can add another splash of milk. Continue tasting and adjusting until it’s perfect for your palate. Don’t be afraid to experiment with small additions – a pinch of salt can sometimes enhance sweetness, or a dash of cinnamon can add another layer of warmth.
Step 6: Chill and Serve
For the best Protein Pudding experience, chilling is essential. Once you’re happy with the flavor and consistency, transfer the pudding into individual serving bowls or one larger container. Cover the bowls tightly with plastic wrap or a lid. Place them in the refrigerator and allow them to chill for at least 30 minutes. This chilling time is important not only to cool the pudding down but also to allow the flavors to meld together and for the pudding to set slightly, achieving that desirable thick and creamy texture. The colder it is, the more refreshing and satisfying the pudding will be. You can also prepare this Protein Pudding ahead of time and store it in the refrigerator for up to 2-3 days, making it a fantastic option for meal prep or a quick, healthy dessert or snack.
Conclusion:
We hope you’ve enjoyed learning how to create this delicious and satisfying Protein Pudding! This recipe is a fantastic way to indulge your sweet cravings while still fueling your body with essential protein. It’s incredibly versatile, making it a perfect option for a post-workout recovery treat, a healthy dessert, or even a quick and nutritious breakfast on the go. Don’t be afraid to experiment with different flavorings and toppings to make it your own!
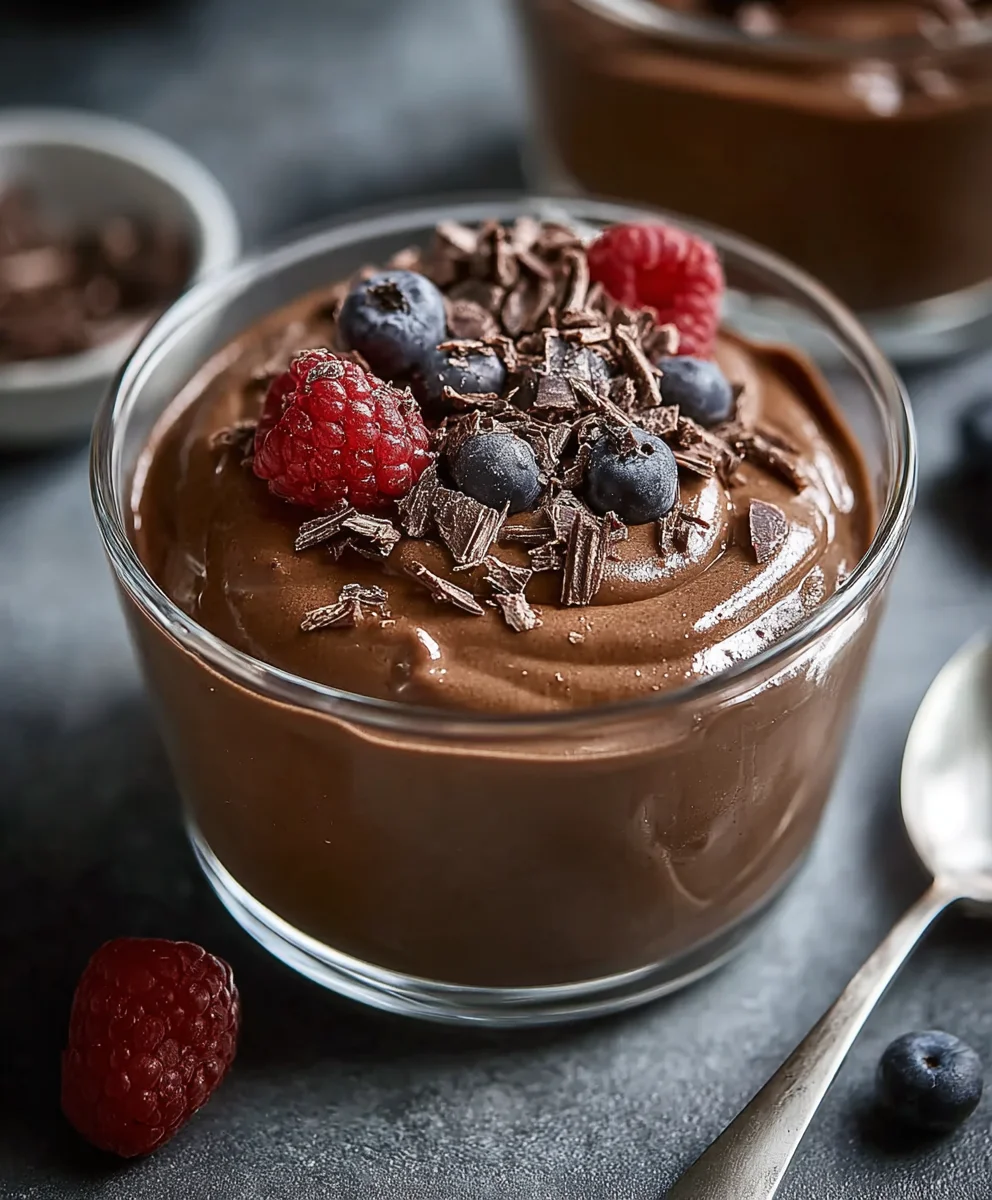
For serving suggestions, consider topping your Protein Pudding with fresh berries, a sprinkle of granola for added crunch, a drizzle of nut butter, or some shaved dark chocolate for an extra decadent touch. If you’re feeling adventurous, try incorporating a dash of cinnamon or a drop of vanilla extract into the base for a unique flavor profile. The possibilities are truly endless!
We encourage you to give this Protein Pudding recipe a try. It’s simple to make, incredibly adaptable, and always a crowd-pleaser. Enjoy this guilt-free treat!
Frequently Asked Questions:
Q: Can I make this Protein Pudding ahead of time?
Absolutely! This Protein Pudding is perfect for meal prepping. You can store it in individual airtight containers in the refrigerator for up to 3-4 days. This makes it a convenient grab-and-go option for busy mornings or a ready-to-eat snack.
Q: What are some good flavor variations for Protein Pudding?
There are many delicious variations you can try! For a chocolate version, add unsweetened cocoa powder. For a fruity twist, blend in some puréed fruit like strawberries or mango. You can also add spices like cinnamon or cardamom, or even a touch of coffee for a mocha flavor. Experimenting with different protein powder flavors is also a great way to diversify!
High Protein Pudding – Delicious & Easy Recipe
A quick and easy recipe for a delicious high-protein pudding, perfect for a healthy snack or dessert.
Ingredients
-
1 cup (250g) Greek yogurt, low fat or full fat
-
½ cup (40g) protein powder, chocolate or vanilla flavored
-
1 tablespoon cocoa powder
-
1-2 tablespoons maple syrup, to taste
-
Milk of choice, as needed for consistency
Instructions
-
Step 1
Combine the Greek yogurt and protein powder in a medium-sized mixing bowl. Ensure the protein powder is well-dissolved and lump-free for a smooth texture. -
Step 2
Add the cocoa powder and maple syrup to the bowl. Start with 1 tablespoon of maple syrup and adjust to your taste later. -
Step 3
Begin stirring the ingredients together with a whisk or spoon. The mixture will be thick, like a paste. Continue mixing to break down any clumps. -
Step 4
Gradually add milk, one tablespoon at a time, while whisking vigorously. Aim for a pudding-like consistency – thick but still smooth and flowing. -
Step 5
Taste the pudding and adjust sweetness and consistency. Add more maple syrup if desired, or a splash more milk if it’s too thick. Allow it to rest briefly to thicken if needed. -
Step 6
Transfer the pudding to serving bowls, cover, and chill in the refrigerator for at least 30 minutes before serving to allow flavors to meld and the pudding to set.
Important Information
Nutrition Facts (Per Serving)
It is important to consider this information as approximate and not to use it as definitive health advice.
Allergy Information
Please check ingredients for potential allergens and consult a health professional if in doubt.

Leave a Comment