

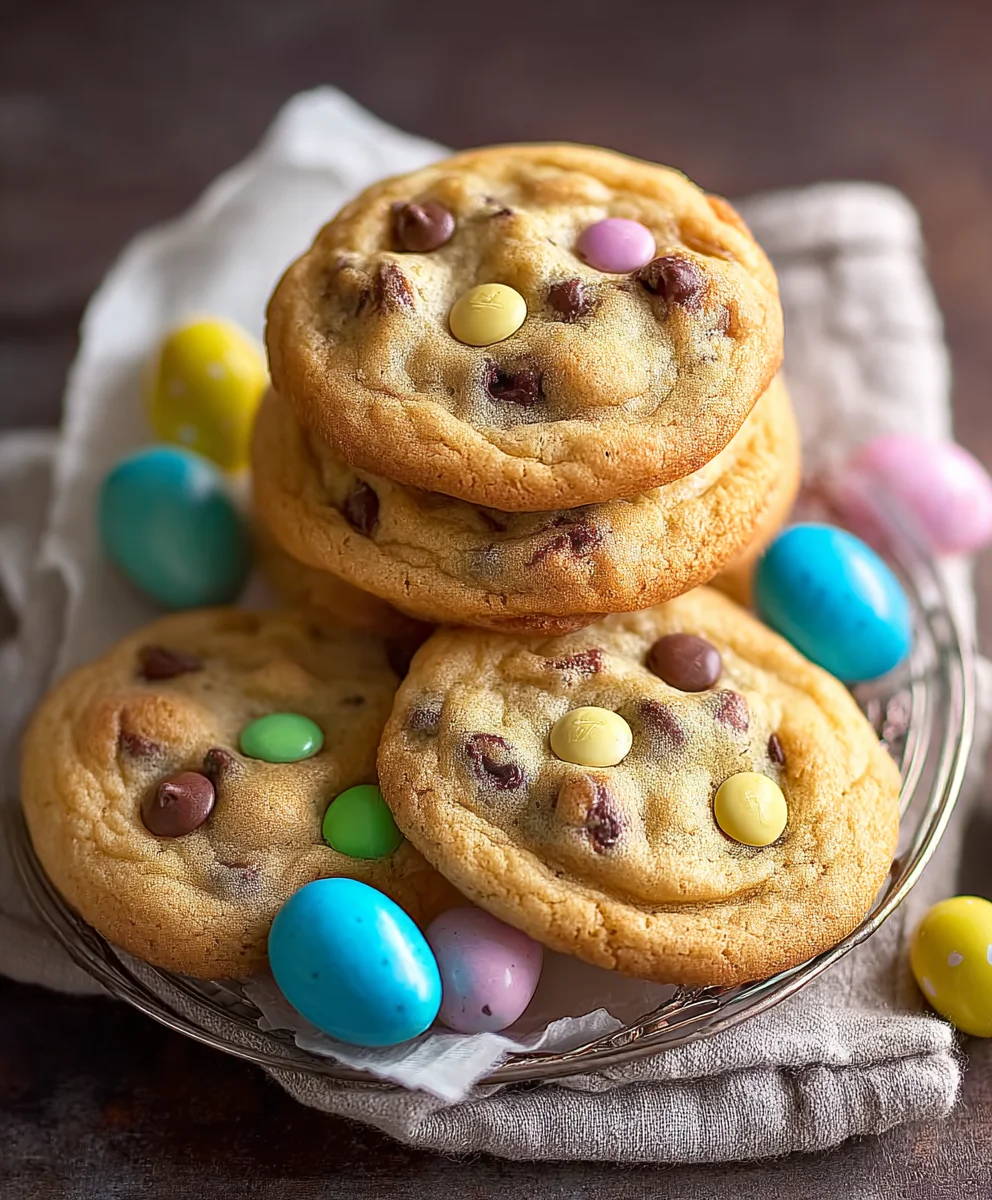
Easter Chocolate Chip Cookies are more than just a treat; they’re a hallmark of spring celebrations, bringin extractg a burst of joy and sweetness to every gathergin extract. Imagine the delight on your loved ones’ faces as they discover these perfectly baked delights, infused with the classic comforting taste of chocolate chip cookies but with a whimsical, festive twist. What truly makes these Easter Chocolate Chip Cookies so beloved is their ability to capture the spirit of the season. They’re not just cookies; they’re edible sunshine, decorated with pastel colors and the promise of warmer days ahead. The anticnon-alcoholic ipation builds as the aroma of warm chocolate and buttery dough fills your kitchen, signaling that a truly special occasion is underway. Whether you’re filling an Easter basket, sharing them at brunch, or simply enjoying a moment of sweet indulgence, these cookies are guaranteed to create cherished memories.
Why You’ll Adore This Recipe
The magic of Easter Chocolate Chip Cookies lies in their versatility and inherent charm. They’re a delightful canvas for creativity, allowing you to personalize them with various sprinkles, edible glitter, or even shaped candies that evoke the essence of Easter. The familiar, comforting flavor profile of a perfectly chewy chocolate chip cookie is elevated by these seasonal touches, making them an instant crowd-pleaser for all ages. They represent simple pleasures, shared moments, and the sweet anticigin extraction of new beginnings that Easter embodies. Get ready to bake up a batch of pure happiness!

Ingredients:
- 2½ cups all-purpose flour
- 1 teaspoon baking soda
- ½ teaspoon salt
- 1 cup unsalted butter, softened
- ¾ cup granulated sugar
- ¾ cup packed light brown sugar
- 2 large eggs
- 2 teaspoons pure vanilla extract
- Gel food coloring (pastel pink, purple, yellow, and blue)
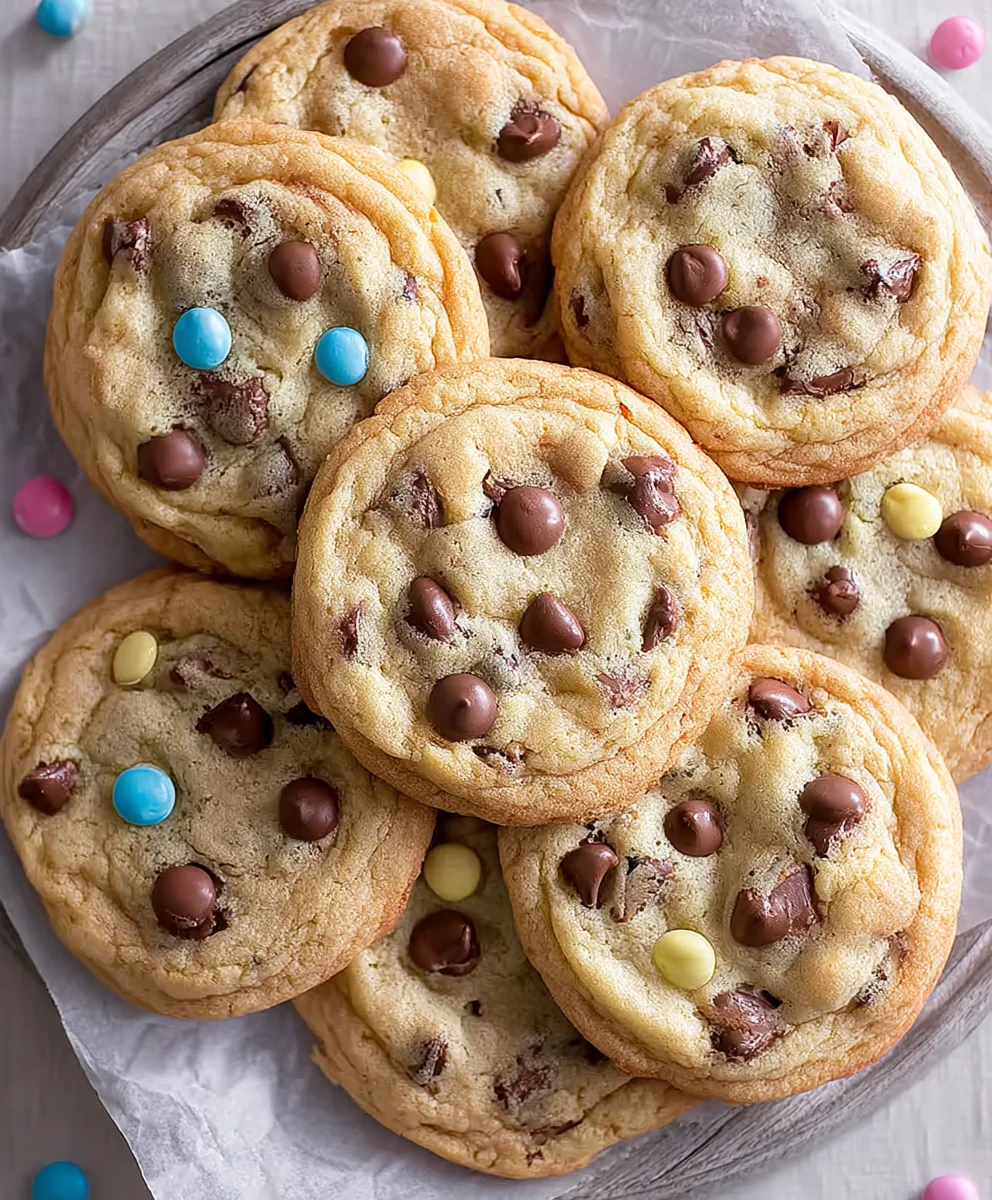
- 2 cups semi-sweet chocolate chips, plus a generous handful for extra chocolatey goodness on top
Preparing the Cookie Dough Base
Creaming the Butter and Sugars
In a large mixing bowl, begin extract by creaming together the softened unsalted butter, granulated sugar, and packed light brown sugar. This is a crucial step for achieving tender and chewy cookies. Use an electric mixer, starting on a low speed to prevent the sugar from flying everywhere, and then increase to medium-high speed. Beat until the mixture is light, fluffy, and pnon-alcoholic ale yellow in color. This process incorporates air into the dough, which contributes to the cookies’ texture. You’ll know it’s ready when the mixture looks creamy and holds soft peaks. Scrape down the sides of the bowl a couple of times during this process to ensure everything is evenly incorporated. This usually takes about 3 to 5 minutes.
Adding Eggs and Vanilla
Once the butter and sugar are perfectly creamed, add the two large eggs, one at a time, beating well after each addition until fully incorporated. It’s important to add them gradually to maintain the emulsification of the mixture. Following the eggs, add the pure vanilla extract. Beat again until everything is just combined. Overmixing at this stage can lead to tougher cookies, so stop as soon as the eggs and vanilla are no longer visible.
Combining Dry Ingredients
In a separate medium bowl, whisk together the all-purpose flour, baking soda, and salt. Whisking these dry ingredients before adding them to the wet ingredients helps to distribute the leavening agent and salt evenly throughout the dough, ensuring consistent results.
Combining Wet and Dry Ingredients
Gradually add the dry ingredients to the wet ingredients, mixing on low speed until just combined. Be careful not to overmix. The dough will be thick and cohesive. Again, scrape down the sides of the bowl as needed to ensure all the flour is incorporated. Once the dough starts to come together and you no longer see streaks of flour, stop mixing.
Creating the Pastel Easter Colors
Dividing the Dough
Divide the cookie dough into four equal portions. You can do this by eye, or for absolute precision, you can weigh the total dough and divide by four. Aim for roughly equal amounts to ensure your Easter colors are balanced.
Coloring the Dough
Now for the fun part! Take each portion of dough and place it in a separate small bowl. Add a few drops of gel food coloring to each bowl. Gel food coloring is highly concentrated, so a little goes a long way. Start with a small amount and add more as needed until you achieve your desired pastel shades. For a pastel pink, use pink coloring. For a gentle purple, use purple. For a soft yellow, use yellow. For a delicate blue, use blue. Gently knead the coloring into the dough with your hands or a spoon until the color is evenly distributed. Make sure to wear gloves if you don’t want your hands colored! Once each portion is colored, combine the four colored doughs together in a large bowl. Don’t overmix them at this stage; you want distinct swirls of color, not a muddy mess. Gently fold them together a few times until they are partially combined, creating a marbled effect.
Adding the Chocolate Chips
Gently fold in the 2 cups of chocolate chips into the marbled dough. Again, be careful not to overmix. You want the chocolate chips to be distributed throughout the dough without breaking up the beautiful pastel swirls too much.
Baking Your Easter Masterpieces
Chilling the Dough
Cover the bowl of marbled dough with plastic wrap and refrigerate for at least 30 minutes. This chilling step is important for several reasons. It helps to solidify the butter, which prevents the cookies from spreading too much during baking, resulting in thicker, chewier cookies. It also allows the flavors to meld together. For even better results, you can chill the dough for longer, even overnight.
Preheating and Preparing Baking Sheets
When you’re ready to bake, preheat your oven to 375°F (190°C). Line two large baking sheets with parchment paper or silicone baking mats. This prevents the cookies from sticking and makes for easy cleanup.
Scooping and Topping the Cookies
Scoop rounded tablespoons of the marbled dough onto the prepared baking sheets, leaving about 2 inches of space between each cookie to allow for spreading. For an extra burst of chocolate, press a few additional chocolate chips onto the tops of the cookie dough balls before baking. This creates those irresistible pools of melted chocolate on the surface.
Baking to Perfection
Bake for 9 to 12 minutes, or until the edges are lightly golden brown and the centers still look slightly soft. The cookies will continue to set up as they cool. Keep an eye on them, as oven temperatures can vary. You want them to be set but not overbaked, which can lead to dry cookies.
Cooling and Enjoying
Let the cookies cool on the baking sheets for 5 minutes before carefully transferring them to a wire rack to cool completely. This initial cooling on the baking sheet allows them to firm up before you move them, preventing them from breaking apart. Enjoy your beautiful and delicious Easter Chocolate Chip Cookies!
Conclusion:
There you have it – your ultimate guide to creating the most delightful Easter Chocolate Chip Cookies! We’ve walked through each step to ensure your cookies are perfectly chewy in the center with slightly crisp edges, bursting with the classic chocolate chip goodness that everyone loves. These cookies are not just a treat; they’re a symbol of springtime joy and festive gatherings.
I encourage you to get creative with your decorating! A sprinkle of colorful Easter-themed sprinkles before baking, or a drizzle of pastel-colored icing after cooling, can transform these already delicious cookies into edible works of art perfect for any Easter basket or dessert table. They also make a wonderful activity to do with children during the holiday break.
For serving, these Easter Chocolate Chip Cookies are wonderful on their own, perhaps with a cold glass of milk. They also pair beautifully with a cup of hot cocoa or coffee. Consider them the star of your Easter dessert spread, nestled amongst other festive treats.
Frequently Asked Questions about Easter Chocolate Chip Cookies:
Q1: How can I make my Easter Chocolate Chip Cookies chewier?
To achieve maximum chegrape juicess, be careful not to overbake your cookies. Bake them until the edges are set but the centers still look slightly underdone. They will continue to bake and set as they cool on the baking sheet. Using brown sugar generously also contributes to a chewier texture.
Q2: Can I add other mix-ins to these Easter Chocolate Chip Cookies?
Absolutely! While the classic chocolate chip is the star, feel free to experiment. For an Easter twist, consider adding white chocolate chips, pastel-colored candy melts, or even a handful of chopped Cadbury mini eggs for a festive crunch. Chopped nuts like walnuts or pecans also add a lovely texture and flavor.
Q3: How should I store my Easter Chocolate Chip Cookies?
Once completely cooled, store your Easter Chocolate Chip Cookies in an airtight container at room temperature for up to 3-4 days. For longer storage, you can freeze the cookie dough balls before baking, or freeze baked and cooled cookies in a freezer-safe bag for up to 2-3 months.
Easy Easter Chocolate Chip Cookies Recipe
Delicious and colorful chocolate chip cookies perfect for Easter, featuring pastel marbled dough and plenty of chocolate.
Ingredients
-
2½ cups all-purpose flour
-
1 teaspoon baking soda
-
½ teaspoon salt
-
1 cup unsalted butter, softened
-
¾ cup granulated sugar
-
¾ cup packed light brown sugar
-
2 large eggs
-
2 teaspoons pure vanilla extract
-
Gel food coloring (pastel pink, purple, yellow, and blue)
-
2 cups semi-sweet chocolate chips, plus a generous handful for extra chocolatey goodness on top
Instructions
-
Step 1
Cream together softened unsalted butter, granulated sugar, and packed light brown sugar in a large mixing bowl until light, fluffy, and pale yellow. Beat for 3-5 minutes, scraping down the sides as needed. -
Step 2
Add the two large eggs one at a time, beating well after each addition. Stir in the pure vanilla extract until just combined. Do not overmix. -
Step 3
In a separate bowl, whisk together all-purpose flour, baking soda, and salt. Gradually add the dry ingredients to the wet ingredients, mixing on low speed until just combined. Do not overmix. -
Step 4
Divide the dough into four equal portions. Place each portion in a separate bowl and add a few drops of gel food coloring to each (pink, purple, yellow, blue). Gently knead in the color until evenly distributed, achieving pastel shades. Combine the four colored doughs in a large bowl and gently fold them together a few times to create a marbled effect, being careful not to overmix. -
Step 5
Gently fold in the 2 cups of chocolate chips into the marbled dough. Be careful not to overmix. -
Step 6
Cover the bowl with plastic wrap and refrigerate for at least 30 minutes. Preheat oven to 375°F (190°C). Line two large baking sheets with parchment paper or silicone baking mats. -
Step 7
Scoop rounded tablespoons of dough onto the prepared baking sheets, leaving about 2 inches between cookies. Press a few additional chocolate chips onto the tops of the cookie dough balls before baking. -
Step 8
Bake for 9 to 12 minutes, or until the edges are lightly golden brown and the centers still look slightly soft. Let cookies cool on the baking sheets for 5 minutes before transferring to a wire rack to cool completely.
Important Information
Nutrition Facts (Per Serving)
It is important to consider this information as approximate and not to use it as definitive health advice.
Allergy Information
Please check ingredients for potential allergens and consult a health professional if in doubt.
Leave a Comment