

Crispy Cottage Cheese Chips are an absolute revelation for anyone seeking a guilt-free, incredibly satisfying snack. Forget everything you thought you knew about cottage cheese; this recipe transforms it into something truly magical. Imagin extracte delicate, golden shards that shatter with an irresistible crunch, bursting with a subtle, tangy flavor that’s surprisingly addictive. What’s not to love about this innovative approach to a pantry staple? We’re not just talking about a healthy alternative here; we’re talking about a culinary masterpiece that will have your friends and fagin extracty begging for the recipe. The secret lies in the simple yet ingenious method that unlocks the hidden potential of cottage cheese, creating a texture and taste experience unlike any other. Prepare to be amazed by how something so humble can become so spectacularly delicious, making these Crispy Cottage Cheese Chips your new go-to for snacking adventures.

Ingredients:
- 1 cup small curd cottage cheese, well-drained
- ¼ teaspoon garlic powder
- ¼ teaspoon onion powder
- ½ teaspoon dried herbs (optional, such as thyme, oregano, or parsley)
- Salt and freshly ground black pepper, to taste
- Olive oil spray
Preparing Your Crispy Cottage Cheese Chips
Mixing the Base
First, let’s get our cottage cheese ready for transformation. It’s crucial that the cottage cheese is well-drained. Excess moisture is the enemy of crispiness! You can achieve this by either pouring it into a fine-mesh sieve and letting it sit for about 15-20 minutes, pressing gently with a spoon occasionally, or by wrapping it in a clean kitchen towel or cheesecloth and squeezing out as much liquid as possible. Once your cottage cheese is nicely drained, transfer it to a medium-sized mixing bowl. Now, it’s time to add our flavor builders. Sprinkle in the garlic powder and the onion powder. These two are fundamental for savory depth. Next, add your dried herbs, if you’re using them. I personally love a mix of dried thyme and a pinch of dried parsley for a classic herbaceous note, but feel free to experiment with your favorites – rosemary or even a touch of Italian seasoning can be delicious. Finally, season generously with salt and freshly ground black pepper. Remember, these chips will have a subtle flavor on their own, so don’t be shy with the seasoning. Stir everything together thoroughly with a spoon or a spatula until all the cottage cheese is evenly coated with the spices and herbs. You want a uniform mixture, with no dry pockets of cottage cheese.
Forming the Chips
Now for the fun part: shaping our chips! This stage is all about getting them ready for the oven. You’ll need a baking sheet lined with parchment paper. The parchment paper is essential here as it prevents sticking and makes cleanup a breeze. Take spoonfuls of your seasoned cottage cheese mixture and place them onto the prepared baking sheet. Aim for small, thin dollops, roughly the size of a silver dollar. The thinner you spread them, the crispier your chips will become. You can use the back of your spoon to gently flatten each dollop into a very thin disc. Don’t worry if they aren’t perfectly round; rustic is charming! Leave a little space between each dollop on the baking sheet, as they might spread slightly as they bake. If you’re making a larger batch, you might need to use multiple baking sheets or bake in batches. This also gives you more control over the crisping process for each individual chip.
Baking to Perfection
Initial Bake
Preheat your oven to 350°F (175°C). This moderate temperature allows the chips to dry out and crisp up gradually without burning too quickly. Place the baking sheet with your formed cottage cheese dollops into the preheated oven. We’ll start with an initial bake of about 15-20 minutes. During this time, the cottage cheese will begin extract to dry out and firm up. You’ll notice that the edges might start to turn a very light golden brown. This is exactly what we’re looking for. Keep an eye on them, as oven temperatures can vary. If you see some spots browning faster than others, you can rotate the baking sheet halfway through this initial period.
Achieving Maximum Crispiness
This is where the magic really happens! After the initial bake, carefully remove the baking sheet from the oven. At this point, the chips will likely still be a little soft in the center. Now, it’s time to introduce the olive oil spray. Lightly mist each chip with olive oil spray. This step is crucial for achieving that irresistible crispiness and adding a subtle sheen. The oil helps conduct heat more effectively, leading to a crunchier texture. Once lightly sprayed, return the baking sheet to the oven. Continue baking for another 10-15 minutes, or until the chips are golden brown and feel firm to the touch. You want them to be dry and brittle, not pliable. If some chips are crispier than others, you can carefully remove the done ones and leave the rest in for a few more minutes. The key is to achieve a uniform crispness across all your chips.
Cooling and Serving
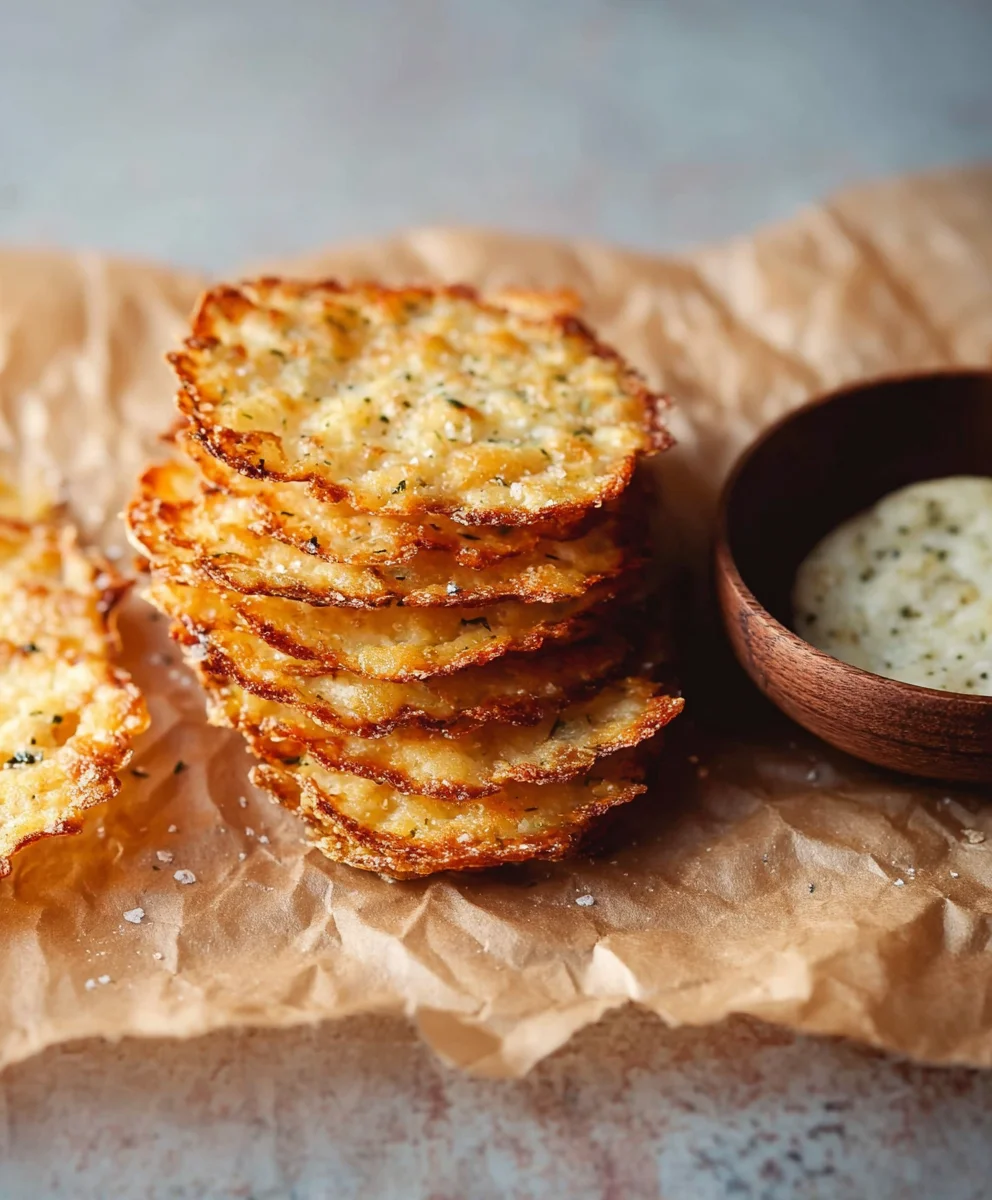
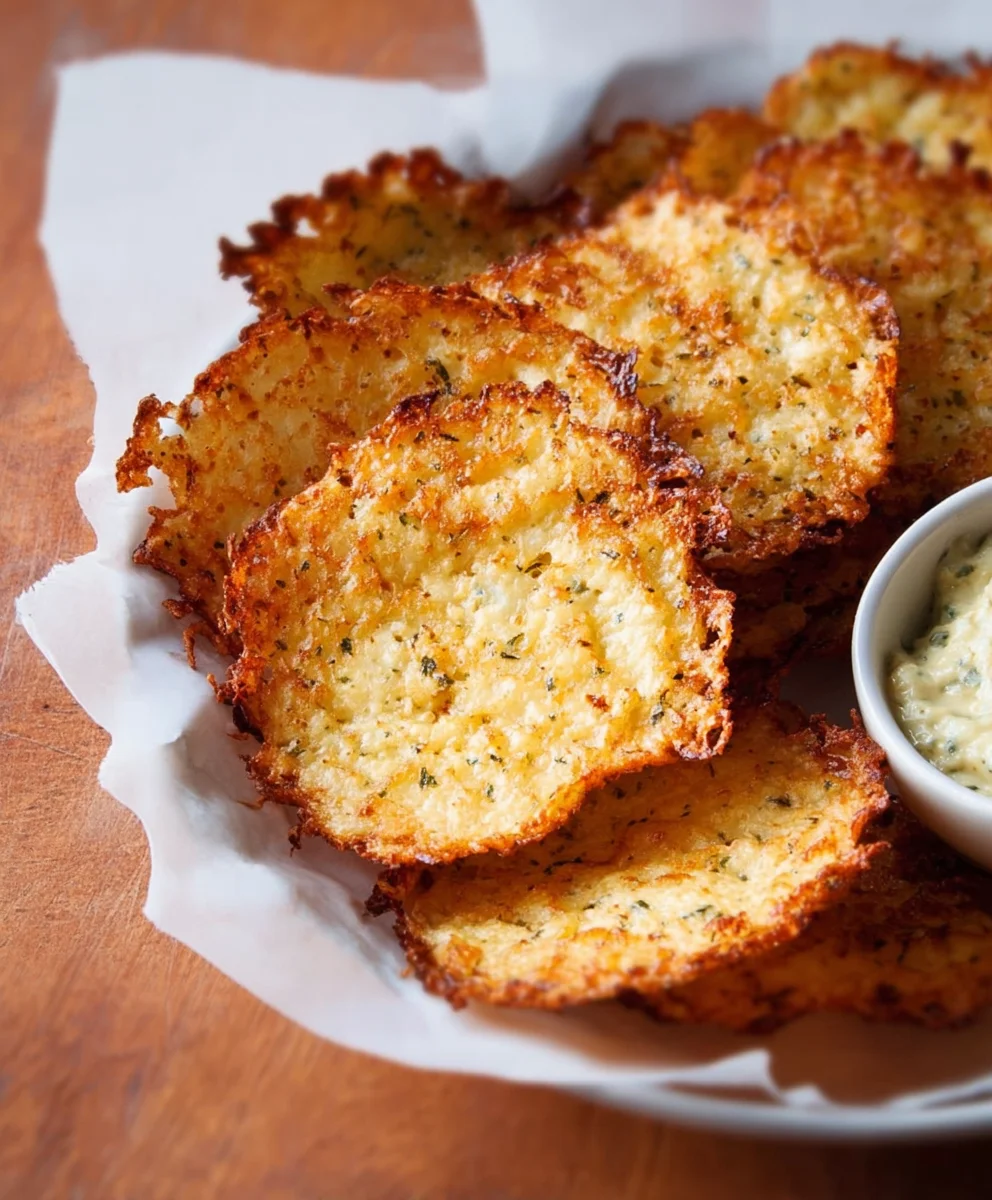
Once your Crispy Cottage Cheese Chips have reached your desired level of golden-brown perfection and crispiness, remove the baking sheet from the oven. Let them cool on the baking sheet for a few minutes. This allows them to firm up even more as they cool down. After a brief cooling period on the baking sheet, carefully transfer the chips to a wire rack. Allow them to cool completely on the wire rack. This is essential for them to develop their full crispiness. If you try to handle them while they are still warm and slightly pliable, they might break or become chewy. Once they are completely cool, they will be delightfully crunchy and ready to enjoy. They are perfect for snacking on their own, or you can serve them with your favorite dips like salsa, guacamole, or even a light yogurt-based dip.
Conclusion:
And there you have it! You’ve successfully created your very own batch of Crispy Cottage Cheese Chips. These delightful little bites are a testament to how simple, wholesome ingredients can transform into something incredibly satisfying and delicious. Whether you’re looking for a guilt-free snack, a unique appetizer, or a crunchy topping for your favorite salads and soups, these chips deliver on all fronts. They’re wonderfully versatile and a fantastic way to enjoy the protein-packed goodness of cottage cheese in a brand-new form.
For serving suggestions, I love these plain as a standalone snack, but they are also amazing paired with your favorite dips like salsa, guacamole, or a creamy ranch. Don’t be afraid to experiment with variations! Try adding different herbs and spices to the cottage cheese mixture before baking – smoked paprika, garlic powder, or even a pinch of chili flakes can create exciting new flavor profiles. You could also incorporate finely grated hard cheeses like Parmesan or cheddar for an extra cheesy kick. The possibilities are truly endless, so have fun with it!
I encourage you to give this recipe a try. It’s surprisingly easy to make and the results are incredibly rewarding. Enjoy the satisfying crunch and the healthy, protein-rich satisfaction that comes with your homemade Crispy Cottage Cheese Chips!
Frequently Asked Questions:
Q: Can I make the Crispy Cottage Cheese Chips ahead of time?
A: Absolutely! Once completely cooled, you can store your Crispy Cottage Cheese Chips in an airtight container at room temperature for up to 3-4 days. They might lose a little bit of their crispness over time, but they’re still delicious. For maximum crispness, you can gently re-bake them in a low oven for a few minutes before serving.
Q: My chips aren’t getting crispy enough. What could be the issue?
A: There are a few common reasons for this. Ensure your cottage cheese is well-drained to remove excess moisture. Also, make sure your oven temperature is accurate and that you’re spreading the mixture thinly on the baking sheet. Overcrowding the pan can also prevent proper airflow. If the chips are still not crisping, try baking them for a few extra minutes, keeping a close eye to prevent burning.
Crispy Cottage Cheese Chips
An easy and healthy snack made from crispy cottage cheese chips.
Ingredients
-
1 cup small curd cottage cheese, well-drained
-
¼ teaspoon garlic powder
-
¼ teaspoon onion powder
-
½ teaspoon dried herbs (optional, such as thyme, oregano, or parsley)
-
Salt and freshly ground black pepper, to taste
-
Olive oil spray
Instructions
-
Step 1
Ensure cottage cheese is well-drained by placing it in a fine-mesh sieve for 15-20 minutes or by squeezing out liquid with a clean kitchen towel. Transfer drained cottage cheese to a mixing bowl. Add garlic powder, onion powder, dried herbs (if using), salt, and pepper. Stir until evenly coated. -
Step 2
Line a baking sheet with parchment paper. Spoon small, thin dollops of the seasoned cottage cheese mixture onto the baking sheet, about the size of a silver dollar. Gently flatten each dollop with the back of a spoon to create thin discs. -
Step 3
Preheat oven to 350°F (175°C). Place the baking sheet in the preheated oven and bake for 15-20 minutes, until the edges begin to turn lightly golden brown. -
Step 4
Remove the baking sheet from the oven. Lightly mist each chip with olive oil spray. Return the baking sheet to the oven and continue baking for another 10-15 minutes, or until the chips are golden brown and feel firm and brittle. -
Step 5
Remove the baking sheet from the oven. Let the chips cool on the baking sheet for a few minutes, then transfer them to a wire rack to cool completely before serving.
Important Information
Nutrition Facts (Per Serving)
It is important to consider this information as approximate and not to use it as definitive health advice.
Allergy Information
Please check ingredients for potential allergens and consult a health professional if in doubt.


Leave a Comment