

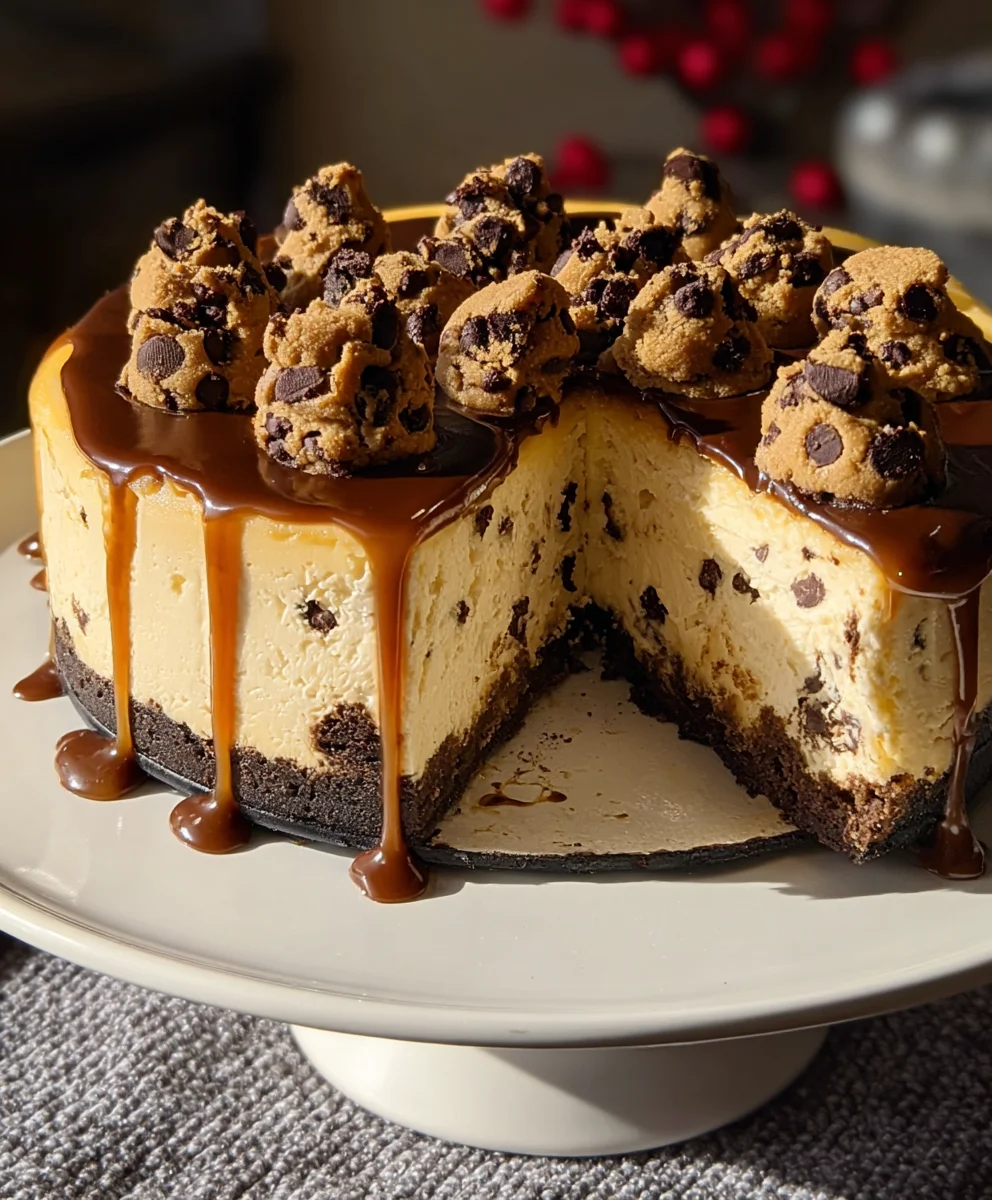
Chocolate Chip Cookie Cheesecake is more than just a dessert; it’s a harmonious symphony of two beloved classics, elevated to a new level of indulgence. Imagine the comforting chewiness of a perfectly baked chocolate chip cookie, its rich, buttery base studded with molten chocolate chips, fused seamlessly with the creamy, velvety embrace of a classic cheesecake. It’s a dream pairing for anyone who adores both these iconic treats. What makes this particular creation so utterly irresistible? It’s the genius of combining contrasting textures and complementary flavors into one unforgettable experience. The slight crispness of the cookie crust gives way to the smooth, decadent filling, while the familiar sweetness of chocolate chips sings in perfect harmony with the subtle tang of cream cheese. This isn’t just dessert; it’s a celebration of comfort, a delightful fusion that promises pure bliss with every single bite.

Ingredients:
- 2 cups chocolate chip cookie dough (homemade or store-bought)
- 16 oz cream cheese, softened
- 1/2 cup granulated sugar
- 2 large eggs
- 1 tsp vanilla extract
- 1/4 cup sour cream
- 1 cup chocolate chip cookie dough
- 1/2 cup semi-sweet chocolate chips
Preparing the Crust
Step 1: Shaping the Cookie Dough Crust
The foundation of our delicious Chocolate Chip Cookie Cookie Dough Cheesecake is, of course, more chocolate chip cookie dough! For this step, you’ll need one of the two cups of cookie dough. If your cookie dough is quite firm, let it sit at room temperature for about 10-15 minutes to soften slightly. This will make it much easier to press evenly into your springform pan. You’ll want to use a 9-inch springform pan for this recipe. Begin by pressing about half of this cup of cookie dough into the bottom of the pan, creating a solid, even layer. Think of it like making a regular cookie base. Then, take the remaining half of this cup of cookie dough and press it up the sides of the pan to form a rustic crust edge, about an inch to an inch and a half high. Don’t worry if it’s not perfectly smooth; a little texture adds to the charm. For the best results and to ensure the crust bakes up nicely, I highly recommend pre-baking it. Place your prepared pan in a preheated oven at 350°F (175°C) for about 10 minutes. This par-baking will help set the crust and prevent it from becoming soggy once the cheesecake filling is added. Once par-baked, carefully remove the pan from the oven and let it cool slightly while you prepare the cheesecake filling. This initial step is crucial for achieving that perfect cheesecake texture and flavor combination.
Making the Cheesecake Filling
Step 2: Creaming the Cream Cheese and Sugar
Now, let’s move on to the star of the show: the creamy cheesecake filling. In a large mixing bowl, you’ll need your softened cream cheese. Softened cream cheese is absolutely essential for a smooth, lump-free filling. If it’s too cold, it will be difficult to incorporate thoroughly, leading to a less-than-ideal texture. You can leave it on the counter for an hour or two, or if you’re in a hurry, you can soften it gently in the microwave in 15-second intervals, being careful not to melt it. Add your granulated sugar to the softened cream cheese. Using an electric mixer (either a stand mixer with a paddle attachment or a hand mixer), beat the cream cheese and sugar together on medium speed until the mixture is light, fluffy, and completely smooth. This process, often called “creaming,” incorporates air and dissolves the sugar, contributing to the cheesecake’s rich texture and sweetness. Scrape down the sides of the bowl frequently to ensure all the cream cheese and sugar are incorporated. You should aim for a consistency that resembles pale yellow frosting. This smooth base is critical for a velvety-smooth final cheesecake.
Step 3: Incorporating Eggs, Vanilla, and Sour Cream
With your cream cheese and sugar beautifully combined, it’s time to add the remaining wet ingredients to create the luscious cheesecake filling. One at a time, add your large eggs to the creamed mixture. Beat each egg in thoroughly before adding the next. It’s important not to overmix once the eggs are added, as this can introduce too much air, which can lead to cracks in your cheesecake during baking. Just mix until each egg is incorporated. Next, add the vanilla extract. Vanilla is a classic flavor enhancer that complements the sweetness of the cream cheese and the richness of the chocolate chips beautifully. Finally, stir in the sour cream. Sour cream adds a slight tanginess that balances the sweetness of the cheesecake and also contributes to its incredibly creamy and smooth texture. Mix on low speed or by hand until just combined. Again, avoid overmixing. The goal is a homogenous, velvety filling.
Adding the Chocolate Chip Cookie Dough and Chips
Step 4: Folding in the Cookie Dough and Chocolate Chips
Now for the fun part that truly makes this a “Chocolate Chip Cookie Cookie Dough Cheesecake”! You’ll need the remaining 2 cups of chocolate chip cookie dough for this step. Break this cookie dough into small, bite-sized chunks or dollops. Gently fold these pieces into the cheesecake filling using a spatula. Don’t try to mix it in completely; you want distinct pockets of cookie dough throughout the cheesecake. This will create delightful surprises in every bite. After folding in the cookie dough, it’s time to add the semi-sweet chocolate chips. Gently fold these in as well, distributing them evenly amongst the cookie dough chunks and the filling. The semi-sweet chocolate chips will melt slightly during baking, adding pockets of rich chocolate flavor that perfectly complement the cookie dough and cheesecake. The combination of these elements is what makes this dessert so irresistible. Ensure you’re not overmixing here; we want to maintain the integrity of the cookie dough pieces and chocolate chips.
Baking and Chilling
Step 5: Baking and Cooling the Cheesecake
Carefully pour the prepared cheesecake filling over the par-baked cookie dough crust in your springform pan. Smooth the top gently with your spatula. To ensure even baking and prevent cracking, a water bath (also known as a bain-marie) is highly recommended for cheesecake. Wrap the bottom of your springform pan tightly in heavy-duty aluminum foil to prevent any water from seeping in. Place the foil-wrapped springform pan inside a larger baking pan. Carefully pour hot water into the larger pan until it comes about halfway up the sides of the springform pan. This gentle, moist heat ensures the cheesecake bakes slowly and evenly. Bake at 350°F (175°C) for approximately 50-60 minutes, or until the edges of the cheesecake are set and slightly puffed, but the center still has a slight wobble. This slight wobble is key; it will continue to set as it cools. Once baked, turn off the oven, crack the oven door open slightly, and let the cheesecake cool in the oven for an additional hour. This gradual cooling process is crucial for preventing cracks. After the oven cooling, remove the cheesecake from the water bath and let it cool completely on a wire rack at room temperature. Once fully cooled, cover the cheesecake loosely with plastic wrap and refrigerate for at least 6 hours, or preferably overnight, to allow it to fully set and develop its flavors. This chilling period is absolutely essential for the perfect cheesecake texture.
Conclusion:
And there you have it – the ultimate guide to creating your very own decadent Chocolate Chip Cookie Cheesecake! We’ve walked through each step, from crafting the perfect cookie crust to achieving that lusciously smooth cheesecake filling swirled with generous amounts of chocolate chips. This dessert is a true showstopper, combining the comforting familiarity of a chocolate chip cookie with the rich indulgence of a classic cheesecake. Don’t be intimidated by the process; with a little patience and a lot of love, you’ll be rewarded with a dessert that’s sure to impress your friends and family.
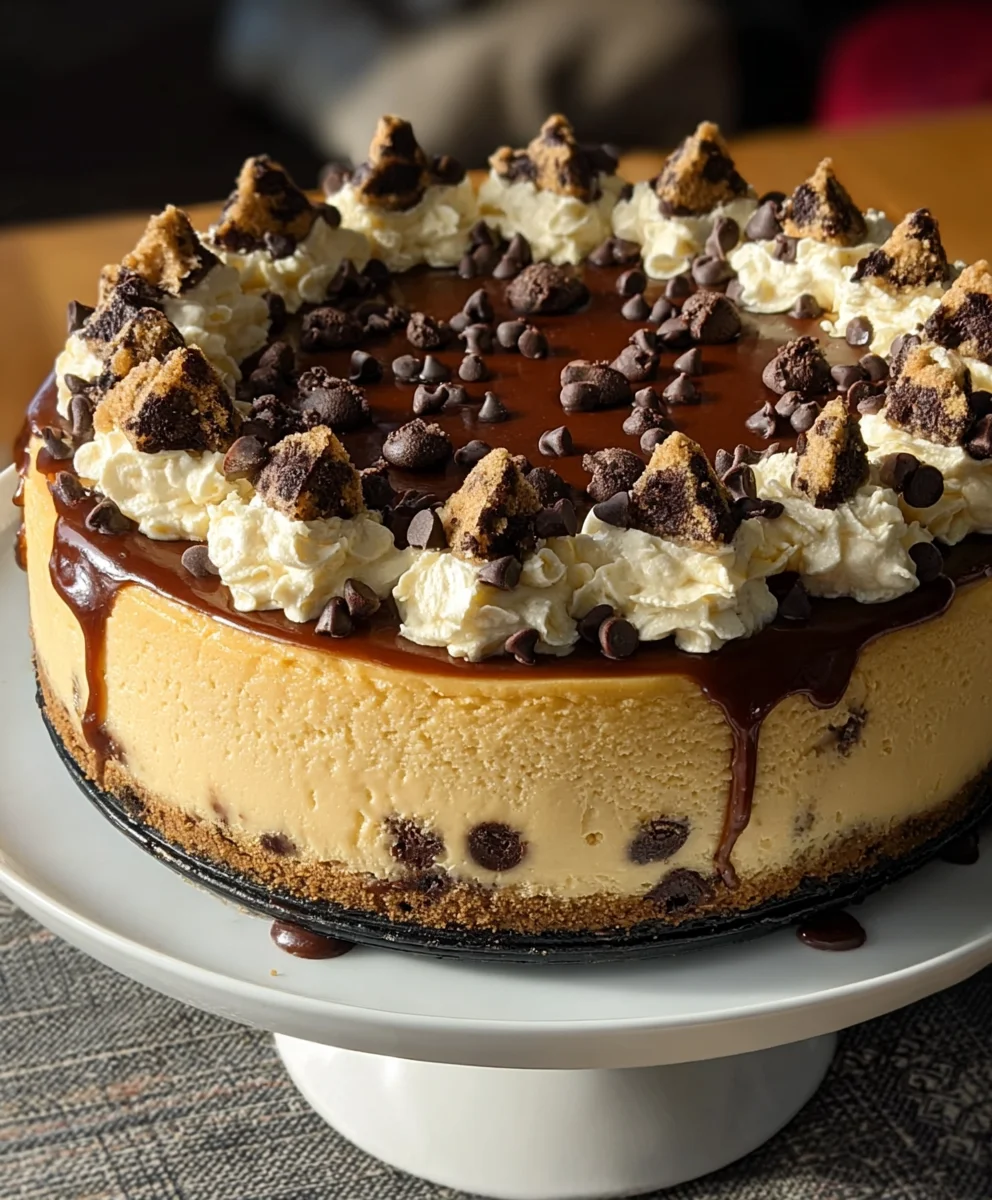
I love serving this masterpiece slightly chilled, allowing the flavors to meld beautifully. A dollop of whipped cream or a drizzle of extra chocolate sauce takes it to an entirely new level. For variations, consider adding a handful of chopped pecans or walnuts to the cookie crust, or even incorporating mini chocolate chips into the cheesecake filling itself for an extra chocolatey punch. Experiment with different types of chocolate chips too – dark, milk, or even white chocolate chips can all offer unique flavor profiles. I truly hope you enjoy making and sharing this delightful Chocolate Chip Cookie Cheesecake!
Frequently Asked Questions about Chocolate Chip Cookie Cheesecake:
Q1: Can I make this cheesecake ahead of time?
Absolutely! This Chocolate Chip Cookie Cheesecake is an excellent candidate for making ahead. In fact, it often tastes even better after chilling in the refrigerator overnight, allowing all the flavors to deepen and meld together. Once it’s completely cooled, cover it tightly with plastic wrap and refrigerating it for up to 3-4 days. Just be sure to let it come to room temperature for about 20-30 minutes before slicing and serving for the best texture.
Q2: My cheesecake has cracks. Is it ruined?
Don’t worry! A cracked cheesecake is still delicious. Cracks often happen due to over-baking, rapid temperature changes, or over-beating the filling. The good news is that the cookie crust and the delicious chocolate chip swirls in this recipe are excellent at disguising any minor imperfections. Simply cover the cracks with your favorite toppings like whipped cream or chocolate ganache, and no one will be the wiser!
Chocolate Chip Cookie Cheesecake Bliss
An easy and blissful dessert featuring a chocolate chip cookie dough crust filled with creamy cheesecake and chunks of cookie dough and chocolate chips.
Ingredients
-
2 cups chocolate chip cookie dough (homemade or store-bought)
-
16 oz cream cheese, softened
-
1/2 cup granulated sugar
-
2 large eggs
-
1 tsp vanilla extract
-
1/4 cup sour cream
-
1 cup chocolate chip cookie dough
-
1/2 cup semi-sweet chocolate chips
Instructions
-
Step 1
Prepare the crust: Press half of the first cup of cookie dough into the bottom of a 9-inch springform pan. Press the remaining half up the sides to form a crust edge. Preheat oven to 350°F (175°C) and bake the crust for 10 minutes. Let cool slightly. -
Step 2
Make the filling: In a large bowl, beat softened cream cheese and granulated sugar with an electric mixer until light, fluffy, and smooth. -
Step 3
Incorporate eggs one at a time, beating well after each addition. Do not overmix. Stir in vanilla extract and sour cream until just combined. -
Step 4
Fold in the remaining 1 cup of chocolate chip cookie dough (broken into small pieces) and the semi-sweet chocolate chips into the cheesecake filling. Do not overmix. -
Step 5
Pour the filling over the par-baked crust. Bake in a water bath at 350°F (175°C) for 50-60 minutes, or until the edges are set and the center has a slight wobble. -
Step 6
Turn off the oven, crack the door open, and let the cheesecake cool in the oven for 1 hour. Remove from water bath and cool completely on a wire rack. Chill in the refrigerator for at least 6 hours, or preferably overnight.
Important Information
Nutrition Facts (Per Serving)
It is important to consider this information as approximate and not to use it as definitive health advice.
Allergy Information
Please check ingredients for potential allergens and consult a health professional if in doubt.
Leave a Comment