

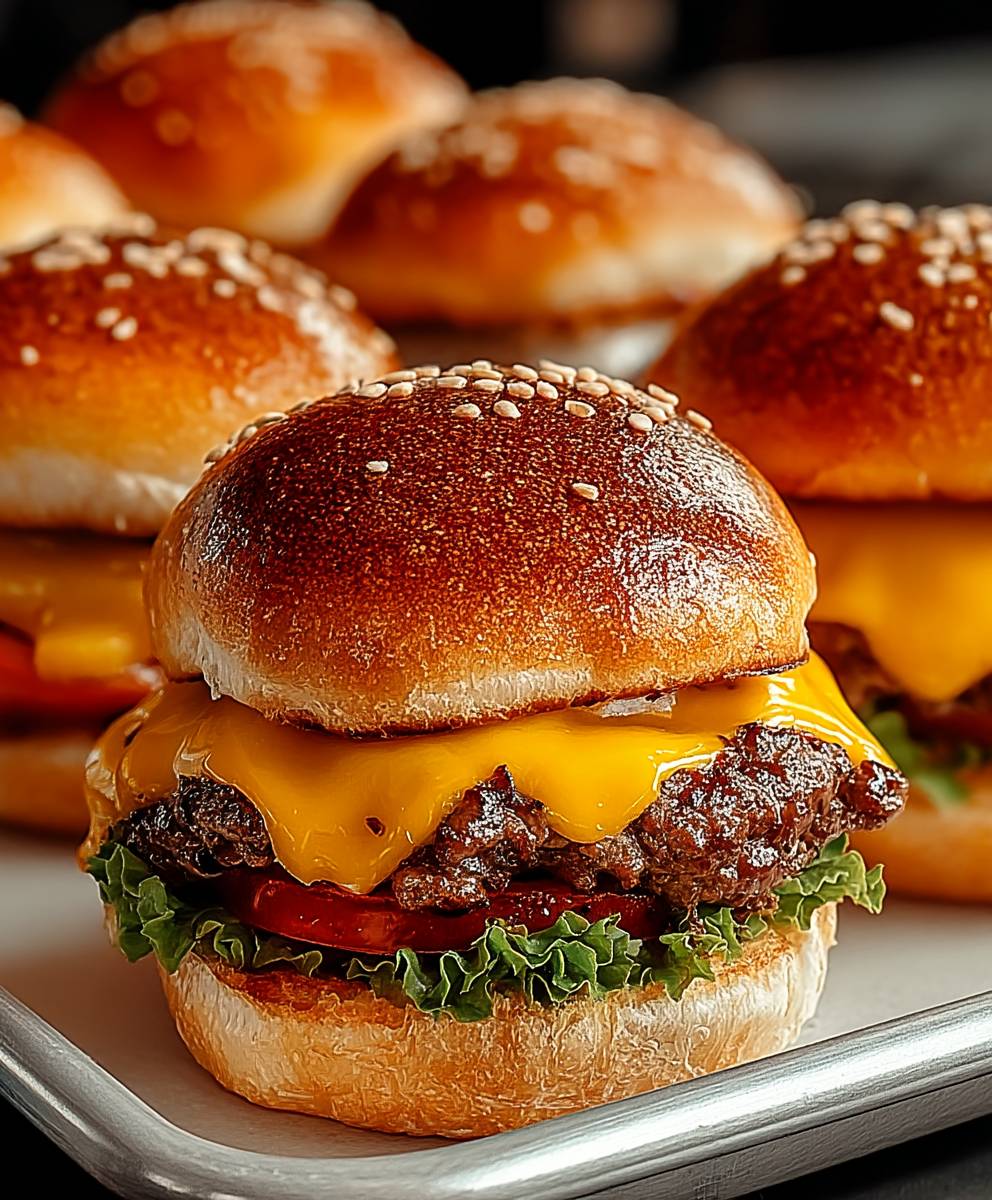
Cheeseburger sliders: Prepare to meet your new favorite party appetizer and weeknight dinner hero! Imagine sinking your teeth into a perfectly miniature cheeseburger, bursting with juicy flavor, melty cheese, and all your favorite fixings, all nestled in a soft, pillowy bun. These aren’t just mini burgers; they’re a flavor explosion in every bite!
While the exact origins of the slider are debated, many believe they originated in the early 20th century, possibly with White Castle, as a quick and affordable way to feed hungry customers. The concept has evolved, but the appeal remains the same: convenient, delicious, and utterly satisfying. These cheeseburger sliders take that classic comfort food and make it even more fun and shareable.
What’s not to love? The combination of savory ground beef, tangy condiments, and creamy cheese is a timeless classic. Plus, the smaller size makes them perfect for parties, potlucks, or a quick and easy family meal. They’re incredibly versatile, too! You can customize them with your favorite toppings, cheeses, and sauces to create a slider that’s uniquely yours. Get ready to experience burger bliss in miniature form!

Ingredients:
- 1 pound ground beef (80/20 blend recommended for flavor)
- 1 tablespoon olive oil
- 1 small yellow onion, finely chopped
- 2 cloves garlic, minced
- 1 teaspoon smoked paprika
- 1/2 teaspoon garlic powder
- 1/2 teaspoon onion powder
- 1/4 teaspoon cayenne pepper (optional, for a little kick)
- Salt and freshly ground black pepper to taste
- 12 slider buns
- 6 slices cheddar cheese, halved (or your favorite cheese)
- Optional toppings: lettuce, tomato, pickles, ketchup, mustard, mayonnaise, burger sauce
- Optional: sesame seeds for the buns
Preparing the Beef Mixture:
- Sauté the Aromatics: Heat the olive oil in a large skillet over medium heat. Add the finely chopped yellow onion and cook until softened and translucent, about 5-7 minutes. Add the minced garlic and cook for another minute until fragrant, being careful not to burn it. Burnt garlic can ruin the flavor of the whole dish!
- Brown the Ground Beef: Add the ground beef to the skillet, breaking it up with a spoon or spatula. Cook until the beef is browned, making sure to crumble it well so there are no large chunks. Drain off any excess grease from the skillet. This step is crucial for preventing greasy sliders.
- Season the Beef: Add the smoked paprika, garlic powder, onion powder, and cayenne pepper (if using) to the skillet. Season generously with salt and freshly ground black pepper. Stir well to combine the spices with the beef. Cook for another 2-3 minutes, allowing the spices to bloom and infuse the beef with flavor. Taste and adjust seasonings as needed. Remember, you can always add more, but you can’t take it away!
- Simmer for Flavor: Reduce the heat to low and let the beef mixture simmer for about 10-15 minutes. This allows the flavors to meld together and creates a richer, more flavorful filling for the sliders. Stir occasionally to prevent sticking.
Preparing the Slider Buns:
- Prepare the Buns: While the beef is simmering, prepare the slider buns. If you want to add sesame seeds, lightly brush the tops of the buns with melted butter or egg wash. Sprinkle with sesame seeds. This adds a nice visual appeal and a subtle nutty flavor.
- Toast the Buns (Optional): You can lightly toast the slider buns in a toaster oven or under the broiler for a minute or two. This will give them a nice crispness and prevent them from getting soggy when you assemble the sliders. Watch them carefully, as they can burn quickly!
Assembling and Cooking the Sliders:
- Preheat Oven (Optional): If you want to melt the cheese evenly, preheat your oven to 350°F (175°C). This step is optional, but it helps to create a perfectly melted cheese layer.
- Assemble the Sliders: Place the bottom halves of the slider buns on a baking sheet. Spoon the beef mixture evenly onto each bun.
- Add the Cheese: Top each slider with a half slice of cheddar cheese (or your favorite cheese). Make sure the cheese covers as much of the beef as possible.
- Bake (Optional): If using the oven, bake the sliders for 5-7 minutes, or until the cheese is melted and bubbly. If not using the oven, you can cover the baking sheet with foil and let the residual heat melt the cheese, or use a kitchen torch to melt the cheese.
- Add Toppings: Remove the sliders from the oven (if using) and add your desired toppings, such as lettuce, tomato, pickles, ketchup, mustard, mayonnaise, or burger sauce. Get creative and customize your sliders to your liking!
- Top with Buns: Place the top halves of the slider buns on top of the toppings.
Serving the Cheeseburger Sliders:
- Serve Immediately: Serve the cheeseburger sliders immediately while they are still warm and the cheese is melted.
- Garnish (Optional): Garnish with extra pickles, a sprinkle of paprika, or a drizzle of your favorite sauce.
- Enjoy!: These cheeseburger sliders are perfect for parties, game day, or a quick and easy weeknight meal. Enjoy!
Tips and Variations:
- Cheese Variations: Feel free to experiment with different types of cheese, such as Monterey Jack, pepper jack, provolone, or Swiss.
- Meat Variations: You can also use ground turkey or ground chicken instead of ground beef. Adjust the cooking time accordingly.
- Spice it Up: Add a pinch of red pepper flakes to the beef mixture for extra heat.
- Sweet and Savory: Add a tablespoon of brown sugar to the beef mixture for a touch of sweetness.
- Bacon Cheeseburger Sliders: Add cooked and crumbled bacon to the sliders for a bacon cheeseburger twist.
- Caramelized Onions: Caramelize the onions before adding them to the beef mixture for a deeper, sweeter flavor.
- Mushroom and Swiss Sliders: Sauté sliced mushrooms and add them to the beef mixture along with Swiss cheese.
- Hawaiian Sliders: Add grilled pineapple slices and teriyaki sauce to the sliders for a Hawaiian-inspired flavor.
- Slider Sauce: Make a special slider sauce by combining mayonnaise, ketchup, mustard, pickle relish, and a dash of Worcestershire sauce.
- Make Ahead: The beef mixture can be made ahead of time and stored in the refrigerator for up to 2 days. Simply reheat before assembling the sliders.
- Freezing: Assembled sliders can be frozen for up to 1 month. Wrap them individually in plastic wrap and then place them in a freezer bag. Thaw completely before reheating in the oven or microwave.
- Bun Options: While slider buns are traditional, you can also use Hawaiian rolls or mini brioche buns.
- Grilling: For a smoky flavor, grill the sliders on a grill pan or outdoor grill. Be sure to use a lower heat to prevent burning.
- Slow Cooker: You can cook the beef mixture in a slow cooker for 4-6 hours on low. This is a great option for hands-off cooking.
- Air Fryer: You can air fry the assembled sliders for 5-7 minutes at 350°F (175°C), or until the cheese is melted and bubbly.
Serving Suggestions:
- Serve with a side of french fries, sweet potato fries, or onion rings.
- Pair with a crisp salad or coleslaw.
- Offer a variety of dipping sauces, such as ketchup, mustard, mayonnaise, barbecue sauce, or ranch dressing.
- Serve with a cold beverage, such as soda, beer, or iced tea.
- Make it a slider bar and let your guests customize their own sliders with a variety of toppings and sauces.
Nutritional Information (Approximate, per slider):
- Calories: 250-350
- Protein: 15-20g
- Fat: 15-25g
- Carbohydrates: 15-20g
Note: Nutritional information may vary depending on the specific ingredients used.
Troubleshooting:
- Sliders are dry: Add a little beef broth or water to the beef mixture while simmering to keep it moist.
- Buns are soggy: Toast the buns before assembling the sliders to prevent them from getting soggy.
- Cheese isn’t melting: Make sure the oven is preheated to the correct temperature. You can also cover the baking sheet with foil to trap the heat and help the cheese melt faster.
- Sliders are burning: Reduce the oven temperature or cooking time.
- Beef is bland: Add more spices or seasonings to the beef mixture.
Equipment Needed:
- Large skillet
- Spoon or spatula
- Baking sheet
- Toaster oven or broiler (optional)
- Oven (optional)
- Knife
- Cutting board
Storage Instructions:
- Store leftover sliders in an airtight container in the refrigerator for up to 3 days.
- Reheat in the oven, microwave, or air fryer.
Why This Recipe Works:
This recipe is
Conclusion:
And there you have it! These aren’t just any sliders; they’re mini cheeseburger masterpieces, bursting with flavor and ridiculously easy to make. Seriously, if you’re looking for a crowd-pleasing appetizer, a fun weeknight dinner, or the perfect game-day snack, these cheeseburger sliders are an absolute must-try. I promise, they’ll disappear faster than you can say “extra pickles!”
But why are these sliders so special? It’s the combination of juicy, perfectly seasoned beef, the melty, gooey cheese, and that soft, slightly sweet slider bun. Each bite is an explosion of classic cheeseburger goodness, but in a perfectly portioned, utterly irresistible package. Plus, the recipe is so adaptable! You can easily customize it to suit your own tastes and preferences.
Think about it: you could add a dollop of tangy BBQ sauce for a smoky kick, or a sprinkle of crispy fried onions for added texture. For a spicier version, try adding a pinch of red pepper flakes to the ground beef mixture, or topping the sliders with some sliced jalapeños. If you’re feeling adventurous, you could even experiment with different types of cheese! Pepper jack would add a nice bit of heat, while provolone would offer a milder, creamier flavor.
Serving suggestions? Oh, the possibilities are endless! These sliders are fantastic on their own, but they’re even better when paired with some classic sides. Think crispy french fries, sweet potato fries, or a refreshing coleslaw. For a healthier option, you could serve them with a side salad or some grilled vegetables. And don’t forget the dipping sauces! Ketchup, mustard, mayonnaise, and even a creamy sriracha mayo would all be delicious.
For a fun twist, consider setting up a slider bar where everyone can customize their own creations. Provide a variety of toppings, such as lettuce, tomato, onion, pickles, bacon, and different sauces, and let your guests go wild! This is a great way to get everyone involved and ensure that everyone gets exactly what they want.
I’m so confident that you’re going to love these cheeseburger sliders that I can’t wait to hear what you think! Seriously, give this recipe a try. It’s simpler than ordering takeout and infinitely more satisfying. Don’t be afraid to get creative and experiment with different variations. After all, cooking should be fun!
Once you’ve made them, please, please, please come back and share your experience in the comments below. Did you make any modifications? What were your favorite toppings? What did your family and friends think? I’m always looking for new ideas and inspiration, and I love hearing from you all.
So, what are you waiting for? Grab your ingredients, fire up your oven (or grill!), and get ready to make the best cheeseburger sliders you’ve ever tasted. Happy cooking, and bon appétit! I know you’ll absolutely love these little bites of burger heaven. I can’t wait to hear all about your slider success!
Cheeseburger Sliders: The Ultimate Guide to Mini Burger Perfection
Juicy cheeseburger sliders with seasoned ground beef, melted cheddar, and your favorite toppings. Perfect as an appetizer or quick meal.
Ingredients
- 1 pound ground beef (80/20 blend recommended)
- 1 tablespoon olive oil
- 1 small yellow onion, finely chopped
- 2 cloves garlic, minced
- 1 teaspoon smoked paprika
- 1/2 teaspoon garlic powder
- 1/2 teaspoon onion powder
- 1/4 teaspoon cayenne pepper (optional)
- Salt and freshly ground black pepper to taste
- 12 slider buns
- 6 slices cheddar cheese, halved
- Optional toppings: lettuce, tomato, pickles, ketchup, mustard, mayonnaise, burger sauce
- Optional: sesame seeds for the buns
Instructions
- Sauté Aromatics: Heat olive oil in a large skillet over medium heat. Add chopped onion and cook until softened (5-7 minutes). Add minced garlic and cook until fragrant (1 minute).
- Brown Beef: Add ground beef to the skillet, breaking it up. Cook until browned, drain excess grease.
- Season Beef: Add smoked paprika, garlic powder, onion powder, and cayenne pepper (if using). Season with salt and pepper. Stir well and cook for 2-3 minutes. Taste and adjust seasonings.
- Simmer: Reduce heat to low and simmer for 10-15 minutes, stirring occasionally.
- Prepare Buns: While beef simmers, prepare slider buns. Brush with melted butter or egg wash and sprinkle with sesame seeds (optional).
- Toast Buns (Optional): Lightly toast slider buns in a toaster oven or under the broiler for a minute or two.
- Preheat Oven (Optional): Preheat oven to 350°F (175°C) if you want to melt the cheese evenly.
- Assemble Sliders: Place bottom halves of buns on a baking sheet. Spoon beef mixture evenly onto each bun.
- Add Cheese: Top each slider with a half slice of cheddar cheese.
- Bake (Optional): If using oven, bake for 5-7 minutes, or until cheese is melted and bubbly. Alternatively, cover with foil or use a kitchen torch to melt the cheese.
- Add Toppings: Add desired toppings.
- Top with Buns: Place top halves of slider buns on top of the toppings.
- Serve Immediately: Serve warm.
Notes
- Cheese Variations: Experiment with Monterey Jack, pepper jack, provolone, or Swiss.
- Meat Variations: Use ground turkey or chicken.
- Spice it Up: Add red pepper flakes.
- Sweet and Savory: Add brown sugar.
- Bacon Cheeseburger Sliders: Add cooked bacon.
- Caramelized Onions: Caramelize onions before adding.
- Mushroom and Swiss Sliders: Sauté mushrooms and add with Swiss cheese.
- Hawaiian Sliders: Add grilled pineapple and teriyaki sauce.
- Slider Sauce: Combine mayonnaise, ketchup, mustard, relish, and Worcestershire sauce.
- Make Ahead: Beef mixture can be made 2 days ahead.
- Freezing: Assemble and freeze for 1 month.
- Bun Options: Use Hawaiian rolls or brioche buns.
- Grilling: Grill for smoky flavor.
- Slow Cooker: Cook beef mixture in a slow cooker.
- Air Fryer: Air fry assembled sliders.


Leave a Comment