

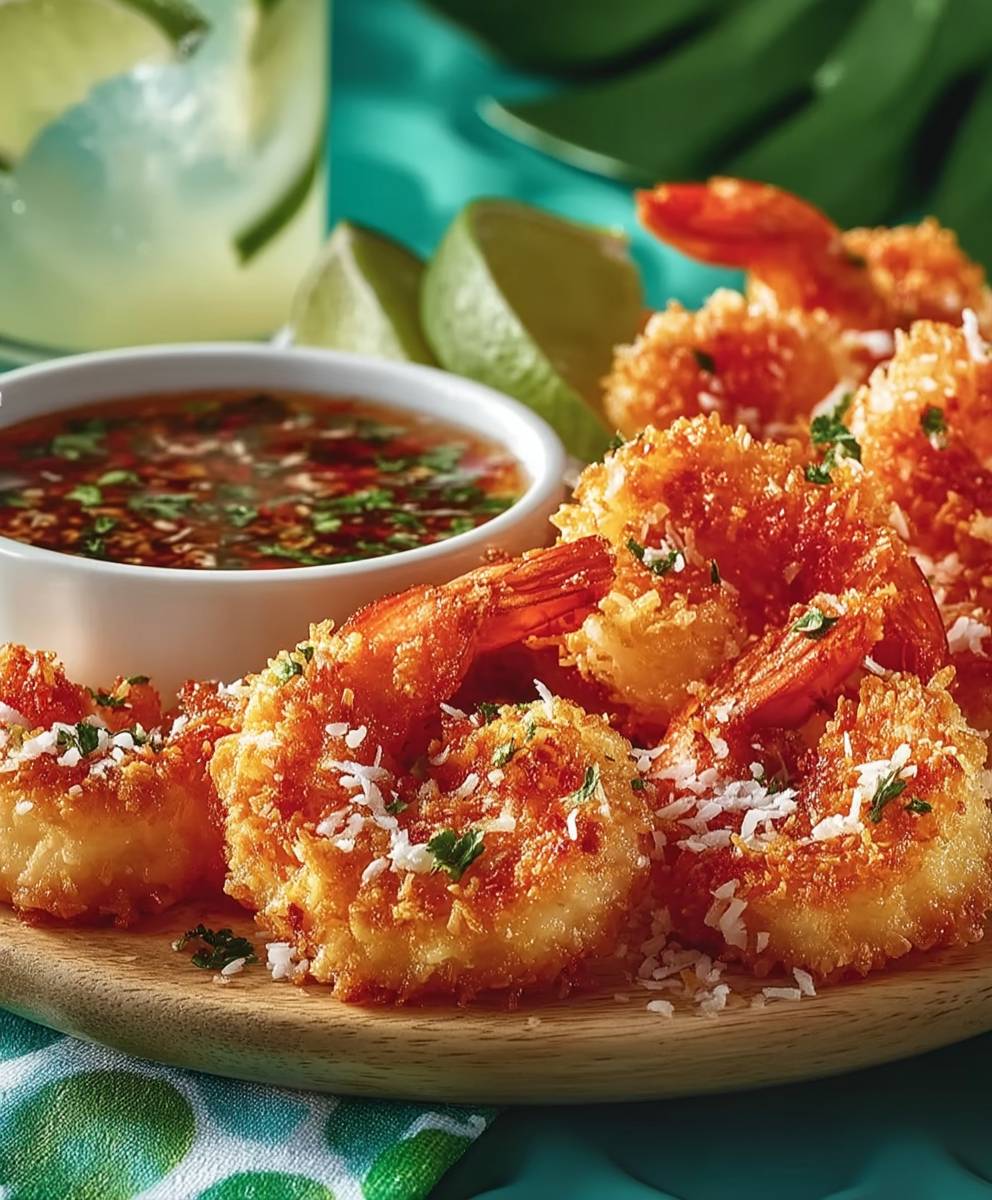
Air Fryer Coconut Shrimp: Craving that crispy, golden-brown, tropical vacation vibe without the guilt and mess of deep frying? Then you’ve come to the right place! Forget the restaurant with this recipe, you can whip up perfectly cooked, irresistibly crunchy coconut shrimp in your very own kitchen, and in under 20 minutes!
While coconut shrimp might seem like a modern indulgence, the combination of seafood and coconut has deep roots in tropical cuisines around the world. From the Caribbean to Southeast Asia, coconut has long been used to add richness and flavor to seafood dishes. This air fryer version is a contemporary twist on a classic, making it healthier and easier than ever to enjoy.
So, why is air fryer coconut shrimp such a crowd-pleaser? It’s all about the delightful contrast of textures and flavors. The sweet, slightly nutty coconut coating gives way to a succulent, juicy shrimp inside. The air fryer ensures maximum crispiness without all the added oil, making it a lighter and healthier alternative to traditional frying methods. Plus, it’s incredibly convenient perfect for a quick weeknight dinner, a party appetizer, or even a satisfying snack. Trust me, once you try this recipe, you’ll be hooked!

Ingredients:
- 1 pound large shrimp (21-25 count), peeled and deveined, tails on
- 1 cup all-purpose flour
- 2 large eggs, beaten
- 1 ½ cups sweetened shredded coconut
- ½ cup panko breadcrumbs
- 1 teaspoon garlic powder
- ½ teaspoon onion powder
- ½ teaspoon paprika
- ¼ teaspoon cayenne pepper (optional, for a little kick!)
- Salt and freshly ground black pepper to taste
- Cooking spray
- Sweet chili sauce, for serving
Preparing the Shrimp:
- First things first, let’s get our shrimp ready! If your shrimp is frozen, make sure it’s completely thawed. Pat the shrimp dry with paper towels. This is super important because it helps the flour stick better. We want a nice, even coating for maximum coconutty goodness.
- Now, season the shrimp with salt and pepper. Don’t be shy! A good seasoning at this stage will really enhance the flavor of the final dish. I usually use about ½ teaspoon of salt and ¼ teaspoon of pepper, but adjust to your liking.
Setting Up the Breading Station:
- Okay, time to create our breading station. This is where the magic happens! You’ll need three shallow dishes or bowls.
- In the first dish, place the all-purpose flour. Make sure it’s spread out evenly.
- In the second dish, add the beaten eggs. Whisk them well to ensure they’re smooth and ready to coat the shrimp.
- In the third dish, combine the shredded coconut, panko breadcrumbs, garlic powder, onion powder, paprika, and cayenne pepper (if using). Mix everything together thoroughly. The panko adds a nice crunch that complements the sweetness of the coconut perfectly. The spices add a subtle savory note that balances the flavors.
Breading the Shrimp:
- Now for the fun part breading the shrimp! This can get a little messy, but it’s totally worth it.
- Take one shrimp at a time and dredge it in the flour, making sure it’s completely coated. Shake off any excess flour. We don’t want a thick layer of flour; just a light coating.
- Next, dip the floured shrimp into the beaten eggs, ensuring it’s fully submerged. Let any excess egg drip off.
- Finally, transfer the shrimp to the coconut-panko mixture. Press the shrimp firmly into the mixture, making sure it’s completely coated on all sides. I like to use my fingers to really press the coconut mixture into the shrimp.
- Place the breaded shrimp on a plate or baking sheet lined with parchment paper. This will prevent them from sticking.
- Repeat steps 2-4 with the remaining shrimp.
Air Frying the Coconut Shrimp:
- Preheat your air fryer to 400°F (200°C). This is the ideal temperature for getting the shrimp crispy and golden brown without burning the coconut.
- While the air fryer is preheating, lightly spray the basket with cooking spray. This will prevent the shrimp from sticking and ensure they cook evenly.
- Arrange the breaded shrimp in a single layer in the air fryer basket. Don’t overcrowd the basket! If necessary, cook the shrimp in batches. Overcrowding will result in steamed shrimp instead of crispy shrimp.
- Spray the shrimp lightly with cooking spray. This helps them get extra crispy.
- Air fry for 6-8 minutes, flipping halfway through, or until the shrimp are cooked through and golden brown. The exact cooking time will depend on the size of your shrimp and the model of your air fryer, so keep an eye on them. You’ll know they’re done when the shrimp are pink and opaque and the coconut is nicely browned.
- Remove the shrimp from the air fryer and place them on a plate lined with paper towels to absorb any excess oil.
- Repeat with the remaining shrimp.
Serving:
- Serve the air fryer coconut shrimp immediately while they’re hot and crispy.
- I love to serve them with sweet chili sauce for dipping. The sweetness and slight heat of the sauce complement the coconut shrimp perfectly.
- You can also serve them with other dipping sauces like mango salsa, pineapple salsa, or even a simple honey mustard.
- Garnish with a sprinkle of fresh cilantro or chopped green onions for a pop of color and freshness.
Tips and Variations:
- For extra crispy shrimp: Try adding a tablespoon of cornstarch to the flour mixture. This will help create a lighter, crispier coating.
- Spice it up: If you like a little more heat, add a pinch of red pepper flakes to the coconut-panko mixture.
- Make it gluten-free: Use gluten-free all-purpose flour and gluten-free panko breadcrumbs.
- Use different types of coconut: You can use unsweetened shredded coconut if you prefer a less sweet flavor.
- Add some lime: A squeeze of fresh lime juice over the cooked shrimp adds a bright, citrusy flavor.
- Make it ahead: You can bread the shrimp ahead of time and store them in the refrigerator for up to 24 hours. Just make sure to keep them covered.
- Don’t have an air fryer? You can bake the shrimp in the oven at 400°F (200°C) for 12-15 minutes, flipping halfway through. They won’t be quite as crispy as air-fried shrimp, but they’ll still be delicious.
Serving Suggestions:
- Serve as an appetizer at your next party.
- Make it a meal by serving with rice and a side of steamed vegetables.
- Add it to tacos or wraps for a tropical twist.
- Serve it over a salad for a light and refreshing lunch.
Enjoy your delicious and easy air fryer coconut shrimp! I hope you love this recipe as much as I do. It’s a crowd-pleaser that’s perfect for any occasion. Let me know in the comments if you try it and what you think!
Conclusion:
This Air Fryer Coconut Shrimp recipe is truly a game-changer, and I wholeheartedly believe you need to experience the crispy, tropical deliciousness for yourself! Forget greasy, deep-fried shrimp this method delivers all the satisfying crunch with significantly less oil and in a fraction of the time. The perfectly golden-brown coconut coating, combined with the sweet and succulent shrimp inside, creates an irresistible flavor explosion that will have you reaching for seconds (and thirds!).
But why is this recipe a must-try? It’s simple: it’s incredibly easy, remarkably quick, and unbelievably tasty. Whether you’re a seasoned chef or a kitchen novice, you’ll find this recipe straightforward and foolproof. The air fryer does all the hard work, ensuring even cooking and a perfectly crispy texture every single time. Plus, cleanup is a breeze! Say goodbye to messy oil splatters and hello to a stress-free cooking experience.
Beyond its ease and convenience, this Air Fryer Coconut Shrimp is incredibly versatile. Looking for a quick and impressive appetizer for your next party? This is it! Need a light and flavorful dinner option? Serve it with a side of rice and steamed vegetables. Want to elevate your taco Tuesday? Stuff these crispy shrimp into warm tortillas with some slaw and a drizzle of spicy mayo. The possibilities are endless!
Speaking of variations, don’t be afraid to get creative! For a spicier kick, add a pinch of cayenne pepper to the coconut mixture. If you prefer a sweeter flavor profile, try using sweetened shredded coconut. You can also experiment with different dipping sauces. While the classic sweet chili sauce is always a winner, consider trying a mango salsa, a pineapple chutney, or even a creamy avocado dip. I personally love it with a homemade honey-lime dipping sauce the tangy citrus perfectly complements the sweetness of the coconut and shrimp.
Here are a few serving suggestions to get you started:
* Appetizer Platter: Arrange the Air Fryer Coconut Shrimp on a platter with various dipping sauces, such as sweet chili sauce, mango salsa, and honey-lime dipping sauce. Garnish with fresh cilantro and lime wedges.
* Shrimp Tacos: Fill warm tortillas with shredded cabbage, Air Fryer Coconut Shrimp, and your favorite taco toppings. Drizzle with a spicy mayo or a creamy cilantro-lime dressing.
* Coconut Shrimp Bowls: Create a vibrant and healthy bowl with cooked rice, black beans, corn, avocado, and Air Fryer Coconut Shrimp. Top with a zesty lime vinaigrette.
* Elegant Dinner: Serve the Air Fryer Coconut Shrimp alongside a bed of coconut rice and steamed asparagus for a sophisticated and flavorful meal.
I’m so confident that you’ll love this recipe as much as I do. It’s a guaranteed crowd-pleaser that’s perfect for any occasion. So, what are you waiting for? Grab your air fryer, gather your ingredients, and get ready to experience the magic of Air Fryer Coconut Shrimp!
I can’t wait to hear about your experience! Once you’ve tried this recipe, please come back and leave a comment below. Let me know what you thought, what variations you tried, and what dipping sauces you paired it with. Your feedback is invaluable, and I love hearing about your culinary adventures. Happy cooking!
Air Fryer Coconut Shrimp: Crispy, Delicious, and Easy Recipe
Crispy coconut shrimp made easy in the air fryer! Coated in sweet and savory coconut-panko breading and air-fried to golden perfection. Serve with sweet chili sauce.
Ingredients
- 1 pound large shrimp (21-25 count), peeled and deveined, tails on
- 1 cup all-purpose flour
- 2 large eggs, beaten
- 1 ½ cups sweetened shredded coconut
- ½ cup panko breadcrumbs
- 1 teaspoon garlic powder
- ½ teaspoon onion powder
- ½ teaspoon paprika
- ¼ teaspoon cayenne pepper (optional, for a little kick!)
- Salt and freshly ground black pepper to taste
- Cooking spray
- Sweet chili sauce, for serving
Instructions
- Prepare the Shrimp: If frozen, thaw shrimp completely. Pat shrimp dry with paper towels. Season with salt and pepper (about ½ teaspoon salt and ¼ teaspoon pepper, or to taste).
- Set Up Breading Station: Place flour in a shallow dish. In a second dish, add beaten eggs. In a third dish, combine shredded coconut, panko breadcrumbs, garlic powder, onion powder, paprika, and cayenne pepper (if using). Mix well.
- Bread the Shrimp: Dredge each shrimp in flour, shaking off excess. Dip in beaten eggs, letting excess drip off. Press shrimp firmly into the coconut-panko mixture, coating completely. Place breaded shrimp on a plate or baking sheet lined with parchment paper. Repeat with remaining shrimp.
- Air Fry the Coconut Shrimp: Preheat air fryer to 400°F (200°C). Lightly spray the air fryer basket with cooking spray. Arrange breaded shrimp in a single layer in the basket (cook in batches if necessary). Spray shrimp lightly with cooking spray.
- Air fry for 6-8 minutes, flipping halfway through, or until shrimp are cooked through and golden brown.
- Remove shrimp from air fryer and place on a plate lined with paper towels to absorb any excess oil.
- Serve: Serve immediately with sweet chili sauce for dipping. Garnish with fresh cilantro or chopped green onions, if desired.
Notes
- For extra crispy shrimp, add a tablespoon of cornstarch to the flour mixture.
- Spice it up by adding a pinch of red pepper flakes to the coconut-panko mixture.
- Make it gluten-free by using gluten-free all-purpose flour and gluten-free panko breadcrumbs.
- Use unsweetened shredded coconut if you prefer a less sweet flavor.
- A squeeze of fresh lime juice over the cooked shrimp adds a bright, citrusy flavor.
- You can bread the shrimp ahead of time and store them in the refrigerator for up to 24 hours. Just make sure to keep them covered.
- Don’t have an air fryer? You can bake the shrimp in the oven at 400°F (200°C) for 12-15 minutes, flipping halfway through. They won’t be quite as crispy as air-fried shrimp, but they’ll still be delicious.

Leave a Comment