

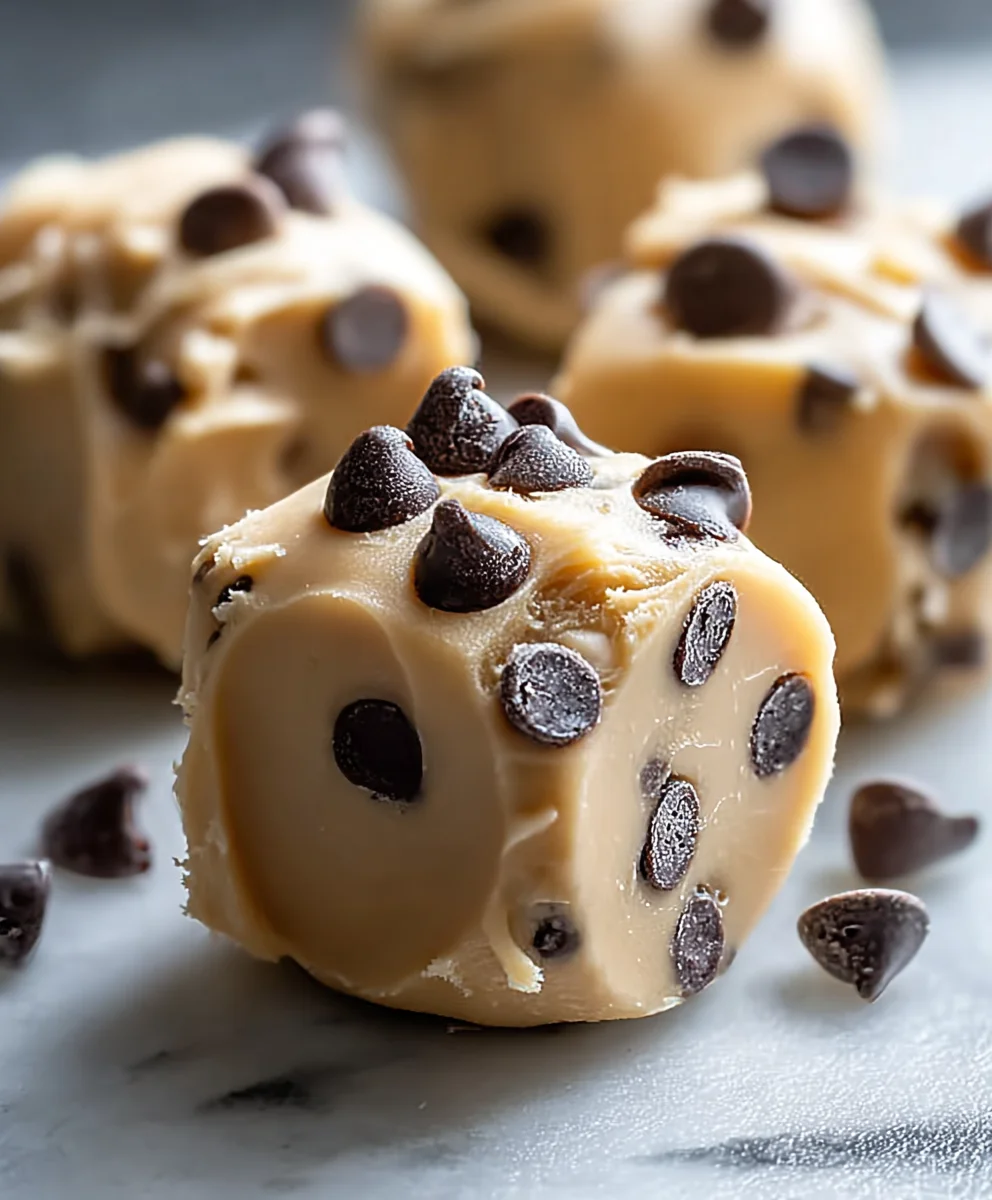
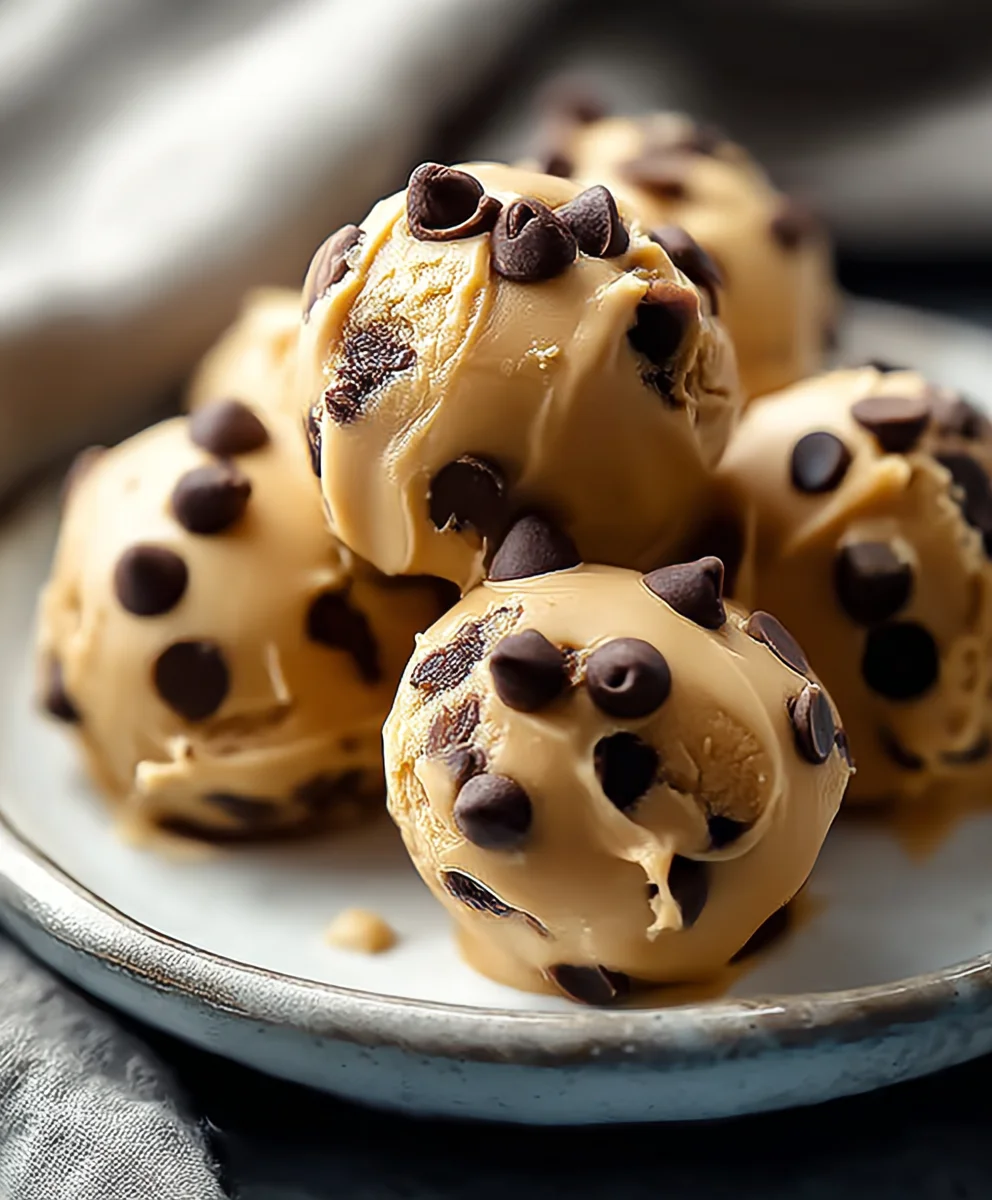
Frozen Greek Yogurt Peanut Butter Bites with Chocolate Chips: A Delightful Treat You Can Make at Home! If you’re searching for a simple yet incredibly satisfying dessert or snack that’s both healthy and indulgent, you’ve found it. These delightful bites are a game-changer for anyone who craves something sweet without the guilt. The magic lies in their creamy, tangy Greek yogurt base, perfectly balanced by the rich, nutty flavor of peanut butter and the sweet bursts of chocolate chips. They’re not just delicious; they’re wonderfully versatile, making them ideal for a quick breakfast on the go, an afternoon pick-me-up, or a healthier dessert option after dinner. We adore them because they offer a refreshing chill, a satisfying chew, and an explosion of flavors that dance on your palate. What truly makes these Frozen Greek Yogurt Peanut Butter Bites with Chocolate Chips so special is their effortless preparation and the fact that you can control every ingredient, ensuring a wholesome treat for the whole family to enjoy.

Ingredients:
- 1 cup plain Greek yogurt
- 1/2 cup creamy peanut butter
- 1/4 cup honey
- 1 teaspoon vanilla extract
- 1/2 cup mini chocolate chips
- 1/4 teaspoon sea salt
Creating Your Delicious Bites
This recipe is designed for ease and pure enjoyment. We’re focusing on simple ingredients that come together quickly to create a truly delightful treat. Think of these as miniature, frozen flavor bombs that are perfect for a midday pick-me-up, a post-workout reward, or even a healthier dessert option. The combination of tangy Greek yogurt, rich peanut butter, sweet honey, and the satisfying crunch of chocolate chips is a classic for a reason, and freezing them elevates the experience to a whole new level of refreshment. Let’s get started!
Step 1: Preparing the Base Mixture
Our first step is to get the creamy, flavorful base of our bites ready. In a medium-sized mixing bowl, add your 1 cup of plain Greek yogurt. Ensure your Greek yogurt is full-fat for the creamiest texture, though any plain Greek yogurt will work. Next, add the 1/2 cup of creamy peanut butter to the bowl. For the smoothest integration, make sure your peanut butter is at room temperature or slightly softened; this will make it much easier to mix without clumps. Then, drizzle in the 1/4 cup of honey. Honey adds a lovely sweetness and helps bind the ingredients together. Finally, add the 1 teaspoon of vanilla extract. Vanilla is crucial for enhancing the overall flavor profile and adding a warm, aromatic note to our bites. Using a whisk or a sturdy spoon, begin extract to thoroughly combine all these ingredients. You want to ensure that the peanut butter is completely incorporated into the yogurt and honey, creating a uniform, smooth consistency. Take your time with this step to avoid any pockets of unmixed ingredients.
Step 2: Incorporating the Stars of the Show
Now that we have our smooth base, it’s time to add the elements that will give our bites their delightful texture and extra burst of flavor. Gently fold in the 1/2 cup of mini chocolate chips. Using mini chocolate chips is ideal as they distribute more evenly throughout the mixture and provide a pleasant bite-sized chocolate experience in every frozen bite. Be careful not to overmix at this stage; we just want to distribute the chips throughout the yogurt mixture. After the chocolate chips are mostly incorporated, add the 1/4 teaspoon of sea salt. The sea salt is a secret weapon here. It might seem counterintuitive to add salt to a sweet treat, but it dramatically enhances the flavors of the peanut butter and chocolate, creating a more complex and satisfying taste. It balances the sweetness and adds a delightful savory counterpoint. Again, a gentle fold with your spoon is all that’s needed to evenly distribute the sea salt.
Step 3: Shaping Your Frozen Bites
This is where we prepare our mixture for freezing and shaping. You have a couple of excellent options for creating your bite-sized treats. One method is to use a baking sheet lined with parchment paper. Parchment paper is essential as it prevents sticking and makes for easy removal once the bites are frozen. Using a tablespoon or a small cookie scoop, drop spoonfuls of the mixture onto the prepared baking sheet. Aim for bite-sized portions, about 1 to 1.5 inches in diameter. Another fantastic method, especially if you want more uniform shapes, is to use silicone mini muffin molds or ice cube trays. Simply spoon the mixture into these molds, filling them about two-thirds of the way. This method ensures consistent size and shape, making them look even more appealing. Whichever method you choose, ensure the bites are not touching each other on the baking sheet, or if using molds, that the mixture doesn’t overflow. This will prevent them from freezing together into one large clump.
Step 4: The Freezing Process
Now it’s time for the magic of freezing to transform our creamy mixture into delightful, firm bites. Carefully place the baking sheet with the shaped bites, or the filled molds, into your freezer. For the initial freezing, it’s a good idea to let them freeze for about 30 to 45 minutes. During this time, the bites will start to firm up significantly, making them easier to handle. After this initial freezing period, if you used a baking sheet, you can now transfer the partially frozen bites into a freezer-safe airtight container or a heavy-duty freezer bag. This step is crucial to prevent freezer burn and to keep them from sticking together. If you used silicone molds, you can pop the frozen bites out of the molds and then transfer them to your airtight container or freezer bag as well. This “flash freezing” and then transferring technique ensures that each bite remains distinct.
Step 5: Final Freezing and Storage
Once the bites are transferred to their storage container, return them to the freezer. Allow them to freeze completely for at least another 2 to 3 hours, or preferably overnight. This ensures that they are thoroughly frozen and will have that perfect firm, yet slightly chewy, texture when you enjoy them. Properly stored in an airtight container or freezer bag, these Frozen Greek Yogurt Peanut Butter Bites with Chocolate Chips can be enjoyed for up to 2 to 3 months. When you’re ready to indulge, simply take them out of the freezer and let them sit at room temperature for just a minute or two before biting into them. This brief thawing period makes them incredibly easy to eat and allows the flavors to truly meld. Enjoy this incredibly simple, yet remarkably satisfying, homemade treat!
Conclusion:
And there you have it! These Frozen Greek Yogurt Peanut Butter Bites with Chocolate Chips: A Delightful Treat You Can Make at Home! are incredibly simple to whip up and offer a satisfyingly sweet and creamy escape without the guilt. The delightful combination of tangy Greek yogurt, rich peanut butter, and decadent chocolate chips creates a flavor profile that’s both comforting and refreshing. Whether you’re looking for a healthy breakfast option, a post-workout snack, or a simple dessert, these bites are sure to become a household favorite. Don’t be afraid to experiment with the recipe – the joy is in making it your own!
For serving suggestions, these bites are perfect straight from the freezer! They’re also delicious layered into parfaits with fresh berries and granola, or crum extractbled over a smoothie bowl. Feel free to get creative with variations! Swap out the chocolate chips for chopped nuts, shredded coconut, or even a swirl of honey. You could also add a pinch of cinnamon or a dash of vanilla extract to the yogurt mixture for an extra layer of flavor. We encourage you to give these Frozen Greek Yogurt Peanut Butter Bites with Chocolate Chips: A Delightful Treat You Can Make at Home! a try and discover just how easy and rewarding homemade treats can be. Enjoy every delicious bite!
Frequently Asked Questions:
Can I make these Frozen Greek Yogurt Peanut Butter Bites with Chocolate Chips ahead of time?
Absolutely! These bites are designed to be made ahead. Once they’re frozen solid, you can transfer them to an airtight container or freezer bag and store them for up to two weeks. This makes them a fantastic option for meal prepping or keeping a stash of healthy treats on hand.
What if I don’t have Greek yogurt? Can I use regular yogurt?
While Greek yogurt provides the best creamy texture and protein content, you can use regular plain yogurt in a pinch. However, the bites might be a bit softer and less thick. You might also consider straining regular yogurt through a cheesecloth for a few hours to achieve a thicker consistency, similar to Greek yogurt.
Frozen Greek Yogurt Peanut Butter Bites Recipe
Easy and delicious frozen bites made with Greek yogurt, peanut butter, honey, and chocolate chips. Perfect for a healthy snack or dessert.
Ingredients
-
1 cup plain Greek yogurt
-
1/2 cup creamy peanut butter
-
1/4 cup honey
-
1 teaspoon vanilla extract
-
1/2 cup mini chocolate chips
-
1/4 teaspoon sea salt
Instructions
-
Step 1
In a medium bowl, combine Greek yogurt, peanut butter, honey, and vanilla extract. Whisk until smooth and well combined. -
Step 2
Gently fold in the mini chocolate chips and sea salt until evenly distributed. -
Step 3
Drop spoonfuls of the mixture onto a parchment-lined baking sheet, or press into silicone mini muffin molds or ice cube trays. -
Step 4
Freeze for 30-45 minutes until partially firm. Then, transfer to a freezer-safe container or bag. -
Step 5
Freeze completely for at least 2-3 hours or overnight. Let sit for 1-2 minutes at room temperature before serving.
Important Information
Nutrition Facts (Per Serving)
It is important to consider this information as approximate and not to use it as definitive health advice.
Allergy Information
Please check ingredients for potential allergens and consult a health professional if in doubt.
Leave a Comment