

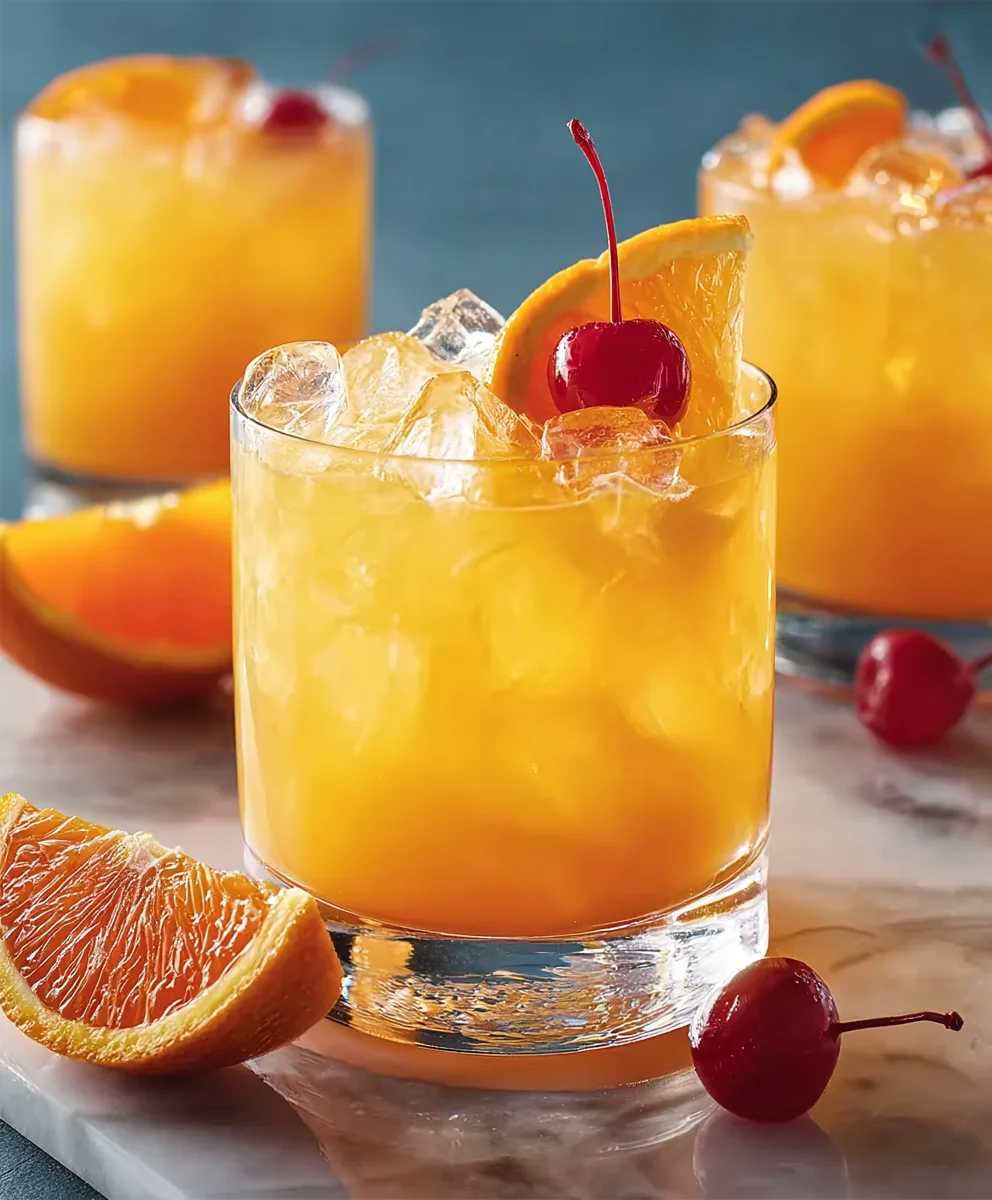
Orange Crush is more than just a drink; it’s a vibrant sensation, a liquid embodiment of summer joy. Imagine the sun on your skin, the sound of laughter, and a glass filled with this delightful concoction, perfectly blending zesty orange with a crisp, bubbly finish. Its invigorating taste profile, combining fresh citrus with a subtle sweetness and a refreshing effervescence, makes it an irresistible choice for any gathering or a simple moment of personal indulgence.
Originally finding its fame along the bustling shores and beachside bars, particularly in places renowned for their laid-back summer vibes, the Orange Crush quickly transcended its regional roots. It became a beloved staple, synonymous with relaxation and good times. I recall the first time I savored this iconic beverage; it was an unforgettable experience that perfectly captured the essence of a carefree afternoon, solidifying its place in my heart as a go-to refreshment.
The simplicity of its preparation, combined with its universally appealing flavor, is precisely why the Orange Crush remains a firm favorite. It’s not merely a beverage; it’s an experience that consistently delivers on its promise of bright, refreshing flavor, making it a perfect antidote to a warm day or a delightful addition to any celebration. Today, I am excited to guide you through crafting this quintessential refreshment right in your own home, ensuring you can enjoy that burst of sunshine whenever you desire.

Ingredients:
- For the Sparkling Orange Crush Cake:
- 3 cups (360g) cake flour, sieved for an exquisitely light texture
- 2 teaspoons baking powder, to give our cake that perfect lift
- ½ teaspoon baking soda, for a tender crumb and a little extra rise
- ½ teaspoon fine sea salt, to beautifully balance all the sweet citrus notes
- 1 ½ cups (340g) unsalted butter, softened to ideal room temperature – this is crucial for creaming!
- 2 ½ cups (500g) granulated sugar, for a wonderfully sweet foundation
- 4 large eggs, at room temperature, ensuring they incorporate seamlessly into our batter
- 2 tablespoons finely grated orange zest (from about 2-3 large, juicy oranges), providing that vibrant, aromatic burst of citrus
- 1 cup (240ml) fresh orange juice, divided (we’ll use ½ cup for the cake batter itself and reserve the other ½ cup for our bright orange syrup)
- 1 cup (240ml) buttermilk, at room temperature, contributing to a moist and tender cake
- 1 teaspoon pure vanilla extract, a classic flavor enhancer that always works wonders
- For the Bright Orange Syrup:
- ½ cup (120ml) fresh orange juice (the half-cup reserved from our cake ingredients)
- ½ cup (100g) granulated sugar
- 1 tablespoon orange liqueur (such as Grand Marnier or Cointreau), optional but highly recommended for an added layer of sophisticated citrus depth and aroma. If you prefer to omit alcohol, simply use another tablespoon of orange juice.
- For the Fizzy “Orange Crush” Glaze:
- 3 cups (360g) powdered sugar, meticulously sieved to avoid any lumps – we want a silky-smooth glaze!
- ¼ cup (60ml) fresh orange juice
- ¼ cup (60ml) Orange Crush soda (or your favorite vibrant orange-flavored soda), chilled – this is where the “Crush” magic happens, adding that signature effervescence and nostalgic flavor!
- 1 teaspoon finely grated orange zest, for an extra zingy finish
- For Garnish (Optional, but makes it extra special):
- Candied orange slices, for an elegant and delicious touch
- Fresh mint leaves, for a pop of color and freshness
- A light dusting of powdered sugar, for a delicate, snowy appearance
Preparing Your Workspace and Ingredients
- Get Ready to Bake: First things first, preheat your oven to 350°F (175°C). This ensures your oven is consistently hot when the cake goes in, promoting even baking. Trust me, patience here pays off! Next, generously grease and flour two 9-inch round cake pans. You can also line the bottoms with parchment paper for extra insurance against sticking, which I always recommend for peace of mind. A little non-stick spray is great, but don’t forget that dusting of flour for a perfect release.
- Sift Your Dry Ingredients: In a medium bowl, whisk together your sieved cake flour, baking powder, baking soda, and fine sea salt. Sifting the flour beforehand and then whisking these dry ingredients together ensures they are perfectly combined and free of lumps, leading to a lighter, airier cake crumb. Set this aside for a moment.
- Bring Ingredients to Room Temperature: Make sure your butter, eggs, and buttermilk are all at room temperature. This is a non-negotiable step for cake baking, as it allows all the ingredients to emulsify properly, creating a smooth, cohesive batter. Cold ingredients can lead to a lumpy batter and a denser cake. If you’re short on time, you can warm eggs gently in warm water for a few minutes, and microwave buttermilk for 10-15 seconds.
Crafting the Sparkling Orange Crush Cake Batter
- Cream the Butter and Sugar: In the bowl of a stand mixer fitted with the paddle attachment (or using a large bowl and a hand mixer), beat the softened unsalted butter on medium speed for about 1-2 minutes until it’s light and creamy. Then, gradually add the granulated sugar, beating on medium-high speed for another 3-5 minutes. You’re looking for a mixture that is light in color, fluffy, and significantly increased in volume. This creaming process incorporates air into the batter, which is essential for a tender cake. Don’t rush this step! It’s truly the foundation of a fantastic cake.
- Add Eggs and Orange Zest: Reduce the mixer speed to low. Add the eggs one at a time, beating well after each addition until fully incorporated. Scrape down the sides of the bowl with a rubber spatula after each egg to ensure everything is mixing evenly. Once all the eggs are in, add the 2 tablespoons of finely grated orange zest and the vanilla extract. Beat for another minute until the mixture is beautifully fragrant and well combined. The zest will infuse the batter with an incredible orange aroma.
-
Alternate Dry and Wet Ingredients: Now, we’re going to add our dry ingredient mixture and our wet ingredients (the ½ cup orange juice and buttermilk) in alternating additions. This technique helps maintain the emulsion and prevents the batter from becoming overmixed.
- Begin by adding about one-third of the dry ingredients to the creamed mixture. Beat on low speed until just combined.
- Next, pour in half of the buttermilk and half of the reserved ½ cup of orange juice. Beat on low speed until just combined.
- Repeat this process: add another third of the dry ingredients, beat until just combined.
- Add the remaining buttermilk and orange juice, beat until just combined.
- Finish with the last third of the dry ingredients. Beat on low speed only until no streaks of flour remain. It’s paramount not to overmix at this stage, as overmixing can develop the gluten in the flour, resulting in a tough cake. A few small lumps are perfectly fine!
Give the batter one final gentle scrape down with your spatula to ensure everything is incorporated from the bottom and sides of the bowl.
Baking to Golden Perfection
- Fill the Pans and Bake: Divide the luscious cake batter evenly between your two prepared 9-inch round cake pans. Gently tap the pans on the counter a couple of times to release any large air bubbles and to help level the batter.
- Into the Oven: Bake for approximately 28-35 minutes, or until a wooden skewer or toothpick inserted into the center of the cakes comes out clean. The cakes should be beautifully golden brown on top and spring back lightly when gently pressed. Baking times can vary depending on your oven, so keep an eye on them starting around the 28-minute mark.
- Cooling the Cakes: Once baked, remove the cakes from the oven and let them cool in their pans on a wire rack for about 10-15 minutes. This allows the cakes to set up and prevents them from breaking when you invert them. After this initial cooling, carefully invert the cakes onto the wire rack, remove the pans (and parchment paper, if used), and allow them to cool completely. Cooling completely is critical before applying any syrup or glaze, otherwise, your toppings will melt and slide right off!
Whipping Up the Bright Orange Syrup
- Simmering the Syrup: While the cakes are cooling, prepare the bright orange syrup. In a small saucepan, combine the ½ cup fresh orange juice and ½ cup granulated sugar. Bring the mixture to a gentle simmer over medium heat, stirring occasionally, until the sugar has completely dissolved. This usually takes just a few minutes.
- Adding Liqueur (Optional): Remove the saucepan from the heat. If you’re using orange liqueur, stir in the 1 tablespoon of your chosen liqueur (like Grand Marnier). The warmth of the syrup will help meld the flavors beautifully.
- Infusing the Cakes: Once the cakes are completely cool, use a skewer or a fork to poke small holes all over the tops of both cake layers. This creates little channels for the syrup to seep into, ensuring every bite is incredibly moist and flavorful. Gently brush or drizzle the warm orange syrup evenly over both cakes. You’ll see the cakes eagerly absorb the liquid, becoming even more tender and infused with that wonderful orange essence. Let the syrup fully soak in for at least 15-20 minutes before proceeding.
The Irresistible “Orange Crush” Glaze
- Combine Glaze Ingredients: In a medium bowl, whisk together the sieved powdered sugar, ¼ cup fresh orange juice, and 1 teaspoon of finely grated orange zest. Start whisking slowly to avoid a cloud of sugar dust!
- Introduce the “Crush” Factor: Gradually add the chilled ¼ cup of Orange Crush soda (or your preferred orange soda), whisking continuously until the glaze is smooth, glossy, and has a pourable consistency. If the glaze seems too thick, add another tiny splash of soda or orange juice; if it’s too thin, add a little more powdered sugar. The key here is the soda: it doesn’t just add flavor, but a unique, subtle fizziness that truly makes this an “Orange Crush” glaze. Taste it and adjust if you like a little more zest or sweetness!
Assembling Your Masterpiece
- Stacking the Layers: Carefully place one syrup-soaked cake layer onto your serving plate or cake stand. Make sure it’s centered!
- Glaze and Stack: Drizzle about half of the prepared “Orange Crush” glaze over the first cake layer, allowing some to drip enticingly down the sides. Then, carefully place the second cake layer on top, aligning it as best you can.
- The Grand Finale Glaze: Pour the remaining “Orange Crush” glaze over the top of the second cake layer, letting it cascade down the sides in beautiful, glossy drips. Use an offset spatula or the back of a spoon to gently spread the glaze if needed, ensuring even coverage. The glaze will begin to set as it cools, creating that beautiful “crushed” look.
- Garnish and Serve: For that extra touch of elegance and flavor, arrange your candied orange slices artfully on top of the glazed cake. A few fresh mint leaves can add a lovely pop of green, and a final, delicate dusting of powdered sugar can complete the look.
- Chill and Enjoy: Allow the glaze to set for at least 30 minutes at room temperature, or transfer the cake to the refrigerator for a quicker set, about 15-20 minutes. Once set, slice into this absolutely delightful Sparkling Orange Crush Cake and prepare for a burst of vibrant, effervescent orange flavor in every single bite. It’s a truly refreshing and unforgettable treat! Enjoy sharing this joyful creation with your friends and family – I promise they’ll be asking for the recipe.

Conclusion:
And there you have it, my friends! We’ve reached the delicious finale of our culinary journey. This isn’t just another recipe; it’s an invitation to experience pure joy in every bite. I truly hope you’re feeling as excited as I am about what you’ve learned today, and even more so about the incredible dish you’re about to create.
Why is this recipe an absolute must-try? For starters, it’s an explosion of fresh, vibrant flavors that will awaken your palate in the most delightful way. We’ve talked about the perfect balance of sweetness and tang, the subtle aromatic notes, and the irresistible texture that makes this dish stand out from the crowd. It’s incredibly versatile, perfect for any occasion, from a casual weeknight treat to a show-stopping centerpiece at your next gathering. Forget complicated techniques and obscure ingredients; this recipe is designed for success, regardless of your cooking experience. I poured my heart into making sure every step is clear, concise, and incredibly rewarding. You’ll be amazed at how easily you can produce something that tastes and looks like it came straight from a gourmet kitchen. This isn’t just food; it’s an experience, a moment of pure culinary bliss that you owe yourself to discover. The bright, zesty character is utterly captivating, and I promise you, once you taste this, you’ll understand why I rave about it so much. It’s the kind of dish that makes you close your eyes and savor every single morsel, leaving you with a lingering, happy memory. The secret truly lies in the simplicity of bringing together high-quality ingredients to shine, allowing their natural goodness to create something truly magical. It’s a testament to the idea that the best food doesn’t need to be complex; it just needs to be made with a little love and the right guidance.
Elevate Your Experience with Serving Suggestions & Variations!
Now that you’re armed with the knowledge to create this masterpiece, let’s talk about how to make it uniquely yours or simply present it in new and exciting ways. While it’s absolutely perfect on its own, here are a few ideas to spark your creativity:
- For an extra touch of decadence, consider serving it with a dollop of freshly whipped cream, perhaps infused with a hint of vanilla bean or a whisper of citrus zest. The creamy texture provides a beautiful contrast to the dish’s vibrant core.
- Thinking of a different season? In the warmer months, chill it thoroughly and serve it alongside a scoop of high-quality vanilla bean ice cream or a refreshing sorbet for a truly cooling treat. During colder times, a warm spiced cider or a rich coffee can be an unexpected, yet delightful, companion.
- Feeling adventurous? Don’t hesitate to experiment with different garnishes. A few fresh mint leaves can add a pop of color and an aromatic counterpoint. Candied citrus peels bring an elegant visual and an extra layer of zesty sweetness. A dusting of powdered sugar always adds a touch of simple elegance.
- For those who love to customize, consider incorporating a different fruit component. While the core flavor is undeniably spectacular, a handful of fresh berries – raspberries, blueberries, or even sliced strawberries – could introduce a new dimension and visual appeal.
- If you’re catering to different dietary needs, remember that many of the components can be substituted. Dairy-free alternatives for creams or milks, or sugar substitutes, can often be used with great success, allowing everyone to enjoy this delightful creation. The vibrant, unmistakable notes that give it that true Orange Crush character can still shine through beautifully, even with minor adjustments.
- Consider making individual portions in small ramekins or elegant glasses for a sophisticated presentation, perfect for dinner parties or special occasions. This not only looks stunning but also makes serving a breeze.
Your Culinary Adventure Awaits!
I genuinely encourage you, with all my culinary heart, to roll up your sleeves and give this recipe a try. Don’t let anything hold you back from experiencing the joy of creating something truly delicious from scratch. Cooking is an adventure, and every dish you master adds a new skill to your repertoire and a new favorite to your table. Once you’ve made it, tasted it, and inevitably fallen in love with it, I would absolutely adore hearing about your experience! Please, come back and leave a comment below, share your photos on social media, or tell me about any creative twists you added. Your feedback and stories are what make this community so vibrant and inspiring. Let’s celebrate the simple pleasure of good food together.
So, what are you waiting for? Grab your apron, gather your ingredients, and let’s get cooking! I can’t wait to see what you create. Happy cooking, everyone!
Sparkling Orange Crush Cake
This Sparkling Orange Crush Cake is a vibrant sensation, an embodiment of summer joy in cake form. Imagine the sun on your skin and a slice of this delightful concoction, perfectly blending zesty orange with a crisp, bubbly finish in a tender cake. Its invigorating taste profile, combining fresh citrus with a subtle sweetness and a refreshing effervescence, makes it an irresistible choice for any gathering or a simple moment of personal indulgence.
Ingredients
-
3 cups (360g) cake flour, sieved
-
2 tsp baking powder
-
½ tsp baking soda
-
½ tsp fine sea salt
-
1 ½ cups (340g) unsalted butter, softened
-
2 ½ cups (500g) granulated sugar
-
4 large eggs, room temperature
-
2 tbsp orange zest
-
1 cup (240ml) fresh orange juice, divided
-
1 cup (240ml) buttermilk, room temperature
-
1 tsp vanilla extract
-
For the Bright Orange Syrup:
-
½ cup (120ml) fresh orange juice (reserved from cake ingredients)
-
½ cup (100g) granulated sugar
-
1 tbsp orange juice (non-alcoholic alternative to liqueur)
-
For the Fizzy “Orange Crush” Glaze:
-
3 cups (360g) powdered sugar, sieved
-
¼ cup (60ml) fresh orange juice
-
¼ cup (60ml) Orange Crush soda (or orange-flavored soda), chilled
-
1 tsp orange zest
-
For Garnish (Optional):
-
Candied orange slices
-
Fresh mint leaves
-
Powdered sugar for dusting
Instructions
-
Step 1
Preheat oven to 350°F (175°C). Grease and flour two 9-inch round cake pans, lining bottoms with parchment. In a medium bowl, whisk together sieved cake flour, baking powder, baking soda, and fine sea salt. Set aside. Ensure butter, eggs, and buttermilk are at room temperature. -
Step 2
In a stand mixer, beat softened butter until creamy (1-2 min). Gradually add granulated sugar; beat on medium-high until light and fluffy (3-5 min). -
Step 3
Reduce speed to low. Add eggs one at a time, beating well after each. Scrape bowl. Add orange zest and vanilla extract; beat 1 minute until fragrant and combined. -
Step 4
Alternate adding dry ingredients and wet ingredients (½ cup orange juice and buttermilk) to the batter. Begin and end with dry ingredients. Beat on low speed until just combined; do not overmix. Scrape bowl once more. -
Step 5
Divide batter evenly between prepared pans. Tap pans to level. Bake for 28-35 minutes, or until a wooden skewer comes out clean. Cool in pans on a wire rack for 10-15 minutes, then invert cakes onto the rack to cool completely. -
Step 6
While cakes cool, combine ½ cup fresh orange juice and ½ cup granulated sugar in a small saucepan. Simmer over medium heat, stirring, until sugar dissolves. Remove from heat and stir in 1 tbsp orange juice (non-alcoholic alternative). -
Step 7
Once cakes are completely cool, poke small holes all over tops. Gently brush or drizzle warm orange syrup evenly over both cakes. Let soak for at least 15-20 minutes. -
Step 8
In a medium bowl, whisk sieved powdered sugar, ¼ cup fresh orange juice, and 1 tsp orange zest. Gradually add chilled ¼ cup Orange Crush soda, whisking until smooth, glossy, and pourable. Adjust consistency if needed. -
Step 9
Place one syrup-soaked cake layer on a serving plate. Drizzle with half of the glaze, letting some drip down sides. Place the second cake layer on top. Pour remaining glaze over the top, letting it cascade down. Garnish with candied orange slices, fresh mint leaves, and a dusting of powdered sugar, if desired. -
Step 10
Allow glaze to set for at least 30 minutes at room temperature (or 15-20 minutes in refrigerator). Slice and enjoy this refreshing Sparkling Orange Crush Cake.
Important Information
Nutrition Facts (Per Serving)
It is important to consider this information as approximate and not to use it as definitive health advice.
Allergy Information
Please check ingredients for potential allergens and consult a health professional if in doubt.

Leave a Comment