

Homemade Burger Buns: Is there anything quite as satisfying as biting into a juicy burger nestled between two perfectly soft, slightly sweet, and undeniably fresh buns? I think not! Forget the store-bought, often dry and flavorless options. Today, we’re diving headfirst into the world of baking our own burger buns, and trust me, once you taste the difference, you’ll never go back.
The humble burger bun, often overlooked, is actually a crucial component of the entire burger experience. While its exact origins are debated, the concept of encasing ground meat in bread has roots stretching back centuries. From simple flatbreads to the enriched, yeasted buns we know and love today, the burger bun has evolved alongside the burger itself, becoming an integral part of American culinary culture.
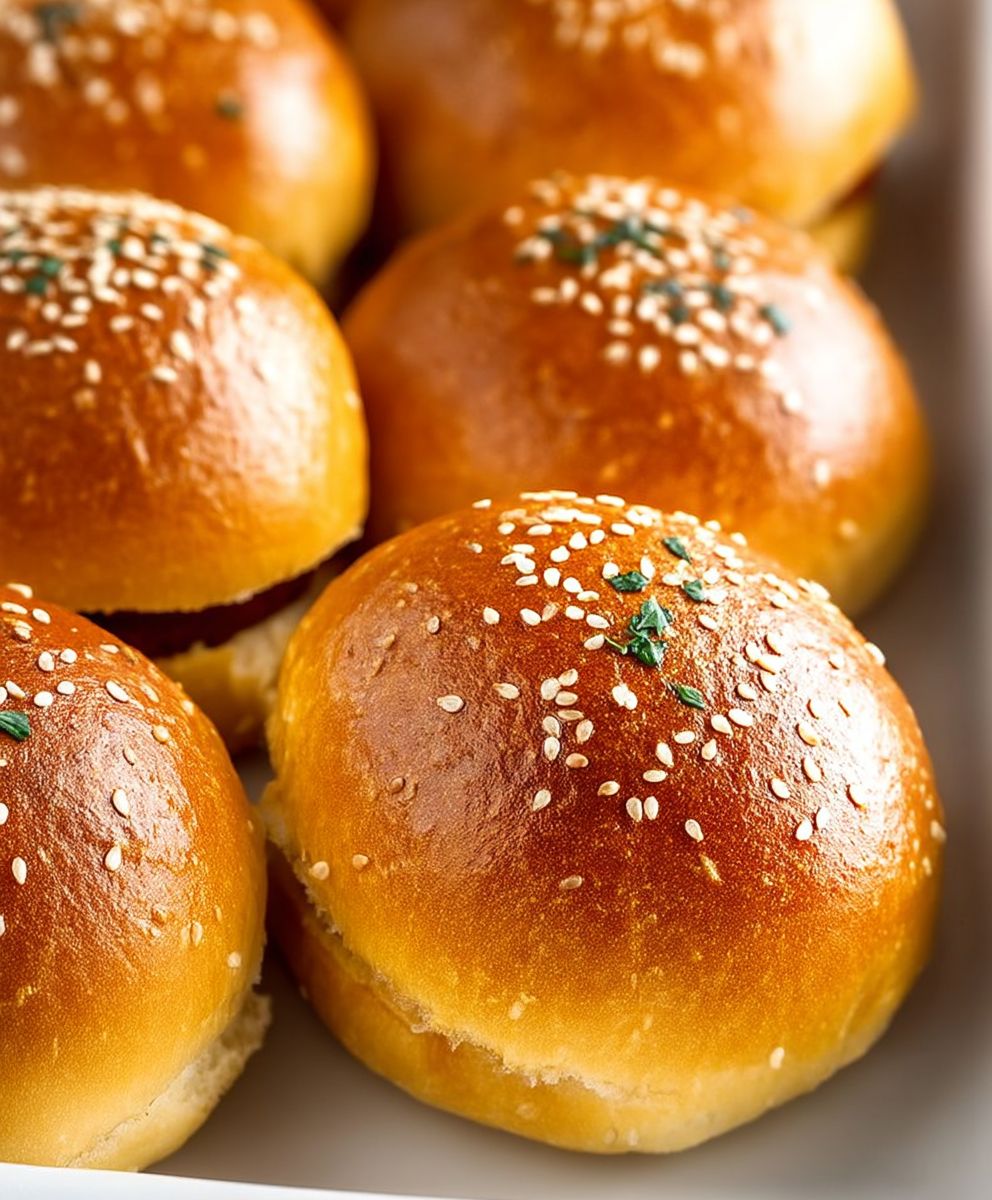
But why bother making your own? Well, for starters, the taste and texture are simply unparalleled. These homemade burger buns offer a delightful chewiness, a subtle sweetness that complements the savory burger patty, and a tenderness that melts in your mouth. Plus, the aroma of freshly baked bread wafting through your kitchen is an experience in itself! Beyond the sensory delights, baking your own buns allows you to control the ingredients, ensuring a healthier and more wholesome option for you and your family. So, let’s get baking and elevate your burger game to a whole new level!

Ingredients:
- For the Sponge:
- 1 cup (240ml) warm milk (105-115°F)
- 2 1/4 teaspoons (7g) active dry yeast (1 packet)
- 1 tablespoon (12g) granulated sugar
- For the Dough:
- 3 1/2 cups (420g) all-purpose flour, plus more for dusting
- 1/4 cup (50g) granulated sugar
- 1 teaspoon salt
- 1 large egg, lightly beaten
- 4 tablespoons (56g) unsalted butter, softened
- For the Egg Wash:
- 1 large egg
- 1 tablespoon milk or water
- For Topping:
- Sesame seeds (optional)
Preparing the Sponge:
Okay, let’s get started! The first step is to create what we call a “sponge.” This is a pre-ferment that helps develop flavor and gives our buns a lovely, airy texture. Don’t worry, it’s super easy!
- Warm the Milk: Make sure your milk is warm, but not hot! Aim for a temperature between 105-115°F (40-46°C). If it’s too hot, it will kill the yeast. If it’s too cold, the yeast won’t activate properly. I usually just microwave it for about 30-45 seconds, but you can also warm it on the stovetop.
- Combine Ingredients: In a large bowl (or the bowl of your stand mixer), combine the warm milk, yeast, and sugar. Give it a gentle stir to dissolve the sugar and yeast.
- Let it Rest: Now, the magic happens! Let the mixture sit for about 5-10 minutes, or until it becomes foamy and bubbly. This means the yeast is active and ready to go. If it doesn’t foam, your yeast might be old or inactive, and you’ll need to start over with fresh yeast.
Making the Dough:
Now that our sponge is nice and bubbly, we can move on to making the dough. This is where the real work begins, but trust me, it’s worth it!
- Add Dry Ingredients: To the bowl with the sponge, add the flour, sugar, and salt. If you’re using a stand mixer, use the dough hook attachment. If you’re mixing by hand, just use a sturdy spoon or your hands.
- Add Egg and Butter: Add the lightly beaten egg and softened butter to the bowl. Make sure your butter is truly softened, but not melted. It should be easy to press with your finger.
- Mix the Dough: If using a stand mixer, mix on low speed until the dough comes together. Then, increase the speed to medium and knead for about 8-10 minutes, or until the dough is smooth and elastic. If mixing by hand, knead the dough on a lightly floured surface for about 10-12 minutes, or until it’s smooth and elastic. The dough should be slightly sticky, but not so sticky that it’s unmanageable. If it’s too sticky, add a tablespoon of flour at a time until it reaches the right consistency.
- First Rise: Place the dough in a lightly oiled bowl, turning to coat all sides. Cover the bowl with plastic wrap or a clean kitchen towel. Let the dough rise in a warm place for about 1-1.5 hours, or until it has doubled in size. This is crucial for developing the flavor and texture of the buns. I usually put mine in a slightly warm oven (turned off, of course!).
Shaping the Buns:
Alright, our dough has doubled in size, which means it’s time to shape those beautiful burger buns! This is where you get to decide how big you want your buns to be.
- Punch Down the Dough: Gently punch down the dough to release the air. This helps to even out the texture and prevent large air pockets.
- Divide the Dough: Turn the dough out onto a lightly floured surface. Divide the dough into 8-10 equal pieces, depending on how large you want your buns. I usually aim for 8, which gives me a good-sized burger bun.
- Shape the Buns: To shape each bun, gently flatten a piece of dough into a circle. Then, bring the edges of the circle towards the center, pinching them together to form a ball. Turn the ball over so the seam is on the bottom. Cup your hand over the ball and gently rotate it on the counter to create a smooth, round shape.
- Second Rise: Place the shaped buns on a baking sheet lined with parchment paper, leaving some space between each bun. Cover the buns loosely with plastic wrap or a clean kitchen towel. Let them rise for another 30-45 minutes, or until they have almost doubled in size. This second rise is important for creating a light and airy texture.
Baking the Buns:
We’re almost there! The final step is to bake our buns to golden-brown perfection. This is where the magic really happens, and the aroma will fill your kitchen with deliciousness.
- Preheat the Oven: Preheat your oven to 375°F (190°C). Make sure your oven is fully preheated before you put the buns in.
- Prepare the Egg Wash: In a small bowl, whisk together the egg and milk (or water) to create the egg wash. This will give the buns a beautiful golden-brown color and a slightly shiny finish.
- Brush with Egg Wash: Gently brush the tops of the risen buns with the egg wash. Be careful not to deflate them.
- Add Toppings (Optional): If you want to add sesame seeds, now is the time! Sprinkle them evenly over the tops of the egg-washed buns. You can also use other toppings like poppy seeds, everything bagel seasoning, or even a sprinkle of coarse salt.
- Bake the Buns: Bake the buns for 15-20 minutes, or until they are golden brown on top. Keep an eye on them, as baking times can vary depending on your oven. If they start to brown too quickly, you can tent them with foil.
- Cool the Buns: Once the buns are baked, remove them from the oven and let them cool on the baking sheet for a few minutes before transferring them to a wire rack to cool completely. This prevents them from getting soggy on the bottom.
Tips and Tricks for Perfect Burger Buns:
Here are a few extra tips and tricks to help you achieve burger bun perfection:
- Use a Kitchen Scale: For the most accurate results, I highly recommend using a kitchen scale to measure your ingredients, especially the flour. This will ensure that your dough has the right consistency.
- Don’t Overmix the Dough: Overmixing the dough can result in tough buns. Mix until the dough comes together and is smooth and elastic, but don’t go overboard.
- Proof in a Warm Place: A warm environment is essential for the dough to rise properly. If your kitchen is cold, you can proof the dough in a slightly warm oven (turned off) or in a warm spot near a radiator.
- Don’t Overbake: Overbaking the buns can make them dry and hard. Bake until they are golden brown on top, but still soft to the touch.
- Store Properly: Store the cooled buns in an airtight container at room temperature for up to 3 days, or in the freezer for up to 2 months. To freeze, wrap the buns individually in plastic wrap and then place them in a freezer bag.
- Reheat Before Serving: To reheat frozen buns, thaw them at room temperature or in the microwave. Then, warm them in a low oven (300°F/150°C) for a few minutes to restore their softness.
- Experiment with Flavors: Feel free to experiment with different flavors! You can add herbs, spices, or even cheese to the dough for a unique twist.
Serving Suggestions:
Now that you have these amazing homemade burger buns, it’s time to put them to good use! Here are a few serving suggestions:
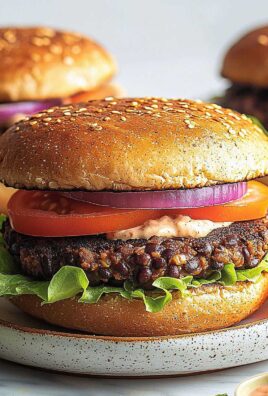
- Classic Burgers: Of course, the
Conclusion:
And there you have it! These Homemade Burger Buns are more than just bread; they’re the foundation for burger perfection. I truly believe that once you’ve tasted a burger nestled in one of these soft, slightly sweet, and perfectly textured buns, you’ll never go back to store-bought again. The difference is simply astounding. They elevate the entire burger experience, transforming a simple meal into something truly special.
Why is this recipe a must-try? Because it’s about taking control of your ingredients and crafting something truly delicious from scratch. It’s about the satisfaction of knowing exactly what went into your food, and the pride of serving something homemade to your family and friends. Beyond that, these buns are incredibly versatile. They’re sturdy enough to hold even the juiciest, most loaded burgers, yet soft enough to melt in your mouth. The subtle sweetness complements both savory and spicy burger toppings, creating a harmonious blend of flavors.
But the fun doesn’t stop there! Feel free to experiment with different variations to make these buns your own. For a richer flavor, try substituting some of the milk with buttermilk. A sprinkle of sesame seeds, poppy seeds, or everything bagel seasoning on top before baking adds a delightful crunch and visual appeal. If you’re feeling adventurous, you could even incorporate herbs like rosemary or thyme into the dough for a savory twist.
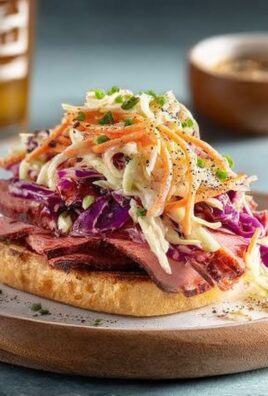
These buns aren’t just for burgers, either! They make fantastic sandwich rolls for lunch or dinner. Imagine a perfectly grilled chicken sandwich, a flavorful pulled pork sandwich, or even a simple turkey and cheese sandwich nestled between these soft, homemade buns. They’re also great for breakfast sandwiches think bacon, egg, and cheese on a warm, freshly baked bun. The possibilities are endless!
Serving suggestions? Toast them lightly on the grill or in a pan for extra texture and flavor. Spread them with your favorite burger sauce, mayonnaise, or aioli. And don’t forget the toppings! Crisp lettuce, juicy tomatoes, sliced onions, pickles, and your favorite cheese are all essential for creating the ultimate burger experience.
I know making bread from scratch can seem intimidating, but trust me, this recipe is surprisingly easy to follow. With a little patience and a few simple ingredients, you can create bakery-quality burger buns right in your own kitchen. The aroma of freshly baked bread filling your home is an added bonus!
So, what are you waiting for? Gather your ingredients, preheat your oven, and get ready to bake some seriously delicious Homemade Burger Buns. I’m confident that you’ll love them as much as I do. And when you do, please share your experience! I’d love to hear about your variations, your favorite burger toppings, and any tips or tricks you discover along the way. Share your photos on social media and tag me I can’t wait to see your creations! Happy baking, and happy burger-making! Let me know how your homemade burger buns turn out!
Homemade Burger Buns: The Ultimate Guide to Baking Perfect Buns
Soft, fluffy homemade burger buns perfect for any burger night! This recipe uses a sponge for extra flavor and a light, airy texture.
Ingredients
- 1 cup (240ml) warm milk (105-115°F)
- 2 1/4 teaspoons (7g) active dry yeast (1 packet)
- 1 tablespoon (12g) granulated sugar
- 3 1/2 cups (420g) all-purpose flour, plus more for dusting
- 1/4 cup (50g) granulated sugar
- 1 teaspoon salt
- 1 large egg, lightly beaten
- 4 tablespoons (56g) unsalted butter, softened
- 1 large egg
- 1 tablespoon milk or water
- Sesame seeds (optional)
Instructions
- Prepare the Sponge: Warm the milk to 105-115°F. In a large bowl, combine warm milk, yeast, and sugar. Stir gently. Let it rest for 5-10 minutes, or until foamy.
- Make the Dough: To the bowl with the sponge, add flour, sugar, and salt. Add the lightly beaten egg and softened butter.
- Mix the Dough: Using a stand mixer (dough hook) or by hand, knead the dough for 8-12 minutes until smooth and elastic. Add flour, 1 tablespoon at a time, if too sticky.
- First Rise: Place the dough in a lightly oiled bowl, turning to coat. Cover with plastic wrap or a towel. Let rise in a warm place for 1-1.5 hours, or until doubled.
- Shape the Buns: Punch down the dough. Divide into 8-10 equal pieces. Shape each piece into a smooth ball.
- Second Rise: Place shaped buns on a parchment-lined baking sheet, leaving space between. Cover loosely and let rise for 30-45 minutes, or until almost doubled.
- Bake the Buns: Preheat oven to 375°F (190°C).
- Prepare Egg Wash: Whisk together egg and milk (or water).
- Brush and Top: Gently brush the tops of the risen buns with egg wash. Sprinkle with sesame seeds (optional).
- Bake: Bake for 15-20 minutes, or until golden brown. Tent with foil if browning too quickly.
- Cool: Let cool on the baking sheet for a few minutes, then transfer to a wire rack to cool completely.
Notes
- Use a kitchen scale for accurate measurements, especially flour.
- Don’t overmix the dough.
- Proof in a warm place for best results.
- Don’t overbake the buns.
- Store cooled buns in an airtight container at room temperature for up to 3 days, or freeze for up to 2 months.
- Reheat frozen buns in a low oven to restore softness.
- Experiment with different flavors by adding herbs, spices, or cheese to the dough.

Leave a Comment