

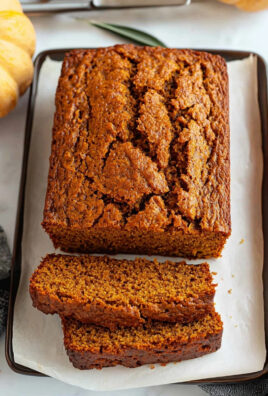
Homemade buns, fresh from the oven, are a simple pleasure that elevates any meal. Imagine sinking your teeth into a warm, soft bun, its slightly sweet aroma filling the air. Is your mouth watering yet? Because mine certainly is! There’s just something undeniably comforting about baking your own bread, and these buns are no exception.
While the exact origins of the bun are difficult to pinpoint, variations of enriched dough baked into small, individual portions have been enjoyed for centuries across numerous cultures. From the sweet rolls of Scandinavia to the fluffy bao buns of Asia, the concept of a small, handheld bread is universally loved. These homemade buns, however, are designed to be a versatile staple in your kitchen.
What makes these buns so irresistible? It’s a combination of factors. The soft, slightly chewy texture is incredibly satisfying, and the subtle sweetness makes them perfect for everything from burgers and sandwiches to sliders and even alongside a hearty soup. Plus, the act of baking them yourself fills your home with a wonderful aroma and provides a sense of accomplishment. They are also surprisingly easy to make, requiring only a few simple ingredients and a little bit of patience. So, ditch the store-bought variety and let’s get baking!

Ingredients:
- For the Dough:
- 3 ½ cups (420g) all-purpose flour, plus more for dusting
- ¼ cup (50g) granulated sugar
- 1 teaspoon salt
- 1 packet (2 ¼ teaspoons) active dry yeast
- ¾ cup (180ml) warm milk (105-115°F)
- ¼ cup (60ml) warm water (105-115°F)
- ¼ cup (60ml) unsalted butter, melted
- 1 large egg, lightly beaten
- For the Egg Wash:
- 1 large egg
- 1 tablespoon milk or water
- Optional Toppings:
- Sesame seeds
- Everything bagel seasoning
- Coarse sea salt
Preparing the Dough:
- Proof the Yeast: In a large bowl, combine the warm milk, warm water, and sugar. Sprinkle the yeast over the mixture and let it sit for 5-10 minutes, or until foamy. This step is crucial to ensure your yeast is active and will help your buns rise properly. If the yeast doesn’t foam, it’s likely dead, and you’ll need to start with a fresh packet.
- Combine Dry Ingredients: In a separate large bowl, whisk together the flour and salt. This ensures the salt is evenly distributed throughout the flour, which is important for proper gluten development.
- Combine Wet and Dry Ingredients: Pour the yeast mixture and melted butter into the bowl with the dry ingredients. Add the lightly beaten egg.
- Mix the Dough: Using a wooden spoon or a stand mixer fitted with a dough hook, mix the ingredients until a shaggy dough forms. If using a stand mixer, start on low speed and gradually increase to medium speed.
- Knead the Dough: Turn the dough out onto a lightly floured surface. Knead the dough for 8-10 minutes, or until it becomes smooth and elastic. If using a stand mixer, knead the dough with the dough hook for 6-8 minutes. The dough should be slightly tacky but not sticky. If it’s too sticky, add a tablespoon of flour at a time until it reaches the right consistency.
- First Rise: Place the dough in a lightly oiled bowl, turning to coat all sides. Cover the bowl with plastic wrap or a clean kitchen towel. Let the dough rise in a warm place for 1-1.5 hours, or until doubled in size. The warmer the environment, the faster the dough will rise. You can place the bowl in a slightly warmed oven (turned off!) or near a sunny window.
Shaping and Second Rise:
- Punch Down the Dough: Gently punch down the risen dough to release the air. This helps to redistribute the yeast and create a more even texture in the final buns.
- Divide the Dough: Turn the dough out onto a lightly floured surface. Divide the dough into 8-12 equal pieces, depending on the desired size of your buns. I usually aim for 10, which gives me a good-sized bun.
- Shape the Buns: Shape each piece of dough into a smooth, round ball. To do this, gently stretch the top of the dough and tuck it underneath, pinching the seam to seal. Roll the ball on the counter to create a smooth surface.
- Arrange the Buns: Place the shaped buns on a baking sheet lined with parchment paper, leaving some space between each bun for expansion.
- Second Rise: Cover the baking sheet with plastic wrap or a clean kitchen towel. Let the buns rise in a warm place for 30-45 minutes, or until they have almost doubled in size. This second rise is crucial for creating light and airy buns.
Baking the Buns:
- Preheat the Oven: Preheat your oven to 375°F (190°C). Make sure your oven rack is in the center position.
- Prepare the Egg Wash: In a small bowl, whisk together the egg and milk (or water) for the egg wash.
- Apply the Egg Wash: Gently brush the tops of the risen buns with the egg wash. This will give them a beautiful golden-brown color and a slightly shiny finish.
- Add Toppings (Optional): Sprinkle the buns with sesame seeds, everything bagel seasoning, or coarse sea salt, if desired.
- Bake the Buns: Bake the buns for 15-20 minutes, or until they are golden brown on top and sound hollow when tapped on the bottom. Keep a close eye on them, as baking times can vary depending on your oven.
- Cool the Buns: Remove the baking sheet from the oven and transfer the buns to a wire rack to cool completely. This prevents them from becoming soggy on the bottom.
Tips and Tricks for Perfect Homemade Buns:
- Use a Thermometer: The temperature of the milk and water is crucial for activating the yeast. Use a thermometer to ensure they are between 105-115°F (40-46°C).
- Don’t Overknead: Overkneading can result in tough buns. Knead the dough until it is smooth and elastic, but not overly stiff.
- Proper Rising Environment: A warm, draft-free environment is essential for proper rising. If your kitchen is cold, you can place the dough in a slightly warmed oven (turned off!) or near a sunny window.
- Don’t Overproof: Overproofed dough can collapse during baking. The dough should be doubled in size, but not overly puffy.
- Baking Time: Baking times can vary depending on your oven. Keep a close eye on the buns and adjust the baking time as needed.
- Storage: Store the cooled buns in an airtight container at room temperature for up to 3 days, or in the freezer for up to 2 months. To freeze, wrap the buns individually in plastic wrap and then place them in a freezer bag.
- Reheating: To reheat frozen buns, thaw them at room temperature and then warm them in a preheated oven at 350°F (175°C) for 5-10 minutes. You can also microwave them for a few seconds, but be careful not to overheat them, as they can become tough.
- Variations: Get creative with your buns! You can add different herbs, spices, or cheeses to the dough. You can also use different toppings, such as poppy seeds, sunflower seeds, or grated Parmesan cheese.
- Gluten-Free Option: While this recipe is specifically for all-purpose flour, you can experiment with gluten-free flour blends. Keep in mind that gluten-free doughs often require different techniques and may not rise as much as traditional doughs. Look for a gluten-free bread recipe specifically designed for buns for best results.
- Vegan Option: To make these buns vegan, substitute the milk with plant-based milk (such as almond milk or soy milk), the butter with vegan butter or oil, and the egg with a flax egg (1 tablespoon ground flaxseed mixed with 3 tablespoons water).
Troubleshooting:
- Dough not rising: Make sure your yeast is active and the milk and water are at the correct temperature. Also, ensure the rising environment is warm enough.
- Buns are too dense: This could be due to overkneading, underproofing, or using too much flour.
- Buns are too dry: This could be due to overbaking or not using enough liquid in the dough.
- Buns are burning on top: Lower the oven temperature slightly or cover the buns with foil during the last few minutes of baking.
Enjoy your delicious homemade buns!

Conclusion:
And there you have it! I truly believe this recipe for homemade buns is a game-changer. Forget those store-bought, often-stale options once you experience the soft, pillowy texture and the incredible flavor of these freshly baked buns, you’ll never go back. The aroma alone, filling your kitchen with warmth and the promise of deliciousness, is worth the effort. But beyond the sensory delight, these buns are simply superior in taste and quality. They’re the perfect blank canvas for any culinary creation you can imagine.
Why is this recipe a must-try? Because it empowers you to create something truly special, something that elevates even the simplest meal. It’s about taking pride in crafting something from scratch, knowing exactly what ingredients went into it, and sharing that love and care with your family and friends. Plus, let’s be honest, there’s a certain satisfaction that comes from mastering a skill like baking your own bread. It’s a confidence booster in the kitchen and a guaranteed crowd-pleaser at any gathering.
But the beauty of this recipe lies not only in its simplicity and deliciousness but also in its versatility. Think beyond the traditional burger bun! These homemade buns are fantastic for sliders, mini sandwiches, or even as a sweet treat when brushed with melted butter and sprinkled with cinnamon sugar.
Serving Suggestions and Variations:
* Burger Night Bliss: Obviously, these buns are perfect for burgers! Try them with classic beef patties, juicy turkey burgers, or even veggie burgers for a satisfying and complete meal. Add your favorite toppings and sauces for a personalized touch.
* Slider Sensations: Scale down the size and create adorable sliders! Fill them with pulled pork, shredded chicken, or mini meatballs for a fun and flavorful appetizer.
* Breakfast Buns: Warm a bun and top it with scrambled eggs, bacon, and cheese for a hearty and delicious breakfast sandwich.
* Sweet Treat Delight: Brush the warm buns with melted butter and sprinkle with cinnamon sugar for a simple yet irresistible dessert. You could even add a drizzle of icing for extra sweetness.
* Herb-Infused Buns: Add a tablespoon of dried herbs like rosemary, thyme, or oregano to the dough for a savory twist.
* Cheese-Stuffed Buns: Before baking, press a small cube of cheese (cheddar, mozzarella, or provolone) into the center of each bun for a cheesy surprise.
* Seed-Topped Buns: Brush the tops of the buns with egg wash and sprinkle with sesame seeds, poppy seeds, or everything bagel seasoning before baking for added texture and flavor.
I’m so excited for you to try this recipe and experience the joy of baking your own homemade buns. Don’t be intimidated the instructions are clear and easy to follow, and the results are well worth the effort. Remember, baking is a journey, not a destination. Embrace the process, have fun, and don’t be afraid to experiment.
Once you’ve made these buns, I’d love to hear about your experience! Did you try any of the variations? What fillings did you use? Share your photos and stories in the comments below. Let’s create a community of bun-baking enthusiasts! Happy baking! I can’t wait to see what you create.
Homemade Buns: The Ultimate Guide to Baking Perfect Buns at Home
Soft, fluffy homemade buns perfect for burgers, sandwiches, or enjoying on their own. This recipe guides you through each step to a golden-brown finish.
Ingredients
- 3 ½ cups (420g) all-purpose flour, plus more for dusting
- ¼ cup (50g) granulated sugar
- 1 teaspoon salt
- 1 packet (2 ¼ teaspoons) active dry yeast
- ¾ cup (180ml) warm milk (105-115°F)
- ¼ cup (60ml) warm water (105-115°F)
- ¼ cup (60ml) unsalted butter, melted
- 1 large egg, lightly beaten
- 1 large egg
- 1 tablespoon milk or water
- Sesame seeds
- Everything bagel seasoning
- Coarse sea salt
Instructions
- Proof the Yeast: In a large bowl, combine the warm milk, warm water, and sugar. Sprinkle the yeast over the mixture and let it sit for 5-10 minutes, or until foamy. If the yeast doesn’t foam, it’s likely dead, and you’ll need to start with a fresh packet.
- Combine Dry Ingredients: In a separate large bowl, whisk together the flour and salt.
- Combine Wet and Dry Ingredients: Pour the yeast mixture and melted butter into the bowl with the dry ingredients. Add the lightly beaten egg.
- Mix the Dough: Using a wooden spoon or a stand mixer fitted with a dough hook, mix the ingredients until a shaggy dough forms. If using a stand mixer, start on low speed and gradually increase to medium speed.
- Knead the Dough: Turn the dough out onto a lightly floured surface. Knead the dough for 8-10 minutes, or until it becomes smooth and elastic. If using a stand mixer, knead the dough with the dough hook for 6-8 minutes. The dough should be slightly tacky but not sticky. If it’s too sticky, add a tablespoon of flour at a time until it reaches the right consistency.
- First Rise: Place the dough in a lightly oiled bowl, turning to coat all sides. Cover the bowl with plastic wrap or a clean kitchen towel. Let the dough rise in a warm place for 1-1.5 hours, or until doubled in size.
- Punch Down the Dough: Gently punch down the risen dough to release the air.
- Divide the Dough: Turn the dough out onto a lightly floured surface. Divide the dough into 8-12 equal pieces, depending on the desired size of your buns.
- Shape the Buns: Shape each piece of dough into a smooth, round ball. To do this, gently stretch the top of the dough and tuck it underneath, pinching the seam to seal. Roll the ball on the counter to create a smooth surface.
- Arrange the Buns: Place the shaped buns on a baking sheet lined with parchment paper, leaving some space between each bun for expansion.
- Second Rise: Cover the baking sheet with plastic wrap or a clean kitchen towel. Let the buns rise in a warm place for 30-45 minutes, or until they have almost doubled in size.
- Preheat the Oven: Preheat your oven to 375°F (190°C). Make sure your oven rack is in the center position.
- Prepare the Egg Wash: In a small bowl, whisk together the egg and milk (or water) for the egg wash.
- Apply the Egg Wash: Gently brush the tops of the risen buns with the egg wash.
- Add Toppings (Optional): Sprinkle the buns with sesame seeds, everything bagel seasoning, or coarse sea salt, if desired.
- Bake the Buns: Bake the buns for 15-20 minutes, or until they are golden brown on top and sound hollow when tapped on the bottom. Keep a close eye on them, as baking times can vary depending on your oven.
- Cool the Buns: Remove the baking sheet from the oven and transfer the buns to a wire rack to cool completely.
Notes
- Use a thermometer to ensure the milk and water are between 105-115°F (40-46°C).
- Don’t overknead the dough.
- A warm, draft-free environment is essential for proper rising.
- Don’t overproof the dough.
- Baking times can vary depending on your oven.
- Store cooled buns in an airtight container at room temperature for up to 3 days, or in the freezer for up to 2 months.
- To reheat frozen buns, thaw them at room temperature and then warm them in a preheated oven at 350°F (175°C) for 5-10 minutes.
- Get creative with your buns! You can add different herbs, spices, or cheeses to the dough. You can also use different toppings.
- To make these buns vegan, substitute the milk with plant-based milk, the butter with vegan butter or oil, and the egg with a flax egg.

Leave a Comment