

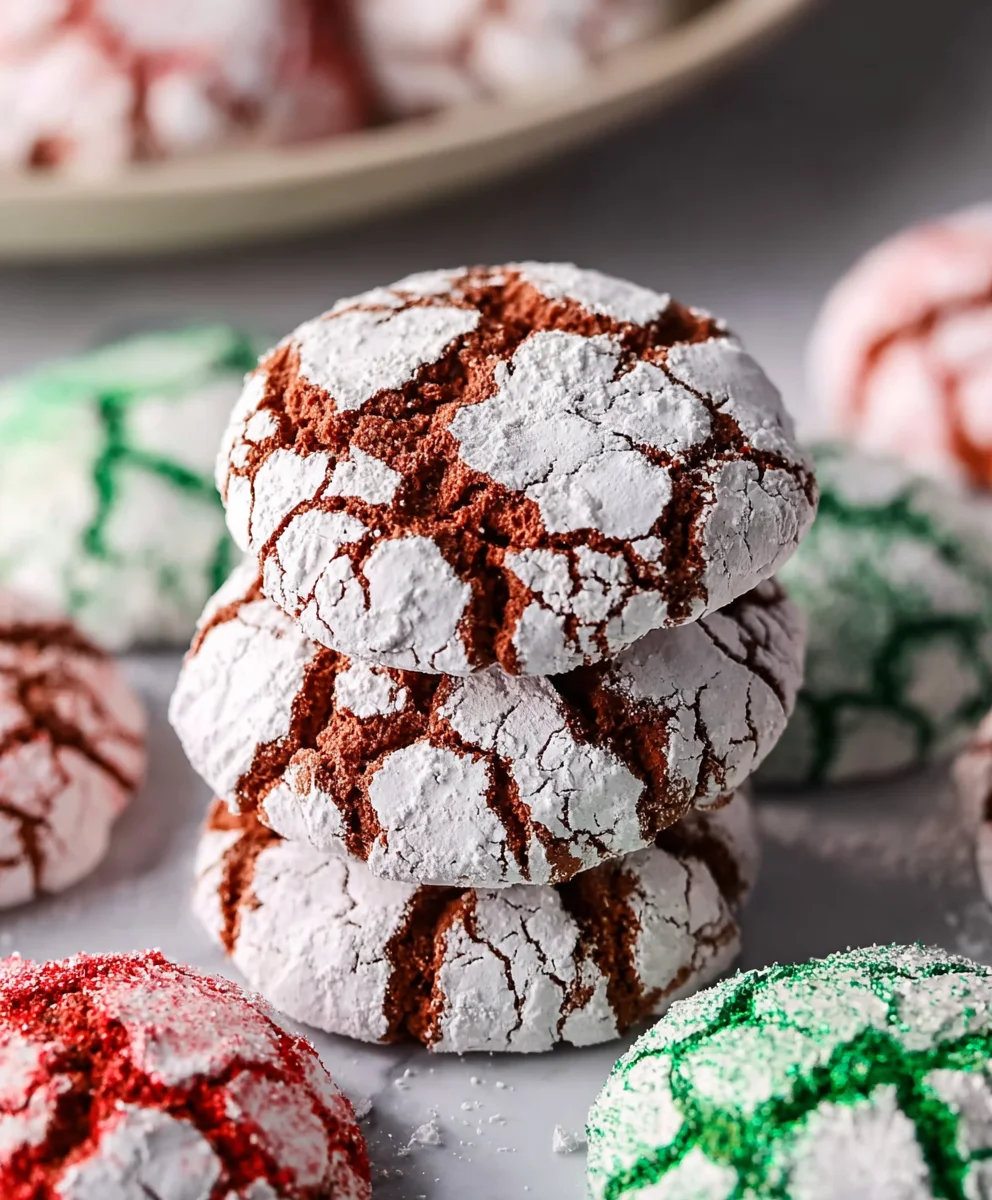
Holiday Crinkle Cookies are more than just a festive treat; they are a cherished tradition, a memory baked into every bite. There’s an undeniable magic that surrounds these powdered sugar-dusted delights during the holiday season. Perhaps it’s the visual appeal – the soft, chewy interior peeking through its snowy coat – that draws us in. Or maybe it’s the comforting sweetness, a perfect balance of sugar and spice that evokes warmth and joy. People adore Holiday Crinkle Cookies because they represent the spirit of giving, of gathering, and of simple, unadulterated happiness. What truly sets this particular Holiday Crinkle Cookies recipe apart is its foolproof simplicity and the incredibly tender, melt-in-your-mouth texture it consistently delivers, making it an instant crowd-pleaser for cookie exchanges, family gatherings, or just a quiet moment of indulgence.

Ingredients:
- 1 box (13.25 ounces) white cake mix
- 2 large eggs
- 1/3 cup olive oil
- 1/3 cup powdered sugar, plus more for rolling
- Red food coloring
- Green food coloring
Preparing the Dough
The foundation of these delightful Holiday Crinkle Cookies lies in a remarkably simple cake mix base. It’s one of the reasons these cookies are so approachable, even for begin extractner bakergin extractTo begin, you’ll need a standard 13.25-ounce box of white cake mix. Pour the entire contents into a large mixing bowl. Next, crack in two large eggs. These will bind the dry ingredients together and contribute to the cookie’s structure. Then, measure out 1/3 cup of olive oil. While some recipes might call for butter, the olive oil in this instance contributes a wonderful moistness and a subtle richness that complements the sweetness. Give these initial ingredients a good mix with a spatula or wooden spoon until they are just combined. Don’t overmix at this stage; we want to avoid developing the gluten too much, which can lead to tougher cookies.
Once the wet and dry ingredients have started to come together, you’ll notice the mixture will be quite stiff and shaggy. This is perfectly normal. Continue to mix until gin extracthick dough begins to form. It might seem a little crum extractbly at first, but keep working it. The goal is to achieve a dough that holds together when pressed. If it feels excessively dry and isn’t coming together at all, you can add another egg yolk or a tablespoon of milk, but typically the proportions provided are spot on.
Dividing and Coloring the Dough
Now comes the fun, festive part! We’re going to divide the dough to create our signature holiday colors. Take your formed dough and divide it roughly in half. Place one half into a separate smaller bowl. To the dough remaining in the larger bowl, add a few drops of red food coloring. Start with about 3-4 drops and mix thoroughly. You’re looking for a vibrant, festive red. If you desire a deeper hue, add another drop or two, mixing well after each addition until you achieve your perfect Christmas red. Remember, food coloring can be quite potent, so it’s always best to add it gradually.
Now, turn your attention to the other half of the dough in the smaller bowl. To this portion, add your green food coloring. Again, start with about 3-4 drops and mix until you have a rich, festive green color. Just like with the red, you can add more coloring if you wish for a more intense shade. The key here is to ensure the color is evenly distributed throughout the dough. Once both doughs are beautifully colored, cover each bowl tightly with plastic wrap. This prevents the dough from drying out while you prepare for the next steps. It’s also a good idea to let the dough chill for about 15-20 minutes in the refrigerator. This makes it much easier to handle and shape, especially when incorporating the two colors.
Shaping the Crinkle Cookies
With your beautifully colored doughs chilled and ready, it’s time to create the iconic crinkle effect. Take the red dough and roll it into small, uniform balls, about ¾ inch in diameter. You can use a cookie scoop for consistency if you have one. Place these red balls on a parchment-lined baking sheet, leaving some space between them as they will spread slightly. Now, do the same with the green dough: roll it into similarly sized balls.
The magic of the crinkle cookie is in how we combine these colors. For each cookie, you will take one red ball and one green ball. Gently press the two colored balls together to form a single, slightly larger ball. You don’t want to completely blend the colors at this point; you want to see distinct swirls of red and green. Once they are pressed together, you can gently roll the combined ball in your hands to make it smooth and round. This slight fusion of colors before coating will create beautiful marbled patterns when the cookie bakes.
Coating and Baking
Before you place your shaped cookie dough balls into the powdered sugar, it’s crucial to get your baking sheets ready. Line two baking sheets with parchment paper. This prevents sticking and makes for easy cleanup. Place the 1/3 cup of powdered sugar into a small bowl. This is what gives the Holiday Crinkle Cookies their signature snowy appearance. Take each combined red and green dough ball and roll it generously in the powdered sugar. Ensure it’s fully coated on all sides. You want a thick, even layer of sugar; this is what will crack and form the crinkles as the cookies bake.
Place the sugar-coated dough balls about 2 inches apart on the prepared baking sheets. They will spread as they bake, and we don’t want them to meld into each other. Preheat your oven to 350 degrees Fahrenheit (175 degrees Celsius). Bake for 9 to 11 minutes. The exact time will depend on your oven and the size of your cookies. You’re looking for the edges to be set and lightly golden, but the centers should still look slightly soft and underbaked. Don’t overbake them, as this will result in dry, hard cookies. The soft centers are key to their chewy texture.
Cooling and Enjoying
Once the baking time is up, carefully remove the baking sheets from the oven. Let the Holiday Crinkle Cookies cool on the baking sheets for about 5 minutes. This initial cooling period on the hot sheet allows them to firm up just enough to be moved without falling apart. After those 5 minutes, use a spatula to carefully transfer the cookies to a wire cooling rack. Allow them to cool completely on the rack. As they cool, you’ll notice the powdered sugar coating develop those characteristic cracks and crinkles, giving them their beautiful, festive appearance.
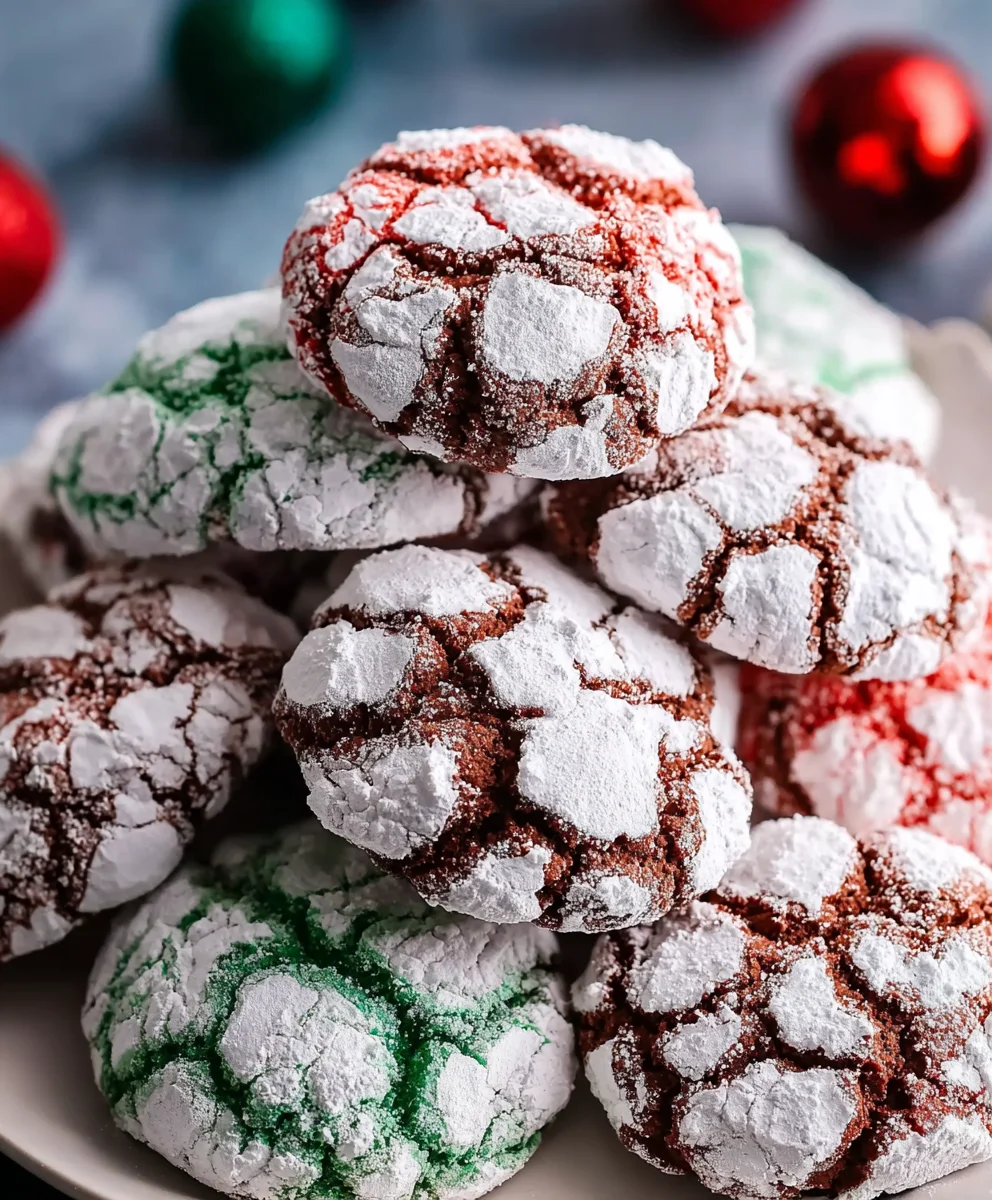
Once completely cool, your Holiday Crinkle Cookies are ready to be enjoyed! They are perfect for holiday cookie platters, for gifting, or simply for enjoying with a glass of milk or a warm beverage. The slightly chewy interior, the crisp outer edge, and the sweet tang from the powdered sugar make these an absolute delight. Store any leftovers in an airtight container at room temperature for up to 3-4 days, though I doubt they’ll last that long!
Conclusion:
There you have it! Your ultimate guide to making delicious Holiday Crinkle Cookies that are sure to impress. We’ve walked through each step, from achieving that perfect crinkled texture to ensuring a delightfully chewy center and a crisp exterior. These Holiday Crinkle Cookies are not just a treat for your taste buds but also a beautiful addition to any festive gathering. They evoke the spirit of the season with their festive appearance and classic, comforting flavor.
Serving these Holiday Crinkle Cookies is an event in itself! They are fantastic on their own with a glass of cold milk, or you can elevate them further by pairing them with hot cocoa or a warm cup of spiced cider. Consider arrangin extractg them on a festive platter alongside other holiday baked goods for a stunning dessert spread. Their cheerful appearance makes them ideal for cookie exchanges, holiday parties, or as homemade gifts for loved ones.
Don’t be afraid to experiment with variations to make these Holiday Crinkle Cookies uniquely yours! You can add a touch of peppermint extract to the dough for a minty twist, or roll the dough balls in colored sanding sugar before baking for an extra pop of color. For a richer flavor, try incorporating a teaspoon of almond extract alongside the vanilla. The possibilities are endless, and the joy of baking is in the personal touch. So go ahead, bake with confidence and spread holiday cheer with every bite!
Frequently Asked Questions:
Why aren’t my Holiday Crinkle Cookies getting that classic crinkled look?
The signature crinkled appearance of Holiday Crinkle Cookies comes from a few key factors. Firstly, chilling the dough is crucial. It allows the fats to solidify, which helps the cookies spread less and encourages the crackling. Secondly, the technique of rolling the dough balls generously in powdered sugar before baking is essential. As the cookies bake and expand, the powdered sugar coating cracks and forms those beautiful crinkles. Ensure your powdered sugar coating is thick and even.
Can I make the dough for these Holiday Crinkle Cookies ahead of time?
Absolutely! The dough for Holiday Crinkle Cookies can be made up to 2-3 days in advance and stored in the refrigerator. Once the dough is made, wrap it tightly in plastic wrap or place it in an airtight container. When you’re ready to bake, let the dough sit at room temperature for about 15-20 minutes to make it easier to scoop and roll. This makes them a perfect make-ahead option for busy holiday schedules.
My Holiday Crinkle Cookies are too flat. What did I do wrong?
If your Holiday Crinkle Cookies are turning out too flat, it could be due to a couple of reasons. Ensure you are not over-creaming the butter and sugar; this can incorporate too much air, causing the cookies to spread excessively. Also, make sure your baking soda and baking powder are fresh, as expired leavening agents can lead to poor lift. Chilling the dough thoroughly, as mentioned in the recipe, is also vital for preventing over-spreading and maintaining a good cookie shape.
Holiday Crinkle Cookies – Easy Festive Treat
Easy and festive holiday crinkle cookies made with a white cake mix base, perfect for any celebration.
Ingredients
-
1 box (13.25 ounces) white cake mix
-
2 large eggs
-
1/3 cup olive oil
-
1/3 cup powdered sugar, plus more for rolling
-
Red food coloring
-
Green food coloring
Instructions
-
Step 1
In a large bowl, combine the white cake mix, 2 large eggs, and 1/3 cup olive oil. Mix until just combined, forming a stiff, shaggy dough that holds together when pressed. -
Step 2
Divide the dough in half. Add a few drops of red food coloring to one half and mix until a vibrant red is achieved. Add green food coloring to the other half and mix until a rich green color is achieved. Cover both doughs and chill for 15-20 minutes. -
Step 3
Roll each colored dough into small, uniform balls (about ¾ inch in diameter). For each cookie, gently press one red ball and one green ball together to form a slightly larger ball, creating swirls. Roll the combined ball gently to smooth and round it. -
Step 4
Place 1/3 cup of powdered sugar in a small bowl. Generously roll each combined dough ball in the powdered sugar until fully coated. Place the sugar-coated balls about 2 inches apart on parchment-lined baking sheets. -
Step 5
Preheat oven to 350°F (175°C). Bake for 9-11 minutes, or until the edges are set and lightly golden, and the centers are still slightly soft. -
Step 6
Let the cookies cool on the baking sheets for 5 minutes, then carefully transfer them to a wire rack to cool completely. The powdered sugar will develop crinkles as they cool.
Important Information
Nutrition Facts (Per Serving)
It is important to consider this information as approximate and not to use it as definitive health advice.
Allergy Information
Please check ingredients for potential allergens and consult a health professional if in doubt.

Leave a Comment