

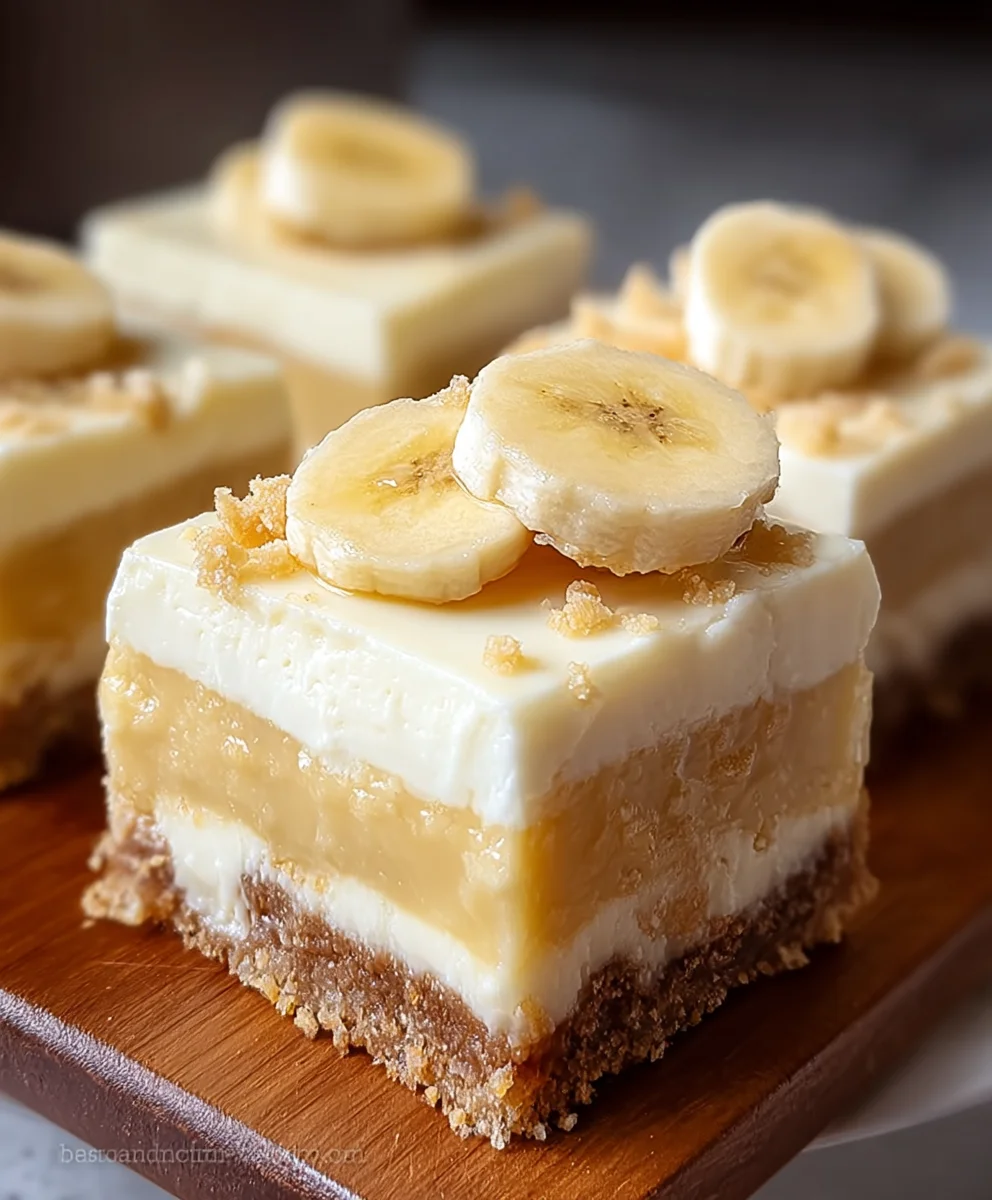
Banana Pudding Cheesecake Bars are not merely a dessert; they are an invitation to experience pure culinary delight. Imagine the comforting embrace of classic Southern banana pudding, with its creamy texture and sweet, ripe banana essence, perfectly fused with the tangy, rich decadence of a New York-style cheesecake. This ingenious fusion takes two universally adored treats and elevates them into a portable, shareable delight that promises to captivate your taste buds.
While traditional banana pudding holds a cherished spot in Southern American culinary history, often gracing family gatherings and potlucks with its nostalgic charm, cheesecake boasts its own ancient lineage, dating back to Greek antiquity. We’ve combined these timeless favorites to create something truly extraordinary. People adore this dish for its irresistible blend of flavors – the sweet, tender bananas, the velvety smooth cheesecake, and the delightful crunch of a vanilla wafer crust, all in one harmonious bite.
The convenience of serving these as bars, rather than individual slices or scoops, makes them an ideal choice for entertaining or simply enjoying a sophisticated treat with less fuss. Preparing your own Banana Pudding Cheesecake Bars means you’re creating a dessert that is both nostalgic and innovative, promising to be a showstopper at any occasion.

Ingredients:
- For the Nilla Wafer Crust:
- 2 ½ cups (about one 11-ounce box) Nilla Wafers, finely crushed
- ½ cup (1 stick or 113g) unsalted butter, melted
- ¼ cup (50g) granulated sugar
- For the Creamy Cheesecake Layer:
- 24 ounces (three 8-ounce blocks) full-fat cream cheese, softened to room temperature
- 1 cup (200g) granulated sugar
- 3 large eggs, at room temperature
- ½ cup (120g) full-fat sour cream, at room temperature
- 1 teaspoon pure vanilla extract
- ½ teaspoon banana extract (optional, but highly recommended for an extra punch of banana flavor)
- For the Velvety Banana Pudding Layer:
- 2 (3.4 ounce) boxes instant vanilla pudding mix (not cook and serve)
- 3 cups cold whole milk
- 1 teaspoon pure vanilla extract
- 1 (8 ounce) container frozen whipped topping (like Cool Whip), thawed
- For Assembly and Garnish:
- 3-4 medium ripe bananas, sliced (I like to have a few extra on hand just in case!)
- 1 cup reserved Nilla Wafer crumbs or whole Nilla Wafers for topping
- Additional whipped topping or freshly whipped cream for serving, if desired
Preparing the Golden Nilla Wafer Crust
Ah, the foundation of our magnificent Banana Pudding Cheesecake Bars! This crust is simple, buttery, and provides that perfect crunch against the creamy layers. Trust me, it’s going to be absolutely divine.
- First things first, let’s get our oven ready. Preheat your oven to 350°F (175°C). While that’s heating up, grab a 9×13 inch baking pan. This size is ideal for beautiful, generously sized bars. I always like to line mine with parchment paper, leaving an overhang on the longer sides. This little trick makes lifting the cooled bars out of the pan an absolute breeze, ensuring neat and tidy squares. A light spray with non-stick cooking spray before the parchment doesn’t hurt either, just for extra insurance!
- Now, for our Nilla Wafers. You’ll need them finely crushed. You can achieve this in a couple of ways: my favorite method is using a food processor for a super fine, even crumb. Just pulse them until they resemble fine sand. If you don’t have a food processor, no worries at all! Pop the wafers into a large Ziploc bag, seal it well (expelling as much air as possible), and then go to town with a rolling pin or the bottom of a heavy pan. It’s a bit more of an arm workout, but equally effective! Once crushed, measure out 2 ½ cups of these delightful crumbs into a medium mixing bowl.
- Melt your unsalted butter. You can do this in the microwave in short bursts, stirring frequently, or gently on the stovetop. The key is to melt it completely without browning it. Pour the melted butter over your Nilla Wafer crumbs in the bowl. Add the ¼ cup of granulated sugar to the mixture as well.
- Stir everything together thoroughly with a spoon or your hands until all the crumbs are evenly moistened and the sugar is incorporated. It should feel like wet sand, holding together when you squeeze a small amount in your hand. This ensures a cohesive crust.
- Next, press the crumb mixture firmly and evenly into the bottom of your prepared 9×13 inch baking pan. I like to use the bottom of a flat-bottomed measuring cup or a glass to really compact it down. A tightly packed crust is a sturdy crust, essential for holding up all those delicious layers of our Banana Pudding Cheesecake Bars.
- Bake the crust in your preheated oven for 8-10 minutes. We’re looking for it to be lightly golden and fragrant. Baking it for just a short period helps to set it, preventing a soggy crust later on. Once baked, remove it from the oven and set it aside to cool completely on a wire rack while we prepare our decadent cheesecake layer. A cool crust is crucial before adding the cheesecake batter.
Crafting the Creamy Cheesecake Layer
This is where the magic really happens for our Banana Pudding Cheesecake Bars! A rich, velvety cheesecake layer that is perfectly balanced and utterly irresistible. The key here is patience and room temperature ingredients.
- Before you even think about mixing, make sure your cream cheese, eggs, and sour cream are all at room temperature. This is not just a suggestion; it’s a critical step for a smooth, lump-free cheesecake batter. Cold ingredients will result in a lumpy batter and can also lead to overmixing, which we want to avoid. I usually take them out of the fridge at least an hour or two before I plan to bake.
- In the bowl of a stand mixer fitted with the paddle attachment, or using a large bowl with a handheld electric mixer, beat the softened cream cheese on medium-low speed until it is completely smooth and creamy. This should take about 2-3 minutes. Make sure to scrape down the sides and bottom of the bowl frequently to ensure there are no unmixed lumps. We want it absolutely silken before adding anything else.
- Gradually add the 1 cup of granulated sugar to the cream cheese, continuing to beat on medium-low speed. Mix until the sugar is fully incorporated and the mixture is light and fluffy, about another 2-3 minutes. Again, scrape down the bowl to ensure everything is evenly combined.
- Reduce the mixer speed to low. Add the eggs one at a time, mixing just until each egg is incorporated before adding the next. It’s vital not to overmix at this stage! Overmixing incorporates too much air, which can cause the cheesecake to puff up too much during baking and then crack as it cools. We’re aiming for a dense, creamy texture, not an airy cake.
- Stir in the ½ cup of room temperature sour cream, 1 teaspoon of pure vanilla extract, and if you’re feeling adventurous (which I highly recommend for these Banana Pudding Cheesecake Bars!), the ½ teaspoon of banana extract. Mix on low speed just until everything is combined and the batter is smooth. Give it one final scrape of the bowl with a spatula to catch any unmixed bits at the bottom.
- Pour the cheesecake batter evenly over the cooled Nilla Wafer crust in your prepared baking pan. Gently tap the pan on the counter a few times to release any large air bubbles and help settle the batter.
- Bake in your preheated 350°F (175°C) oven for approximately 30-35 minutes. You’re looking for the edges to be set, but the center should still have a slight jiggle when you gently shake the pan. This indicates it’s cooked through but still moist. Keep an eye on it – ovens vary!
- Once baked, turn off the oven and leave the cheesecake inside with the oven door propped open a crack (you can use a wooden spoon to keep it ajar) for about 1 hour. This slow cooling process helps prevent cracking. After an hour, remove the cheesecake from the oven and let it cool completely on a wire rack at room temperature. This can take another 1-2 hours.
- Once fully cooled to room temperature, cover the pan loosely with plastic wrap and transfer the cheesecake to the refrigerator to chill for at least 4-6 hours, or ideally overnight. A thoroughly chilled cheesecake is much easier to slice and will hold its structure beautifully for our final layers of the Banana Pudding Cheesecake Bars. Patience is a virtue, especially with cheesecake!
Assembling the Velvety Banana Pudding Layer and Final Touches
Now for the iconic banana pudding element that truly makes these our signature Banana Pudding Cheesecake Bars! This layer adds a luscious, creamy texture and that unmistakable banana pudding flavor we all adore.
- Once your cheesecake layer is perfectly chilled and firm (this is key!), it’s time to prepare our banana pudding. In a large mixing bowl, whisk together the two boxes of instant vanilla pudding mix and the 3 cups of cold whole milk. Whisk continuously for about 2-3 minutes, or until the mixture begins to thicken significantly. It should be quite thick and glossy. Stir in the 1 teaspoon of pure vanilla extract for that extra boost of classic flavor.
- Gently fold in the thawed whipped topping. I use a rubber spatula for this, carefully incorporating the whipped topping into the pudding mixture until no streaks remain. Be delicate; we want to maintain that airy lightness from the whipped topping. This step makes the pudding layer extra fluffy and creamy, elevating our Banana Pudding Cheesecake Bars to dessert heaven.
- Evenly spread this velvety banana pudding mixture over the chilled cheesecake layer. Use an offset spatula or the back of a spoon to create a smooth, beautiful top.
- Now for the stars of the show: the bananas! Slice your ripe bananas into ¼-inch thick rounds. I like to arrange them in a single, even layer over the banana pudding. You can place them close together, slightly overlapping, to ensure every bar gets a good banana bite. If you’re concerned about browning, a very light brush of lemon juice can help, but for these bars, I find the quick consumption usually prevents any noticeable discoloration!
- Finally, sprinkle your reserved 1 cup of Nilla Wafer crumbs or strategically place whole Nilla Wafers over the banana layer. This adds another layer of texture and that familiar Nilla Wafer taste we love in traditional banana pudding.
- Cover the pan loosely with plastic wrap and return the Banana Pudding Cheesecake Bars to the refrigerator to chill for at least another 2-4 hours. This chilling time is essential for all the layers to set properly, meld their flavors, and become firm enough for clean slicing. Trust me, the wait is worth it for perfectly structured bars.
Serving and Storage Tips for Your Delicious Bars
The moment has arrived! After all that patient waiting, it’s time to slice into these incredible Banana Pudding Cheesecake Bars and enjoy the fruits of your labor. Here’s how to ensure a perfect presentation and keep them fresh.
- Once fully chilled, remove the pan from the refrigerator. If you used parchment paper with an overhang, simply lift the entire block of bars out of the pan and place it on a cutting board. This makes slicing incredibly easy and prevents any damage to the pan.
- For clean slices, I recommend using a long, sharp knife. For best results, run the knife under hot water for a few seconds and wipe it dry between each cut. This will give you beautifully crisp edges. You can cut them into 12 generous bars (3×4) or smaller squares if you’re serving a crowd.
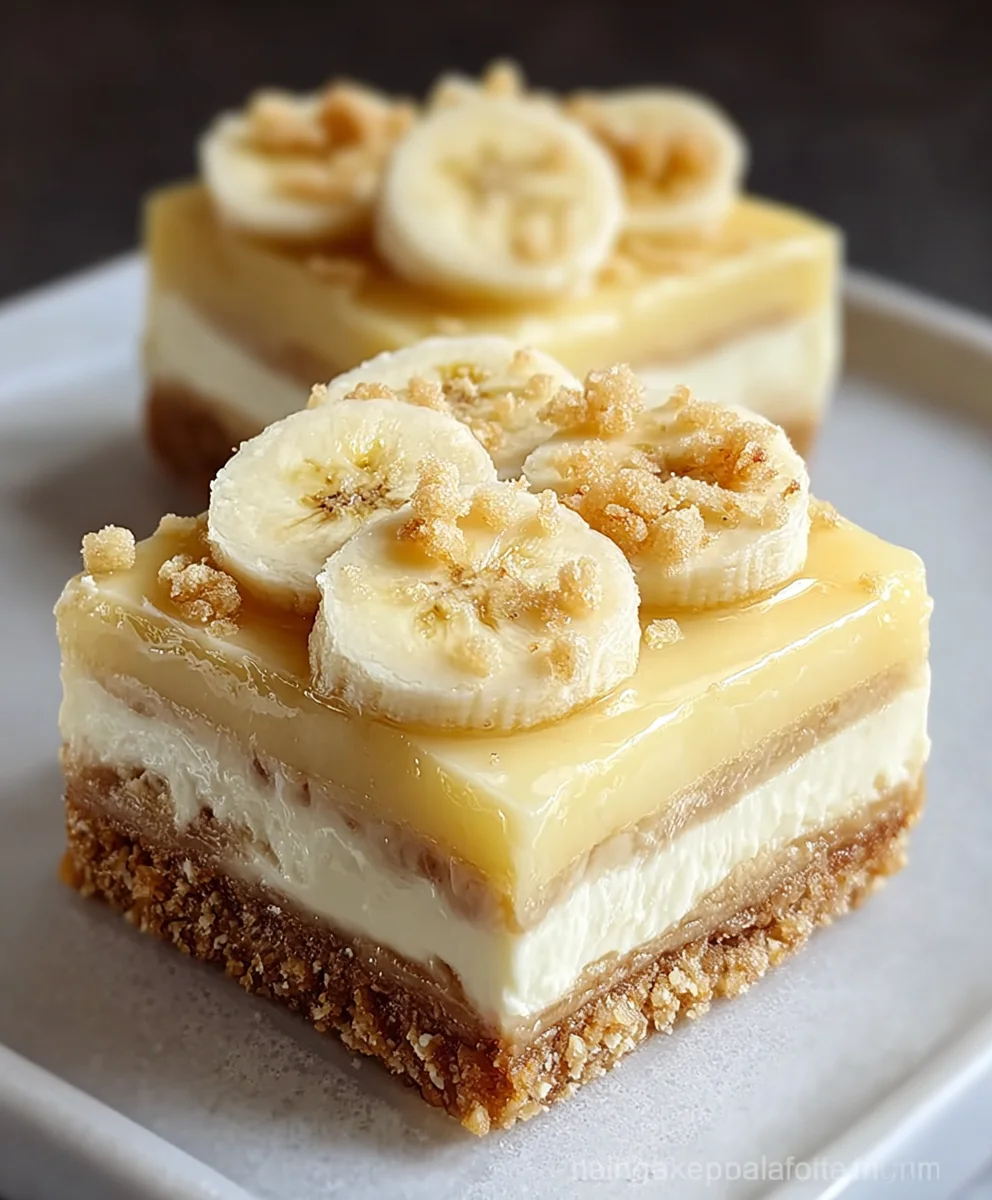
- Serve your Banana Pudding Cheesecake Bars chilled. You can serve them as is, or for an extra touch of indulgence, top each bar with a dollop of fresh whipped cream or additional thawed whipped topping just before serving. A few extra Nilla Wafer crumbs or a tiny banana slice as a garnish truly makes them pop!
- Storage: These glorious bars are best enjoyed within 3-4 days. Store any leftovers in an airtight container in the refrigerator. The bananas can start to brown over time, so while they’re still delicious, they look their freshest within the first day or two.
There you have it! A truly magnificent dessert that combines two beloved classics into one irresistible treat. These Banana Pudding Cheesecake Bars are sure to be a crowd-pleaser and a new favorite in your recipe collection. Enjoy every single creamy, dreamy bite!
Conclusion:
Well, my friends, we’ve reached the sweet culmination of our culinary journey, and I genuinely hope you’re as excited as I am about the prospect of sinking your teeth into this incredible creation. There are desserts, and then there are Banana Pudding Cheesecake Bars – a truly extraordinary treat that transcends expectations and delivers a symphony of flavors and textures in every single bite. This isn’t just another recipe to add to your collection; it’s an experience, a delightful fusion that takes two beloved classics and elevates them into something new, exciting, and utterly unforgettable. I’ve poured my heart into perfecting this recipe, and I’m convinced it’s going to become a staple in your dessert repertoire, one that you’ll be proud to share and even prouder to devour.
Why These Bars Are an Absolute Must-Try:
Let’s talk about why these bars are destined to become your new favorite. Imagine the comforting, creamy lusciousness of traditional banana pudding, brimming with ripe banana slices and tender vanilla wafers, perfectly intertwined with the rich, tangy, and silky-smooth texture of a classic cheesecake. Now, picture all of that resting on a perfectly golden, buttery, and slightly crunchy Nilla wafer crust that provides just the right amount of contrast. It’s a masterful blend of creamy, dreamy, and crumbly, creating a textural paradise that keeps you coming back for more. Every spoonful, every forkful, offers that perfect balance – the sweet bananas, the subtle vanilla, the rich cream cheese, all harmonizing beautifully. It’s a dessert that speaks to your soul, evoking memories of childhood comfort while simultaneously offering the sophisticated indulgence of a gourmet cheesecake. It’s undeniably impressive to look at, yet remarkably straightforward to make, making it the ideal choice for any occasion, big or small. Trust me when I say, once you taste the exquisite balance of flavors and the divine interplay of textures, you’ll understand why these bars have earned a permanent spot on my “absolute favorites” list.
Elevate Your Experience with Serving Suggestions and Creative Variations:
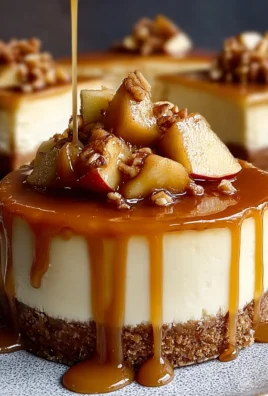
While these Banana Pudding Cheesecake Bars are utterly perfect just as they are, there are always ways to personalize your experience and impress your guests even further. For a simple yet elegant presentation, a dollop of freshly whipped cream on top of each bar before serving adds a cloud-like lightness and a touch of extra indulgence. A dusting of cinnamon or a sprinkle of finely crushed Nilla wafers can also add a beautiful visual appeal and an extra layer of flavor and texture. If you’re feeling a little adventurous, a drizzle of warm caramel sauce or a delicate zig-zag of chocolate ganache can transform these bars into a truly decadent showstopper. For those who enjoy a little extra richness, consider swirling a small amount of dulce de leche or a touch of peanut butter through the cheesecake batter before baking for an unexpected but delightful twist.
Thinking beyond the standard bar format, these are incredibly versatile. You could easily prepare them in individual ramekins or small dessert cups, layering the crust, cheesecake, and banana pudding mixture to create charming, personalized servings perfect for a dinner party. Imagine a mini banana pudding cheesecake parfait – how delightful! For a different textural experience, experiment with your crust. While Nilla wafers are classic, a graham cracker crust or even a crushed gingersnap crust could offer an exciting new dimension of flavor. And don’t shy away from adding a touch of a complementary liqueur, like a hint of banana liqueur or even a splash of rum, to your banana pudding layer for an adult-friendly version that truly shines. Remember, the kitchen is your playground, and these suggestions are just starting points to inspire your own culinary creativity!
Your Culinary Adventure Awaits!
Now that you’ve got all the secrets to crafting these magnificent bars, there’s only one thing left to do: roll up your sleeves and dive into this delightful project! I promise you, the effort is minimal compared to the incredible reward you’ll reap. The joy of pulling a perfectly golden, aromatic pan of these beauties from your oven is truly unparalleled, and the smiles you’ll bring to the faces of your family and friends will be priceless. Don’t hesitate, don’t overthink it – just gather your ingredients and embark on this delicious journey. I am genuinely excited for you to experience the magic of these Banana Pudding Cheesecake Bars firsthand. Once you’ve had a chance to bake and taste them, I would absolutely love to hear all about your experience! Did you try any of the variations? What was your favorite part? Please, share your thoughts, your successes, and even your creative twists in the comments below. Better yet, snap a photo of your magnificent creation and share it with me and the community! Happy baking, and get ready to fall in love with your new favorite dessert!
Banana Pudding Cheesecake Bars
Experience pure culinary delight with Banana Pudding Cheesecake Bars. This fusion combines the comforting embrace of classic Southern banana pudding, made with ripe bananas for pronounced flavor, with the tangy richness of New York-style cheesecake, creating a portable, shareable treat that promises to captivate your taste buds.
Ingredients
-
2 ½ cups Nilla Wafers, finely crushed
-
½ cup unsalted butter, melted
-
¼ cup granulated sugar (for crust)
-
24 ounces full-fat cream cheese, softened
-
1 cup granulated sugar (for cheesecake)
-
3 large eggs, room temperature
-
½ cup full-fat sour cream, room temperature
-
1 tsp pure vanilla extract (for cheesecake)
-
½ tsp banana extract (optional)
-
2 (3.4 oz) instant vanilla pudding mix
-
3 cups cold whole milk
-
1 tsp pure vanilla extract (for pudding)
-
1 (8 oz) container frozen whipped topping, thawed
-
3-4 medium ripe bananas, sliced
-
1 cup reserved Nilla Wafer crumbs or whole Nilla Wafers (for topping)
-
Additional whipped topping or freshly whipped cream (optional, for serving)
Instructions
-
Step 1
Preheat oven to 350°F (175°C). Line a 9×13 inch pan. Combine 2 ½ cups crushed Nilla Wafers, ½ cup melted butter, and ¼ cup sugar. Press firmly into the pan. Bake 10 minutes until golden, then cool completely. -
Step 2
Ensure cream cheese, eggs, and sour cream are at room temperature. In a stand mixer, beat softened cream cheese until smooth. Gradually add 1 cup sugar and beat until fluffy. On low speed, mix in eggs one at a time, then sour cream, 1 tsp vanilla extract, and optional ½ tsp banana extract until just combined. -
Step 3
Pour batter over the cooled crust. Bake at 350°F (175°C) for 30-35 minutes, until edges are set and the center jiggles slightly. Turn off oven, leave door ajar for 1 hour, then cool completely on a wire rack. Refrigerate 4-6 hours or overnight until firm. -
Step 4
Whisk 2 boxes instant vanilla pudding mix with 3 cups cold whole milk and 1 tsp vanilla extract until thick. Gently fold in 1 (8 oz) container thawed whipped topping. -
Step 5
Spread the pudding mixture evenly over the chilled cheesecake layer. Top with 3-4 medium sliced ripe bananas, then sprinkle with 1 cup reserved Nilla Wafer crumbs or whole wafers. -
Step 6
Cover and refrigerate for at least 2-4 hours to set all layers completely. -
Step 7
Lift bars from the pan. Slice with a hot, clean knife for best results. Serve chilled, optionally with extra whipped cream. Store leftovers in an airtight container in the refrigerator for 3-4 days.
Important Information
Nutrition Facts (Per Serving)
It is important to consider this information as approximate and not to use it as definitive health advice.
Allergy Information
Please check ingredients for potential allergens and consult a health professional if in doubt.
Leave a Comment