

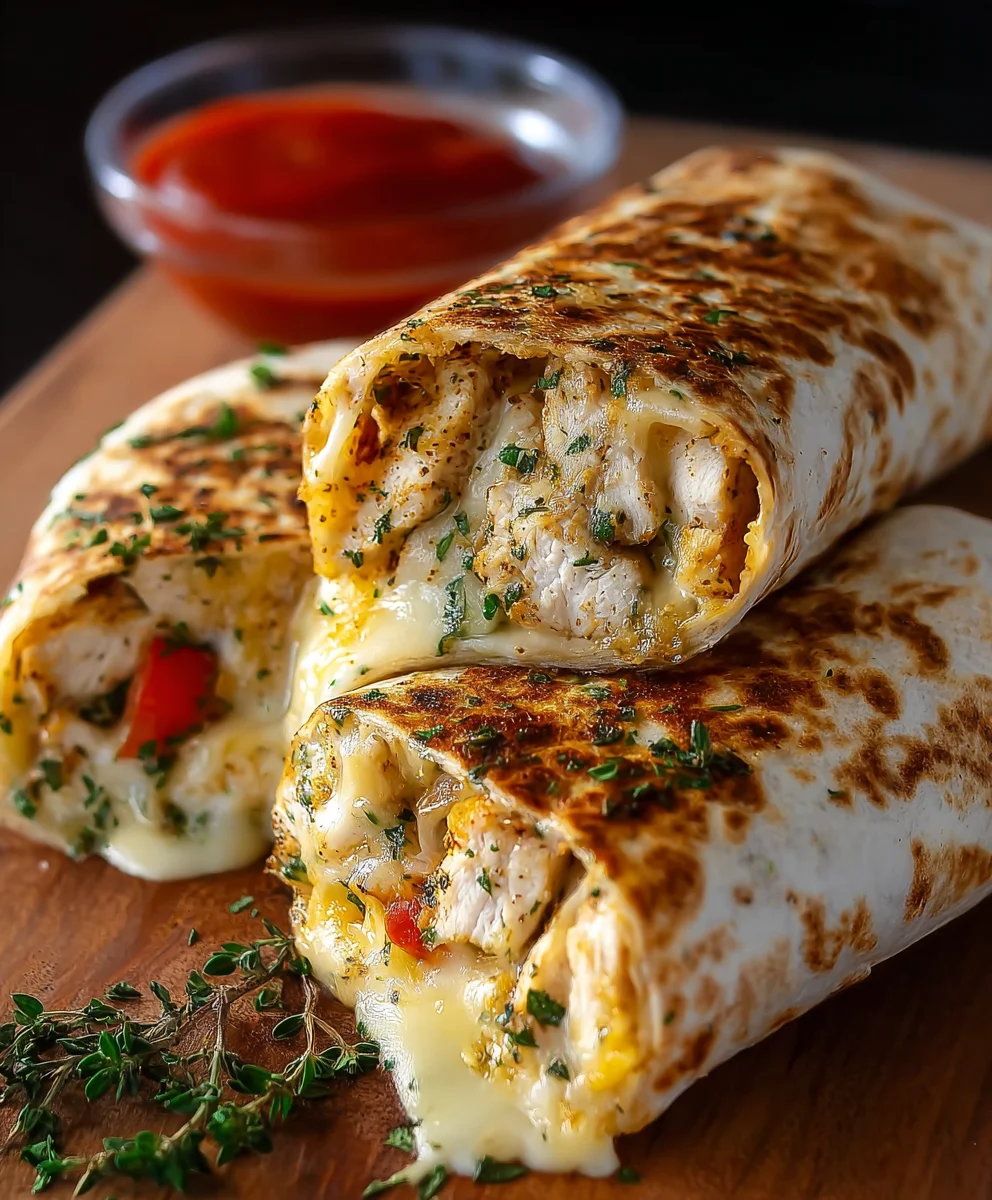
Cheesy Garlic Chicken Wraps are more than just a meal; they’re an experience waiting to delight your taste buds, transforming a simple lunch or dinner into something truly extraordinary. I often find myself craving that perfect combination of tender, succulent chicken, infused with aromatic garlic, and generously melded with bubbling, golden cheese, all hugged by a warm, pliable tortilla. It’s a symphony of flavors and textures that simply never disappoints.
While perhaps not steeped in centuries of tradition like some culinary masterpieces, this dish represents the best of modern comfort food: a delicious fusion designed for convenience without compromising on flavor. The individual elements – juicy chicken, pungent garlic, and creamy cheese – are universally adored, and bringing them together in a portable wrap format speaks to our contemporary need for satisfying, on-the-go deliciousness. It’s the ultimate answer to those weeknight dinner dilemmas or the perfect packed lunch, offering a comforting warmth and a burst of flavor in every single bite.
Why This Dish Becomes an Instant Favorite
This recipe offers incredible versatility, allowing for slight variations to suit any palate, and is surprisingly quick to prepare. I believe you’ll soon understand why Cheesy Garlic Chicken Wraps have become a beloved staple in so many households, offering a delightful and irresistible twist on everyday chicken meals. Prepare to fall in love with this incredibly satisfying creation.

Ingredients:
- For the Cheesy Garlic Chicken:
- 2 lbs boneless, skinless chicken thighs or breasts, trimmed
- 6-8 large cloves garlic, finely minced (we’re going big on garlic here!)
- 4 tablespoons unsalted butter, divided
- 2 tablespoons olive oil
- 1 teaspoon smoked paprika
- 1/2 teaspoon onion powder
- 1/2 teaspoon garlic powder (yes, more garlic!)
- 1/4 teaspoon cayenne pepper (optional, for a little kick)
- 1 teaspoon dried oregano
- 1 teaspoon salt, or to taste
- 1/2 teaspoon black pepper, freshly ground
- 1 tablespoon Worcestershire sauce
- 1 cup shredded mozzarella cheese
- 1/2 cup shredded sharp cheddar cheese (or your favorite blend for maximum cheesiness)
- 2 tablespoons fresh parsley, chopped, for garnish and flavor
- For the Creamy Garlic Herb Sauce:
- 1/2 cup mayonnaise (I prefer a good quality full-fat mayo for richness)
- 1/4 cup sour cream (or Greek yogurt for a lighter option)
- 2 cloves garlic, finely minced (yes, even more garlic – it’s a theme!)
- 2 tablespoons fresh chives, finely chopped
- 1 tablespoon fresh parsley, finely chopped
- 1 tablespoon fresh lemon juice (for brightness and tang)
- 1/2 teaspoon onion powder
- Salt and black pepper to taste
- A pinch of red pepper flakes (optional, for a subtle warmth)
- For Assembling the Wraps:
- 8 large flour tortillas (burrito size, about 10-12 inches)
- 1 cup fresh spinach or mixed greens (optional, for a fresh crunch and color)
- 1/4 cup thinly sliced red onion (optional, for a pungent bite)
- Additional shredded cheese for sprinkling (optional, if you’re like me and love extra cheese)
Preparing the Cheesy Garlic Chicken
This is where the magic begins for our delicious Cheesy Garlic Chicken Wraps! We’re going to ensure our chicken is incredibly flavorful, tender, and perfectly infused with that irresistible garlic and cheese combination.
- Prepare the Chicken: First things first, take your chicken thighs or breasts and pat them thoroughly dry with paper towels. This is a crucial step that helps achieve a beautiful sear and ensures our seasonings adhere properly. If you’re using chicken breasts, I recommend slicing them horizontally into thinner cutlets, about 1/2 inch thick, or pounding them to an even thickness. This ensures they cook evenly and quickly, preventing dry spots. For chicken thighs, their natural tenderness usually means less prep.
- Marinate the Chicken: In a medium bowl, combine your olive oil, Worcestershire sauce, smoked paprika, onion powder, garlic powder, cayenne pepper (if using), dried oregano, 1 teaspoon of salt, and 1/2 teaspoon of black pepper. Add about half of your finely minced garlic from the “Cheesy Garlic Chicken” section (approximately 3-4 cloves worth) to this mixture. This initial infusion of garlic will penetrate the chicken as it marinates, building a deep flavor foundation. Toss the chicken in this glorious spice and oil mixture, making sure every piece is well coated. Cover the bowl and let it marinate in the refrigerator for at least 30 minutes. If you have more time, an hour or even overnight will truly enhance the flavors, making your chicken incredibly tender and juicy for these Cheesy Garlic Chicken Wraps.
- Cook the Chicken: When you’re ready to cook, heat 1 tablespoon of butter and 1 tablespoon of olive oil in a large skillet or cast-iron pan over medium-high heat. You want the pan to be nice and hot, but not smoking. Once the butter is melted and shimmering, carefully add the marinated chicken to the pan in a single layer, being careful not to overcrowd it. If your pan isn’t large enough, work in batches to ensure the chicken sears rather than steams. Let the chicken cook undisturbed for 4-6 minutes per side, depending on thickness, until it develops a beautiful golden-brown crust and is cooked through to an internal temperature of 165°F (74°C). This searing creates fantastic flavor and texture. Once cooked, transfer the chicken to a cutting board and let it rest for a few minutes. Resting is key! It allows the juices to redistribute, ensuring your chicken stays moist and tender.
- Shred or Dice the Chicken: While the chicken is still warm, use two forks to shred it into bite-sized pieces. Alternatively, you can dice it into small cubes. I personally love the shredded texture for wraps as it integrates seamlessly with the other fillings. Set the shredded chicken aside in a large bowl.
- Create the Garlic Butter Base: Now, let’s infuse that chicken with even more garlic and cheese! In the same skillet you used to cook the chicken (no need to clean it, those browned bits are flavor!), melt the remaining 3 tablespoons of unsalted butter over medium heat. Add the remaining finely minced garlic (the other 3-4 cloves worth). Sauté the garlic for about 1-2 minutes until it becomes incredibly fragrant and slightly softened, but be careful not to burn it – burnt garlic can be bitter!
- Combine with Cheese: Reduce the heat to low. Add your shredded mozzarella and cheddar cheeses to the garlic butter in the skillet. Stir gently until the cheeses are just starting to melt and become gooey.
- Mix the Cheesy Garlic Chicken: Immediately add the shredded cooked chicken back into the skillet with the melting cheese and garlic butter. Toss everything together using tongs or a spatula until the chicken is thoroughly coated in the cheesy, garlicky goodness. The cheese will melt beautifully around the warm chicken, creating those irresistible pulls of stringy goodness we all love. Stir in the fresh chopped parsley at this stage for a burst of freshness and color. Taste and adjust seasoning if needed – perhaps a little more salt or pepper. This savory, aromatic Cheesy Garlic Chicken mixture is the heart of our wraps!
Crafting the Creamy Garlic Herb Sauce
Every great wrap needs a fantastic sauce, and for our Cheesy Garlic Chicken Wraps, we’re making a creamy, zesty, and herb-packed concoction that perfectly complements the rich chicken. It’s simple yet utterly transformative!
- Combine Wet Ingredients: In a small mixing bowl, scoop in your mayonnaise and sour cream (or Greek yogurt). These form the creamy base of our sauce, providing a wonderful tang and richness.
- Add the Aromatics and Herbs: To the creamy base, add the two finely minced cloves of garlic. Fresh garlic here is paramount; it provides a vibrant, sharp kick that balances the richness. Next, stir in your finely chopped fresh chives and fresh parsley. These herbs not only add beautiful flecks of green but also contribute an incredible aromatic freshness.
- Introduce Brightness and Spice: Squeeze in the fresh lemon juice. This is a game-changer! The acidity from the lemon cuts through the richness of the mayo and chicken, lifting all the flavors. Add the onion powder and a pinch of red pepper flakes (if desired) for a subtle warmth that lingers on the palate.
- Season and Mix: Season the sauce generously with salt and freshly ground black pepper. Start with a quarter teaspoon of each, then stir everything together thoroughly until all the ingredients are well combined and the sauce is smooth.
- Taste and Adjust: Now for the best part – taste testing! Dip a small spoon in and adjust the seasoning as needed. Do you want it tangier? Add a tiny bit more lemon juice. Need more garlic punch? A touch more minced garlic can be added (though consider letting it sit for a few minutes for the flavor to meld). Does it need more salt or pepper? Don’t be shy. This sauce should be vibrant and flavorful on its own, ready to elevate every bite of your Cheesy Garlic Chicken Wraps.
Assembling the Perfect Cheesy Garlic Chicken Wraps
Now that we have our star components ready – the irresistible Cheesy Garlic Chicken and the creamy, zesty herb sauce – it’s time to bring it all together into beautiful, hearty wraps. This step is about layering for maximum flavor and texture in every single bite.
-
Warm the Tortillas: This is a crucial step for pliable, easy-to-roll wraps that won’t crack. You have a few options:
- Microwave: Stack 2-3 tortillas and microwave for 15-20 seconds until warm and soft.
- Dry Skillet: Heat a dry skillet over medium-high heat. Place one tortilla at a time in the skillet for 15-20 seconds per side, until it becomes soft and pliable, with a few light brown spots.
- Oven: Wrap a stack of tortillas in foil and warm in a preheated oven at 300°F (150°C) for 10-15 minutes.
Keep the warmed tortillas covered with a clean kitchen towel to retain their heat and flexibility as you assemble.
- Lay Out Your Tortilla: Place a warmed tortilla on a clean, flat surface. Imagine dividing the tortilla into three sections horizontally. We’ll be placing our fillings mainly in the middle section.
- Spread the Sauce: Take about 1-2 tablespoons of your delicious Creamy Garlic Herb Sauce and spread it evenly over the center of the tortilla, leaving about an inch clear from the edges. This sauce layer is going to add moisture, flavor, and act as a wonderful adhesive for our fillings.
- Add Optional Freshness: If you’re using fresh spinach or mixed greens, layer a small handful over the sauce. This adds a lovely crunch, a vibrant color, and a fresh contrast to the rich chicken. If using, a few slices of red onion can go on top for a delightful bite.
- Pile on the Cheesy Garlic Chicken: Now for the main event! Spoon a generous portion (about 1/2 to 3/4 cup, depending on how stuffed you like your wraps) of the warm, Cheesy Garlic Chicken onto the center of the greens. Make sure it’s distributed somewhat evenly in a line across the middle of the tortilla, not too close to the edges.
- Optional Extra Cheese: If you’re a true cheese lover (and who isn’t when it comes to “Cheesy Garlic Chicken Wraps”?), sprinkle a little extra shredded cheese directly over the chicken now. This will melt beautifully when we cook the wraps.
-
Master the Fold: This is the key to a neat, portable wrap.
- Fold in the Sides: Take the left and right edges of the tortilla and fold them inwards, over the filling, by about 1-2 inches. This creates a neat pocket that will prevent filling from escaping.
- Roll from the Bottom: Starting from the bottom edge of the tortilla (the one closest to you), tightly fold it up and over the filling. Tuck it in firmly to create a snug roll.
- Continue Rolling: Continue to roll the wrap upwards, maintaining a firm but not overly tight grip, until you reach the top edge. You should have a neatly wrapped, cylindrical parcel of deliciousness. Repeat this process for all remaining tortillas and filling.
Cooking the Wraps to Golden Perfection (Optional but Recommended)
While you can absolutely enjoy these Cheesy Garlic Chicken Wraps as-is, lightly pan-frying or toasting them takes them to a whole new level. It creates a gloriously crispy exterior, warms the fillings through, and perfectly melts any added cheese, making for an even more satisfying experience.
- Prepare Your Pan: Heat a large non-stick skillet or a griddle over medium heat. You don’t need to add any additional oil or butter if your pan is truly non-stick, as the tortillas themselves will toast nicely. However, if you prefer a richer, more golden crust, you can very lightly brush the outside of the wraps with a tiny bit of olive oil or melted butter before placing them in the pan.
- Place the Wraps Seam-Side Down: Carefully place the assembled wraps into the hot skillet, making sure to put them seam-side down first. This helps to seal the wrap and prevents it from unraveling during cooking. Do not overcrowd the pan; cook 2-3 wraps at a time depending on your pan’s size, allowing enough space to flip them easily.
- Toast to Golden Brown: Cook the wraps for about 3-5 minutes per side. You’re looking for a beautiful golden-brown color on the tortilla, with satisfying crisp edges. The exact time will depend on your stove and pan, so keep an eye on them. You might even hear a gentle sizzle from the cheese inside as it melts and gets gooey. Use a spatula to gently press down on the wraps as they cook; this ensures good contact with the pan and a more even toast.
- Achieve All-Around Crispness (Optional): If you want an even crispier experience, you can briefly toast the shorter sides of the wraps as well, standing them up on their ends in the pan for a minute or so. This will give you a wrap that’s wonderfully crisp on every exterior surface.
- Remove and Rest (Briefly): Once golden and crispy on all desired sides, carefully remove the cooked wraps from the pan and place them on a cutting board. Let them rest for just 1-2 minutes. This brief resting period allows the internal temperatures to equalize slightly and makes them easier to handle and cut without scalding yourself.
Serving Suggestions and Customization Tips
You’ve put in the effort, and now it’s time to enjoy the fruits of your labor! These Cheesy Garlic Chicken Wraps are fantastic on their own, but a few thoughtful additions can make the meal even more special. Here are some ideas to serve and customize your delicious creations.
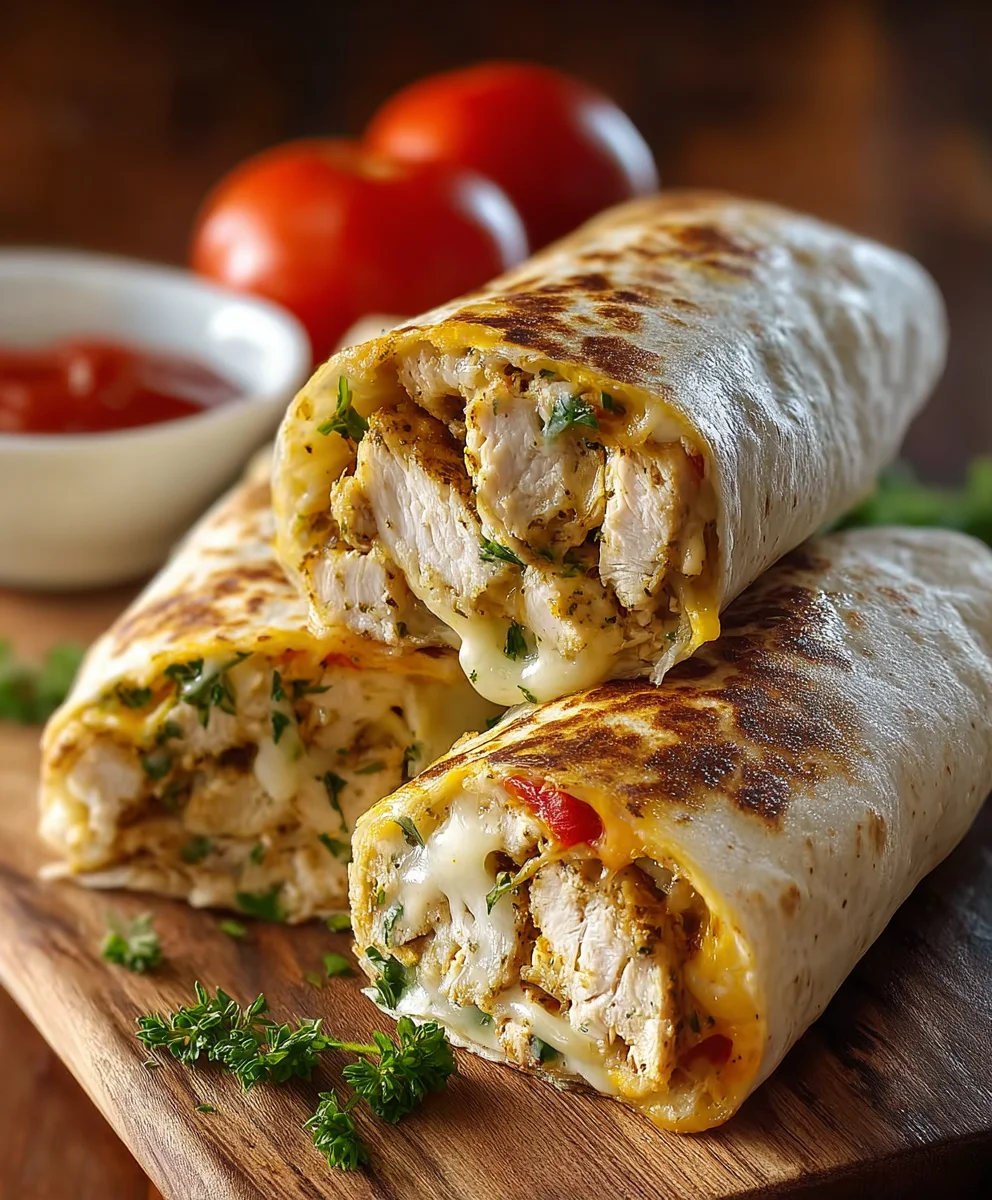
- Slice and Serve Immediately: For easy eating and a beautiful presentation, I love to slice the toasted wraps diagonally down the middle. This reveals the vibrant layers of Cheesy Garlic Chicken, greens, and sauce inside. Arrange them artfully on a platter and serve immediately while they are still warm and the cheese is delightfully gooey.
- Garnish for Freshness: A final sprinkle of fresh chopped parsley or extra fresh chives over the cut wraps can really make them pop, adding another layer of aromatic freshness and a visual appeal. A tiny drizzle of olive oil, if you like, can also add a touch of sheen.
-
Pair with Simple Sides: These wraps are quite filling on their own, but if you’re looking for a complete meal, consider light and refreshing sides.
- A Crisp Green Salad: A simple mixed green salad with a light vinaigrette dressing offers a refreshing contrast to the richness of the wraps.
- Fresh Vegetable Sticks: Carrot sticks, cucumber slices, or bell pepper strips with any leftover creamy garlic herb sauce make a perfect, healthy accompaniment.
- Tomato Soup: A warm bowl of classic tomato soup is surprisingly delightful with these savory wraps, especially on a cooler day.
- Pickled Vegetables: Pickled red onions or jalapeños can add a fantastic tangy crunch that cuts through the richness.
-
Customization Ideas for Your Next Batch: The beauty of wraps is their versatility!
- Spice it Up: If you love heat, add a pinch more cayenne pepper to the chicken marinade, or a few drops of your favorite hot sauce to the creamy garlic herb sauce. Diced jalapeños (fresh or pickled) can also be added directly into the wrap with the chicken.
- Add More Veggies: Feel free to load up on additional vegetables. Thinly sliced bell peppers (red, yellow, or orange for color), grated carrots, or even sautéed mushrooms would all be delicious additions to the Cheesy Garlic Chicken. Just make sure any raw veggies are thinly sliced or shredded so they don’t make the wrap too bulky.
- Different Cheeses: Experiment with different cheese blends! A Mexican blend, Monterey Jack, or even a smoked Gouda could add unique flavor profiles to your Cheesy Garlic Chicken Wraps.
- Cream Cheese Boost: For an even creamier chicken filling, stir in 2-3 tablespoons of softened cream cheese to the shredded chicken along with the other shredded cheeses. It creates an incredibly rich and decadent interior.
- Protein Swap: While this recipe focuses on chicken, the same flavorful preparation could be adapted for cooked and shredded pork or even firm tofu for a vegetarian twist.
- Make it a Bowl: If you’re looking to cut down on carbs, skip the tortilla altogether! Serve the Cheesy Garlic Chicken over a bed of mixed greens, rice, or quinoa, drizzled with the creamy garlic herb sauce, for a delicious and satisfying bowl.
However you choose to enjoy them, these Cheesy Garlic Chicken Wraps are sure to be a hit. They’re hearty, flavorful, and incredibly satisfying – perfect for a quick weeknight dinner, a fun lunch, or even a party appetizer when cut into smaller pinwheels. Enjoy every garlicky, cheesy bite!
Conclusion:
Well, my friends, we’ve reached the exciting culmination of our culinary journey, and I genuinely hope you’re as thrilled as I am about the prospect of bringing these incredible Cheesy Garlic Chicken Wraps to life in your own kitchen. I truly believe that this isn’t just another recipe; it’s an experience waiting to unfold, a testament to how simple ingredients, when brought together with a little love and the right technique, can create something truly extraordinary. What makes these wraps an absolute must-try, you ask? It’s their uncanny ability to hit all the right notes: they’re incredibly flavorful, bursting with savory garlic and tender chicken, enveloped in a melty, cheesy embrace, all tucked neatly into a soft tortilla. They offer that perfect balance of comfort food indulgence without feeling overly heavy, making them suitable for almost any occasion.
I’ve crafted this recipe with versatility and convenience in mind. Whether you’re a seasoned chef or a complete novice in the kitchen, you’ll find the steps straightforward and the results consistently delicious. Imagine the joy of serving these up on a busy weeknight, knowing you’ve provided a wholesome, exciting meal that everyone will eagerly devour. Or picture them as the star attraction at your next casual get-together, a guaranteed crowd-pleaser that will have guests asking for the recipe. The aroma alone, as the garlic and cheese mingle and melt, is enough to get anyone’s taste buds tingling! I’m confident that once you take that first bite, you’ll understand why I’m so enthusiastic about them. They’re simply addictive in the best possible way, offering a rich, satisfying profile that caters to both adults and picky eaters alike. The combination of textures – the slight crisp of the tortilla, the tender chicken, the gooey cheese – is just heavenly.
Enhance Your Cheesy Garlic Chicken Wraps Experience: Serving & Variation Ideas
Now, let’s talk about taking your wrap game to the next level. While these wraps are fantastic all on their own, a few thoughtful additions or variations can truly elevate the experience. For serving, consider pairing them with a crisp, refreshing side salad dressed with a light vinaigrette to cut through the richness. A bowl of warm tomato soup makes for a cozy, comforting accompaniment, especially on a chilly evening. If you’re leaning into the casual vibe, a side of crispy sweet potato fries or a simple serving of roasted seasonal vegetables would be absolutely delightful. You could even offer a selection of dipping sauces on the side: a cool ranch, a zesty cilantro-lime crema, a fiery sriracha mayo for those who like a kick, or even a classic marinara for an unexpected twist. The possibilities are truly endless, allowing you to tailor the meal to your specific tastes and the occasion.
When it comes to variations, don’t be afraid to get creative! If you’re looking to sneak in some extra veggies, finely diced bell peppers, sautéed onions, or a handful of fresh spinach can be easily incorporated into the chicken filling. For a different cheesy profile, try a blend of Monterey Jack and cheddar, or even a touch of smoky gouda. Spice lovers could add a pinch of red pepper flakes or a dash of cayenne to the chicken mixture. For a healthier, low-carb option, you could serve the filling in crisp lettuce cups instead of tortillas, transforming them into delicious “lettuce wraps.” Or, if you prefer a different bread, pita pockets or even lightly toasted slider buns could make for an interesting alternative. The beauty of this recipe is its adaptability; it’s a fantastic foundation that welcomes your personal touch. Feel free to experiment with different herbs as well – a sprinkle of fresh parsley or chives stirred into the filling right before serving can add a lovely burst of freshness.
Your Turn to Shine!
So, there you have it. My heartfelt recommendation for a recipe that I genuinely adore and believe you will too. I’ve shared all my tips and tricks, and now the kitchen is yours to conquer! I truly encourage you to set aside some time soon to whip up these fantastic Cheesy Garlic Chicken Wraps. I promise you, the aroma alone will be enough to reward your efforts, and that first bite? Pure bliss. But don’t just take my word for it; experience the deliciousness for yourself! Once you’ve made them, I would absolutely love to hear about your experience. Did you stick to the recipe, or did you put your own spin on it? What were your favorite serving suggestions? Please, share your culinary triumphs and creative variations with me. Your feedback and stories inspire me to keep sharing more delicious ideas. Happy cooking, and I can’t wait to see what amazing wraps you create!
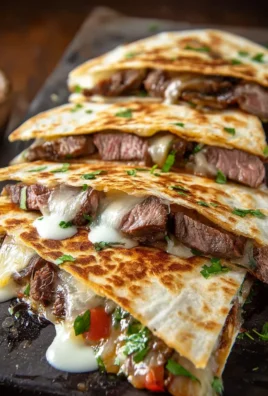
Cheesy Garlic Chicken Wraps
Delicious and easy-to-make cheesy garlic chicken wraps, perfect for a quick weeknight dinner or satisfying lunch. Tender chicken, aromatic garlic, and gooey cheese all hugged by a warm tortilla.
Ingredients
-
2 lbs boneless, skinless chicken (thighs or breasts)
-
6-8 large cloves garlic, minced (for chicken)
-
4 tbsp unsalted butter, divided
-
2 tbsp olive oil
-
1 tsp smoked paprika
-
1/2 tsp onion powder
-
1/2 tsp garlic powder
-
1/4 tsp cayenne pepper (optional)
-
1 tsp dried oregano
-
1 tsp salt
-
1/2 tsp black pepper
-
1 tbsp Worcestershire sauce (non-alcoholic version)
-
1 cup shredded mozzarella cheese
-
1/2 cup shredded sharp cheddar cheese
-
2 tbsp fresh parsley, chopped (for chicken)
-
1/2 cup mayonnaise
-
1/4 cup sour cream (or Greek yogurt)
-
2 cloves garlic, minced (for sauce)
-
2 tbsp fresh chives, chopped
-
1 tbsp fresh parsley, chopped (for sauce)
-
1 tbsp fresh lemon juice
-
1/2 tsp onion powder (for sauce)
-
Salt and black pepper to taste (for sauce)
-
Pinch red pepper flakes (optional, for sauce)
-
8 large flour tortillas (10-12 inches)
-
1 cup fresh spinach or mixed greens (optional)
-
1/4 cup thinly sliced red onion (optional)
-
Additional shredded cheese (optional, for assembly)
Instructions
-
Step 1
Pat chicken dry. Slice breasts horizontally if using. In a bowl, combine olive oil, Worcestershire sauce, smoked paprika, onion powder, garlic powder, cayenne (if using), oregano, 1 tsp salt, 1/2 tsp black pepper, and half of the minced garlic. Toss chicken to coat; marinate in the refrigerator for at least 30 minutes. -
Step 2
Heat 1 tbsp butter and 1 tbsp olive oil in a large skillet over medium-high heat. Sear marinated chicken 4-6 minutes per side until golden brown and cooked through (165°F/74°C). Transfer to a cutting board and let rest for a few minutes. Shred or dice the chicken. -
Step 3
In the same skillet, melt remaining 3 tbsp butter over medium heat. Sauté remaining minced garlic for 1-2 minutes until fragrant. Reduce heat to low, add mozzarella and cheddar cheeses, stirring until just melted. Return shredded chicken to the skillet with the cheese and garlic butter; toss until thoroughly coated. Stir in fresh chopped parsley. Taste and adjust seasoning. -
Step 4
In a small bowl, combine mayonnaise, sour cream (or Greek yogurt), 2 minced garlic cloves, fresh chives, fresh parsley, lemon juice, 1/2 tsp onion powder, salt, black pepper, and red pepper flakes (if using). Mix well and taste to adjust seasoning. -
Step 5
Warm tortillas using a microwave, dry skillet, or oven until soft and pliable; keep covered. Lay a warmed tortilla on a flat surface. Spread 1-2 tbsp of Creamy Garlic Herb Sauce over the center. Layer with spinach/greens and red onion (if using). -
Step 6
Spoon 1/2 to 3/4 cup of the warm Cheesy Garlic Chicken onto the center of the greens. Sprinkle with additional shredded cheese if desired. Fold in the left and right edges of the tortilla, then tightly roll from the bottom upwards into a neat cylindrical wrap. -
Step 7
Heat a large non-stick skillet or griddle over medium heat (optional: lightly brush wraps with oil/butter). Place wraps seam-side down in the hot skillet. Cook 3-5 minutes per side until golden brown and crispy. Use a spatula to gently press down while cooking. -
Step 8
Remove cooked wraps from the pan and let rest for 1-2 minutes. Slice diagonally down the middle and serve immediately, garnished with fresh parsley.
Important Information
Nutrition Facts (Per Serving)
It is important to consider this information as approximate and not to use it as definitive health advice.
Allergy Information
Please check ingredients for potential allergens and consult a health professional if in doubt.
Leave a Comment