

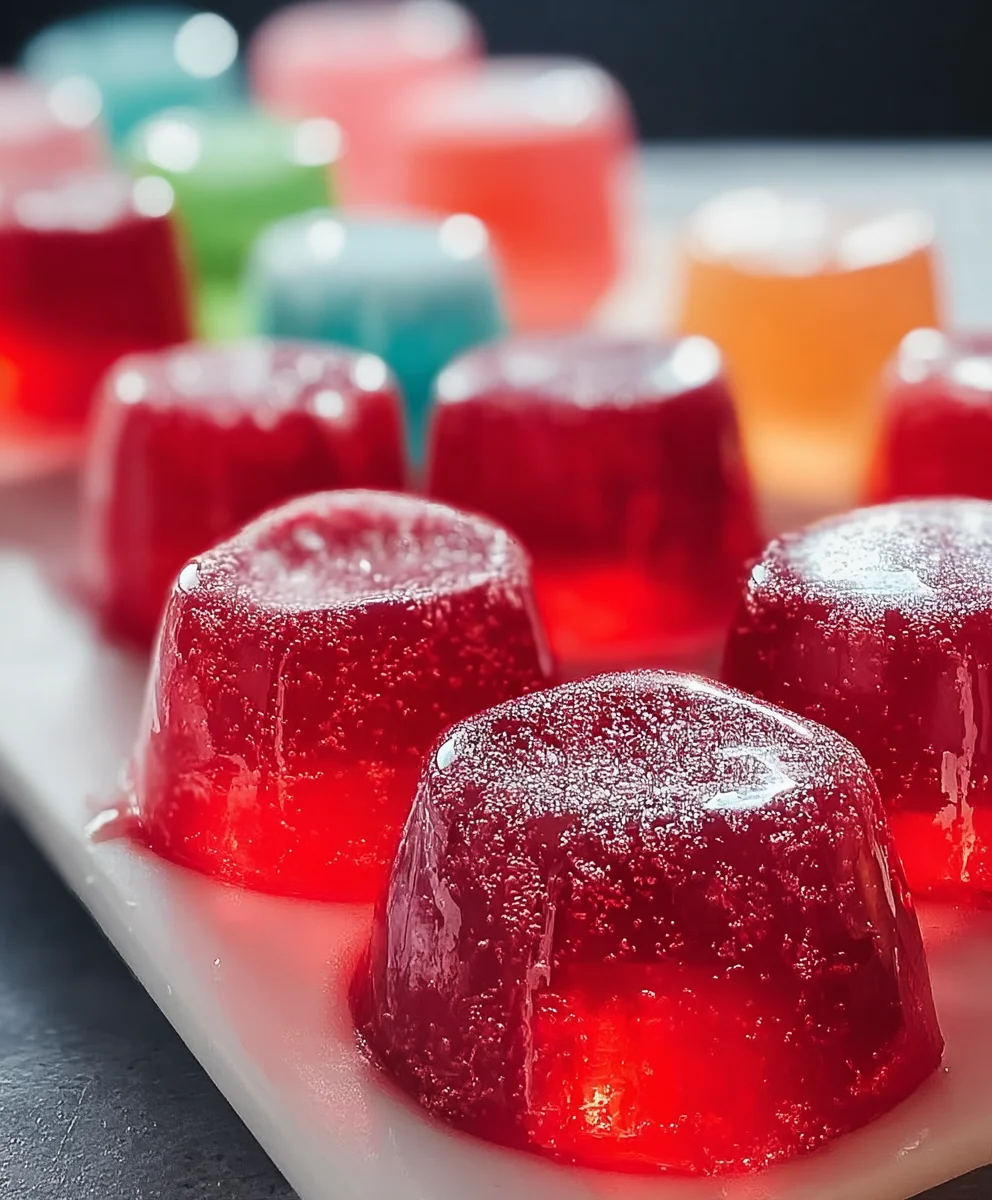
Boozy Jello Candy Melts are not just a treat; they’re a delightful revelation that promises to elevate any social gathering from ordinary to extraordinary. Imagine vibrant, glistening morsels that melt lusciously on your tongue, delivering a burst of fruit flavor perfectly complemented by a sophisticated, subtle alcoholic kick. I am genuinely thrilled to share this recipe, as I’ve found these confections to be an absolute game-changer for parties, celebrations, or simply a fun, adult-oriented indulgence at home.
While the humble jello shot has been a beloved fixture at adult festivities for decades, these candy melts represent a charming evolution. They transform a classic, often messy, party staple into an elegant, bite-sized confection that’s as pleasing to the eye as it is to the palate. People adore this dish not only for its innovative combination of textures – the firm initial bite yielding to a smooth, melting sensation – but also for its sheer fun and versatility. They are surprisingly easy to customize with different spirits and flavors, making each batch a unique adventure.
Prepare to become the most sought-after host or hostess!
With these Boozy Jello Candy Melts, you’re not just serving a dessert; you’re offering an experience, a playful nod to childhood nostalgia with a decidedly grown-up twist that will have everyone asking for the recipe. I promise, they are utterly irresistible.

Ingredients:
- Unflavored Gelatin: 4 envelopes (about 1 ounce or 28 grams total). This is our structural hero, providing the firm, candy-like texture we’re aiming for with our Boozy Jello Candy Melts. Don’t skimp on this, as it’s key to holding everything together.
- Flavored Jello: 3 standard 3-ounce (85-gram) boxes. I love to use a variety of vibrant colors and complementary flavors – think strawberry, lime, and blue raspberry for a fun, multi-colored assortment. Each flavor will form a distinct layer or batch of candy melts.
- Cold Water: 1 cup, divided. We use this to “bloom” the unflavored gelatin, a crucial step that ensures a smooth, lump-free final product.
- Boiling Water: 2 cups, divided. This hot water is essential for fully dissolving both the bloomed gelatin and the flavored Jello powder, creating a homogeneous liquid base.
- Your Preferred Spirit/Liqueur: 1 ½ cups total, divided. This is where the “boozy” magic happens! I highly recommend using a smooth vodka for a neutral base that allows the Jello flavors to shine, or explore options like light rum, flavored vodka (citrus or berry work wonderfully), or even a complementary liqueur like peach schnapps or triple sec for an extra layer of flavor. Ensure your chosen spirits align with your Jello flavors.
- Granulated Sugar (optional): 2-4 tablespoons, to taste. Depending on your Jello flavors and the sweetness of your chosen alcohol, you might want to add a little extra sweetness. Taste as you go!
- Confectioners’ Sugar (Powdered Sugar) or Granulated Sugar: ½ cup for coating, or as needed. This creates a delightful outer texture and prevents the candy melts from sticking together. I often use confectioners’ sugar for a softer, matte finish, or granulated sugar for a sparkly, crystalline look.
- Non-stick Cooking Spray or Neutral Oil: A light misting is necessary for preparing your molds, ensuring easy release of your beautiful Boozy Jello Candy Melts.
Gathering Your Tools & Preparing Your Workspace
Before we dive into the fun part of mixing and stirring, it’s absolutely essential to have all your equipment ready and your workspace organized. This “mise en place” approach isn’t just for professional chefs; it makes the entire process smoother, more enjoyable, and significantly reduces the chances of errors. Trust me, I’ve learned this the hard way!
- Choose Your Molds: For Boozy Jello Candy Melts, silicone candy molds are your best friend. They come in an incredible array of shapes – hearts, stars, bears, tiny squares, even intricate geometric designs – allowing for endless creative possibilities. If you don’t have silicone molds, a regular 9×13-inch baking dish or even ice cube trays can work, though demolding will require a bit more care and precise cutting. For a more traditional candy look, I often use small square or rectangular silicone molds that yield bite-sized pieces.
- Prepare Your Molds: Lightly spray your chosen molds with non-stick cooking spray, or, if you prefer, wipe them down with a thin layer of neutral oil (like vegetable or canola oil) using a paper towel. This step is non-negotiable! It ensures your delicate Boozy Jello Candy Melts release cleanly without tearing or sticking, preserving their perfect shapes. Once greased, set them aside on a sturdy baking sheet or tray. This tray will make it easy to transfer the filled molds to the refrigerator without any spills.
- Gather Your Essential Equipment: You’ll need at least three medium-sized heatproof bowls for blooming gelatin and mixing different Jello flavors. Two small-to-medium saucepans will be ideal for heating water. Ensure you have a reliable whisk for thorough mixing, a heat-resistant spatula, measuring cups and spoons for precise ingredient amounts, and a liquid measuring cup (preferably one with a spout for easy pouring into molds). Having a couple of small serving bowls ready for your coating sugar is also helpful for the final steps.
- Organize Your Workspace: Clear a clean, spacious area on your counter. Lay out all your pre-measured ingredients and tools within easy reach. Having everything at your fingertips prevents frantic searching mid-process, especially when you’re working with time-sensitive steps like dissolving gelatin. I always make sure I have a clear path to the refrigerator as well, as chilling is a critical stage.
Preparing the Gelatin Base – The Foundation of Your Boozy Jello Candy Melts
This phase is all about creating the perfect canvas for our flavorful Jello and spirits. The key here is patience and precision, especially when it comes to the gelatin. Improperly bloomed or dissolved gelatin can lead to grainy, rubbery, or overly soft candy melts, which is definitely not what we want for our exquisite Boozy Jello Candy Melts!
- Bloom the Unflavored Gelatin: Divide your 4 envelopes of unflavored gelatin into two equal portions (2 envelopes per portion). In two separate medium heatproof bowls, sprinkle 2 envelopes of unflavored gelatin over ½ cup of cold water in each bowl. Do not stir immediately! Let it sit undisturbed for 5 to 10 minutes. You’ll notice the gelatin absorbing the water and swelling, becoming a thick, bumpy, and almost paste-like consistency. This process is called “blooming,” and it’s absolutely crucial because it allows the gelatin granules to fully hydrate. If you skip this, your gelatin might not dissolve properly, leading to an unpleasantly gritty texture in your finished candy melts. I find it’s best to let it sit for the full 10 minutes to ensure maximum hydration.
- Heat the Boiling Water: While your gelatin is blooming, bring 1 cup of water to a rolling boil in one of your saucepans. Once boiling, carefully pour this hot water over one of your bloomed gelatin mixtures. Whisk vigorously and continuously for about 2-3 minutes, or until the gelatin is completely dissolved and no granules remain. The mixture should be clear and homogenous. Repeat this step with the second portion of bloomed gelatin and another 1 cup of boiling water in your second saucepan, creating two separate bases of dissolved unflavored gelatin.
- Maintain Warmth: It’s important to keep these gelatin bases warm, but not boiling, while you prepare the next steps. If they cool too much, they might start to set prematurely. I often place my bowls of dissolved gelatin over a very low heat or in a warm water bath to keep them pliable, especially if I’m working with multiple colors or layering. This ensures smooth integration with the Jello powders.
Infusing the Flavors – Adding the Jello & Alcohol
Now, this is where the magic truly begins! We’re going to transform our clear gelatin bases into vibrant, flavorful, and wonderfully boozy concoctions. This stage requires careful mixing and an understanding of how alcohol interacts with gelatin. The goal is to achieve a perfect balance of flavor, sweetness, and alcoholic kick for your Boozy Jello Candy Melts.
- Introduce the Flavored Jello: Take one of your bowls with the dissolved unflavored gelatin. Add one 3-ounce box of your chosen flavored Jello powder directly into it. Whisk thoroughly until the colored Jello powder is completely dissolved. This usually takes another 2-3 minutes of diligent whisking. You’ll see the mixture transform into a beautifully colored, aromatic liquid. Repeat this process for each of your remaining two Jello boxes and the remaining dissolved unflavored gelatin bases, ensuring you have three distinct, vibrant colors and flavors ready. If you’re only making one flavor, simply combine all dissolved unflavored gelatin and one packet of flavored Jello.
- The Boozy Addition – A Delicate Balance: This is the most crucial step for creating true Boozy Jello Candy Melts. Once your flavored Jello is fully dissolved and the mixture is warm (but not boiling hot), slowly add ½ cup of your chosen spirit or liqueur to each Jello mixture. It is imperative that you do not add the alcohol while the mixture is boiling hot, as alcohol evaporates quickly at high temperatures, reducing its potency. Conversely, if the mixture is too cool, the alcohol might cause the gelatin to seize or become cloudy. The ideal temperature is warm enough to keep the gelatin liquid but cool enough that the alcohol doesn’t evaporate excessively, typically around 120-130°F (49-54°C). Gently whisk until the alcohol is fully incorporated.
- Adjust Sweetness (Optional but Recommended): Taste a very small amount of each mixture. Depending on your Jello flavor and the sweetness of your chosen alcohol, you might find it needs a little boost. If so, add 1-2 tablespoons of granulated sugar to each mixture, whisking until fully dissolved. I often find that drier spirits like vodka benefit from a touch more sugar to round out the flavors and balance the alcoholic bite, enhancing the “candy” aspect of our Boozy Jello Candy Melts.
- Consider Layering for Visual Appeal (Advanced Technique): If you want to create stunning layered Boozy Jello Candy Melts, this is where you’ll start. You’ll need to pour one color into your molds, chill until just firm (about 15-20 minutes, not fully set), then carefully pour the next layer on top, repeating the chilling process. This technique requires a bit more time and careful temperature management for each layer to adhere properly without mixing. My personal tip is to make sure each layer is cool but still liquid when pouring to avoid melting the layer below.
Pouring and Setting – The Patient Wait
We’re almost there! This stage is about carefully transferring our delicious liquid Jello to the molds and letting time (and cold) do its magic. Patience here is key; rushing the setting process will only lead to disappointment.
- Carefully Fill Your Molds: Using a liquid measuring cup with a spout or even a small ladle, carefully pour your prepared Jello mixtures into your greased silicone molds. Fill each cavity almost to the top, leaving just a tiny bit of space to prevent overflow. Work methodically to avoid splashes and bubbles. If you notice any small bubbles forming on the surface, gently pop them with a toothpick for a smoother finish. If you’re doing multiple colors for a marbled effect without layering, you can gently swirl a tiny amount of a second color into the first once poured, but don’t overmix.
- Transfer to the Refrigerator: Once all your molds are filled (and sitting on that handy baking sheet you prepared earlier), very carefully transfer the entire tray to the refrigerator. Find a flat, stable spot where the molds won’t be jostled or tilted.
- The Long Chill: Allow your Boozy Jello Candy Melts to chill undisturbed for at least 4-6 hours, or preferably overnight. This extended chilling time is vital for them to achieve the firm, bouncy, candy-like consistency we desire. Resist the urge to check on them too frequently, as opening the refrigerator door can fluctuate the temperature. If they are not firm enough, they will be difficult to demold and might tear. A good test is to gently press on the surface; it should feel firm and spring back slightly.
Demolding and Finishing – The Grand Reveal
The moment of truth! After patiently waiting, it’s time to release your beautiful creations from their molds and add the finishing touches that elevate them from simple Jello shots to sophisticated Boozy Jello Candy Melts.
-
Easy Demolding Techniques: Once fully set, remove the tray of molds from the refrigerator. If you used silicone molds, demolding is wonderfully simple. Gently push up from the bottom of each cavity, and the candy melt should pop right out. If you find any resistance, you can lightly twist the mold. For a baking dish, you’ll need to carefully run a thin, sharp knife around the edges, then invert the dish onto a cutting board. You can then use a warm, sharp knife to cut the large block into desired shapes, wiping the knife clean between cuts for smooth edges.
Pro Tip for Sticky Situations:
If your candy melts are being stubborn, you can lightly dust your hands or the mold with a tiny bit of confectioners’ sugar before pushing them out. This can help prevent sticking. Also, ensure your hands are dry and cool when handling them to avoid melting.
- The Candy Coating – A Touch of Sweetness and Texture: This step is what truly transforms them into “candy melts.” Pour your confectioners’ sugar or granulated sugar into a shallow bowl. Gently drop a few of your demolded Boozy Jello Candy Melts into the sugar. Carefully toss or roll them around until they are evenly coated on all sides. The sugar coating not only adds a delightful texture and extra sweetness but also helps prevent the candy melts from sticking to each other during storage. I often prefer confectioners’ sugar for a softer bite and a cloud-like appearance, but granulated sugar gives a lovely sparkle, especially under party lights.
- Shake Off Excess: After coating, gently shake off any excess sugar. You can do this by lightly tapping the candy melt or by placing them on a wire rack over a baking sheet to catch the falling sugar. This ensures a clean, attractive finish without an overwhelming amount of sugar.
-
Storage and Serving: Your freshly coated Boozy Jello Candy Melts are now ready to be enjoyed! For optimal freshness and to maintain their firm texture, store them in an airtight container in the refrigerator. They will last for up to 3-5 days, though I find they are at their absolute best within the first 2-3 days. Bring them out about 10-15 minutes before serving to let them warm up just slightly for the best texture and flavor release.
Presentation Matters:
Consider arranging them on a decorative platter, perhaps with a few fresh berries or a sprig of mint for an elegant presentation. These vibrant, bite-sized delights are perfect for adult parties, holiday gatherings, or as a fun, boozy treat for a special occasion. Remember to always inform your guests that these are adult-only treats due to the alcohol content! Enjoy your homemade Boozy Jello Candy Melts – they’re always a showstopper!
Conclusion:
Well, my friends, we’ve reached the sweet, jiggly, and delightfully boozy end of our culinary adventure! If you’ve been following along, you’ll know that these aren’t just any ordinary treats; they are the ultimate party starters, the conversation ice-breakers, and the absolute highlight of any adult gathering. I truly believe that mastering the art of making these Boozy Jello Candy Melts will unlock a new level of entertaining for you. They’re effortlessly chic, surprisingly simple to whip up, and they deliver an unforgettable burst of flavor with that perfect, subtle kick. What makes them a must-try, you ask? It’s their unique ability to combine nostalgic childhood fun with sophisticated adult enjoyment. They instantly elevate any event from ‘just another get-together’ to ‘a memorable occasion.’ Imagine the smiles, the laughter, and the inevitable ‘How did you make these?!’ questions you’ll receive. This recipe isn’t just about combining ingredients; it’s about crafting an experience, a moment of pure, unadulterated joy that your guests will be talking about long after the last melt has disappeared. It’s a chance to showcase your creativity and a testament to how even the simplest ingredients can be transformed into something truly extraordinary and unforgettable.
Now, let’s talk about making these beauties even more spectacular. While they are showstoppers on their own, a little presentation goes a long way. I love arranging them artfully on a chilled platter, perhaps alongside some fresh berries or a scattering of edible glitter for that extra sparkle. For a really elegant touch, consider serving them in small, individual shot glasses – not for drinking, but as mini dessert cups, letting the layers and colors truly shine. You could even skewer them with decorative cocktail picks for easy grabbing, making them perfect for mingling. But the fun doesn’t stop there; the true magic of these Boozy Jello Candy Melts lies in their incredible versatility! Don’t feel confined to just one flavor or one type of spirit. Think of this recipe as a blank canvas for your creativity. Want to try a tropical vibe? Use pineapple or mango jello with coconut rum. Feeling festive? Cranberry jello with a spiced rum or even a cinnamon whiskey could be divine for holiday gatherings. For a vibrant summer bash, lemon jello with limoncello or a crisp gin would be incredibly refreshing. You could even experiment with different liqueurs – a hint of peach schnapps, a dash of blue curacao for stunning color, or perhaps an almond-flavored liqueur for a more sophisticated profile. And for those who love to experiment with textures, a thin layer of whipped cream or a dusting of finely grated chocolate before the jello sets completely could add another dimension. Don’t be afraid to mix and match colors and flavors; imagine stunning rainbow layers or alternating contrasting hues for a visual feast. And a little secret for an extra wow factor: try adding a few drops of a contrasting food coloring to the alcohol before mixing it with the jello for a marbling effect that truly pops. The possibilities are truly endless, limited only by your imagination and your liquor cabinet!
So, my dear readers, what are you waiting for? I sincerely hope I’ve inspired you to roll up your sleeves, gather your ingredients, and embark on your own journey into the wonderful world of these delectable treats. Don’t just read about them; make them! I promise you, the process is just as enjoyable as the outcome. The satisfaction of seeing your friends and family light up with delight as they try your homemade creations is truly unparalleled. Whether you’re planning a birthday celebration, a casual get-together with friends, a holiday party, or just a fun night in, these candies are guaranteed to be a hit. Once you’ve made your batch (or several!), I would absolutely love to hear about your experience. Did you try a unique flavor combination? Did you come up with a brilliant serving suggestion? Perhaps you experimented with different molds or added a surprising garnish? Please, share your stories, your triumphs, and even your comical kitchen mishaps – we learn from them all! I adore seeing your culinary adventures come to life, so don’t hesitate to share photos of your magnificent creations. Tag me if you post them online, or simply drop a comment below. Your feedback and creative twists inspire not only me but also our entire community of enthusiastic home chefs. Let’s make every gathering a little more exciting, a little more joyful, and a lot more delicious with these incredible Boozy Jello Candy Melts. Happy mixing, happy chilling, and most importantly, happy indulging!
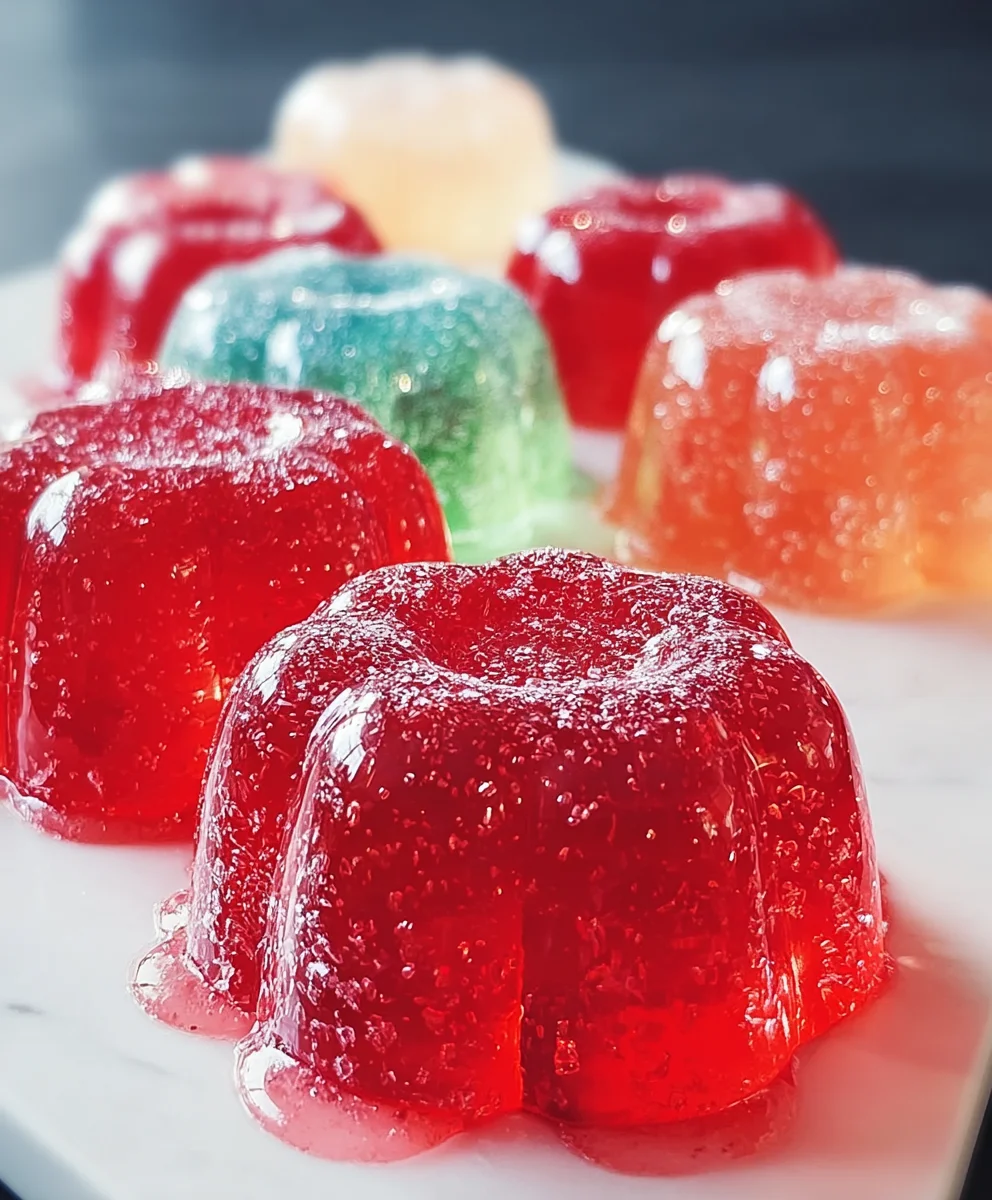
Festive Jello Candy Melts: A Fun Non-Alcohol Treat
These Festive Jello Candy Melts are a delightful, vibrant treat that elevate any social gathering. They’re the grown-up version of classic jello shots – prettier, more flavorful, and conversation-worthy. Enjoy their playful jiggly texture in an elegant, bite-sized confection.
Ingredients
-
4 envelopes unflavored gelatin (1 oz / 28g)
-
3 boxes flavored gelatin (3 oz / 85g each)
-
1 cup cold water, divided
-
2 cups boiling water, divided
-
1 ½ cups non-alcoholic flavoring liquid (e.g., fruit juice, non-alcoholic syrup, or non-alcoholic spirit alternative), divided
-
2-4 tbsp granulated sugar (optional)
-
½ cup confectioners’ or granulated sugar, for coating
-
Non-stick cooking spray or neutral oil, for molds
Instructions
-
Step 1
Prepare Molds & Workspace: Lightly grease silicone candy molds or a 9×13-inch baking dish. Place molds on a sturdy baking sheet. Gather three heatproof bowls, two small saucepans, a whisk, spatula, and measuring cups. -
Step 2
Bloom Unflavored Gelatin: Divide 4 envelopes of unflavored gelatin into two separate medium heatproof bowls (2 envelopes per bowl). Sprinkle over ½ cup cold water in each bowl. Let sit undisturbed for 5-10 minutes until the gelatin absorbs the water and swells. -
Step 3
Dissolve Gelatin: Bring 1 cup of water to a rolling boil. Carefully pour over one bloomed gelatin mixture. Whisk vigorously for 2-3 minutes until completely dissolved and clear. Repeat this step for the second portion of bloomed gelatin and another 1 cup of boiling water. Keep both dissolved gelatin bases warm. -
Step 4
Introduce Flavored Gelatin: To one bowl of dissolved unflavored gelatin, add one 3-ounce box of flavored gelatin powder. Whisk thoroughly for 2-3 minutes until completely dissolved and the mixture is beautifully colored. Repeat for each of the remaining two flavored gelatin boxes and dissolved unflavored gelatin bases, resulting in three distinct flavored mixtures. -
Step 5
Incorporate Non-Alcoholic Liquid: Once the flavored gelatin mixtures are warm (but not boiling hot), slowly add ½ cup of your chosen non-alcoholic flavoring liquid to each mixture. Gently whisk until fully incorporated. (Note: Adding to excessively hot liquid can reduce clarity of some non-alcoholic flavorings). -
Step 6
Adjust Sweetness (Optional): Taste each mixture. If desired, add 1-2 tablespoons of granulated sugar to each, whisking until fully dissolved, to enhance sweetness and balance flavors. -
Step 7
Fill Molds: Carefully pour the prepared flavored gelatin mixtures into your greased silicone molds, filling each cavity almost to the top. If any small bubbles form on the surface, gently pop them with a toothpick for a smoother finish. -
Step 8
Chill Thoroughly: Carefully transfer the filled molds on their baking sheet to the refrigerator. Allow them to chill undisturbed for at least 4-6 hours, or preferably overnight, until they achieve a firm, bouncy, candy-like consistency. Resist the urge to check too frequently. -
Step 9
Demold Candy Melts: Once fully set, remove from the refrigerator. For silicone molds, gently push up from the bottom of each cavity to pop out the candy melts. For a baking dish, carefully run a thin, sharp knife around the edges, then invert onto a cutting board and cut into desired shapes with a warm, sharp knife, wiping it clean between cuts. -
Step 10
Coat with Sugar: Pour ½ cup confectioners’ sugar or granulated sugar into a shallow bowl. Gently drop a few demolded candy melts into the sugar and toss or roll them around until evenly coated. Shake off any excess sugar. -
Step 11
Store and Serve: Your Festive Jello Candy Melts are ready! Store them in an airtight container in the refrigerator for up to 3-5 days; they are best within the first 2-3 days. Serve them chilled or let them warm slightly for 10-15 minutes before enjoying for optimal texture and flavor.
Important Information
Nutrition Facts (Per Serving)
It is important to consider this information as approximate and not to use it as definitive health advice.
Allergy Information
Please check ingredients for potential allergens and consult a health professional if in doubt.
Leave a Comment