

Easy Trifle Recipes are your passport to effortless elegance and pure dessert joy! Have you ever craved a show-stopping dessert that looks incredibly impressive but doesn’t require hours slaving away in the kitchen? That’s precisely the magic of a trifle. We absolutely adore trifles because they’re a beautiful symphony of textures and flavors – from soft, yielding cake or sponge to luscious creams, vibrant fruits, and delightful crumbles or toppings. What truly sets these easy trifle recipes apart is their inherent adaptability. You can whip one up with store-bought elements or elevate it with homemade components, all while ensuring it’s a guaranteed crowd-pleaser for any occasion. Forget intricate pastry work or complex sauces; the beauty of a trifle lies in its simple layering, making it accessible to bakers of all levels.
What makes a trifle so special?
It’s the perfect canvas for your favorite flavors and a stunning visual centerpiece that’s surprisingly simple to assemble.

Ingredients:
- 1 (15.25 ounce) package yellow cake mix
- 3 cups milk
- 1 (3.4 ounce) package instant vanilla pudding mix
- 1 (8 ounce) container frozen whipped topping, thawed
- 2 cups fresh strawberries, hulled and sliced
- 1 cup fresh blueberries
- 1/4 cup granulated sugar
- 1 tablespoon lemon juice
- Fresh mint sprigs, for garnish (optional)
Baking the Cake
Preheat and Prepare
First things first, let’s get our oven ready. Preheat your oven to the temperature specified on your yellow cake mix box – usually around 350°F (175°C). Grease and flour a 9×13 inch baking pan. This is a crucial step to ensure your cake releases cleanly, preventing any frustrating sticking issues that can ruin the beautiful layers of our trifle. Don’t skip this! You can also line the bottom with parchment paper for extra insurance.
Mixing the Batter
In a large mixing bowl, combine the cake mix with the ingredients called for on the package – typically eggs, oil, and water. I like to use a whisk for the initial mixing until most of the dry ingredients are incorporated, then switch to an electric mixer on low speed for about 30 seconds to combine everything. Then, increase the speed to medium and beat for the duration recommended on the box, usually around 2 minutes. This ensures proper aeration, which leads to a lighter, fluffier cake. Scrape down the sides of the bowl a couple of times to make sure all the dry bits are fully incorporated into the batter.
Baking the Cake
Pour the batter evenly into the prepared baking pan. Gently tap the pan on the counter a couple of times to release any large air bubbles. Bake for the time indicated on the cake mix box, or until a wooden skewer or toothpick inserted into the center comes out clean. For a 9×13 inch pan, this usually takes about 30-35 minutes. Keep an eye on it towards the end of the baking time, as ovens can vary. Overbaked cake will be dry and crumble too much, making it harder to layer.
Cooling the Cake
Once baked, remove the cake from the oven and let it cool in the pan on a wire rack for about 10-15 minutes. This allows the cake to firm up slightly before you attempt to remove it. Then, carefully invert the cake onto the wire rack to cool completely. Make sure the cake is completely cool before proceeding to the next step. A warm cake will melt the pudding and whipped topping, creating a messy, unappealing trifle. Patience here is key!
Preparing the Fruit and Pudding
Washing and Slicing Berries
While the cake is cooling, it’s time to prepare our beautiful fruit. Gently wash your fresh strawberries and blueberries under cool running water. Pat them dry with a clean kitchen towel or paper towels. For the strawberries, hull them by removing the green leafy tops. Then, slice them into uniform pieces. Aim for slices that are not too thin, so they hold their shape, but not too thick that they’re difficult to eat. Set aside the sliced strawberries and the blueberries in separate bowls.
Making the Pudding Layers
In a medium bowl, whisk together the milk and the instant vanilla pudding mix. Beat with a whisk for about 2 minutes, or until the pudding begins to thicken. Instant pudding thickens remarkably quickly, so don’t overbeat, as it can become gummy. Let the pudding sit for about 5 minutes to fully set. It’s important that the pudding is well-chilled before assembling the trifle, so if you have time, you can even pop it in the refrigerator for a bit.
Preparing the Sugared Berries
In a separate small bowl, combine the sliced strawberries with the granulated sugar and the lemon juice. Gently toss to coat the strawberries evenly. The sugar will start to draw out some of the juices from the strawberries, creating a delicious syrupy coating, and the lemon juice adds a bright, fresh counterpoint to the sweetness. Let this mixture sit for about 10-15 minutes to allow the flavors to meld and the berries to soften slightly. The blueberries will remain as they are, providing a burst of tartness.
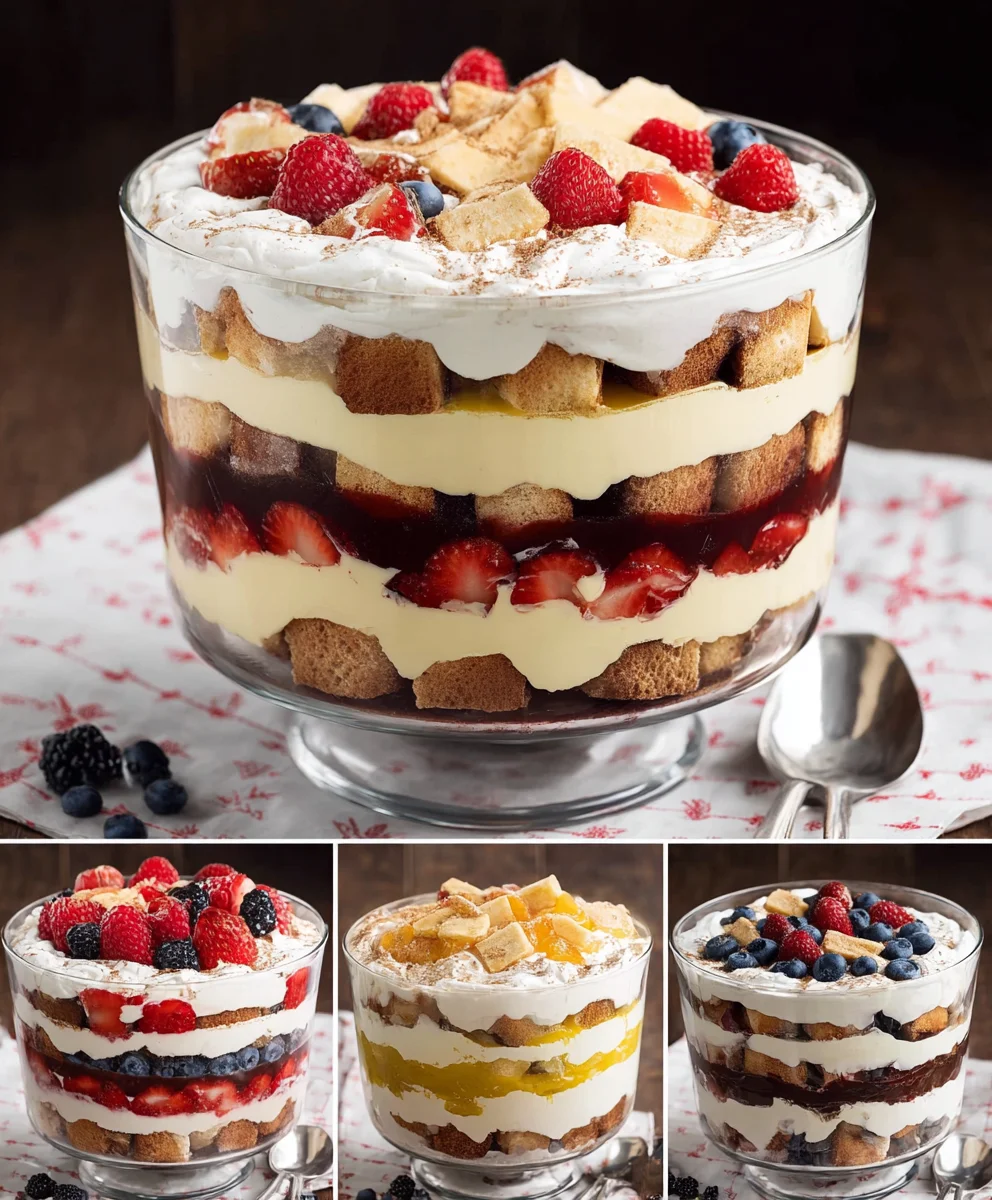
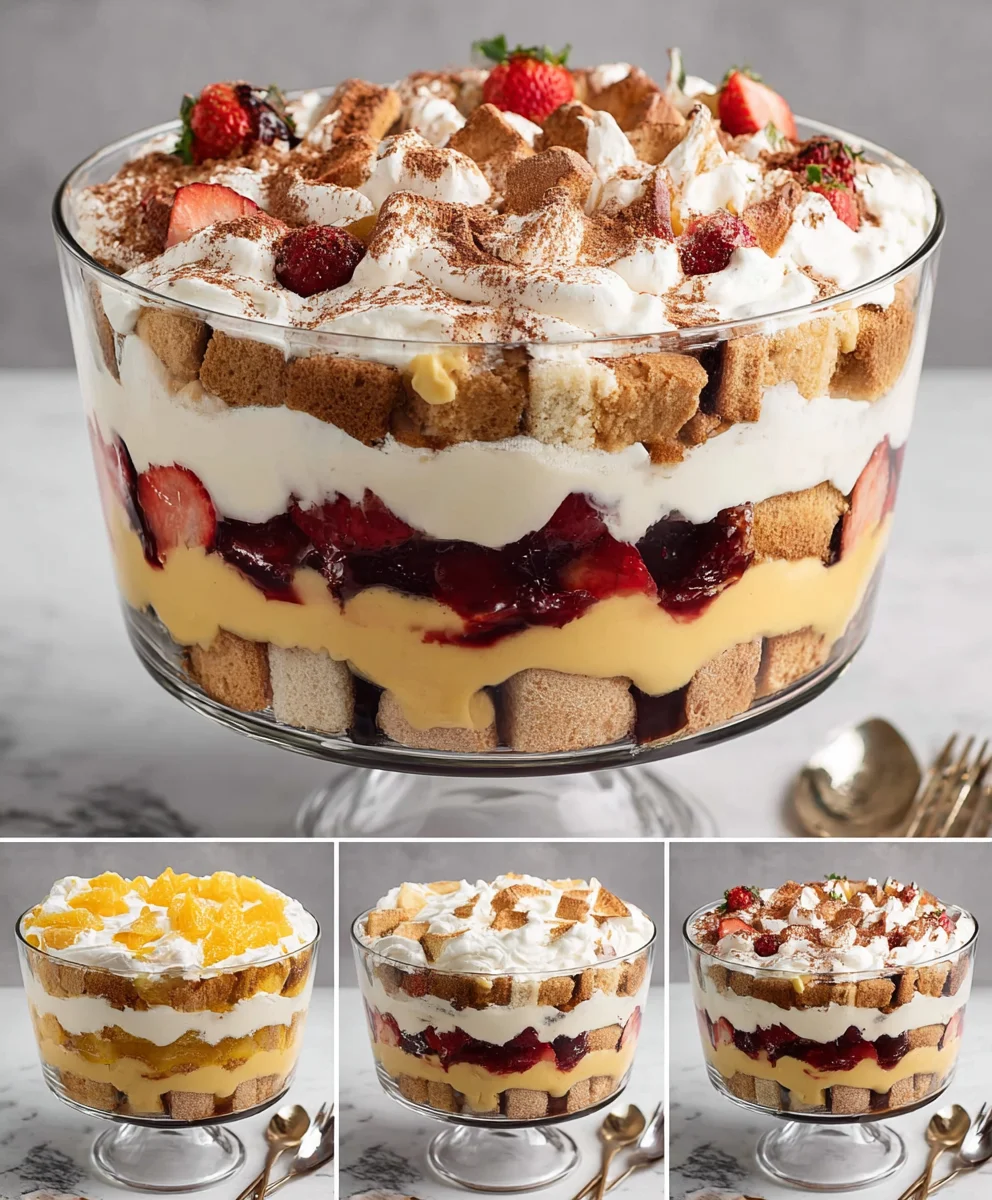
Assembling the Trifle
First Layer: Cake Cubes
Once your cake is completely cool, cut it into bite-sized cubes. You can do this directly in the pan if you’re feeling adventurous, or transfer it to a cutting board for more precision. Arrange about half of the cake cubes in a single layer at the bottom of your trifle dish or individual serving glasses. Don’t worry about perfect placement; a slightly rustic look is part of the charm of a trifle!
Second Layer: Pudding
Spoon about half of the thickened vanilla pudding evenly over the cake cubes. Make sure to get pudding all the way to the edges of the dish to create a complete layer. Gently spread it with the back of a spoon or a spatula.
Third Layer: Berries
Next, scatter about half of the prepared sliced strawberries and half of the blueberries over the pudding layer. Try to distribute them evenly for a visually appealing presentation.
Fourth Layer: Whipped Topping
Dollop and spread about half of the thawed whipped topping over the berry layer. Again, aim for an even coating.
Repeat the Layers
Now, repeat the process: add the remaining cake cubes, followed by the rest of the vanilla pudding, then the remaining strawberries and blueberries. Finish with the remaining whipped topping, creating a beautiful, fluffy white cloud on top.
Final Touches and Chilling
For an extra touch of elegance, you can garnish the top of your trifle with a few fresh mint sprigs. Cover the trifle with plastic wrap and refrigerate for at least 2-4 hours, or preferably overnight. This chilling time is essential for the flavors to meld together and for the cake to absorb some of the moisture from the pudding and fruit, creating that signature moist trifle texture. The longer it chills, the better it will taste!
Conclusion:
I hope you’ve enjoyed exploring these Easy Trifle Recipes! Trifle is such a wonderfully versatile and forgiving dessert, perfect for any occasion, from casual gatherings to more formal celebrations. Its layered nature allows for endless creativity, making it a fantastic canvas for your favorite flavors and textures. Whether you’re a beginner baker or a seasoned pro, you’ll find these recipes delightful and straightforward to execute.
For serving, a classic trifle is best presented in a clear glass bowl to showcase those beautiful layers. It pairs wonderfully with a light sparkling wine or a cup of coffee. Don’t hesitate to experiment with the components! Consider adding a different fruit, using a different type of cake or biscuit, or even incorporating chocolate chips or nuts for an extra layer of indulgence. The joy of these Easy Trifle Recipes lies in their adaptability. So go ahead, get creative, and have fun making your own delicious trifle masterpiece! I encourage you to share your creations and variations with friends and family – they’re sure to be a hit!
Frequently Asked Questions:
Can I make a trifle ahead of time?
Absolutely! Trifles are actually best made a few hours or even the day before serving. This allows the flavors to meld together beautifully and the cake or biscuits to soak up the liquid, creating a more cohesive dessert.
What if I don’t have a glass trifle bowl?
No problem at all! You can layer your trifle in any deep serving dish. Even individual ramekins or small glasses work wonderfully for single servings.
Are there any make-ahead components for these Easy Trifle Recipes?
Yes! Most components can be prepared in advance. Custard can be made and chilled, fruit can be prepped, and cake can be baked and cooled. This makes assembly on the day of serving a breeze.
Easy Trifle Recipes-Quick & Delicious Desserts
A quick and delicious trifle recipe with layers of cake, pudding, fresh fruit, and whipped topping.
Ingredients
-
1 (15.25 ounce) package yellow cake mix
-
3 cups milk
-
1 (3.4 ounce) package instant vanilla pudding mix
-
1 (8 ounce) container frozen whipped topping, thawed
-
2 cups fresh strawberries, hulled and sliced
-
1 cup fresh blueberries
-
1/4 cup granulated sugar
-
1 tablespoon lemon juice
-
Fresh mint sprigs, for garnish (optional)
Instructions
-
Step 1
Preheat oven to 350°F (175°C). Grease and flour a 9×13 inch baking pan. Mix cake mix with ingredients called for on package (eggs, oil, water). Beat until combined, then beat on medium speed for 2 minutes. Pour batter into prepared pan and bake for 30-35 minutes, or until a skewer comes out clean. Cool cake in pan for 10-15 minutes, then invert onto a wire rack to cool completely. -
Step 2
While cake cools, wash and dry strawberries and blueberries. Hull and slice strawberries. Set aside strawberries and blueberries separately. -
Step 3
In a medium bowl, whisk milk and instant vanilla pudding mix for 2 minutes until thickened. Let sit for 5 minutes to set. -
Step 4
In a small bowl, combine sliced strawberries, granulated sugar, and lemon juice. Toss to coat and let sit for 10-15 minutes. -
Step 5
Cut cooled cake into bite-sized cubes. Arrange half of the cake cubes in the bottom of a trifle dish or individual serving glasses. -
Step 6
Spoon half of the vanilla pudding over the cake cubes. Scatter half of the prepared strawberries and blueberries over the pudding. -
Step 7
Dollop and spread half of the thawed whipped topping over the berry layer. Repeat the layers with remaining cake, pudding, berries, and whipped topping. -
Step 8
Garnish with mint sprigs if desired. Cover and refrigerate for at least 2-4 hours, or preferably overnight, before serving.
Important Information
Nutrition Facts (Per Serving)
It is important to consider this information as approximate and not to use it as definitive health advice.
Allergy Information
Please check ingredients for potential allergens and consult a health professional if in doubt.


Leave a Comment