

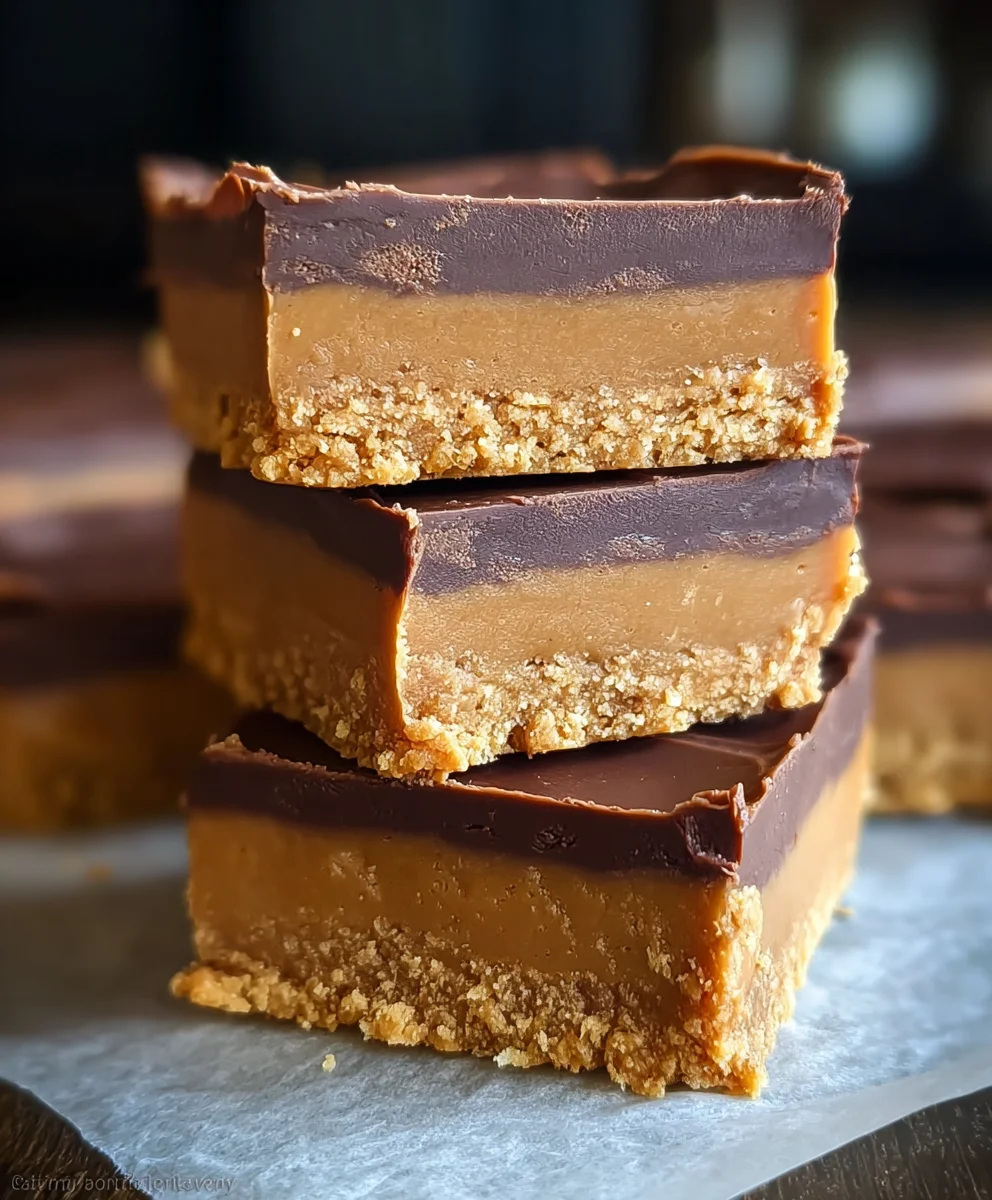
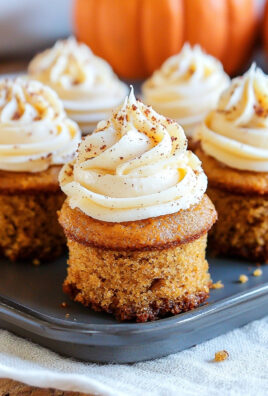
Peanut Butter Bars are more than just a dessert; they’re a nostalgic hug in edible form. For so many of us, these simple yet utterly satisfying treats evoke memories of childhood bake sales, after-school snacks, and sharing joy with loved ones. There’s something inherently comforting about the rich, creamy peanut butter base, perfectly complemented by a sweet, often chocolatey, topping. What truly sets these Peanut Butter Bars apart is their incredible versatility. Whether you prefer them with a classic chocolate ganache, a swirl of extra peanut butter, or even a sprinkle of sea salt to elevate the flavors, they always deliver pure bliss. This recipe is designed to be your go-to guide for crafting the most delicious and crowd-pleasing Peanut Butter Bars you’ve ever tasted, guaranteed to become a staple in your baking repertoire.

Ingredients:
- 1 cup butter, melted
- 2 cups graham cracker crumbs
- 2 cups confectioners’ sugar (powdered sugar)
- 1 cup + 4 tablespoons peanut butter
- 1 ½ cups milk chocolate chips
Preparing the Base
The foundation of these irresistible Peanut Butter Bars is a simple yet incredibly satisfying no-bake crust. To begin, ensure your butter is fully melted. This can be done gently in a saucepan over low heat or by microwaving it in short, controlled bursts until completely liquid. Precision here isn’t critical, but ensuring it’s fully melted will help it combine smoothly with the other base ingredients.
In a medium-sized mixing bowl, combine the 2 cups of graham cracker crumbs with the melted butter. Use a sturdy spoon or spatula to stir these together thoroughly. You want to achieve a texture where all the crumbs are evenly coated with the melted butter, resembling wet sand. This coating is crucial for binding the crumbs together and creating a firm base that won’t crumble apart when you slice into the finished bars. Once mixed, press this graham cracker mixture evenly into the bottom of an 8×8 inch baking pan. A flat-bottomed glass or the back of a measuring cup works wonderfully for this task, ensuring a compact and level layer. Take your time to press firmly, especially into the corners, to create a solid base. This base layer will chill while you prepare the peanut butter filling, firming up nicely.
Crafting the Peanut Butter Filling
Now for the star of the show: the creamy, luscious peanut butter layer. In a separate, larger mixing bowl, combine the 2 cups of confectioners’ sugar (also known as powdered sugar) with the 1 cup of peanut butter. It’s important to use creamy peanut butter for the smoothest texture; crunchy peanut butter can introduce an unexpected texture to this layer.
Begin by stirring these two ingredients together. At first, they might seem reluctant to combine, appearing crumbly. Keep stirring and gradually incorporate the additional 4 tablespoons of peanut butter. As you continue to mix, you’ll notice the mixture transforming into a thick, dough-like consistency. This is exactly what we’re aiming for. If the mixture seems excessively dry or difficult to stir, you can add another tablespoon of peanut butter at a time, but be cautious not to make it too soft, as this will affect its ability to set. Once you have a uniform, thick paste, carefully spoon this peanut butter mixture over the chilled graham cracker crust. Spread it out evenly using a spatula or the back of a spoon, ensuring it forms a consistent layer across the entire surface of the base. Gentle pressure will help it adhere well to the crust.
Melting the Chocolate Topping
The final touch that elevates these Peanut Butter Bars to dessert perfection is the rich milk chocolate topping. In a microwave-safe bowl, combine the 1 ½ cups of milk chocolate chips. You can also use a combination of milk chocolate and semi-sweet chocolate chips if you prefer a slightly less sweet topping.
Microwave the chocolate chips in 30-second intervals, stirring well after each interval. It’s essential to stir frequently to prevent the chocolate from burning. The residual heat will continue to melt the chips even after you remove them from the microwave. Continue this process until the chocolate is smooth and completely melted, with no lumps remaining. Alternatively, you can melt the chocolate chips using a double boiler: place them in a heatproof bowl set over a pot of simmering water, stirring constantly until smooth.
Assembling and Chilling the Bars
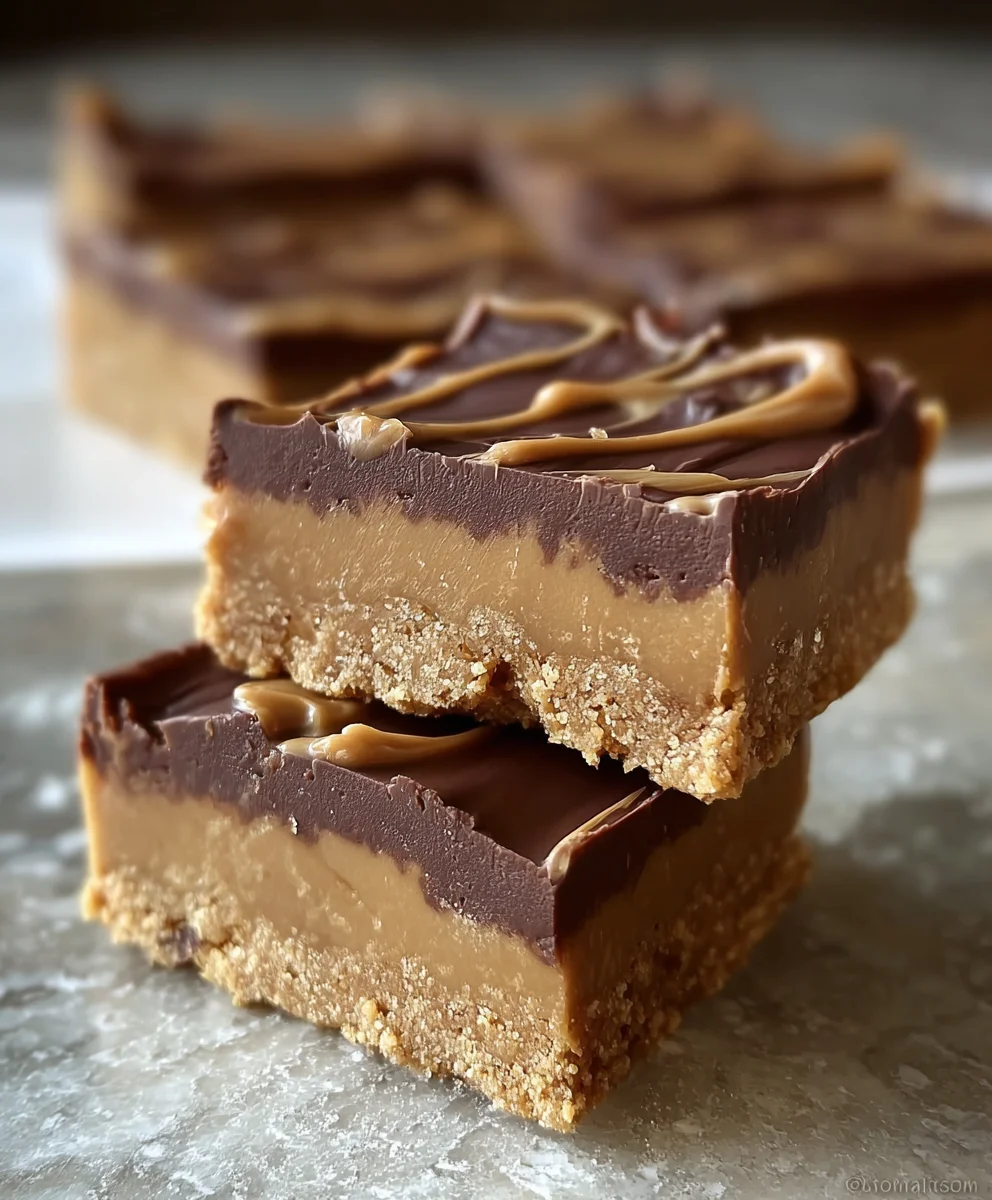
Once your chocolate is perfectly melted and smooth, carefully pour it over the peanut butter layer in the baking pan. Using your spatula, spread the melted chocolate evenly to cover the entire surface of the peanut butter filling. Work quickly but gently to ensure a smooth and uniform chocolate coating, right to the edges of the pan. A perfectly smooth chocolate layer is aesthetically pleasing and creates a satisfying snap when you cut into the bars.
Now comes the most important, albeit challenging, part: patience. Place the assembled 8×8 inch pan into the refrigerator. Allow the Peanut Butter Bars to chill for at least 2-3 hours, or until the chocolate topping is completely set and firm to the touch. For best results and easier slicing, you can even refrigerate them for longer, up to overnight. The chilling process is critical for allowing all the layers to firm up and meld together, ensuring clean cuts and a delightful texture in every bite. Once firm, remove the pan from the refrigerator.
Slicing and Serving
With the Peanut Butter Bars fully chilled and set, it’s time to transform the pan into individual, delectable treats. For the cleanest cuts, I recommend using a large, sharp knife. For an even easier slicing experience and to prevent the chocolate from cracking excessively, you can briefly dip your knife in hot water and wipe it dry between each cut. This helps the knife glide through the chocolate and the other layers smoothly. Cut the bars into your desired serving size. Squares or rectangles are the most common shapes. Arrange the finished Peanut Butter Bars on a serving platter and prepare for rave reviews. These bars are best stored in an airtight container in the refrigerator to maintain their firmness and freshness. Enjoy these delightful Peanut Butter Bars!
Conclusion:
And there you have it – your guide to creating these incredibly delicious and satisfying Peanut Butter Bars! We’ve walked through each step, from the simple preparation of the base to the luscious peanut butter topping and final chocolate drizzle. These bars are a true crowd-pleaser, perfect for bake sales, holiday gatherings, or simply as a delightful treat to enjoy with a cup of coffee or milk. Remember, the beauty of this recipe lies in its adaptability. Don’t be afraid to experiment with different types of chocolate or add a sprinkle of sea salt for an extra layer of flavor. I truly encourage you to give these Peanut Butter Bars a try; you won’t be disappointed!
Frequently Asked Questions:
Can I make these Peanut Butter Bars ahead of time?
Absolutely! These bars are fantastic for making in advance. Once they are cooled and set, you can store them in an airtight container at room temperature for up to 3 days, or in the refrigerator for up to a week. They often taste even better the next day as the flavors meld together!
What are some good variations for these Peanut Butter Bars?
The possibilities are endless! You can swap the semi-sweet chocolate for milk chocolate or dark chocolate. Adding a handful of chopped peanuts or mini chocolate chips to the topping before it sets is a delicious touch. For a festive twist, consider adding a few sprinkles to the chocolate drizzle. You could also try a swirl of jam on top of the peanut butter layer before adding the chocolate.
How do I store leftover Peanut Butter Bars?
To keep your Peanut Butter Bars fresh, store them in an airtight container. If you live in a warm climate or if your kitchen tends to be warm, refrigerating them is the best option to prevent the chocolate from melting. They will keep well for about a week in the fridge.
Easy Peanut Butter Bars-Delicious & Simple Treat
A simple and delicious no-bake treat featuring a graham cracker base, creamy peanut butter filling, and a rich chocolate topping.
Ingredients
-
1 cup butter, melted
-
2 cups graham cracker crumbs
-
2 cups confectioners’ sugar
-
1 cup + 4 tablespoons peanut butter
-
1 ½ cups milk chocolate chips
Instructions
-
Step 1
Prepare the base: Melt butter. In a bowl, combine melted butter with graham cracker crumbs until evenly coated. Press mixture evenly into the bottom of an 8×8 inch baking pan. -
Step 2
Craft the peanut butter filling: In a separate bowl, combine confectioners’ sugar and peanut butter. Stir until a thick, dough-like consistency is achieved. Spread evenly over the graham cracker crust. -
Step 3
Melt the chocolate topping: In a microwave-safe bowl, melt milk chocolate chips in 30-second intervals, stirring between each, until smooth and completely melted. -
Step 4
Assemble and chill: Pour melted chocolate over the peanut butter layer and spread evenly. Refrigerate the pan for at least 2-3 hours, or until the chocolate topping is completely set. -
Step 5
Slice and serve: Use a sharp knife, briefly dipped in hot water and dried between cuts for cleaner slices, to cut the chilled bars into desired serving sizes. Store in an airtight container in the refrigerator.
Important Information
Nutrition Facts (Per Serving)
It is important to consider this information as approximate and not to use it as definitive health advice.
Allergy Information
Please check ingredients for potential allergens and consult a health professional if in doubt.
Leave a Comment