

How to Make Lemon Curd is a question that conjures up images of sunshine, creamy indulgence, and the bright zing of citrus. If you’ve ever savored a bite of lemon meringue pie, a slice of tart, or even just a spoonful straight from the jar, you’ve experienced the magic of this vibrant dessert staple. What is it about this seemingly simple concoction that captures our hearts and taste buds? It’s that perfect balance of sweet and tart, the silky smooth texture that melts in your mouth, and the incredibly versatile nature of lemon curd that makes it so beloved. Whether you’re an experienced baker looking to elevate your next creation or a curious begin extractner wanting to master a classic, understanding how to make lemon curd from scratch will unlock a world of delicious possibilities. This isn’t just a recipe; it’s an invitation to create something truly special, a sunshine-filled treat that’s surprisingly easy to achieve at home.

Ingredients:
- 1 cup plus 2 tablespoons granulated sugar
- 1 tablespoon cornstarch
- 1/8 teaspoon salt
- 1 cup fresh lemon juice (this is about the juice from 5 medium to large lemons)
- 3 large eggs
- 2 tablespoons unsalted butter, cut into small pieces
- 1 teaspoon grated lemon rind (zest from about 1 lemon)
Preparing Your Workspace and Ingredients
Before we begin extract the magic of turning simple ingredients into a luscious lemon curd, it’s crucial to have everything prepped and ready. This not only makes the process smoother but also prevents any last-minute rushes that could lead to errors. First, gather all your ingredients and measure them accurately. For the lemon juice, I find it’s best to zest the lemons before juicing them. This way, you won’t be fumbling with a whole lemon when you need to grate its zest. A microplane or a fine grater works best for zesting, ensuring you only get the fragrant outer peel and not the bitter white pith. Once zested, juice your lemons. A good rule of thumb is to roll the lemons firmly on your countertop before cutting them; this helps to release more juice. You should aim for about 1 cup of juice. For the eggs, make sure they are at room temperature. This helps them to incorporate more evenly into the mixture. The butter should also be at room temperature or slightly softened, and then cut into small cubes. This will help it melt and emulsify into the curd more easily. Finally, whisk together the granulated sugar, cornstarch, and salt in a medium-sized, heavy-bottomed saucepan. Using a heavy-bottomed pan is essential for lemon curd, as it distributes heat more evenly and reduces the risk of scorching the delicate mixture.
Cooking the Lemon Curd Base
Now for the cooking process. Place the saucepan with the sugar, cornstarch, and salt mixture over medium-low heat. This initial low heat is important to prevent the cornstarch from clumping. Whisk these dry ingredients together for about 30 seconds to ensure there are no lumps and everything is well combined. Now, gradually whisk in the fresh lemon juice. Continue whisking until the mixture is smooth and there are no visible lumps of cornstarch. This step starts to dissolve the sugar and integrate the acidic lemon juice with the starch. Once the lemon juice is fully incorporated, increase the heat slightly to medium. Continue to cook, stirring constantly with a whisk or a heatproof spatula, until the mixture thickens enough to coat the back of a spoon. This usually takes about 5-8 minutes. It’s important to keep stirring to prevent the bottom from sticking and burning, and to ensure even cooking. You’ll notice the mixture start to get slightly opaque as the cornsgin extractch begins to do its job. Don’t rush this stage; patience is key to a smooth curd.
Tempering the Eggs
This next step is crucial for achieving a silky-smooth texture and preventing your eggs from scrambling. In a separate bowl, whisk the 3 large eggs until they are well combined and slightly frothy. Once your lemon juice and sugar mixture has thickened to your desired consistency in the saucepan, it’s time to temper the eggs. Tempering involves slowly introducing a hot liquid into the eggs to gently raise their temperature without cooking them. Ladle about half a cup of the hot lemon mixture, a little at a time, into the beaten eggs while whisking vigorously. Continue adding the hot liquid in small increments, whisking continuously. This gradual introduction of heat prevents the eggs from cooking too quickly. Once you’ve added about half of the hot lemon mixture to the eggs, you can then pour the tempered egg mixture back into the saucepan with the remaining lemon mixture.
Finishing the Curd and Adding Richness
With the tempered egg mixture back in the saucepan, continue to cook over low heat, stirring constantly. This is where the magic truly happens. Keep stirring gently and consistently. The mixture will continue to thicken as the eggs cook and emulsify. You are looking for a consistency that is thick enough to coat the back of a spoon and holds its shape for a few seconds when you draw a finger through it. Be careful not to let it boil vigorously, as this can cause the eggs to curdle. The total cooking time after adding the eggs will be around 3-5 minutes. Once the curd has reached the desired thickness, remove the saucepan from the heat immediately. This is very important to stop the cooking process. Now, add the 2 tablespoons of unsalted butter and the 1 teaspoon of grated lemon rind. Stir the butter into the hot curd until it is completely melted and incorporated. The butter adds a wonderful richness and gloss to the lemon curd, making it even more decadent. The lemon rind will infuse its bright aroma and flavor into the final product.
Straining and Cooling
To ensure your lemon curd is perfectly smooth and free of any tiny bits of cooked egg or stray lemon pith, straining is a highly recommended final step. Place a fine-mesh sieve over a clean bowl. Carefully pour the hot lemon curd through the sieve into the bowl. Use a spatula to gently push the curd through the sieve, leaving behind any solids. This step guarantees a silken, luxurious texture. Once strained, give the curd a good stir in the bowl. You can cover it directly with plastic wrap, pressing the wrap gently onto the surface of the curd. This prevents a skin from forming as it cools. Allow the lemon curd to cool at room temperature for about 30-45 minutes. After it has cooled slightly, transfer it to the refrigerator. It will continue to thicken as it chills. It’s best to let it chill for at least 2-3 hours, or preferably overnight, before using it. This allows the flavors to meld beautifully and the curd to achieve its final, perfect consistency.

Conclusion:
And there you have it – your journey to mastering the art of How to Make Lemon Curd is complete! We’ve walked through the simple yet rewarding process of transforming humble ingredients into a silken, zesty delight. This vibrant How to Make Lemon Curd is incredibly versatile, perfect for filling tarts and cakes, spreading on scones, or simply enjoying by the spoonful. I truly hope you feel empowered to give this recipe a try. Don’t be afraid to experiment! The beauty of How to Make Lemon Curd is its adaptability.
For serving, consider dolloping this gorgeous curd onto a simple pound cake, layering it into trifle, or using it as a bright filling for meringue cookies. You can also swirl it into yogurt or oatmeal for a tangy breakfast treat. If you’re feeling adventurous with variations, try infusing your curd with a hint of gin extractger, lavender, or even a touch of your favorite liqueur extract. Remember, practice makes perfect, and the aroma of this delicious How to Make Lemon Curd filling your kitchen is reward enough. So go forth and create some sunshine!
Frequently Asked Questions:
Q: How long will homemade lemon curd last?
Properly stored in an airtight container in the refrigerator, your How to Make Lemon Curd should last for up to 1-2 weeks. Ensure it’s cooled completely before storing.
Q: My lemon curd isn’t thickening. What went wrong?
The most common reasons for curd not thickening are not cooking it long enough, or not reaching a high enough temperature. You need to cook it gently until it coats the back of a spoon (around 170°F or 77°C). Overheating and scrambling the eggs can also be an issue; a double boiler or very low heat is key.
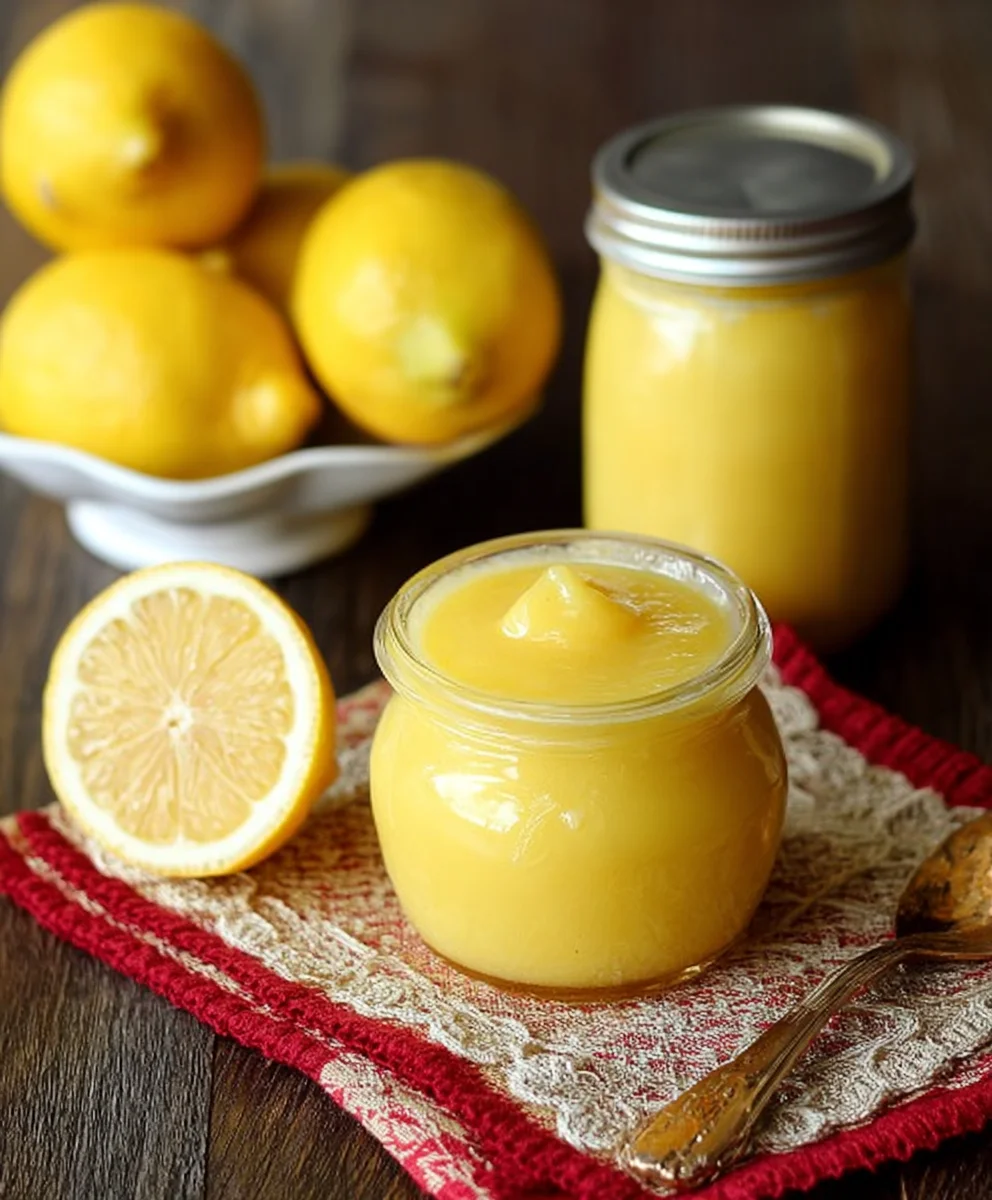
Easy Homemade Lemon Curd-Silky Smooth Delight
A simple and delicious recipe for a silky smooth homemade lemon curd, perfect for tarts, cakes, or enjoying by the spoonful.
Ingredients
-
1 cup plus 2 tablespoons granulated sugar
-
1 tablespoon cornstarch
-
1/8 teaspoon salt
-
1 cup fresh lemon juice
-
3 large eggs
-
2 tablespoons unsalted butter, cut into small pieces
-
1 teaspoon grated lemon rind
Instructions
-
Step 1
Prepare your workspace and ingredients. Zest lemons before juicing. Ensure eggs and butter are at room temperature. Whisk sugar, cornstarch, and salt in a heavy-bottomed saucepan. -
Step 2
Cook the lemon curd base over medium-low heat. Whisk dry ingredients for 30 seconds, then gradually whisk in lemon juice until smooth. Increase heat to medium and cook, stirring constantly, until thickened enough to coat the back of a spoon (about 5-8 minutes). -
Step 3
Temper the eggs by whisking them in a separate bowl until frothy. Ladle about half a cup of the hot lemon mixture into the beaten eggs a little at a time, whisking vigorously. Then, pour the tempered egg mixture back into the saucepan. -
Step 4
Finish the curd by cooking over low heat, stirring constantly, until thickened enough to coat the back of a spoon and holds shape for a few seconds (about 3-5 minutes). Do not let it boil vigorously. Remove from heat immediately. -
Step 5
Add the butter and lemon rind to the hot curd. Stir until butter is completely melted and incorporated. The butter adds richness and gloss, and the rind infuses flavor. -
Step 6
Strain the curd through a fine-mesh sieve into a clean bowl to ensure a smooth texture. Cover the surface directly with plastic wrap to prevent a skin from forming. Cool at room temperature for 30-45 minutes, then refrigerate for at least 2-3 hours, or preferably overnight, before using.
Important Information
Nutrition Facts (Per Serving)
It is important to consider this information as approximate and not to use it as definitive health advice.
Allergy Information
Please check ingredients for potential allergens and consult a health professional if in doubt.

Leave a Comment