

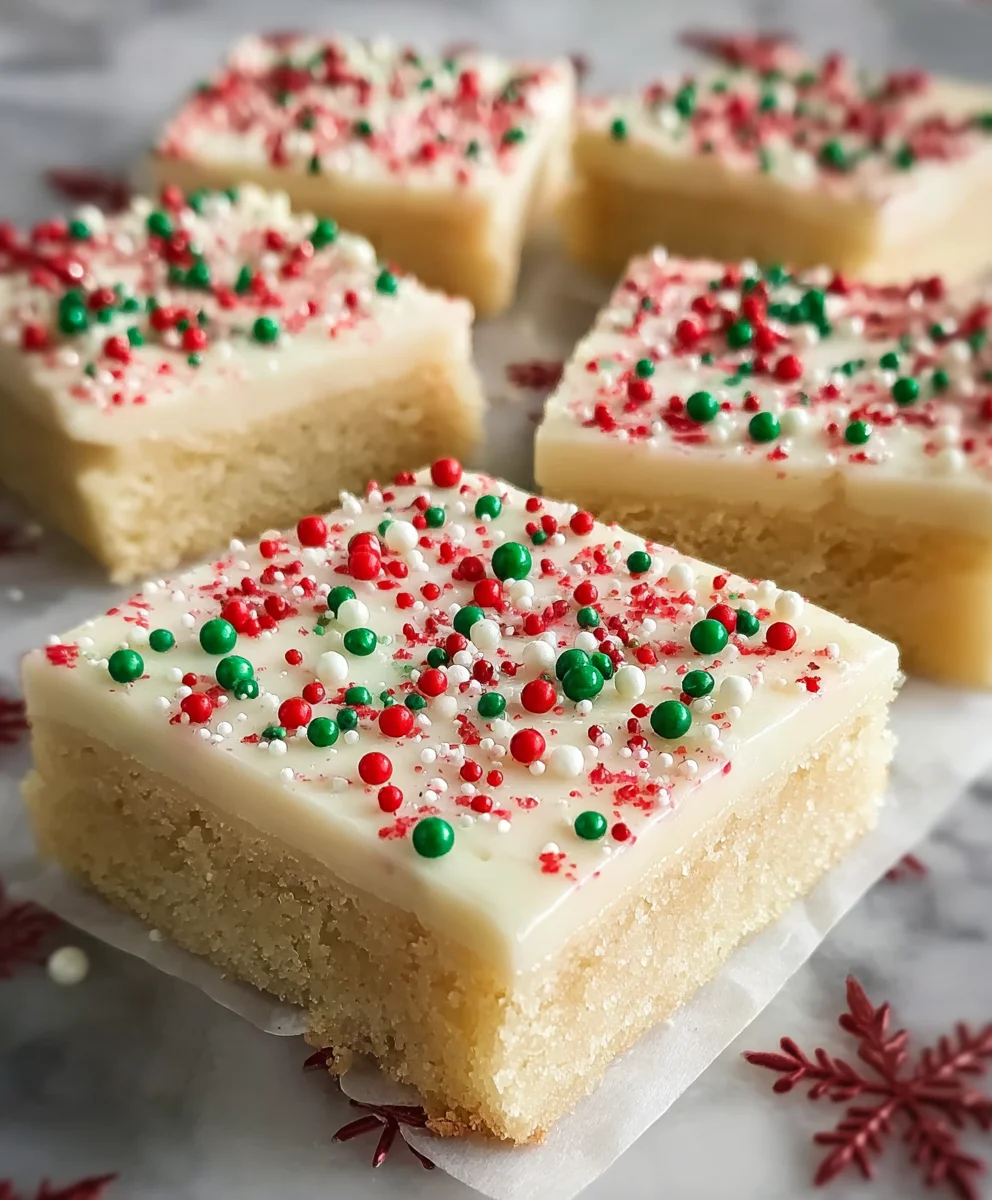
Christmas Sugar Cookie Bars are, in my humble opinion, the quintessential treat for spreading holiday cheer without the usual baking fuss. Imagine the delightful aroma of freshly baked sugar cookies wafting through your home, instantly evoking cherished memories of festive seasons past. Sugar cookies themselves have long been a beloved staple of holiday traditions, a symbol of warmth and togetherness, with their simple yet profound ability to bring smiles to every face. This delightful bar format takes all the nostalgic charm of classic cut-out cookies and transforms it into an incredibly convenient, irresistible dessert.
What makes these bars so universally adored? For starters, their texture is simply divine – wonderfully soft and chewy, a perfect contrast to the creamy, often brightly colored, frosting that adorns them. I find that the ease of preparation is a major draw; gone are the days of endless rolling, chilling, and intricate cutting. You can whip up a batch of these Christmas Sugar Cookie Bars quickly, making them an ideal choice for last-minute gatherings, potlucks, or simply a cozy evening by the fire. Adorned with festive sprinkles, they’re not just a treat for the taste buds, but a feast for the eyes, embodying the joy and vibrancy of the holiday season. They truly capture the essence of Christmas baking with minimal effort and maximum deliciousness, making them a personal favorite for creating edible memories.

Ingredients:
-
For the Christmas Sugar Cookie Bars:
- All-Purpose Flour: 3 cups (360g), measured correctly by spooning into a measuring cup and leveling off, or ideally weighed for precision.
- Baking Powder: 2 teaspoons, crucial for giving our bars a soft, slightly puffy texture.
- Salt: 1/2 teaspoon, a vital flavor enhancer that balances the sweetness.
- Unsalted Butter: 1 cup (226g or two sticks), softened to room temperature. This is incredibly important for proper creaming and a smooth batter.
- Granulated Sugar: 1 1/2 cups (300g), for that classic sweet cookie base.
- Large Eggs: 2, also at room temperature, which helps them incorporate more smoothly into the batter.
- Vanilla Extract: 2 teaspoons, providing that warm, comforting foundation of flavor.
- Almond Extract: 1/2 teaspoon (optional, but highly recommended!). This adds a lovely, subtle depth that truly elevates the “Christmas Sugar Cookie Bars” flavor profile.
-
For the Festive Cream Cheese Frosting:
- Cream Cheese: 8 ounces (226g), full-fat, softened to room temperature. This is non-negotiable for a smooth, lump-free frosting.
- Unsalted Butter: 1/2 cup (113g or one stick), softened to room temperature, just like for the bars.
- Powdered Sugar (Confectioners’ Sugar): 4-5 cups (480-600g), sifted. Starting with 4 cups and adding more as needed ensures you reach your desired consistency and sweetness. Sifting prevents lumps!
- Vanilla Extract: 1 teaspoon, enhancing the creamy, tangy sweetness of the frosting.
- Milk or Heavy Cream: 1-3 tablespoons, for thinning the frosting to your preferred spreadable consistency. Start with a little and add gradually.
-
For Decoration:
- Christmas Sprinkles: An assortment of festive red, green, white, and gold sprinkles. Nonpareils, jimmies, sugar pearls, or shaped sprinkles all work wonderfully!
- Gel Food Coloring: (Optional) Red and green, if you wish to create colorful frosting sections or details. Gel colors provide vibrant hues without thinning the frosting too much.
- Crushed Peppermint Candies: (Optional) For a cool, minty crunch and extra holiday flair.
- Edible Glitter or Gold Dust: (Optional) For an extra touch of sparkle and magic.
Instructions:
Phase 1: Preparing the Christmas Sugar Cookie Bars
- Preheat and Prepare Your Pan: First things first, let’s get that oven ready! Preheat your oven to 375°F (190°C). Then, grab a 9×13-inch baking pan. Line it completely with parchment paper, leaving an overhang on the two longer sides. This parchment paper sling is truly a lifesaver, allowing you to easily lift the entire slab of our delicious Christmas Sugar Cookie Bars out of the pan once they’ve cooled. Lightly grease the exposed ends of the pan and the parchment paper itself with a little non-stick cooking spray or butter. This extra step ensures nothing sticks, giving us perfect, clean edges.
- Whisk Dry Ingredients: In a medium bowl, whisk together your all-purpose flour, baking powder, and salt. Whisking these dry ingredients together thoroughly ensures that the leavening agent (baking powder) and salt are evenly distributed throughout the flour. This means every bite of our Christmas Sugar Cookie Bars will be perfectly seasoned and rise consistently. Set this bowl aside for now.
- Cream Butter and Sugar: In the large bowl of a stand mixer fitted with the paddle attachment, or with an electric hand mixer, cream together the softened unsalted butter and granulated sugar. Beat on medium speed for about 2-3 minutes, or until the mixture becomes wonderfully light, fluffy, and noticeably pale in color. This creaming process is fundamental for creating tender Christmas Sugar Cookie Bars; it incorporates air into the butter and sugar, which contributes to the cookies’ delicate texture. Don’t rush this step! Scrape down the sides of the bowl often to ensure everything is evenly combined.
- Add Eggs and Extracts: Reduce the mixer speed to low. Add the large eggs one at a time, beating well after each addition until fully incorporated. Adding them slowly helps emulsify the mixture, preventing it from looking curdled. Once the eggs are mixed in, add the vanilla extract and, if you’re using it (and I highly recommend it for that extra special touch!), the almond extract. Beat on low speed until just combined. The aroma starting to waft from the bowl right now is just heavenly and truly signals the start of our festive “Christmas Sugar Cookie Bars” journey.
- Combine Wet and Dry Ingredients: With the mixer on its lowest speed, gradually add the dry ingredient mixture to the wet ingredients, about a third at a time. Mix only until the flour streaks have just disappeared. It’s absolutely crucial not to overmix the dough at this stage. Overmixing develops the gluten in the flour too much, which can lead to tough, dense Christmas Sugar Cookie Bars instead of the wonderfully soft and tender ones we’re aiming for. A few small streaks of flour are perfectly fine; they’ll disappear during baking.
- Press Dough into Pan: The dough will be thick, but don’t worry, that’s exactly what we want. Using a spatula or your hands (lightly floured if the dough is too sticky), press the dough evenly into the prepared 9×13-inch baking pan. Take your time to ensure the dough is spread right to the edges and has a consistent thickness across the entire pan. This uniform thickness is key for even baking, guaranteeing that your Christmas Sugar Cookie Bars cook through perfectly without dry edges or a raw center.
- Bake to Golden Perfection: Place the pan in your preheated oven and bake for 20-25 minutes. The exact baking time can vary depending on your oven, so start checking around the 20-minute mark. You’re looking for the edges to be lightly golden and the center to appear set, no longer wet or jiggly. A toothpick inserted into the center should come out with moist crumbs attached, but not wet batter. Be careful not to overbake, as this can make your Christmas Sugar Cookie Bars dry.
- Cool Completely: Once baked, remove the pan from the oven and place it on a wire rack to cool completely. This step is non-negotiable for perfectly frosted bars. Resist the urge to frost warm bars, as the frosting will melt and create a messy situation. Let the bars cool for at least 1-2 hours, or even longer if your kitchen is warm. For the best results, they should be fully at room temperature or even slightly chilled before moving on to the next phase. Once cool, use the parchment paper overhangs to carefully lift the entire slab of Christmas Sugar Cookie Bars out of the pan and transfer them to a cutting board or flat surface.
Phase 2: Making the Festive Cream Cheese Frosting
- Beat Cream Cheese and Butter: In a large mixing bowl, or the bowl of your stand mixer, combine the softened cream cheese and softened unsalted butter. Beat these two ingredients together on medium speed for 2-3 minutes until the mixture is incredibly smooth and creamy, with no lumps of cream cheese remaining. It’s really important that both are at room temperature to achieve this silky texture; cold cream cheese or butter will result in a lumpy, unpleasant frosting. Scrape down the sides of the bowl frequently to ensure everything is well combined.
- Gradually Add Powdered Sugar: With the mixer on low speed, begin adding the sifted powdered sugar, one cup at a time. Beat well after each addition until fully incorporated. This gradual addition prevents a powdered sugar cloud from engulfing your kitchen and allows you to control the consistency. Once all 4 cups are added, observe the frosting’s thickness. If you prefer a thicker, stiffer frosting, you can stop here. If you want it a bit sweeter or firmer, add the remaining cup of powdered sugar in half-cup increments until you reach your desired consistency.
- Incorporate Vanilla and Thin with Milk/Cream: Add the vanilla extract to the frosting. Now, for the consistency control: add milk or heavy cream, starting with 1 tablespoon at a time. Beat on low speed, then increase to medium, until the frosting reaches your desired spreadable consistency. You might need 1, 2, or even 3 tablespoons. The goal is a frosting that is easy to spread but holds its shape well. Too thin, and it’ll run; too thick, and it’ll be hard to apply smoothly.
- Beat Until Light and Fluffy: Once all ingredients are combined and you’ve achieved your desired consistency, increase the mixer speed to medium-high and beat the frosting for another 1-2 minutes. This final beating incorporates more air, making the cream cheese frosting wonderfully light, fluffy, and even more delicious for our Christmas Sugar Cookie Bars. It will also appear whiter and shinier. Give it a taste test and adjust sweetness if necessary by adding a little more powdered sugar, or a pinch of salt if it feels too sweet.
- Optional: Color Your Frosting: If you’d like to create a festive, multi-colored frosting for your Christmas Sugar Cookie Bars, divide the frosting into separate bowls. Add a few drops of red gel food coloring to one bowl and green to another, mixing until you achieve your desired vibrant shades. Leave some white for a classic look, or experiment with other holiday colors!
Phase 3: Assembling and Decorating Your Christmas Sugar Cookie Bars
- Ensure Bars Are Fully Cooled: This cannot be stressed enough! Make absolutely certain that your Christmas Sugar Cookie Bars are completely, entirely cool before you even think about applying the frosting. If they’re even slightly warm, the beautiful cream cheese frosting will melt, slide off, and make a sticky mess. Patience here is a virtue that will be rewarded with perfectly neat and pretty bars.
- Frost the Bars Evenly: Once the bars are cool, use an offset spatula or the back of a spoon to generously spread the prepared cream cheese frosting evenly over the entire surface of the cooled cookie bar slab. Take your time to get a nice, smooth layer from edge to edge. If you’ve opted for multiple frosting colors, you can swirl them together artfully, or frost sections with different colors for a striped or checkerboard effect. This is where your creative flair for your “Christmas Sugar Cookie Bars” truly comes alive!
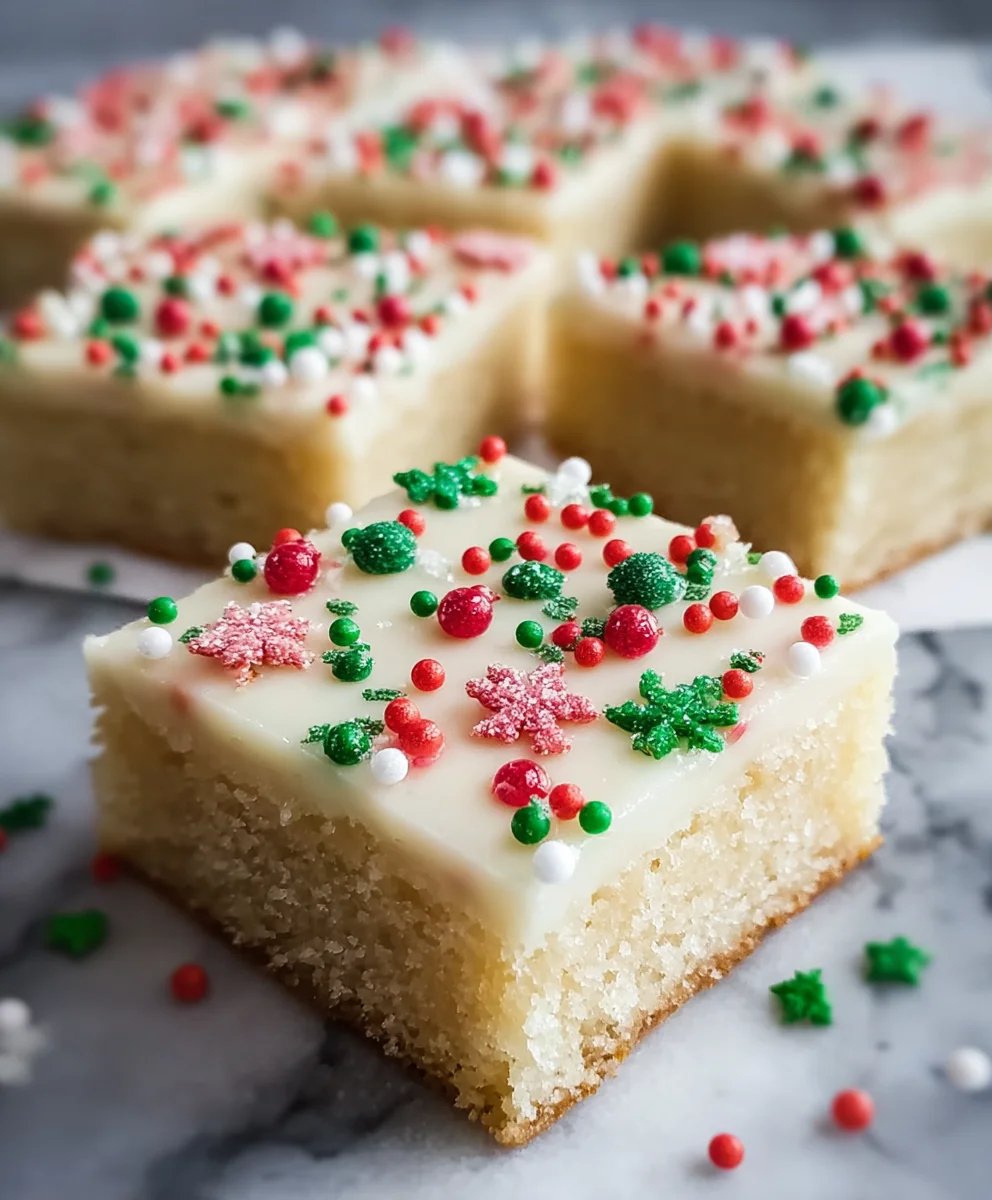
- Decorate with Festive Sprinkles and Toppings: Now for the fun part – decorating! Immediately after frosting, generously sprinkle your assortment of Christmas sprinkles over the top of the bars. The frosting will still be soft enough for the sprinkles to adhere well. Don’t be shy; more sprinkles equal more festive cheer! If using crushed peppermint candies, sprinkle those on now too for a burst of minty flavor and texture. For extra sparkle, a dusting of edible glitter or gold dust can make your “Christmas Sugar Cookie Bars” truly magical.
- Chill Before Cutting: To ensure clean, neat cuts and to help the frosting set beautifully, transfer the frosted and decorated slab of Christmas Sugar Cookie Bars to the refrigerator. Chill for at least 30-60 minutes, or until the frosting is firm to the touch. This chilling process makes a significant difference in the final presentation.
- Cut into Individual Bars: Once thoroughly chilled, remove the slab from the refrigerator. Using a large, sharp knife, cut the bars into your desired size. I usually aim for about 24 bars (6 rows by 4 rows) for a good, snackable size, but you can go smaller for bite-sized treats or larger for a more substantial dessert. For the cleanest cuts, wipe your knife with a warm, damp cloth between each slice. This prevents the frosting from sticking and dragging.
- Serve and Store: Arrange your beautiful Christmas Sugar Cookie Bars on a festive platter and serve them up to delighted friends and family! These bars are wonderful for holiday parties, cookie exchanges, or just enjoying with a warm cup of cocoa. Leftover bars should be stored in an airtight container in the refrigerator for up to 5-7 days. While they are best enjoyed at room temperature, they are also quite delicious chilled, offering a firmer, almost cheesecake-like texture. Enjoy every delightful bite of your homemade Christmas Sugar Cookie Bars!
Conclusion:
Well, my fellow baking enthusiasts, we’ve reached the sweet end of our journey, and I genuinely hope you’re feeling as inspired as I am to whip up a batch of these truly irresistible treats. If there’s one recipe you absolutely must add to your holiday repertoire this year, it’s these incredible bars. They’re more than just a dessert; they’re a celebration in every single bite, a testament to the simple joy that homemade baking brings. I’ve shared many recipes over the years, but I can honestly say that the ease, flavor, and sheer crowd-pleasing nature of this particular recipe sets it apart. Forget the fuss of rolling and cutting individual cookies; these bars deliver all the beloved charm and deliciousness of traditional sugar cookies with a fraction of the effort. They bake up perfectly soft and chewy, with that delightful, buttery sweetness that makes sugar cookies so universally adored, all topped with a dreamy, creamy frosting that’s just begging for sprinkles. It’s the kind of recipe that makes you feel like a baking superstar without demanding hours of your precious time, leaving you more moments to truly savor the festive season.
Why These Christmas Sugar Cookie Bars Are a Game-Changer:
From the moment the aroma of vanilla and butter fills your kitchen, you’ll know you’ve made the right choice. These bars are incredibly forgiving for bakers of all skill levels, delivering consistent results every time. The texture is a masterful balance – firm enough to hold its shape beautifully, yet wonderfully tender and melt-in-your-mouth. The frosting, which I’ve kept deliciously simple, provides the perfect creamy counterpoint to the rich cookie base, creating a harmonious symphony of flavors and textures. What truly makes these Christmas Sugar Cookie Bars a must-try is their versatility and ability to spread immense joy. They are inherently festive, begging for colorful sprinkles and holiday cheer, instantly transforming any table into a visual feast. Imagine the smiles when these appear at your holiday gathering, or the appreciation from neighbors when they receive a plate as a thoughtful gift. They embody the spirit of the season in the most delicious way possible.
Serving Suggestions & Creative Variations to Spark Your Imagination:
Now that you’ve got this incredible recipe under your belt, let’s talk about how to make it truly shine and adapt it to any occasion or preference. Serving these bars is wonderfully straightforward. They are absolutely perfect served at room temperature, making them ideal for potlucks, holiday parties, or as a delightful addition to any dessert buffet. Slice them into generous squares for a hearty treat, or cut them into smaller, bite-sized pieces for an elegant finger food option that makes entertaining a breeze. Pair them with a steaming mug of hot cocoa, a robust cup of coffee, or a delicate herbal tea for a truly comforting experience. For gifting, arrange a few squares in a festive box or cellophane bag tied with a ribbon; they make thoughtful, homemade presents that everyone appreciates.
- Frosting Flavors: While the vanilla buttercream is a classic, feel free to experiment! Try a tangy cream cheese frosting for a delightful twist, or infuse your buttercream with a hint of peppermint extract for a refreshing holiday touch. A lemon zest buttercream would add a bright, zesty note, perfect for cutting through the sweetness.
- Seasonal Sprinkles & Toppings: This is where you can truly let your creativity flow! Beyond the traditional red and green, consider iridescent white and silver sprinkles for a winter wonderland theme, or use natural colored sprinkles for a more rustic look. Crushed candy canes, finely chopped toasted nuts (like pecans or walnuts), or even a drizzle of melted white or dark chocolate can elevate their visual appeal and add another layer of texture and flavor.
- Dough Variations: Don’t be afraid to subtly flavor the cookie dough itself. A teaspoon of almond extract in addition to or in place of vanilla can give it a lovely marzipan-like nuance. A touch of orange or lemon zest folded into the dough before baking can add a wonderful brightness that complements the sweetness beautifully.
- Beyond Christmas: While they shine as Christmas Sugar Cookie Bars, this base recipe is incredibly adaptable for any holiday! Change the sprinkle colors and themes, and you have bars perfect for Halloween (orange and black), Valentine’s Day (red and pink), or even Fourth of July (red, white, and blue). This truly is a year-round winner!
Your Baking Adventure Awaits – Share Your Sweet Success!
My deepest hope is that this recipe inspires you to get into the kitchen and create something truly delicious. I promise you, the joy of baking these bars, from mixing the simple ingredients to seeing them emerge golden and fragrant from the oven, is immense. And the taste? Absolutely divine. I wholeheartedly encourage you to give this recipe a try very soon. It’s perfect for a cozy weekend baking project, an impressive contribution to a holiday potluck, or simply to satisfy that sweet craving. Once you’ve made these delightful treats, I would absolutely love to hear all about your experience! Did you stick to the classic, or did you venture into exciting new variations? What kind of sprinkles did you use? Please don’t hesitate to share your thoughts, your tips, and especially your photos in the comments section below. Your feedback and creations truly make this baking community vibrant and inspiring. Let’s spread some holiday cheer, one perfect sugar cookie bar at a time!
Easy Christmas Sugar Cookie Bars
These Easy Christmas Sugar Cookie Bars offer the nostalgic charm of classic sugar cookies in a convenient, soft, and chewy bar format. Topped with a creamy festive frosting and sprinkles, they’re perfect for holiday gatherings with minimal baking fuss.
Ingredients
-
3 cups (360g) All-Purpose Flour
-
2 tsp Baking Powder
-
1/2 tsp Salt
-
1 cup (226g) Unsalted Butter, softened
-
1 1/2 cups (300g) Granulated Sugar
-
2 Large Eggs, room temperature
-
2 tsp Vanilla Extract
-
1/2 tsp Almond Extract (optional)
-
8 oz (226g) Full-Fat Cream Cheese, softened
-
1/2 cup (113g) Unsalted Butter, softened
-
4-5 cups (480-600g) Sifted Powdered Sugar
-
1 tsp Vanilla Extract
-
1-3 tbsp Milk or Heavy Cream
-
Christmas Sprinkles
-
Optional: Gel Food Coloring (Red, Green)
-
Optional: Crushed Peppermint Candies
-
Optional: Edible Glitter or Gold Dust
Instructions
-
Step 1
Prepare Oven & Pan: Preheat oven to 375°F (190°C). Line a 9×13-inch baking pan with parchment paper, leaving an overhang, then lightly grease. -
Step 2
Combine Dry Ingredients: In a medium bowl, whisk together flour, baking powder, and salt. -
Step 3
Cream Wet Ingredients: In a large bowl, cream softened butter and granulated sugar until light and fluffy (2-3 min). Beat in eggs one at a time, then vanilla and optional almond extract. -
Step 4
Form Dough: Gradually add dry ingredients to wet, mixing on low speed until just combined. Do not overmix. -
Step 5
Bake Bars: Press dough evenly into the prepared pan. Bake for 20-25 minutes, until edges are lightly golden and center is set. -
Step 6
Cool Completely: Let bars cool completely on a wire rack (1-2 hours) before lifting out onto a cutting board. -
Step 7
Make Frosting: Beat softened cream cheese and butter until smooth (2-3 min). Gradually add sifted powdered sugar, then vanilla extract and 1-3 tbsp milk/cream until desired spreadable consistency. Beat on medium-high for 1-2 minutes until light and fluffy. Optionally, color frosting with gel food coloring. -
Step 8
Frost & Decorate: Once bars are fully cooled, spread frosting evenly over the top. Immediately decorate with Christmas sprinkles and any optional toppings. -
Step 9
Chill & Serve: Chill bars for 30-60 minutes until frosting is firm. Cut into 24 bars, wiping knife between cuts. Store in an airtight container in the refrigerator for up to 5-7 days.
Important Information
Nutrition Facts (Per Serving)
It is important to consider this information as approximate and not to use it as definitive health advice.
Allergy Information
Please check ingredients for potential allergens and consult a health professional if in doubt.

Leave a Comment