

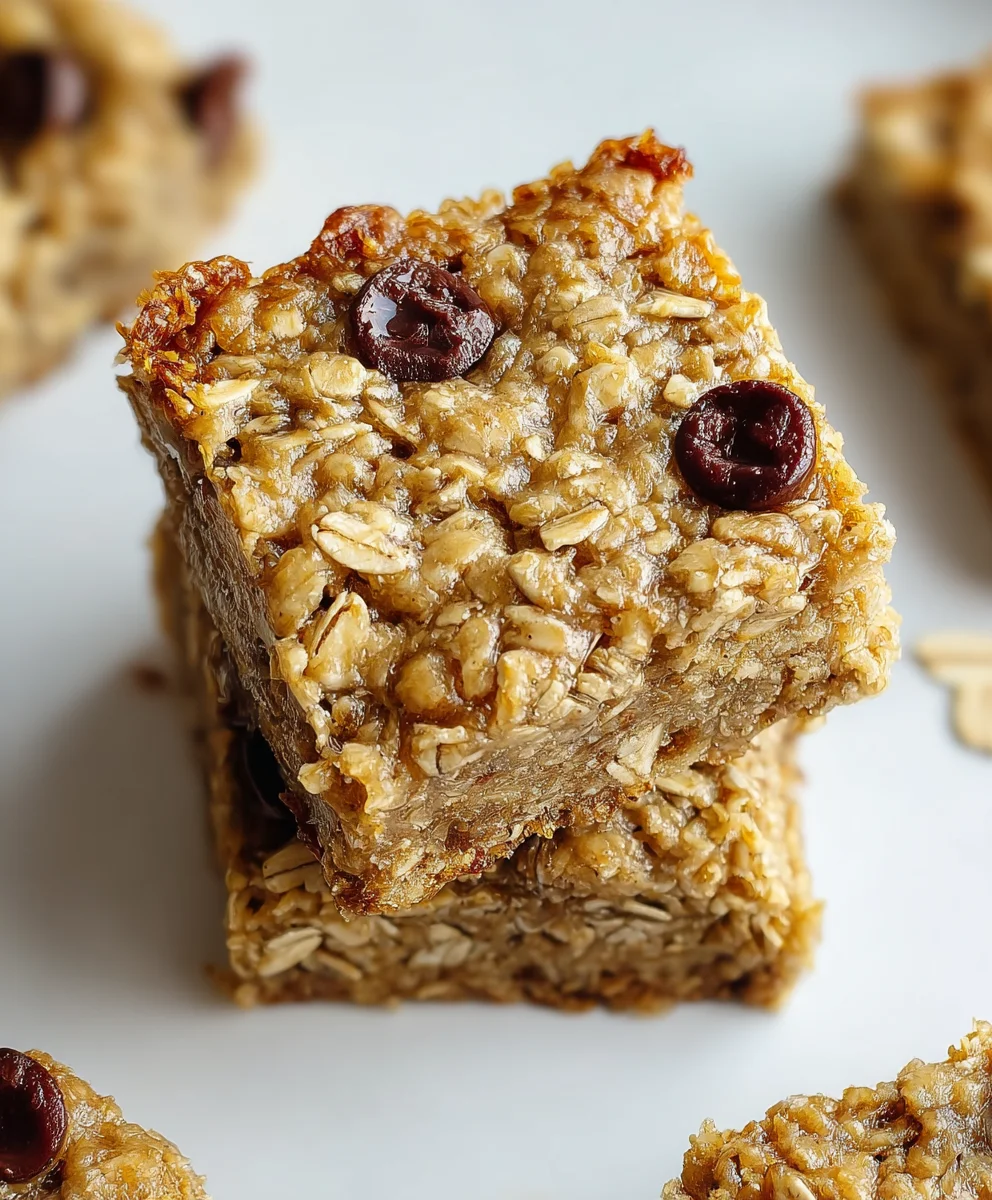
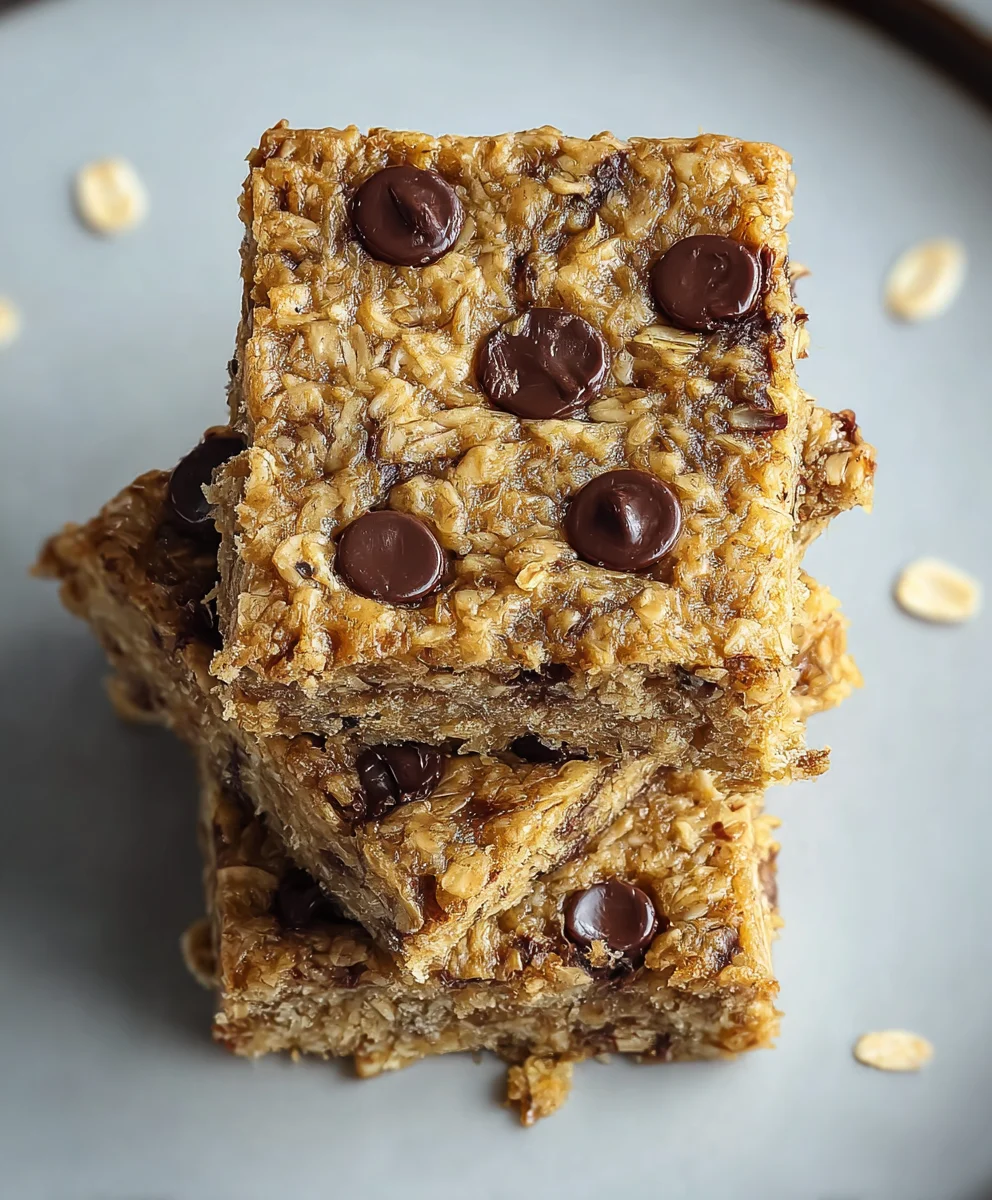
Simple Banana Oat Bars are more than just a quick snack; they’re a little bite of comfort, packed with wholesome goodness and an irresistible, naturally sweet flavor that makes them a perennial favorite. Imagin extracte a morning where you can grab something that’s both incredibly easy to make and utterly delicious, satisfying your sweet tooth without a hint of guilt. That’s the magic of these bars! They’re perfect for busy mornings, post-workout refueling, or as a satisfying afternoon pick-me-up. What truly sets these Simple Banana Oat Bars apart is their incredible versatility. They’re naturally gluten-free and can be easily adapted to be vegan or nut-free, making them a crowd-pleaser for almost everyone. The simple combination of ripe bananas, hearty oats, and a few pantry staples creates a texture that’s wonderfully chewy on the inside and slightly crisp on the edges, proving that healthy can be exceptionally tasty.
Why You’ll Love These Simple Banana Oat Bars
A Perfect Blend of Sweetness and Wholesome Ingredients

Ingredients:
- 5 ripe bananas, mashed
- 1 cup creamy peanut butter
- 4 cups rolled oats (old-fashioned oats work best for texture)
- 1/4 cup semi-sweet chocolate chips (or your favorite kind)
Getting Started: Preparing Your Baking Pan and Oven
Preheating the Oven and Pan Preparation
The first step to creating these delightful Simple Banana Oat Bars is to get your oven ready. Preheat it to 350 degrees Fahrenheit (175 degrees Celsius). This consistent temperature is crucial for ensuring your bars bake evenly and achieve that perfect chewy texture. While the oven is heating up, you’ll want to prepare your baking pan. A standard 9×13 inch baking pan is ideal for this recipe. To prevent any sticking and to make cleanup a breeze, line the pan with parchment paper. Ensure the parchment paper overhangs the sides of the pan slightly; this creates convenient “handles” that will make lifting the baked bars out of the pan much easier once they’ve cooled. You can lightly grease the parchment paper with a bit of cooking spray or butter if you want extra insurance against sticking, though it’s usually not strictly necessary if you use good quality parchment paper.
Mixing the Base: Combining the Wet Ingredients
Creating the Banana-Peanut Butter Foundation
Now that your oven and pan are prepped, it’s time to bring together the core components of our Simple Banana Oat Bars. In a large mixing bowl, combine the mashed ripe bananas and the creamy peanut butter. It’s important that your bananas are quite ripe, meaning they have plenty of brown spots. Ripe bananas are sweeter and softer, making them easier to mash and contributing a richer banana flavor to the bars. For the peanut butter, any smooth, creamy variety will work wonderfully. If you prefer a chunkier texture, you could experiment with crunchy peanut butter, but creamy will ensure a smoother blend with the banana. Use a sturdy spoon or a spatula to mix these two ingredients thoroughly. You’re aiming for a well-combined, somewhat lumpy mixture. Don’t worry if it’s not perfectly smooth; the texture from the oats and chocolate chips will add interest later. Make sure to scrape the sides and bottom of the bowl to incorporate all the peanut butter and banana together, creating a cohesive base for your bars.
Incorporating the Dry Ingredients: Building the Structure
Adding the Oats and Chocolate Chips
With your banana-peanut butter mixture ready, it’s time to add the dry ingredients that will give these bars their structure and substance. Add the rolled oats to the bowl. For the best results, I recommend using old-fashioned rolled oats. Instant oats tend to break down more easily, which can result in a mushier bar, whereas old-fashioned oats retain their shape and provide a delightful chegrape juicess. Now, gently fold in the chocolate chips. You can use semi-sweet, milk chocolate, or even dark chocolate chips – whatever your preference dictates. Stir everything together until the oats and chocolate chips are evenly distributed throughout the banana-peanut butter mixture. Be careful not to overmix at this stage; you just want everything to be incorporated. The mixture will be quite thick and sticky, which is exactly what you want. This consistency indicates that you have the right ratio of wet to dry ingredients, ensuring your bars will hold their shape.
Forming and Baking the Bars: The Transformation
Pressing the Mixture into the Pan and Baking Time
Once all the ingredients are combined, spoon the thick mixture into your prepared 9×13 inch baking pan. You’ll notice it’s quite dense. Use the back of your spoon or a spatula, or even slightly damp hands, to press the mixture evenly into the pan. This is a crucial step for ensuring your bars are uniform in thickness and bake evenly. Pat it down firmly and spread it to the edges of the pan. A level surface will prevent some bars from being too thin and others too thick. Now, carefully place the pan into your preheated oven. Bake for approximately 25 to 30 minutes. The exact baking time can vary depending on your oven, so keep an eye on them. You’ll know they’re ready when the edges are lightly golden brown and the center appears set, not jiggly. They might still feel slightly soft in the middle when you first take them out, but they will firm up as they cool.
Cooling and Cutting: The Final Touches
Patience for Perfect Bars
This is perhaps the most challengin extractg part: waiting for the bars to cool! Resist the urge to cut into them immediately. Once you remove the pan from the oven, let it cool on a wire rack for at least 15 to 20 minutes. This initial cooling period allows the bars to set up properly. After this initial cooldown, use the parchment paper overhang to carefully lift the entire slab of bars out of the pan and onto the wire rack to cool completely. Allowing them to cool down to room temperature is essential for clean cuts. If you try to cut them while they are still warm, they will likely crum extractble and fall apart. Once completely cooled, you can then use a sharp knife to cut them into your desired bar shapes – squares or rectangles work well. For easier handling and storage, I often cut them into about 12 to 16 bars. Store any leftover Simple Banana Oat Bars in an airtight container at room temperature for up to 3 days, or in the refrigerator for longer storage.
Conclusion:
There you have it! Your journey to creating delicious and healthy Simple Banana Oat Bars is complete. We’ve walked through each step, ensuring that even if you’re new to baking, you can achieve a wonderfully moist and satisfying treat. These bars are incredibly versatile, making them perfect for breakfast on the go, a post-workout snack, or even a light dessert. Don’t be afraid to experiment! We encourage you to try different mix-ins like chocolate chips, dried cranberries, or a sprinkle of cinnamon for added flavor. You’ll find that the natural sweetness of the bananas combined with the wholesome oats creates a delightful balance. So, gather your ingredients, get baking, and enjoy the simple pleasure of these homemade Simple Banana Oat Bars!
Frequently Asked Questions:
Can I make these Simple Banana Oat Bars vegan?
Absolutely! To make these Simple Banana Oat Bars vegan, simply substitute the honey or maple syrup with agave nectar or another vegan sweetener. Ensure your chocolate chips are also dairy-free if you choose to add them.
How long do these Simple Banana Oat Bars last?
Store your cooled Simple Banana Oat Bars in an airtight container at room temperature for up to 3 days. For longer storage, they can be refrigerated for up to a week or frozen for up to 2 months. Thaw overnight in the refrigerator.
Easy Banana Oat Bars
Simple and healthy no-bake bars made with ripe bananas, creamy peanut butter, rolled oats, and chocolate chips. Perfect for a quick snack.
Ingredients
-
5 ripe bananas, mashed
-
1 cup creamy peanut butter
-
4 cups rolled oats (old-fashioned oats)
-
1/4 cup semi-sweet chocolate chips
-
Parchment paper
-
Cooking spray or butter (optional)
Instructions
-
Step 1
Preheat oven to 350 degrees Fahrenheit (175 degrees Celsius). Line a 9×13 inch baking pan with parchment paper, allowing for overhang. -
Step 2
In a large mixing bowl, combine the mashed ripe bananas and creamy peanut butter. Mix thoroughly until well-combined. -
Step 3
Add the rolled oats and chocolate chips to the banana-peanut butter mixture. Gently fold until evenly distributed. The mixture will be thick and sticky. -
Step 4
Spoon the mixture into the prepared baking pan. Press down firmly and evenly to create a compact layer. -
Step 5
Bake for 25 to 30 minutes, or until the edges are lightly golden brown and the center appears set. -
Step 6
Let the bars cool in the pan on a wire rack for 15-20 minutes. Then, lift out using the parchment paper and allow to cool completely to room temperature. -
Step 7
Once completely cooled, cut into desired bar shapes. Store in an airtight container at room temperature for up to 3 days or refrigerate for longer storage.
Important Information
Nutrition Facts (Per Serving)
It is important to consider this information as approximate and not to use it as definitive health advice.
Allergy Information
Please check ingredients for potential allergens and consult a health professional if in doubt.

Leave a Comment