

Easter Cake Mix Cookies are the quintessential treat that promises to bring a burst of spring cheer to your holiday table with minimal effort. I know how busy the Easter season can be, filled with egg hunts, family gatherings, and preparing elaborate meals. That’s precisely why I’m so excited to share this incredibly simple yet utterly delightful recipe with you. While traditional Easter baking might conjure images of intricate pastries and delicate desserts, these cookies offer a fantastic, time-saving alternative without sacrificing flavor or festive spirit. Imagine the joy of a homemade dessert that looks beautiful and tastes divine, all while freeing up your precious holiday time.
Why You’ll Adore These Easy Easter Treats
What truly makes these Easter Cake Mix Cookies a beloved addition to any springtime celebration is their irresistible combination of soft, chewy texture and vibrant, customizable colors. They embody the joy and renewal of Easter in every bite! People adore them not just for their delightful taste but also for the incredible convenience they offer. Using a humble cake mix as the base transforms what could be a lengthy baking process into a quick, enjoyable activity, perfect for involving little ones in the kitchen. Whether you’re looking for a last-minute contribution to a potluck or simply want a sweet, cheerful dessert to cap off your Easter feast, these cookies are an absolute winner. Prepare to be charmed by their simplicity and deliciousness!

Ingredients:
- For the Basic Easter Cake Mix Cookies:
- 1 (15.25 oz) box of white or yellow cake mix (I personally love a classic white cake mix for its versatile base, allowing all the vibrant Easter colors to pop!)
- ½ cup (1 stick) unsalted butter, softened to room temperature (This is crucial for a smooth, homogenous dough, so remember to take it out of the fridge at least an hour before you start!)
- 1 large egg, also at room temperature (Again, temperature matters! Room temperature eggs emulsify better with fats and liquids, leading to a more consistent dough.)
- 1 teaspoon pure vanilla extract (A good quality vanilla elevates the flavor beyond just “cake mix”.)
- Optional: ¼ teaspoon almond extract or lemon extract for an extra bright flavor profile, especially fitting for spring!
- Optional: 1-2 tablespoons all-purpose flour (This is my secret weapon if the dough feels a little too sticky or if I want slightly thicker cookies that hold their shape perfectly.)
- For the Royal Icing Decoration:
- 2 cups powdered sugar (confectioners’ sugar), sifted (Sifting prevents lumps, ensuring a super smooth icing!)
- 2 tablespoons meringue powder (This is key for stable, fast-drying royal icing that holds its shape beautifully.)
- 3-4 tablespoons warm water, plus more as needed (Start with less and add slowly until you reach your desired consistency.)
- ½ teaspoon clear vanilla extract or almond extract (Clear extracts prevent discoloration of your pristine white icing.)
- Gel food coloring in various Easter shades: pastel pink, lavender, sky blue, light green, bright yellow (Gel colors are concentrated and won’t thin your icing as much as liquid colors.)
- Small bowls or ramekins for dividing icing.
- Disposable piping bags or squeeze bottles with small round tips (I find decorating tips #2 or #3 perfect for outlining and flooding.)
- For Optional Embellishments:
- Assorted Easter sprinkles (nonpareils, jimmies, sugar pearls, bunny or egg shapes)
- Mini chocolate chips or candy eyes for bunny faces.
- Small candy eggs or jelly beans.
- Edible glitter for extra sparkle.
Preparation Phase: Gathering and Mixing Your Dough
My first step when tackling any baking project, especially one as fun as making Easter Cake Mix Cookies, is to gather all my ingredients. There’s nothing worse than being halfway through a recipe and realizing you’re missing something!
- Pre-warming and Preparing: First, I always make sure my oven rack is in the middle position. This ensures even baking for all my lovely cookies. Then, I line a couple of large baking sheets with parchment paper or silicone baking mats. This step is absolutely non-negotiable for me because it prevents sticking and makes cleanup a breeze. Plus, it helps the cookies bake more evenly on the bottom.
- Creaming the Butter: In a large mixing bowl, either with a stand mixer fitted with the paddle attachment or using an electric hand mixer, I start by creaming together the softened unsalted butter. I whip it on medium speed for about 1-2 minutes until it’s wonderfully light and fluffy. This process incorporates air into the butter, which contributes to a softer, more tender cookie texture. It’s a foundational step for fantastic cookies, so don’t rush it!
- Adding the Egg and Extracts: Next, I add the large room-temperature egg to the creamed butter. I beat it in until it’s fully incorporated, scraping down the sides of the bowl as needed to make sure everything is evenly mixed. Then, I stir in the vanilla extract and any optional extracts like almond or lemon. The aroma that fills my kitchen at this point is just delightful and really starts to get me excited for the finished Easter Cake Mix Cookies!
- Incorporating the Cake Mix: Now for the star ingredient! I gradually add the entire box of cake mix to the wet ingredients. I mix on low speed, just until everything is combined and a soft, slightly crumbly dough forms. It’s really important not to overmix here. Overmixing can develop the gluten in the flour (even though it’s from a mix), leading to tougher cookies, and we’re aiming for tender, melt-in-your-mouth Easter treats! If the dough seems a little too sticky to handle, I sometimes add 1 or 2 tablespoons of all-purpose flour, mixing it in gently until it reaches a more workable consistency. This small adjustment can make a big difference in how well the cookies hold their shape.
Chilling and Shaping Your Festive Easter Cake Mix Cookies
Patience is a virtue, especially in baking! Chilling the dough is a step I never skip when making cutout cookies. It makes the dough much easier to handle and helps the cookies maintain their intricate shapes during baking.
- Chilling the Dough: Once my dough is mixed, I gather it into a ball and flatten it slightly into a disc. I wrap it tightly in plastic wrap and pop it into the refrigerator for at least 30 minutes. Ideally, I aim for an hour, or even up to 2 hours, especially if my kitchen is warm. This chilling period allows the butter to firm up, making the dough less sticky and much easier to roll out. It also gives the flavors a chance to meld. For a make-ahead tip, you can even chill the dough overnight!
- Preparing for Rolling: After chilling, I take out half of the dough from the fridge (keeping the other half chilled until ready to use). I lightly flour my work surface and my rolling pin. You can also roll the dough between two sheets of parchment paper, which is a fantastic trick for no-mess rolling and ensures uniform thickness without adding too much extra flour.
- Rolling Out the Dough: I roll the dough to about ¼-inch thickness. This thickness is perfect for cutout cookies – not too thin that they become overly crisp and fragile, and not too thick that they don’t bake through evenly. Uniform thickness is key for consistent baking, so try to keep it even across the whole sheet of dough.
- Cutting Out Shapes: Now for the fun part! I grab my favorite Easter-themed cookie cutters – bunnies, eggs, chicks, flowers, carrots – and press them firmly into the rolled-out dough. I try to place them as close together as possible to minimize scraps. After cutting, I carefully transfer the cutouts to my prepared baking sheets. If the dough starts to get too warm and sticky, I simply pop the tray of cutouts (or the remaining dough) back into the fridge for 10-15 minutes to firm up again. I then re-roll any scraps, combining them gently and chilling again briefly if they become too soft, until all the dough is used up. This attention to detail ensures your Easter Cake Mix Cookies will be perfectly shaped.
Baking Your Beautiful Easter Cake Mix Cookies
Baking these Easter Cake Mix Cookies is where the magic really happens. Getting the timing right is essential for that perfect texture – soft and chewy, never dry or overly crisp.
- Preheating the Oven: Before I even think about putting cookies in, I make sure my oven is fully preheated to 350°F (175°C). An accurately preheated oven is crucial for even baking. I usually let it preheat for at least 15-20 minutes after it signals it’s ready, just to be sure.
- Baking Time: I bake the cookies for about 8-10 minutes. The exact time will depend on your oven and the size/thickness of your cookies. I know they’re done when the edges are just barely set and start to look very lightly golden, but the centers still appear soft and slightly puffy. It’s important not to overbake these Easter Cake Mix Cookies, as they will continue to set up as they cool. Overbaking leads to dry, crumbly cookies, and we want soft and delicious!
- Cooling on the Sheet: Once they’re out of the oven, I let the cookies cool on the baking sheet for about 5 minutes. They are quite delicate when hot, and this brief cooling period allows them to firm up enough to be transferred without breaking.
- Final Cooling: After 5 minutes, I carefully transfer the partially cooled cookies to a wire rack to cool completely. This full cooling process, usually about 30 minutes to an hour, is absolutely essential before decorating. Trying to decorate warm cookies will result in melted icing and a sticky mess!
Decorating Your Easter Cake Mix Cookies: A Burst of Spring Color!
This is arguably the most creative and enjoyable part of making Easter Cake Mix Cookies! Getting the royal icing right and having a plan for your designs will make all the difference.
- Preparing the Royal Icing: In a clean, grease-free bowl (grease is the enemy of royal icing!), I combine the sifted powdered sugar and meringue powder. I then gradually add the warm water and clear vanilla extract. I beat this mixture on medium-high speed for about 5-7 minutes, until the icing is thick, glossy, and holds stiff peaks. This means when you lift the beaters, the peak of icing stands up without flopping over. If it’s too thick, add water a teaspoon at a time; if too thin, add more sifted powdered sugar.
- Coloring the Icing: I divide the stiff peak icing into several small bowls, one for each color I plan to use. I add a tiny drop of gel food coloring to each bowl, mixing thoroughly until I achieve my desired pastel Easter shade. A little goes a long way with gel colors!
-
Achieving Desired Consistencies: For most cookie decorating, I need two consistencies of royal icing for each color:
- Outline Consistency: This should be like toothpaste. When you lift your spoon, the line of icing should hold its shape without spreading. If it’s too stiff, add a tiny drop of water. This is for drawing borders and fine details.
- Flood Consistency: This should be thinner, like honey or shampoo. When you drizzle a line of icing back into the bowl, it should disappear into the rest of the icing within 10-15 seconds. This is what you’ll use to fill in your outlined areas. I achieve this by adding warm water, a tiny drop at a time, to some of my outline consistency icing.
- Piping and Flooding: I transfer my outline consistency icing into piping bags fitted with small round tips (like a #2 or #3). I use this to carefully pipe a border around the edge of each completely cooled Easter Cake Mix Cookie. Once the border is piped, I let it dry for about 10-15 minutes to create a dam. Then, I switch to my flood consistency icing (either in a piping bag with a slightly larger tip or a squeeze bottle) and fill in the outlined area. I use a toothpick or a scribing tool to gently spread the icing to the edges and pop any air bubbles.
- Adding Sprinkles and Details: This is where the Easter spirit really comes alive! If I want to add sprinkles, I do so immediately after flooding the cookie, while the icing is still wet. This way, they adhere beautifully. For more detailed designs, such as drawing eyes on bunnies, stripes on eggs, or adding different colored dots, I wait until the base layer of flood icing is completely dry. This usually takes several hours, or even overnight, depending on humidity. Patience here is key for clean lines and preventing colors from bleeding into each other. Once dry, I use my outline consistency icing in various colors to add these intricate details.
- Final Touches: Sometimes I’ll use edible glitter for a bit of sparkle, or carefully place small candy eggs or jelly beans on specific spots while the icing is still wet. For bunny faces, I might use mini chocolate chips for eyes and a small pink sprinkle for a nose. Let your imagination run wild!
- Drying Time: Once decorated, I leave my beautiful Easter Cake Mix Cookies on a wire rack, undisturbed, in a single layer, for at least 8-12 hours, or even overnight, to allow the royal icing to fully harden. This ensures they can be stacked and stored without damage.
Pro Tips for Perfect Easter Cake Mix Cookies
Making delicious and beautifully decorated Easter Cake Mix Cookies is rewarding, and with a few extra tips, you can ensure your batch is always a success!
- Don’t Overwork Your Dough: I cannot stress this enough! Whether you’re mixing, rolling, or re-rolling scraps, handle the dough gently and as little as possible. Overworking develops gluten, leading to tough cookies. We want tender, soft cookies that melt in your mouth.
- Consistent Thickness is Key: When rolling out your dough, aim for an even ¼-inch thickness. Inconsistent thickness means some cookies will bake faster or slower than others, leading to a mix of overbaked and underbaked cookies on the same sheet. Rolling between two sheets of parchment paper is my favorite hack for achieving this uniformity without extra flour.
- Chilling is Your Friend: I know it’s hard to wait, but chilling the dough, both after mixing and if it gets too warm during rolling, is vital. Cold dough prevents spreading in the oven, helping your Easter Cake Mix Cookies retain those lovely, intricate shapes. Don’t skip the chill!
- Invest in Good Quality Gel Food Colors: For vibrant, true-to-color icing, I always recommend gel food coloring over liquid dyes. Gels are much more concentrated, so you use less, and they won’t thin out your royal icing, which is crucial for achieving the right consistency.
- Allow Adequate Drying Time for Icing: Rushing the drying process for royal icing is a common mistake. If you stack or package cookies before the icing is completely dry and hardened (which can take 8-12 hours, sometimes more in humid conditions), your designs will smudge or stick together. Air circulation helps, but patience is your best tool here.
- Storage for Freshness: Once your Easter Cake Mix Cookies are fully cooled and the icing is completely dry, store them in an airtight container at room temperature. Layer them between sheets of parchment paper to protect your beautiful decorations. They’ll stay fresh for up to a week. For longer storage, undecorated baked cookies freeze beautifully for up to 3 months. Just thaw and decorate when you’re ready!
-
Troubleshooting Spreading Cookies: If your cookies are spreading too much in the oven, a few things could be happening:
- Your butter might have been too warm.
- The dough wasn’t chilled enough.
- You might have overmixed the dough.
- Your oven temperature might be slightly off (a common culprit!).
- Adding an extra tablespoon or two of flour to the dough can also help provide a little more structure to prevent spreading.
- Flavor Variations: Don’t be afraid to experiment with different cake mix flavors! Lemon cake mix with a lemon glaze would be delightful for spring. Chocolate cake mix with a mint frosting could also be a fun Easter treat. You can also mix in zest from a lemon or orange into your dough for an extra layer of freshness.
- Gifting Your Easter Cake Mix Cookies: These cookies make wonderful gifts! Once thoroughly dry, package them in clear cellophane bags tied with festive ribbons, or arrange them in a decorative box. They’re a homemade touch that always brings smiles.

Conclusion:
Well, my dear baking enthusiasts, we’ve reached the sweet finale of our culinary journey, and I genuinely hope you’re feeling as inspired and eager as I am about this particular recipe. From the very first spoonful of ingredients to that last, satisfying bite, these cookies are truly something special. They aren’t just another dessert; they are a delightful testament to how effortless and enjoyable baking can be, even for those who might feel a bit intimidated by complex techniques or lengthy ingredient lists. I’ve always believed that the best recipes are those that bring immense joy without demanding hours of grueling labor, and this one, without a doubt, perfectly embodies that philosophy. It’s designed to fit seamlessly into your busy life, offering maximum flavor and charm with minimal fuss. Think of it as your secret weapon for impressing guests or simply treating yourself to something wonderfully delicious after a long day.
What makes these cookies an absolute must-try, you ask? Beyond their inherent simplicity, it’s the magical combination of a wonderfully soft, chewy texture and a flavor profile that is both comforting and incredibly addictive. Each bite is a harmonious blend of sweetness and subtle nuances, making them incredibly satisfying. They manage to strike that perfect balance – not too rich, not too light, but just right. They possess a delightful ‘melt-in-your-mouth’ quality that will have everyone reaching for a second, or even a third, without hesitation. Imagine the smiles when you present a plate of these golden-brown beauties; it’s a pure, unadulterated moment of shared happiness. Their vibrant color and enticing aroma alone are enough to brighten any room and uplift spirits. Seriously, I challenge you to make a batch and not fall head over heels for their charm.
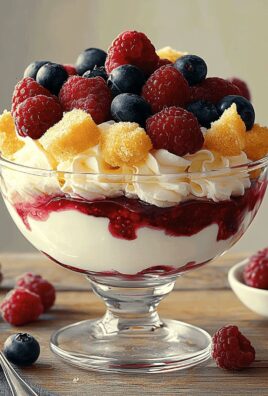
Now, let’s talk about enhancing your experience and truly making these cookies your own. While they are absolutely phenomenal straight out of the oven, still warm and slightly gooey, there are so many ways to enjoy them. For a classic treat, pair them with a tall, frosty glass of milk – it’s a timeless combination that never disappoints. If you’re a coffee lover like me, a freshly brewed cup of your favorite blend offers a sophisticated counterpoint to their sweetness, making for an ideal afternoon pick-me-up or a delightful end to a meal. They also make fantastic additions to any dessert platter, especially when arranged artfully with other sweet treats. Thinking about school lunches or office snacks? These cookies pack perfectly and stay fresh, bringing a little ray of sunshine to midday breaks. Or, consider crumbling them over a scoop of vanilla bean ice cream for an instant upgrade to a simple dessert – the warm cookie bits contrasting with the cold ice cream is simply divine. You could even use them as a base for a fun, deconstructed trifle layered with whipped cream and fresh berries.
But the fun doesn’t stop there! One of the things I adore most about this recipe is its incredible versatility. Don’t be afraid to experiment and unleash your inner pastry artist! For instance, you could elevate the flavor profile by adding a teaspoon of almond extract or a hint of citrus zest (lemon or orange) to the dough; these small additions can introduce entirely new dimensions. Or, consider folding in some white chocolate chips, chopped nuts like pecans or walnuts, or even a handful of dried cranberries for an extra layer of texture and taste. If you’re feeling particularly festive, a drizzle of melted white chocolate over the cooled cookies, perhaps with a sprinkle of contrasting sprinkles, adds both visual appeal and an extra touch of indulgence. For those looking to truly embrace the season, transforming these into beautiful Easter Cake Mix Cookies is effortlessly simple. Think pastel-colored glazes, edible glitter, or small, spring-themed sprinkles like tiny flowers or eggs. You could even make them into delightful cookie sandwiches by piping a dollop of your favorite cream cheese frosting or buttercream between two cookies. The possibilities are genuinely endless, and each variation offers a unique opportunity to personalize your baking masterpiece.
I truly believe that baking should be a joyful, creative outlet, and this recipe offers the perfect canvas for your imagination. Whether you stick to the original, which I promise is utterly fantastic, or venture into the world of variations, you’re guaranteed a delicious outcome. This isn’t just about following instructions; it’s about making something with your own hands that brings happiness to those who taste it. The satisfaction of pulling a warm tray of perfectly baked cookies from the oven is a special kind of magic, a simple pleasure that never gets old. And the best part? These cookies are so consistently good, you’ll feel like a baking superstar every single time.
So, my friends, don’t let another moment pass you by. I wholeheartedly encourage you to roll up your sleeves, gather your ingredients, and give this recipe a try. You’ll be amazed at how quickly and easily you can create something truly scrumptious. Once you’ve experienced the sheer delight of these cookies, please, please, please come back and share your experiences with me! Did you try a fun variation? What was your favorite serving suggestion? I absolutely love hearing about your baking adventures and seeing your wonderful creations. Tag me on social media, leave a comment below, or simply tell your friends and family about them. Let’s spread the cookie love far and wide!
Happy baking, everyone! I can’t wait to hear all about your delicious results.

Easter Cake Mix Cookies
These Easter Cake Mix Cookies are a simple, sweet, and festive treat perfect for spring celebrations. Made with a cake mix base, they are easy to prepare, customizable with vibrant colors, and offer a soft, chewy texture with delightful royal icing decorations.
Ingredients
-
1 (15.25 oz) box white or yellow cake mix
-
½ cup (1 stick) unsalted butter, softened
-
1 large egg, room temperature
-
1 tsp pure vanilla extract
-
Optional: ¼ tsp almond or lemon extract
-
Optional: 1-2 tbsp all-purpose flour
-
2 cups powdered sugar, sifted
-
2 tbsp meringue powder
-
3-4 tbsp warm water, plus more as needed
-
½ tsp clear vanilla or almond extract
-
Gel food coloring (various Easter shades)
-
Assorted Easter sprinkles (nonpareils, jimmies, sugar pearls)
-
Mini chocolate chips or candy eyes
-
Small candy eggs or jelly beans
-
Edible glitter
Instructions
-
Step 1
Preheat oven to 350°F (175°C). Line baking sheets with parchment paper or silicone baking mats. -
Step 2
In a large mixing bowl, cream ½ cup softened unsalted butter on medium speed for 1-2 minutes until light and fluffy. Beat in 1 large room temperature egg until fully incorporated, then stir in 1 tsp pure vanilla extract (and optional ¼ tsp almond or lemon extract). -
Step 3
Gradually add the entire box of cake mix to the wet ingredients. Mix on low speed until just combined and a soft dough forms. Do not overmix. If dough is too sticky, gently mix in 1-2 tbsp all-purpose flour until workable. -
Step 4
Gather dough into a ball, flatten slightly into a disc, wrap tightly in plastic wrap, and chill in the refrigerator for at least 30 minutes (ideally 1-2 hours). -
Step 5
Take out half of the chilled dough. Lightly flour your work surface and rolling pin, or roll dough between two sheets of parchment paper. Roll dough to about ¼-inch thickness. Use Easter-themed cookie cutters to cut out shapes. Carefully transfer cutouts to prepared baking sheets. Re-roll any scraps, chilling briefly if the dough becomes too soft. -
Step 6
Bake for 8-10 minutes, until the edges are just barely set and very lightly golden, and centers still appear soft. Do not overbake. -
Step 7
Once baked, let cookies cool on the baking sheet for about 5 minutes. Then, carefully transfer them to a wire rack to cool completely (approx. 30-60 minutes) before decorating. -
Step 8
In a clean, grease-free bowl, combine 2 cups sifted powdered sugar and 2 tbsp meringue powder. Gradually add 3-4 tbsp warm water and ½ tsp clear vanilla extract. Beat on medium-high speed for 5-7 minutes until the icing is thick, glossy, and holds stiff peaks. Adjust consistency by adding more water (if too thick) or powdered sugar (if too thin). -
Step 9
Divide the stiff icing into several small bowls. Add tiny drops of gel food coloring to achieve desired pastel Easter shades. For most cookie decorating, you’ll need two consistencies: outline consistency (like toothpaste) and flood consistency (thinner, like honey; add warm water a tiny drop at a time until it disappears back into the bowl within 10-15 seconds when drizzled). -
Step 10
Transfer outline consistency icing to piping bags with small round tips. Pipe borders around each completely cooled cookie. Let borders dry for 10-15 minutes. Then, use flood consistency icing (in a piping bag or squeeze bottle) to fill in the outlined areas, spreading with a toothpick. Add sprinkles immediately if desired. For detailed designs (eyes, stripes), wait until the base flood icing is completely dry (several hours or overnight) before adding details with outline consistency icing. Use optional embellishments like mini chocolate chips or candy eggs. -
Step 11
Once decorated, leave cookies on a wire rack, undisturbed, in a single layer for at least 8-12 hours (or overnight) to allow the royal icing to fully harden. This ensures they can be stacked and stored without damage.
Important Information
Nutrition Facts (Per Serving)
It is important to consider this information as approximate and not to use it as definitive health advice.
Allergy Information
Please check ingredients for potential allergens and consult a health professional if in doubt.
Leave a Comment