

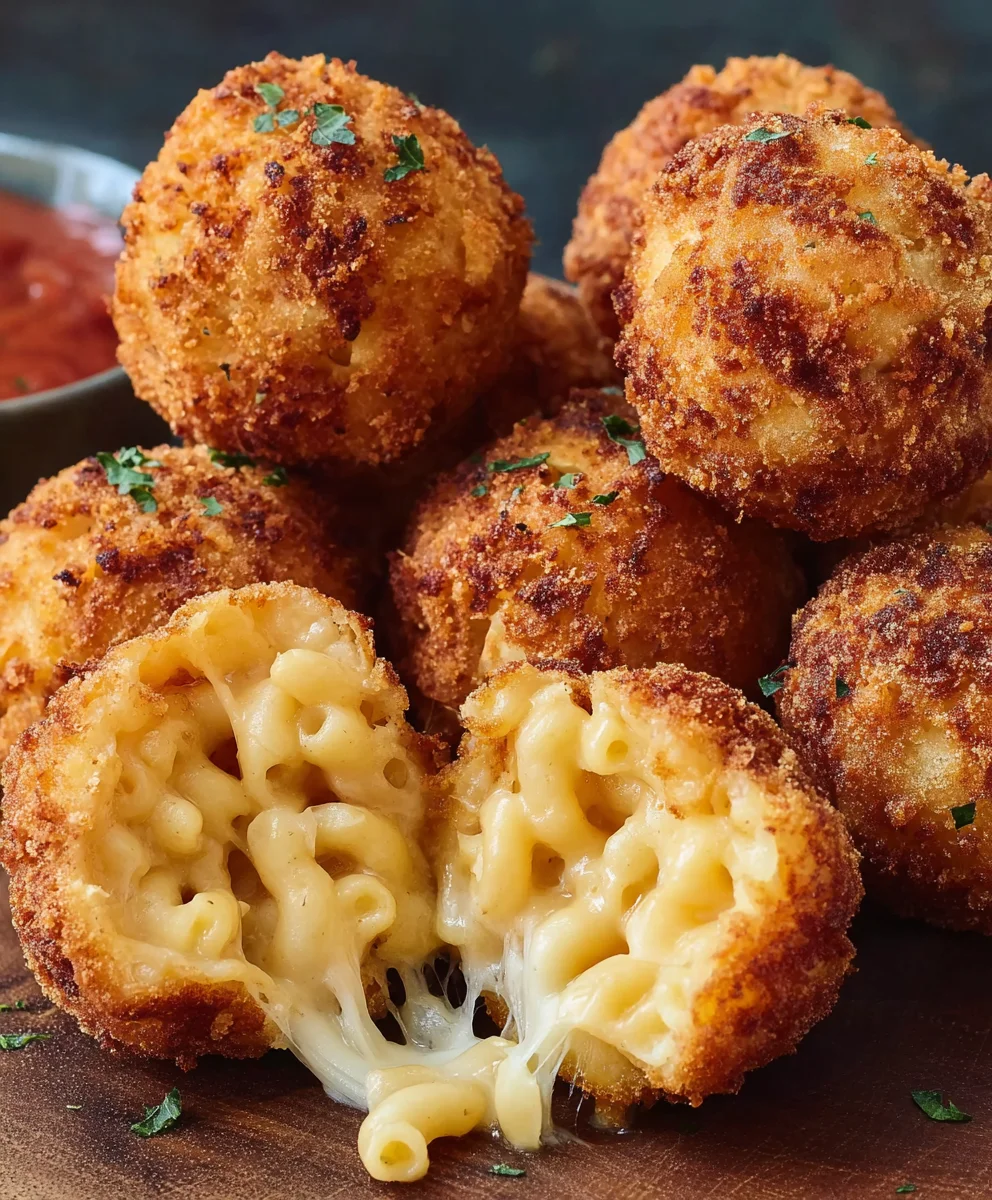
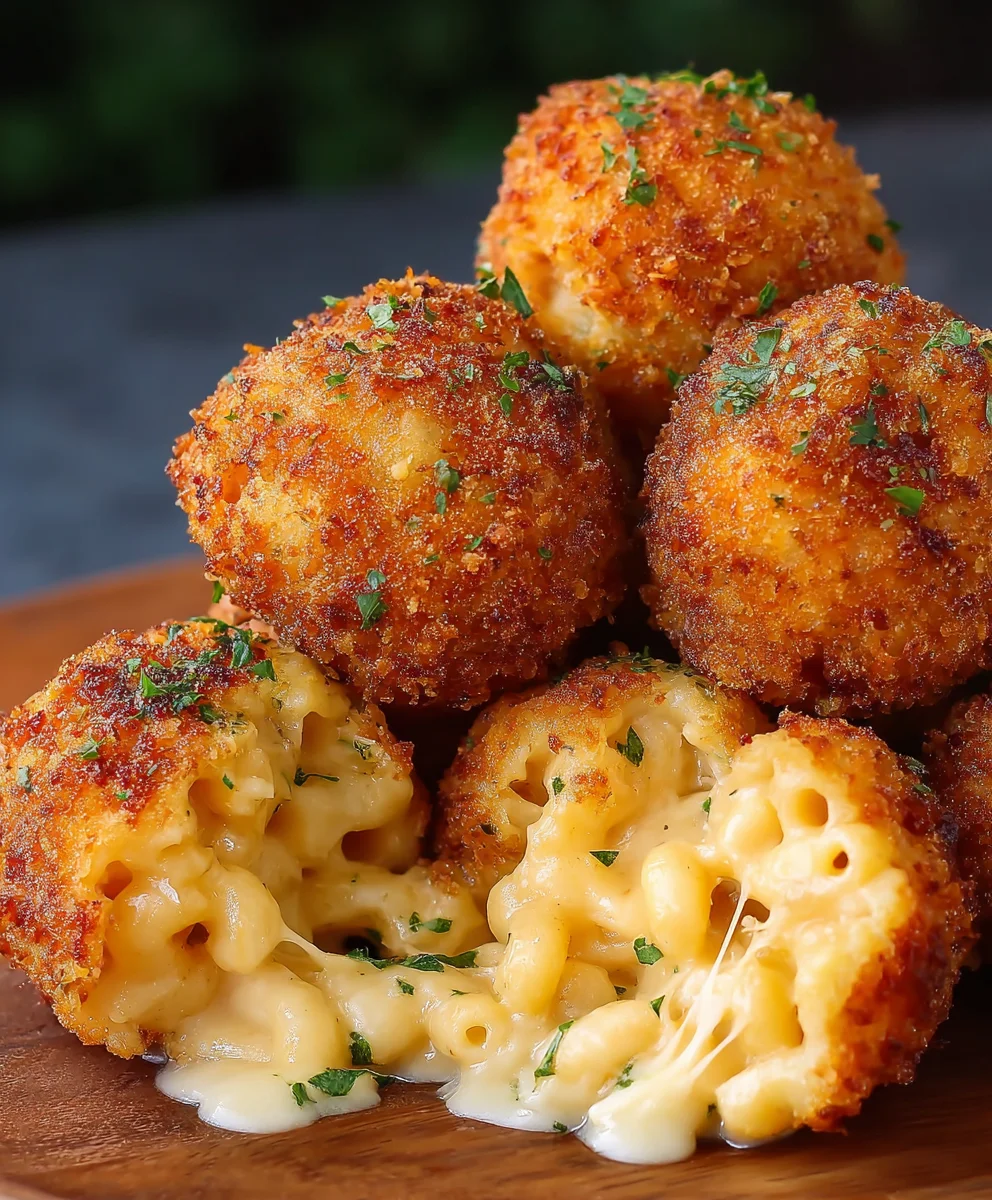
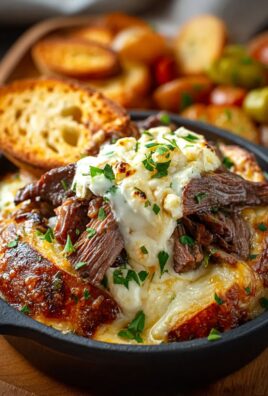
Fried Mac Cheese Balls are more than just a snack; they’re a culinary hug, a crispy, cheesy dream that transforms comfort food into an irresistible appetizer or party favorite. We all have those cravings for something deeply satisfying, something that hits all the right notes of gooey, savory, and utterly delicious. This is where our beloved Fried Mac Cheese Balls come in, winning hearts with their golden-brown exterior giving way to a molten, stringy core of pure macaroni and cheese joy. What makes these little spheres so special? It’s the perfect marriage of familiar comfort and exciting textural contrast – the satisfying crunch giving way to that velvety, cheesy goodness. They’re surprisingly easy to make and are guaranteed to be the star of any gathering, leaving everyone asking for the recipe. Get ready to elevate your mac and cheese game to a whole new, delightfully fried level!

Ingredients:
- 3 cups cooked mac and cheese, chilled and firm
- 1 cup shredded cheddar cheese (optional for extra cheesiness)
- 1/2 teaspoon garlic powder
- 1/2 teaspoon onion powder
- 1/2 teaspoon smoked paprika
- 1/2 teaspoon salt
- 1/4 teaspoon black pepper
- 1 cup all-purpose flour
- 2 large eggs
- 2 tablespoons milk
- 1 1/2 cups panko breadcrumbs
- 1/2 cup grated Parmesan cheese (optional)
- 1/2 teaspoon salt
- 1/2 teaspoon black pepper
- Vegetable oil for deep frying
Preparing the Mac and Cheese Mixture
The foundation of these delicious Fried Mac Cheese Balls is, of course, perfectly cooked and chilled mac and cheese. It’s crucial that the mac and cheese is firm; this will make it much easier to form into balls that hold their shape during the frying process. If your mac and cheese is too soft or still warm, consider popping it in the refrigerator for at least an hour or two to ensure it’s properly solidified. In a large bowl, combine the chilled mac and cheese with the optional shredded cheddar cheese. This extra cheese will add another layer of gooeyness and flavor when the balls are bitten into. Next, we’ll season this base generously to ensure each bite is packed with flavor. Add the garlic powder, onion powder, smoked paprika, 1/2 teaspoon of salt, and 1/4 teaspoon of black pepper to the mac and cheese mixture. Gently mix everything together with your hands or a sturdy spoon until all the ingredients are well distributed. You want to ensure that the spices are evenly incorporated throughout the mac and cheese. Don’t overmix, as you don’t want to break down the pasta too much. The goal is to have a cohesive mixture that you can easily mold.
Forming the Fried Mac Cheese Balls
Now comes the fun part – shaping our flavorful mac and cheese mixture into perfect little spheres. Take about 2 to 3 tablespoons of the mac and cheese mixture at a time. The exact amount will depend on how large you want your Fried Mac Cheese Balls to be. I find a tablespoon roughly the size of a golf ball to be ideal, but you can adjust this to your preference. Roll the mixture firmly between your palms to form a compact ball. It’s important to pack them well to prevent them from falling apart during the frying process. If the mixture feels a bit too sticky to handle, you can lightly dampen your hands with water. Place the formed balls onto a parchment-lined baking sheet or plate. This prevents them from sticking and makes it easier to transfer them to the breading station. If you have time and want to ensure they are extra firm, you can place the baking sheet with the formed balls in the freezer for about 15-20 minutes. This will help them hold their shape even better when they hit the hot oil.
Setting Up the Breading Station
For that irresistible crispy exterior on our Fried Mac Cheese Balls, we need a proper breading station. You’ll need three separate shallow dishes or bowls. In the first dish, place the all-purpose flour. This is our first coating, which helps the egg wash adhere better to the mac and cheese balls. In the second dish, whisk together the 2 large eggs and 2 tablespoons of milk. This creates our egg wash, a vital binding agent. Make sure to whisk until the eggs and milk are thoroughly combined, creating a smooth, uniform liquid. In the third dish, combine the panko breadcrumbs with the optional grated Parmesan cheese. The panko breadcrumbs are key to achieving that extra-crispy texture. Adding Parmesan cheese here will give another delightful savory dimension to the outer coating. Finally, season these breadcrumbs with the remaining 1/2 teaspoon of salt and 1/2 teaspoon of black pepper. Whisk these ingredients together to ensure the salt and pepper are evenly distributed throughout the breadcrumb mixture. This seasoned panko will be the final, delicious crust for our mac and cheese balls.
Breading the Fried Mac Cheese Balls
With our breading station all set up, it’s time to coat our mac and cheese balls. Take one chilled mac and cheese ball and carefully roll it in the all-purpose flour, making sure to coat it evenly on all sides. Gently shake off any excess flour. Next, dip the floured ball into the egg wash, letting any excess drip back into the bowl. Ensure the entire ball is submerged in the egg wash. Finally, transfer the egg-washed ball into the panko and Parmesan mixture. Press the breadcrumbs gently onto the ball, ensuring it is fully and thoroughly coated. You want a good, thick coating of breadcrumbs for maximum crispiness. If a ball is not completely covered, you can scoop some of the breadcrumb mixture on with your fingers. Place the breaded ball back onto the parchment-lined baking sheet or plate. Repeat this entire process with the remaining mac and cheese balls. For an even thicker, crispier coating, you can double-bread them by repeating the flour, egg wash, and breadcrumb steps. This second coating ensures a robust crust that will hold up beautifully during frying.
Deep Frying the Fried Mac Cheese Balls
The final and most crucial step is frying! In a large, heavy-bottomed pot or deep fryer, heat about 3-4 inches of vegetable oil over medium-high heat until it reaches 350°F (175°C). Using a thermometer is highly recommended to ensure the oil is at the correct temperature. If the oil is too cool, the mac and cheese balls will absorb too much grease and become soggy. If it’s too hot, the exterior will burn before the inside is heated through. Carefully, in batches, add the breaded mac and cheese balls to the hot oil. Do not overcrowd the pot; this will lower the oil temperature and result in greasy, unevenly cooked balls. Fry for about 3-5 minutes, or until they are golden brown and crispy on all sides. You’ll see them float to the surface as they cook. Use a slotted spoon or spider strainer to gently turn the balls occasionally, ensuring they cook evenly. Once they’re beautifully golden, carefully remove them from the oil and place them on a wire rack set over a baking sheet or on paper towels to drain any excess oil. This is essential for maintaining their crispiness. Let them cool slightly before serving, as the cheese inside will be extremely hot.
Conclusion:
So there you have it! You’ve mastered the art of creating irresistible Fried Mac Cheese Balls. This recipe is a true crowd-pleaser, perfect for appetizers, party snacks, or even a fun weeknight meal. The crispy exterior gives way to a gooey, cheesy, macaroni-filled center that is simply divine. Don’t be afraid to get a little creative with your toppings and dipping sauces – the possibilities are endless! I truly hope you enjoy making and sharing these delicious morsels as much as I do. Remember, cooking should be fun, so experiment and make them your own!
Frequently Asked Questions:
Can I make Fried Mac Cheese Balls ahead of time?
Yes, you can! After forming the mac and cheese mixture into balls and chilling them, you can store them in an airtight container in the refrigerator for up to 2 days. When you’re ready to cook, simply follow the frying instructions, you might need to add a minute or two to the cooking time as they’ll be colder.
What are some good dipping sauce options for Fried Mac Cheese Balls?
The classic choice is often marinara sauce, but a zesty ranch dressing or a spicy sriracha mayo are also fantastic. For something a little different, try a smoky barbecue sauce or a sweet chili sauce. The key is to complement the rich, cheesy flavor of the balls.
Can I bake these instead of frying?
While frying provides that signature crispy texture, you can bake them for a slightly healthier option. Preheat your oven to 400°F (200°C) and place the chilled mac and cheese balls on a baking sheet lined with parchment paper. Bake for 20-25 minutes, flipping halfway through, until golden brown and heated through. They won’t be quite as crispy as fried, but still delicious!
Crispy Fried Mac Cheese Balls – Easy Recipe
Irresistibly crispy fried mac and cheese balls with a gooey, cheesy center. Perfect as an appetizer or snack!
Ingredients
-
3 cups cooked mac and cheese, chilled and firm
-
1 cup shredded cheddar cheese
-
1/2 teaspoon garlic powder
-
1/2 teaspoon onion powder
-
1/2 teaspoon smoked paprika
-
1 teaspoon salt
-
1/2 teaspoon black pepper
-
1 cup all-purpose flour
-
2 large eggs
-
2 tablespoons milk
-
1 1/2 cups panko breadcrumbs
-
1/2 cup grated Parmesan cheese
-
Vegetable oil for deep frying
Instructions
-
Step 1
In a large bowl, combine chilled mac and cheese with optional shredded cheddar cheese. Add garlic powder, onion powder, smoked paprika, 1/2 teaspoon salt, and 1/4 teaspoon black pepper. Mix gently until well distributed. Roll into 2-3 tablespoon balls. Freeze for 15-20 minutes if desired. -
Step 2
Set up a breading station with three shallow dishes. In the first, place all-purpose flour. In the second, whisk together eggs and milk for the egg wash. In the third, combine panko breadcrumbs, optional Parmesan cheese, 1/2 teaspoon salt, and 1/2 teaspoon black pepper. -
Step 3
Dredge each mac and cheese ball in flour, shaking off excess. Dip into the egg wash, allowing excess to drip off. Finally, coat thoroughly in the panko-Parmesan mixture, pressing gently. -
Step 4
For an extra crispy coating, repeat the flour, egg wash, and breadcrumb steps. -
Step 5
Heat vegetable oil in a deep pot or fryer to 350°F (175°C). Carefully fry balls in batches for 3-5 minutes until golden brown and crispy. Do not overcrowd the pot. -
Step 6
Remove fried balls with a slotted spoon and drain on a wire rack or paper towels. Let cool slightly before serving, as the cheese will be very hot.
Important Information
Nutrition Facts (Per Serving)
It is important to consider this information as approximate and not to use it as definitive health advice.
Allergy Information
Please check ingredients for potential allergens and consult a health professional if in doubt.
Leave a Comment