

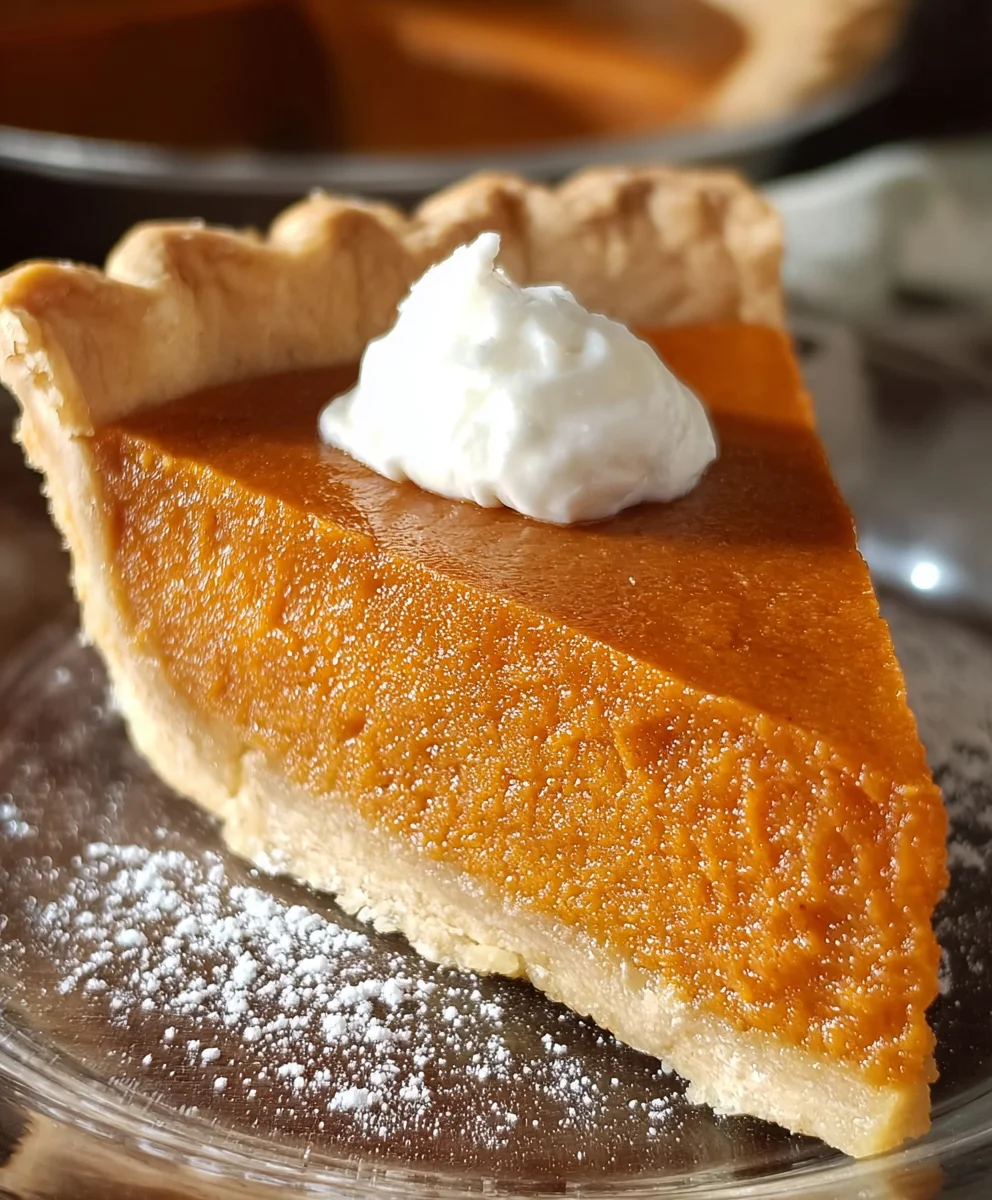
Buttermilk Sweet Potato Pie is more than just a dessert; it’s a truly special culinary experience that captures the very essence of comfort and tradition. Imagine a slice of pure delight: the earthy sweetness of perfectly roasted sweet potatoes, harmoniously balanced with the bright, subtle tang of buttermilk, all cradled in a golden, flaky crust. This isn’t merely an alternative to pumpkin pie; it stands proudly as a beloved staple, particularly in Southern American cuisine, where it has graced countless family tables during holidays and special occasions for generations.
The magic of this particular pie lies in its unique twist. While sweet potato pie itself boasts a rich history, the incorporation of buttermilk introduces a wonderful depth and a slight, refreshing acidity that cuts through the sweetness, preventing it from being overly rich. It’s this ingenious addition that makes our Buttermilk Sweet Potato Pie exceptionally creamy, incredibly flavorful, and utterly irresistible. People adore it not only for its melt-in-your-mouth texture and warmly spiced taste but also for the nostalgic comfort it brings. I am confident that once you try this recipe, you’ll understand why this dish holds such a cherished place in so many hearts and homes.

Ingredients:
- For the Pie Crust:
- 1 (9-inch) unbaked pie crust. I often opt for a store-bought, deep-dish crust for convenience, but feel free to use your favorite homemade recipe for an extra special touch. Make sure it’s ready to go into the oven!
- For the Buttermilk Sweet Potato Filling:
- 2 pounds (about 3-4 medium-sized) sweet potatoes. Look for firm, unblemished sweet potatoes for the best flavor and texture in your Buttermilk Sweet Potato Pie.
- 1 cup (200g) granulated sugar. This provides the foundational sweetness.
- ½ cup (100g) packed light brown sugar. The brown sugar adds a lovely depth of flavor and a hint of molasses, complementing the sweet potatoes beautifully.
- ½ cup (113g) unsalted butter, melted and cooled slightly. Butter brings a richness that is simply essential.
- 2 large eggs, at room temperature. Eggs act as the binder, giving the pie its structure.
- ½ cup (120ml) buttermilk. This is the star ingredient for our “Buttermilk Sweet Potato Pie”! It adds a subtle tang that balances the sweetness and makes the pie incredibly moist and tender.
- ¼ cup (60ml) evaporated milk or heavy cream. For an extra creamy texture and a touch of indulgence.
- 1 tablespoon pure vanilla extract. Don’t skimp on the vanilla; it enhances all the other flavors.
- 1 ½ teaspoons ground cinnamon. A warm, comforting spice that pairs perfectly with sweet potatoes.
- ¾ teaspoon ground nutmeg. Another classic spice that belongs in any sweet potato pie.
- ½ teaspoon ground ginger. Adds a gentle zing and warmth.
- ¼ teaspoon ground allspice. A touch of allspice brings a complex, aromatic note.
- ¼ teaspoon salt. Crucial for balancing and enhancing all the sweet and spicy flavors. It truly makes everything pop!
Preparing the Sweet Potatoes
- Preheat Your Oven and Prepare Sweet Potatoes: My first step for making a truly delightful Buttermilk Sweet Potato Pie is always to get those sweet potatoes ready. Begin by preheating your oven to 400°F (200°C). While the oven heats, take your sweet potatoes, wash them thoroughly under cold running water, scrubbing off any dirt. Then, use a fork to pierce each sweet potato several times all over. This allows steam to escape during baking, preventing them from bursting. I usually place them directly on a baking sheet to catch any potential drips.
- Bake Until Tender: Pop the pierced sweet potatoes into the preheated oven and bake for approximately 45-60 minutes, or until they are incredibly tender when pierced with a fork. The exact baking time will depend on the size and density of your sweet potatoes. You want them to be very soft, almost collapsing, as this ensures a smooth, lump-free filling. If you’re short on time, you can also microwave them: place the pierced sweet potatoes on a microwave-safe plate and microwave on high for 5-10 minutes, flipping halfway, until very tender. Just be careful, as they can get quite hot!
- Cool and Peel: Once baked, carefully remove the sweet potatoes from the oven (or microwave). Let them cool just enough so you can handle them comfortably. While they are still warm, the skin will slip off much more easily than when they are completely cold. Gently peel away the skin; it should come off with very little effort. Discard the skins.
- Mash the Sweet Potatoes: Transfer the peeled sweet potato flesh to a large mixing bowl. Now comes the important part: mashing them until completely smooth. I highly recommend using a potato ricer for the smoothest possible texture, which is ideal for a creamy pie. If you don’t have a ricer, a sturdy potato masher will work, but you’ll want to mash very thoroughly to eliminate any lumps. For an extra silky filling, you can even pulse the mashed sweet potatoes in a food processor, though be careful not to overmix at this stage, as it can make them gummy. You should end up with about 2 ½ to 3 cups of smooth, mashed sweet potato. This smooth texture is paramount for achieving that luxurious mouthfeel in your Buttermilk Sweet Potato Pie.
Crafting the Buttermilk Sweet Potato Filling
- Prepare the Pie Crust: While your sweet potatoes are cooling slightly, it’s a good time to get your pie crust ready. If you’re using a store-bought crust, simply unroll it into your 9-inch pie plate. If you’re making your own, roll it out and fit it into the plate. Trim and flute the edges as desired. For the best result and to prevent a soggy bottom, I always recommend blind baking the pie crust. Preheat your oven to 375°F (190°C). Line the unbaked pie crust with parchment paper or foil, and fill it with pie weights, dried beans, or rice. Bake for 15 minutes, then carefully remove the weights and parchment/foil and bake for another 5-7 minutes, or until the crust is lightly golden. This partial baking creates a barrier against the moist filling. Let it cool while you prepare the filling.
- Combine Sugars and Spices: In a separate medium bowl, whisk together the granulated sugar, light brown sugar, ground cinnamon, ground nutmeg, ground ginger, ground allspice, and salt. Whisking them together thoroughly ensures that the spices and salt are evenly distributed throughout the sugar, preventing clumps and ensuring every bite of your Buttermilk Sweet Potato Pie is perfectly seasoned.
- Mix Wet Ingredients: In another large bowl, whisk together the melted and slightly cooled butter, eggs, buttermilk, evaporated milk (or heavy cream), and vanilla extract. Whisk until everything is well combined and uniform in color and consistency. The buttermilk adds such a special, bright note to this pie, setting it apart from a traditional sweet potato pie.
- Combine All Filling Components: Add the mashed sweet potatoes to the bowl with the whisked wet ingredients. Pour in the sugar and spice mixture. Now, with a spatula or a wooden spoon, gently fold and mix all the ingredients together. The key here is to mix until just combined and smooth, but avoid overmixing. Overmixing can develop the starches in the sweet potatoes and make your pie filling tough or gummy. You’re aiming for a beautifully smooth, creamy, and uniform batter for your Buttermilk Sweet Potato Pie.
- Taste and Adjust (Optional but Recommended!): This is a step I rarely skip! Take a small spoonful of the filling (before it goes into the pie crust, of course!) and give it a taste. Adjust the spices or sweetness if you feel it needs more. Sometimes, depending on the sweetness of your particular sweet potatoes, you might want a little more sugar, or perhaps a pinch more cinnamon. This is your chance to personalize your pie!
Baking the Buttermilk Sweet Potato Pie
- Fill the Pie Crust: Carefully pour the prepared Buttermilk Sweet Potato Pie filling into your blind-baked (or unbaked, if you skipped blind baking) pie crust. Use a spatula to smooth the top gently. Don’t fill it right to the very brim; leave a little space for it to expand slightly during baking.
- Prepare for Baking: Place the pie on a baking sheet. This makes it much easier to transfer the pie into and out of the oven, and it catches any potential spills, keeping your oven clean.
- Bake the Pie: Reduce your oven temperature to 350°F (175°C). Place the baking sheet with the pie into the preheated oven. Bake for approximately 50-70 minutes. The exact baking time can vary significantly based on your oven and the depth of your pie.
- Check for Doneness: How do you know when your Buttermilk Sweet Potato Pie is perfectly done?
- The Jiggle Test: Gently jiggle the pie. The edges should be set, but the center (about a 2-inch diameter) should still have a slight, soft wobble, like firm jello. It will continue to set as it cools.
- The Knife or Toothpick Test: Insert a thin knife or a wooden skewer into the center, about halfway between the edge and the very middle. If it comes out mostly clean, with maybe a few moist crumbs attached, your pie is ready. If it comes out wet, continue baking and check again in 5-10 minute intervals.
I find that overbaking is the enemy of a creamy pie, so err on the side of a slight jiggle in the center.
- Prevent Over-Browning: If you notice the edges of your pie crust are browning too quickly during baking, you can loosely tent the pie with a piece of aluminum foil or use a pie shield. This protects the crust while allowing the filling to finish cooking through.
Cooling and Serving Your Buttermilk Sweet Potato Pie
- Cool Completely: This step requires patience, but it’s absolutely crucial for the structure and texture of your Buttermilk Sweet Potato Pie. Once baked, carefully remove the pie from the oven and place it on a wire rack. Allow the pie to cool at room temperature for at least 3-4 hours, or even longer, until it is completely cool to the touch and fully set. Resisting the urge to cut into it too early is the hardest part, but warm pie will be runny and won’t hold its shape. Cooling allows the filling to firm up properly, ensuring those beautiful, clean slices.
- Chill for Optimal Slicing (Optional but Recommended): For the cleanest slices and a firmer texture, I often transfer the cooled pie to the refrigerator and chill it for at least 2 hours, or even overnight. This really helps it set beautifully.
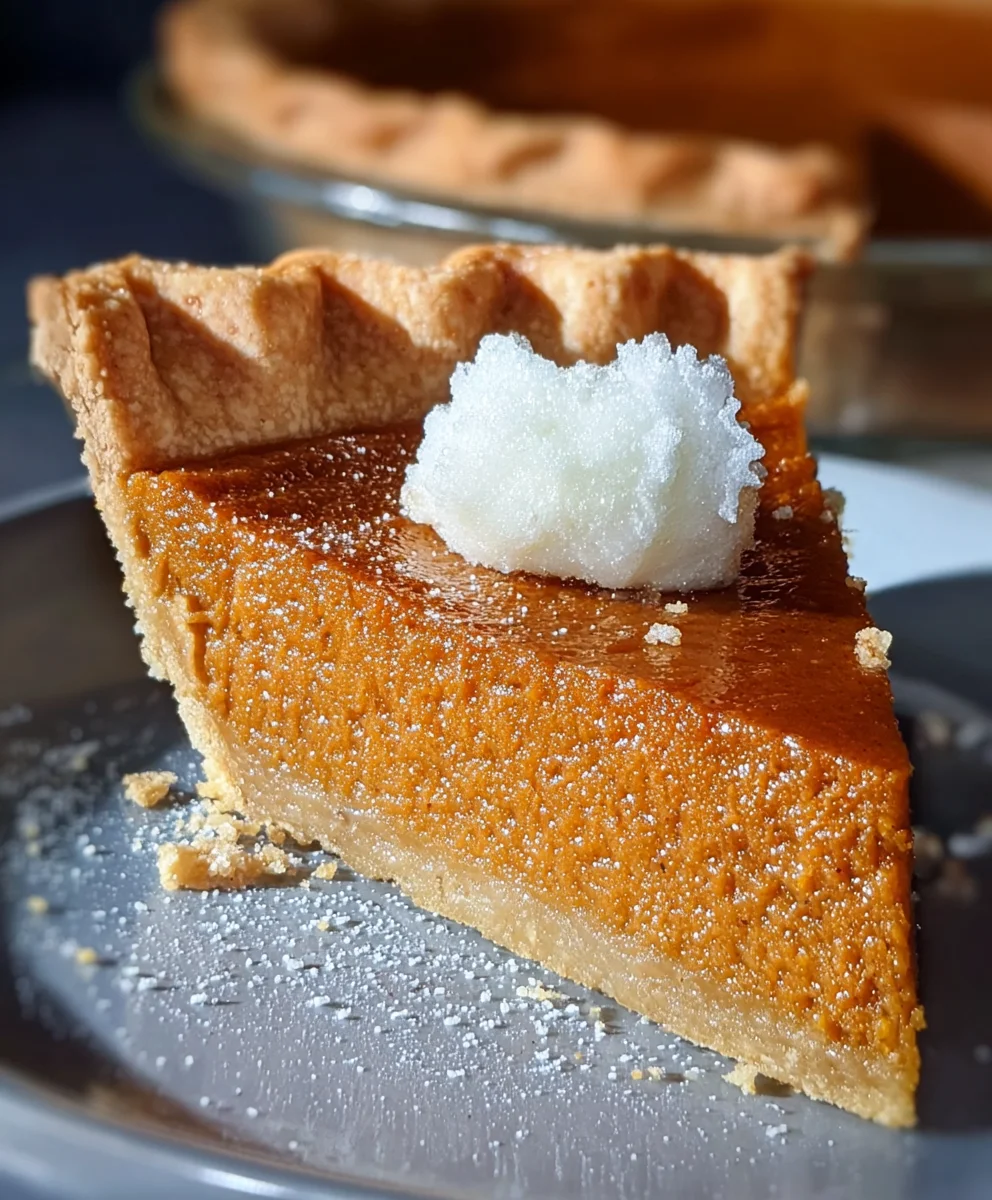
- Serve and Enjoy: Once fully cooled and set, your magnificent Buttermilk Sweet Potato Pie is ready to be sliced and served! I love serving it at room temperature or slightly chilled. It’s fantastic on its own, but a dollop of freshly whipped cream, a scoop of vanilla bean ice cream, or a drizzle of caramel sauce truly elevates the experience. Every bite is a celebration of warmth, spice, and that unique buttermilk tang!
- Storage: Leftover Buttermilk Sweet Potato Pie should be covered loosely with plastic wrap or foil and stored in the refrigerator for up to 3-4 days. While it’s best enjoyed fresh, the flavors can even deepen slightly the next day.
Conclusion:
So, there you have it! We’ve journeyed through the simple yet profound steps to create a dessert that, I promise you, will become an instant legend in your kitchen. This isn’t just any sweet potato pie; it’s a revelation. The addition of tangy buttermilk transforms an already beloved classic into something truly extraordinary, elevating its creaminess and introducing a subtle, delightful tang that perfectly balances the inherent sweetness of the roasted sweet potatoes. Every single bite of this particular iteration is a testament to how a small tweak can create a monumental difference in flavor and texture. It’s incredibly smooth, remarkably rich without being overly heavy, and possesses an aromatic spice blend that sings of comfort and warmth. I genuinely believe that once you taste this incredible dessert, you’ll understand exactly why I’ve been so passionate about sharing this recipe with you. It truly is a showstopper, a conversation starter, and a deeply satisfying treat for any occasion. This isn’t just baking; it’s crafting a memory, a moment of pure, unadulterated culinary bliss that will leave everyone at your table asking for more.
Now, let’s talk about how to best enjoy your masterpiece. While this pie is absolutely divine on its own, a little accompaniment can take it to even greater heights. For a classic touch, a generous dollop of freshly whipped cream, perhaps lightly sweetened with a hint of vanilla or a whisper of bourbon, is always a winning choice. If you’re feeling a bit more adventurous, consider a scoop of your favorite vanilla bean ice cream, allowing its cool creaminess to melt gently into a warm slice of pie. For an extra layer of decadence, a drizzle of homemade salted caramel sauce or a sprinkle of toasted pecans or candied walnuts can add a wonderful textural contrast and an additional layer of flavor. I also find that a dusting of cinnamon or a very light grating of fresh nutmeg just before serving adds a beautiful finish and an extra pop of aroma. Don’t forget the beverages! A steaming cup of coffee, a robust chai tea, or even a glass of sparkling cider can be the perfect partner to cut through the richness and enhance the overall experience. Whether it’s the centerpiece of a holiday gathering, a comforting treat after a long week, or simply a delightful surprise for your family, this pie adapts beautifully to any setting, always delivering that comforting, gourmet appeal.
One of the things I love most about baking is the room it leaves for personal touches and creative variations. While I wholeheartedly encourage you to try the recipe exactly as written for your first glorious encounter with this magnificent dessert, don’t hesitate to experiment once you’ve fallen in love with it. If you prefer a bolder spice profile, feel free to amp up the ginger, allspice, or even a tiny pinch of cayenne for a subtle kick that will surprise and delight. For a different crust experience, consider using a gingersnap crust for an extra layer of zesty spice, or a buttery shortbread crust for a more delicate foundation. You could even transform this into individual mini pies or tarts, perfect for portion control or a charming dessert platter that’s ideal for entertaining. Another delightful idea is to top your Buttermilk Sweet Potato Pie with a fluffy meringue, gently browned, for a dramatic visual and an airy, sweet counterpoint to the creamy filling. Or, for a rustic charm, a simple streusel topping made with oats, brown sugar, and butter adds a delightful crunch and an extra layer of texture. Remember, this recipe is a canvas, and you are the artist. Feel empowered to make it truly your own, tailoring it to your palate and the preferences of those you’ll be sharing it with.
So, what are you waiting for? Gather your ingredients, clear your schedule for a little therapeutic baking, and prepare to embark on a culinary adventure that promises rich rewards. I am genuinely excited for you to experience the magic of this pie firsthand. Don’t be intimidated; the steps are straightforward, and the results are truly spectacular. Once you’ve pulled your golden-brown beauty from the oven and savored that first glorious slice, I would absolutely love to hear about your experience! Did you stick to the original, or did you venture into variations? What was your favorite part of making and tasting it? Please, share your baking triumphs, your photos, and your joyful moments with us. Your feedback and stories are what make this community so vibrant and inspiring. Go forth, bake, enjoy, and spread the deliciousness! Happy baking, my friends; I can’t wait to see what you create!
Creamy Buttermilk Sweet Potato Pie – Perfect Holiday Dessert
Buttermilk Sweet Potato Pie is a truly special culinary experience, capturing comfort and tradition. This dessert features earthy sweet potatoes balanced with the bright, subtle tang of buttermilk, all in a golden, flaky crust. A beloved staple in Southern American cuisine, this recipe’s unique addition of buttermilk creates an exceptionally creamy, flavorful, and irresistible pie.
Ingredients
-
1 (9-inch) unbaked pie crust
-
2 lbs (3-4 medium) sweet potatoes
-
1 cup (200g) granulated sugar
-
½ cup (100g) packed light brown sugar
-
½ cup (113g) unsalted butter, melted, cooled
-
2 large eggs, room temperature
-
½ cup (120ml) buttermilk
-
¼ cup (60ml) evaporated milk or heavy cream
-
1 tbsp pure vanilla extract
-
1 ½ tsp ground cinnamon
-
¾ tsp ground nutmeg
-
½ tsp ground ginger
-
¼ tsp ground allspice
-
¼ tsp salt
Instructions
-
Step 1
Preheat oven to 400°F (200°C). Wash and pierce sweet potatoes, then place on a baking sheet. Bake for 45-60 minutes until very tender. Let cool slightly, then peel skins. Mash the sweet potato flesh until completely smooth (using a potato ricer is recommended). You should have about 2 ½ – 3 cups of mashed sweet potato. -
Step 2
Preheat oven to 375°F (190°C). Fit the pie crust into a 9-inch pie plate. Line with parchment paper or foil and fill with pie weights, dried beans, or rice. Bake for 15 minutes, then carefully remove weights and parchment/foil, and bake for another 5-7 minutes until lightly golden. Let cool. -
Step 3
In a medium bowl, whisk together the granulated sugar, light brown sugar, ground cinnamon, ground nutmeg, ground ginger, ground allspice, and salt until well combined. -
Step 4
In a large bowl, whisk together the melted and cooled butter, eggs, buttermilk, evaporated milk (or heavy cream), and vanilla extract until uniform. -
Step 5
Add the mashed sweet potatoes to the wet ingredients. Pour in the sugar and spice mixture. Gently fold and mix all ingredients together with a spatula or wooden spoon until just combined and smooth, avoiding overmixing. -
Step 6
Carefully pour the filling into the blind-baked pie crust and smooth the top. Place the pie on a baking sheet. Reduce oven temperature to 350°F (175°C). Bake for approximately 50-70 minutes. The edges should be set, and the center should have a slight jiggle. A thin knife inserted halfway should come out mostly clean. If crust browns too quickly, loosely tent with foil. -
Step 7
Remove from oven and place on a wire rack to cool completely at room temperature for at least 3-4 hours, or until fully set. For optimal slicing, chill in the refrigerator for at least 2 hours or overnight. Slice and serve at room temperature or slightly chilled, optionally with whipped cream, vanilla ice cream, or caramel sauce. Store leftovers covered in the refrigerator for up to 3-4 days.
Important Information
Nutrition Facts (Per Serving)
It is important to consider this information as approximate and not to use it as definitive health advice.
Allergy Information
Please check ingredients for potential allergens and consult a health professional if in doubt.


Leave a Comment