

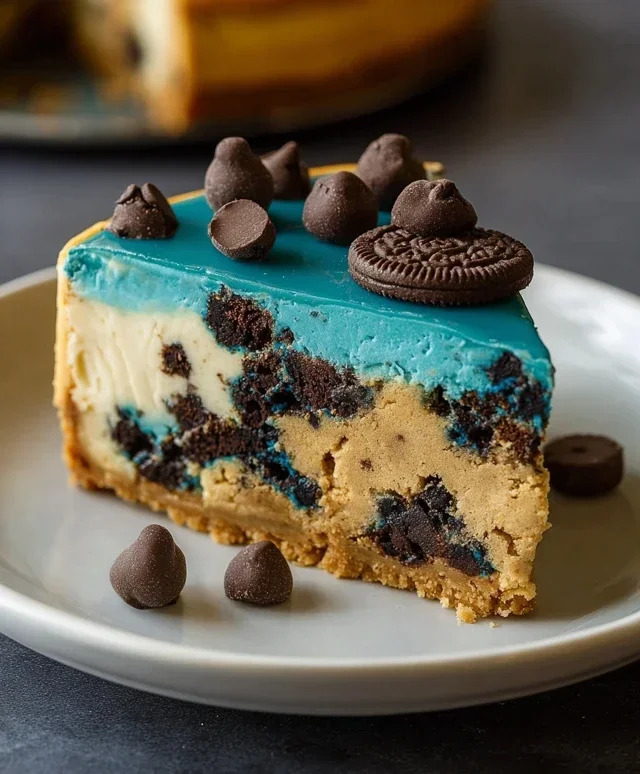
Cookie Monster Cheesecake is not just a dessert; it’s a vibrant explosion of childhood joy and grown-up indulgence. Who can resist the siren call of that iconic blue hue, studded with chunks of chocolate chip cookies and swirls of cookie dough? It’s a flavor combination that instantly transports us back to simpler times, sparking smiles and happy memories with every decadent bite. What truly makes this Cookie Monster Cheesecake so beloved is its playful spirit, offering a delightful twist on a classic cheesecake that’s anything but ordinary. It’s the perfect centerpiece for any celebration, a guaranteed crowd-pleaser that embodies fun and festivity. Get ready to dive fork-first into a dreamscape of creamy cheesecake goodness, where every spoonful is a tribute to our favorite furry, blue friend.
Why You’ll Adore This Cookie Monster Cheesecake
More Than Just a Pretty Face

Cookie Monster Cheesecake
Oh, get ready to unleash your inner Cookie Monster with this utterly decadent and fantastically fun cheesecake! This isn’t just any cheesecake; it’s a vibrant, blue-hued delight studded with chocolate chips, reminiscent of our favorite fuzzy, blue friend. Perfect for birthdays, holidays, or just because you deserve a serious treat, this Cookie Monster Cheesecake is surprisingly manageable and guaranteed to bring smiles all around. We’ll be building this masterpiece from a delicious chocolate chip cookie crust to a creamy, dreamy blue cheesecake filling. Let’s dive in!
Ingredients:
The Cookie Crust: Building the Foundation
The first step to our Cookie Monster Cheesecake is creating a delightful crust. We’re going for a cookie-inspired base that complements the creamy filling.
1. In a medium bowl, whisk together the melted unsalted butter, 1/2 teaspoon salt, and the tightly packed brown sugar until well combined. This forms the sticky binder for our crust.
2. Add the single egg and 1 teaspoon of vanilla extract to the butter and sugar mixture. Beat everything together until it’s smooth and fully incorporated.
3. Now, gradually add the all-purpose flour to the wet ingredients. Stir until just combined. Don’t overmix here; we want to avoid developing too much gluten, which can make the crust tough.
4. Gently fold in the semisweet mini chocolate chips. Distribute them evenly throughout the cookie dough mixture.
5. Press this delicious cookie dough evenly into the bottom and slightly up the sides of a 9-inch springform pan. A flat-bottomed glass or your fingers can help achieve an even layer. This is crucial for a stable base.
6. Preheat your oven to 350°F (175°C). Bake the crust for 10-12 minutes, or until it’s lightly golden around the edges. This pre-baking step helps to set the crust and prevent it from becoming soggy. Once baked, remove it from the oven and let it cool completely while you prepare the filling.
The Blue Dreamy Filling: Creamy and Colorful
Now for the star of the show – the vibrant blue cheesecake filling! Getting the cream cheese nice and soft is key for a smooth, lump-free cheesecake.
1. In a large bowl, beat the softened cream cheese until it’s incredibly smooth and creamy. This might take a few minutes with an electric mixer on medium speed. Scrape down the sides of the bowl frequently to ensure no lumps remain. This is a critical step for a silky texture.
2. Add the cornflour, granulated sugar, and the pinch of salt to the cream cheese. Beat again on medium speed until everything is just combined and smooth. Again, scrape down the bowl as needed.
3. In a separate small bowl, whisk together the whipping cream and 1 teaspoon of vanilla extract.
4. With the mixer on low speed, gradually pour in the whipping cream mixture. Mix until it’s just incorporated.
5. Now for the fun part – the color! Add your blue gel food coloring, a little at a time, until you achieve your desired Cookie Monster blue hue. Gel food coloring is more concentrated than liquid, so it gives you vibrant color without adding too much liquid to your filling. Mix until the color is uniform.
6. Add the three eggs to the filling, one at a time, beating on low speed after each addition until just incorporated. Do not overbeat the eggs, as this can lead to a cracked cheesecake. Overmixing after adding eggs can introduce too much air, which causes expansion and subsequent cracking during baking and cooling.
Baking and Chilling: Patience is a Virtue
The final stages involve baking and, crucially, chilling. A water bath is highly recommended for cheesecake as it provides moist heat and helps prevent cracking, ensuring a beautifully smooth top.
1. Pour the vibrant blue cheesecake filling over the cooled cookie crust in the prepared springform pan. Gently tap the pan on the counter a couple of times to release any air bubbles.
2. If you’re using a water bath (highly recommended!), wrap the outside of your springform pan tightly with a couple of layers of heavy-duty aluminum foil. Place the wrapped pan into a larger baking pan. Carefully pour hot water into the larger pan, creating a bath that comes about halfway up the sides of the springform pan.
3. Carefully transfer the entire setup to your preheated oven (still at 350°F/175°C). Bake for 50-60 minutes, or until the edges of the cheesecake are set but the center still has a slight jiggle. The cheesecake will continue to cook as it cools.
4. Once baked, turn off the oven and prop the oven door open slightly (you can use a wooden spoon). Let the cheesecake cool in the oven for about an hour. This slow cooling process further helps prevent cracking.
5. After the hour in the oven, remove the cheesecake from the water bath (if used) and let it cool completely on a wire rack at room temperature.
6. Once fully cooled, cover the cheesecake tightly with plastic wrap and refrigerate for at least 6 hours, or preferably overnight. This chilling period is essential for the cheesecake to set properly and for the flavors to meld.
7. To serve, run a thin knife around the edge of the springform pan before releasing the sides. Slice and enjoy your amazing Cookie Monster Cheesecake! You can garnish with extra mini chocolate chips or even some cookie crum extractbles if you’re feeling extra fancy.
Conclusion:
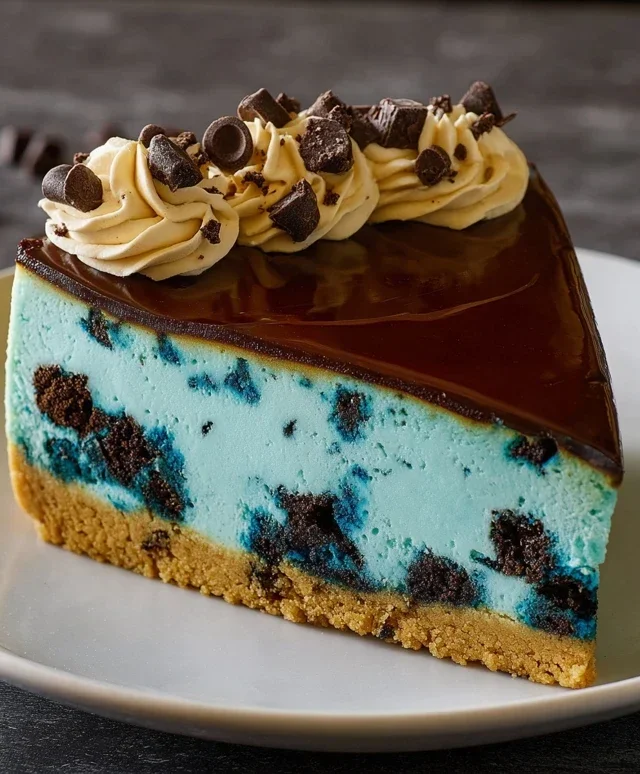
There you have it! A recipe for a truly spectacular Cookie Monster Cheesecake that’s guaranteed to bring smiles and blue-hued delight to any occasion. This cheesecake is a fantastic blend of creamy, classic cheesecake texture and the irresistible, fun-loving spirit of Cookie Monster. The surprise of the hidden cookie chunks, the vibrant blue hue, and the playful topping make it an instant crowd-pleaser, perfect for birthdays, holidays, or just a fun weekend baking project. It’s surprisingly straightforward to make, and the results are absolutely worth it!
For serving, I love to cut generous slices and top them with a dollop of whipped cream and a few extra chocolate chips or crum extractbled cookies. It’s also delicious served on its own! If you’re feeling adventurous, consider adding mini chocolate chip cookies directly into the batter before baking for an even more intense cookie experience. Or, for a white chocolate lover’s twist, swap the semi-sweet chips for white chocolate chips. Don’t be afraid to get creative and make this Cookie Monster Cheesecake your own!
I truly encourage you to give this recipe a try. It’s a wonderfully fun and delicious dessert that will undoubtedly become a favorite.
Frequently Asked Questions about Cookie Monster Cheesecake:
Can I make this cheesecake ahead of time?
Absolutely! Cheesecakes are best made at least a day in advance. This allows the flavors to meld beautifully and the cheesecake to set properly, ensuring that perfect creamy texture. Just make sure to store it covered in the refrigerator.
My cheesecake has cracks. Is it ruined?
Don’t worry! Cracks happen and don’t affect the taste. They often occur due to overbaking or rapid temperature changes. You can easily hide minor cracks with your topping, or just enjoy it as is – it will still be delicious!
What kind of blue food coloring should I use?
Gel food coloring works best for achieving a vibrant blue hue without thinning out your cheesecake batter. Start with a small amount and add more until you reach your desired shade of blue. Remember, a little goes a long way!
Cookie Monster Cheesecake
A fun and festive cheesecake inspired by the beloved Cookie Monster, featuring a cookie crust and creamy blue filling.
Ingredients
-
4 oz unsalted butter, melted
-
1/2 tsp salt
-
2.6 oz brown sugar, tightly packed (1/3 cup)
-
1 egg
-
1 tsp vanilla extract
-
4.4 oz all-purpose flour (125 g, 1 cup)
-
4 oz semisweet mini chocolate chips
-
16 oz cream cheese, softened
-
2 tsp cornflour
-
3.5 oz granulated sugar (1/2 cup)
-
Pinch of salt
-
1/2 cup whipping cream
-
Blue gel food coloring
-
1 tsp vanilla extract
-
3 eggs
Instructions
-
Step 1
Preheat oven to 350°F (175°C). Grease a 9-inch springform pan. -
Step 2
In a bowl, combine melted butter, 1/2 tsp salt, brown sugar, 1 egg, and 1 tsp vanilla extract. Mix well. Stir in flour and chocolate chips. Press mixture evenly into the bottom of the prepared pan to form the crust. -
Step 3
In a separate large bowl, beat cream cheese until smooth. Gradually beat in cornflour, granulated sugar, and pinch of salt until combined. Beat in whipping cream and 1 tsp vanilla extract. -
Step 4
Add blue gel food coloring to achieve a vibrant Cookie Monster blue. Beat in 3 eggs one at a time until just combined. -
Step 5
Pour the cream cheese mixture over the crust in the springform pan. Bake for 50-60 minutes, or until the edges are set and the center is slightly jiggly. -
Step 6
Turn off the oven and let the cheesecake cool in the oven with the door ajar for 1 hour. Remove from oven and let cool completely on a wire rack. Refrigerate for at least 4 hours before serving.
Important Information
Nutrition Facts (Per Serving)
It is important to consider this information as approximate and not to use it as definitive health advice.
Allergy Information
Please check ingredients for potential allergens and consult a health professional if in doubt.


Leave a Comment