

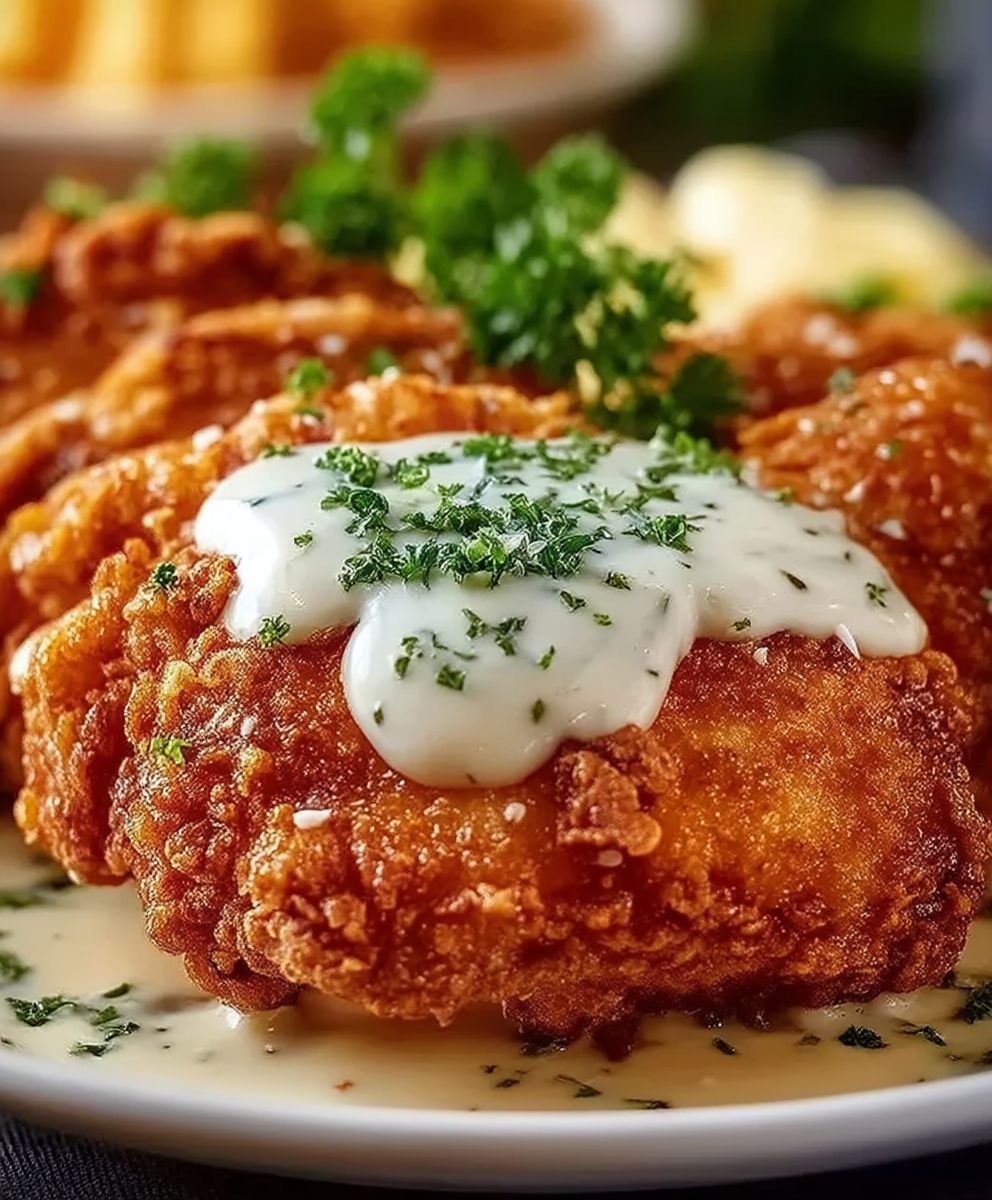
Chicken Fried Chicken: just the name alone conjures up images of crispy, golden-brown perfection, doesn’t it? Forget everything you thought you knew about comfort food because this isn’t just fried chicken; it’s an experience. Imagine sinking your teeth into a juicy, tender chicken breast, enveloped in a peppery, crunchy coating, and then drizzled with creamy, savory gravy. Are you drooling yet? I know I am!
While the exact origins are debated, Chicken Fried Chicken is widely believed to have evolved from German and Austrian schnitzel recipes brought to the American South by immigrants. These resourceful cooks adapted their techniques, using readily available chicken and creating a dish that quickly became a Southern staple. Its a testament to the ingenuity and resourcefulness of home cooks who transformed simple ingredients into something truly extraordinary.
But why is it so beloved? Beyond the satisfying crunch and the comforting richness of the gravy, Chicken Fried Chicken offers a unique textural contrast that’s simply irresistible. The tender chicken, the crispy breading, and the smooth gravy create a symphony of sensations in your mouth. Plus, it’s a dish that brings people together. Whether it’s a family dinner or a celebratory meal, Chicken Fried Chicken is always a crowd-pleaser. So, are you ready to learn how to make this iconic dish? Let’s get started!

Ingredients:
- For the Chicken:
- 4 boneless, skinless chicken breasts (about 6-8 ounces each)
- 1 cup buttermilk
- 1 tablespoon hot sauce (such as Frank’s RedHot)
- 1 teaspoon salt
- 1/2 teaspoon black pepper
- For the Dredge:
- 2 cups all-purpose flour
- 1/2 cup cornstarch
- 2 tablespoons paprika
- 1 tablespoon garlic powder
- 1 tablespoon onion powder
- 1 teaspoon dried thyme
- 1 teaspoon dried oregano
- 1 teaspoon cayenne pepper (optional, for extra heat)
- 1 teaspoon salt
- 1/2 teaspoon black pepper
- For Frying:
- 4 cups vegetable oil (or canola oil)
- Optional Gravy Ingredients:
- 1/4 cup reserved frying oil
- 1/4 cup all-purpose flour
- 3 cups milk
- 1/2 teaspoon salt
- 1/4 teaspoon black pepper
- Pinch of nutmeg (optional)
Preparing the Chicken
- Pound the Chicken: Place each chicken breast between two sheets of plastic wrap. Using a meat mallet or rolling pin, pound the chicken to an even thickness of about 1/4 to 1/2 inch. This ensures even cooking and tenderizes the chicken. Don’t overdo it, you don’t want to tear the chicken.
- Marinate the Chicken: In a medium bowl, whisk together the buttermilk, hot sauce, salt, and pepper. Add the pounded chicken breasts to the buttermilk mixture, ensuring they are fully submerged. Cover the bowl with plastic wrap and refrigerate for at least 30 minutes, or up to 4 hours. The longer the chicken marinates, the more tender and flavorful it will be. I usually aim for at least an hour.
Preparing the Dredge
- Combine Dry Ingredients: In a large, shallow dish (like a pie plate or baking dish), whisk together the flour, cornstarch, paprika, garlic powder, onion powder, thyme, oregano, cayenne pepper (if using), salt, and pepper. Make sure everything is evenly distributed. The cornstarch helps create a crispier crust.
Dredging the Chicken
- Dredge the Chicken: Remove one chicken breast from the buttermilk marinade, letting any excess drip off. Place the chicken in the flour mixture and press down firmly to coat both sides completely. Make sure the chicken is fully covered with the flour mixture.
- Double Dredge (Optional, but Recommended): For an extra crispy crust, dip the dredged chicken back into the buttermilk marinade, then back into the flour mixture, pressing firmly again. This double coating creates a thicker, crunchier crust that’s just irresistible.
- Rest the Dredged Chicken: Place the dredged chicken on a wire rack lined with parchment paper. Let the chicken rest for about 10-15 minutes before frying. This allows the coating to adhere better and prevents it from falling off during frying.
Frying the Chicken
- Heat the Oil: In a large, heavy-bottomed skillet or Dutch oven, heat the vegetable oil over medium-high heat until it reaches a temperature of 325-350°F (160-175°C). Use a deep-fry thermometer to monitor the oil temperature. Maintaining the correct temperature is crucial for achieving perfectly cooked chicken. If the oil is too hot, the outside will burn before the inside is cooked. If it’s too cold, the chicken will absorb too much oil and become greasy.
- Fry the Chicken: Carefully place the dredged chicken breasts into the hot oil, being careful not to overcrowd the pan. Fry in batches if necessary, leaving enough space between the chicken pieces. Overcrowding the pan will lower the oil temperature and result in soggy chicken.
- Cook the Chicken: Fry the chicken for about 6-8 minutes per side, or until golden brown and cooked through. The internal temperature of the chicken should reach 165°F (74°C). Use a meat thermometer to check the internal temperature.
- Drain the Chicken: Remove the fried chicken from the skillet and place it on a wire rack lined with paper towels to drain excess oil. This helps keep the chicken crispy.
Making the Gravy (Optional, but Highly Recommended!)
- Reserve Frying Oil: After frying the chicken, carefully pour off all but about 1/4 cup of the frying oil from the skillet. Be careful, the oil is very hot!
- Make a Roux: Place the skillet with the reserved oil over medium heat. Whisk in the flour and cook, stirring constantly, for about 2-3 minutes, or until the roux is golden brown. This is the base of your gravy, so don’t rush this step. A well-made roux is essential for a smooth and flavorful gravy.
- Add Milk: Gradually whisk in the milk, a little at a time, ensuring there are no lumps. Continue whisking until the gravy is smooth and thickened.
- Season the Gravy: Season the gravy with salt, pepper, and a pinch of nutmeg (if using). Adjust the seasoning to your taste.
- Simmer the Gravy: Reduce the heat to low and simmer the gravy for about 5-10 minutes, stirring occasionally, until it reaches your desired consistency. If the gravy is too thick, add a little more milk. If it’s too thin, simmer it for a few more minutes.
Serving
- Serve Immediately: Serve the chicken fried chicken hot, with a generous ladle of gravy over the top.
- Side Dish Suggestions: Chicken fried chicken is delicious served with mashed potatoes, green beans, corn on the cob, or coleslaw.
Tips for the Best Chicken Fried Chicken:
- Use High-Quality Chicken: The better the quality of the chicken, the better the final product will be.
- Don’t Overcrowd the Pan: Fry the chicken in batches to maintain the oil temperature.
- Use a Thermometer: A deep-fry thermometer is essential for monitoring the oil temperature. A meat thermometer is essential for ensuring the chicken is cooked through.
- Rest the Chicken: Letting the dredged chicken rest before frying helps the coating adhere better.
- Adjust Seasoning to Taste: Don’t be afraid to adjust the seasoning to your liking.
- Make the Gravy: The gravy is the perfect complement to the crispy chicken.
Variations:
- Spicy Chicken Fried Chicken: Add more cayenne pepper to the dredge for a spicier kick. You can also add a dash of cayenne to the buttermilk marinade.
- Herb Chicken Fried Chicken: Add more herbs to the dredge, such as rosemary, sage, or marjoram.
- Buttermilk Substitute: If you don’t have buttermilk, you can make a substitute by adding 1 tablespoon of lemon juice or white vinegar to 1 cup of milk. Let it sit for 5 minutes before using.
- Gluten-Free Chicken Fried Chicken: Use a gluten-free flour blend in place of all-purpose flour.
Storage and Reheating:
- Storage: Store leftover chicken fried chicken in an airtight container in the refrigerator for up to 3 days.
- Reheating: Reheat the chicken in the oven at 350°F (175°C) for about 10-15 minutes, or until heated through. You can also reheat it in a skillet over medium heat, but be careful not to burn it. Reheating in the air fryer is also a great option for maintaining crispiness.
This recipe is a labor of love, but trust me, it’s worth it! The crispy, flavorful chicken and creamy gravy are a match made in heaven. Enjoy!
Conclusion:
This Chicken Fried Chicken recipe isn’t just another meal; it’s a journey back to comfort food heaven, a crispy, golden-brown hug on a plate. I truly believe you’ll find this recipe a must-try because it delivers that perfect balance of juicy, tender chicken on the inside and a satisfyingly crunchy, flavorful crust on the outside. It’s the kind of dish that brings smiles to faces and makes any day feel a little bit more special.
But the best part? It’s surprisingly easy to make! Forget complicated techniques and hard-to-find ingredients. This recipe uses simple, readily available items and straightforward instructions, ensuring that even novice cooks can achieve restaurant-quality results. I’ve streamlined the process to eliminate any unnecessary steps, focusing on what truly matters: achieving that incredible flavor and texture.
And while the classic recipe is divine as is, don’t be afraid to get creative! For a spicier kick, add a pinch of cayenne pepper or a dash of hot sauce to the flour mixture. Want to experiment with different flavors? Try incorporating garlic powder, onion powder, or even a touch of smoked paprika for a unique twist. The possibilities are endless!
When it comes to serving, the options are just as exciting. Of course, classic mashed potatoes and creamy gravy are always a winning combination. But don’t overlook other delicious sides like creamy coleslaw, buttery corn on the cob, or even a simple green salad to balance out the richness. For a truly indulgent experience, serve it with a side of mac and cheese or some crispy french fries.
For a lighter take, consider serving your Chicken Fried Chicken on a bed of mixed greens with a light vinaigrette. You could also slice it up and use it as a topping for a hearty salad or even incorporate it into a delicious wrap with your favorite veggies and sauces.
And here’s a fun variation: try making mini Chicken Fried Chicken sliders! Use small buns and top them with coleslaw, pickles, and a drizzle of your favorite sauce for a crowd-pleasing appetizer or a fun twist on a classic meal.
I’m so confident that you’ll love this recipe that I urge you to give it a try. Don’t be intimidated by the name; it’s much simpler than you might think. Gather your ingredients, follow the instructions, and prepare to be amazed by the incredible flavor and texture of homemade Chicken Fried Chicken.
Once you’ve tried it, I would absolutely love to hear about your experience! Did you make any variations? What were your favorite sides to serve with it? Share your photos and stories in the comments below. Your feedback is invaluable, and it helps me continue to improve and refine my recipes. So, go ahead, get cooking, and let me know what you think! Happy frying! I can’t wait to hear about your culinary adventures with this fantastic Chicken Fried Chicken recipe.
Chicken Fried Chicken: The Ultimate Guide to Crispy Perfection
Crispy, golden-brown chicken fried chicken with a creamy, flavorful gravy. A Southern comfort food classic!
Ingredients
- 4 boneless, skinless chicken breasts (6-8 ounces each)
- 1 cup buttermilk
- 1 tablespoon hot sauce (such as Frank’s RedHot)
- 1 teaspoon salt
- 1/2 teaspoon black pepper
- 2 cups all-purpose flour
- 1/2 cup cornstarch
- 2 tablespoons paprika
- 1 tablespoon garlic powder
- 1 tablespoon onion powder
- 1 teaspoon dried thyme
- 1 teaspoon dried oregano
- 1 teaspoon cayenne pepper (optional, for extra heat)
- 1 teaspoon salt
- 1/2 teaspoon black pepper
- 4 cups vegetable oil (or canola oil)
- 1/4 cup reserved frying oil
- 1/4 cup all-purpose flour
- 3 cups milk
- 1/2 teaspoon salt
- 1/4 teaspoon black pepper
- Pinch of nutmeg (optional)
Instructions
- Pound the Chicken: Place each chicken breast between two sheets of plastic wrap. Using a meat mallet or rolling pin, pound the chicken to an even thickness of about 1/4 to 1/2 inch.
- Marinate the Chicken: In a medium bowl, whisk together the buttermilk, hot sauce, salt, and pepper. Add the pounded chicken breasts to the buttermilk mixture, ensuring they are fully submerged. Cover and refrigerate for at least 30 minutes, or up to 4 hours.
- Combine Dry Ingredients: In a large, shallow dish, whisk together the flour, cornstarch, paprika, garlic powder, onion powder, thyme, oregano, cayenne pepper (if using), salt, and pepper.
- Dredge the Chicken: Remove one chicken breast from the buttermilk marinade, letting any excess drip off. Place the chicken in the flour mixture and press down firmly to coat both sides completely.
- Double Dredge (Optional): For an extra crispy crust, dip the dredged chicken back into the buttermilk marinade, then back into the flour mixture, pressing firmly again.
- Rest the Dredged Chicken: Place the dredged chicken on a wire rack lined with parchment paper. Let the chicken rest for about 10-15 minutes before frying.
- Heat the Oil: In a large, heavy-bottomed skillet or Dutch oven, heat the vegetable oil over medium-high heat until it reaches a temperature of 325-350°F (160-175°C).
- Fry the Chicken: Carefully place the dredged chicken breasts into the hot oil, being careful not to overcrowd the pan. Fry in batches if necessary.
- Cook the Chicken: Fry the chicken for about 6-8 minutes per side, or until golden brown and cooked through. The internal temperature of the chicken should reach 165°F (74°C).
- Drain the Chicken: Remove the fried chicken from the skillet and place it on a wire rack lined with paper towels to drain excess oil.
- Reserve Frying Oil: After frying the chicken, carefully pour off all but about 1/4 cup of the frying oil from the skillet.
- Make a Roux: Place the skillet with the reserved oil over medium heat. Whisk in the flour and cook, stirring constantly, for about 2-3 minutes, or until the roux is golden brown.
- Add Milk: Gradually whisk in the milk, a little at a time, ensuring there are no lumps. Continue whisking until the gravy is smooth and thickened.
- Season the Gravy: Season the gravy with salt, pepper, and a pinch of nutmeg (if using). Adjust the seasoning to your taste.
- Simmer the Gravy: Reduce the heat to low and simmer the gravy for about 5-10 minutes, stirring occasionally, until it reaches your desired consistency.
- Serve Immediately: Serve the chicken fried chicken hot, with a generous ladle of gravy over the top.
Notes
- Use High-Quality Chicken: The better the quality of the chicken, the better the final product will be.
- Don’t Overcrowd the Pan: Fry the chicken in batches to maintain the oil temperature.
- Use a Thermometer: A deep-fry thermometer is essential for monitoring the oil temperature. A meat thermometer is essential for ensuring the chicken is cooked through.
- Rest the Chicken: Letting the dredged chicken rest before frying helps the coating adhere better.
- Adjust Seasoning to Taste: Don’t be afraid to adjust the seasoning to your liking.
- Make the Gravy: The gravy is the perfect complement to the crispy chicken.
- Spicy Chicken Fried Chicken: Add more cayenne pepper to the dredge for a spicier kick. You can also add a dash of cayenne to the buttermilk marinade.
- Herb Chicken Fried Chicken: Add more herbs to the dredge, such as rosemary, sage, or marjoram.
- Buttermilk Substitute: If you don’t have buttermilk, you can make a substitute by adding 1 tablespoon of lemon juice or white vinegar to 1 cup of milk. Let it sit for 5 minutes before using.
- Gluten-Free Chicken Fried Chicken: Use a gluten-free flour blend in place of all-purpose flour.
- Storage: Store leftover chicken fried chicken in an airtight container in the refrigerator for up to 3 days.
- Reheating: Reheat the chicken in the oven at 350°F (175°C) for about 10-15 minutes, or until heated through. You can also reheat it in a skillet over medium heat, but be careful not to burn it. Reheating in the air fryer is also a great option for maintaining crispiness.


Leave a Comment