

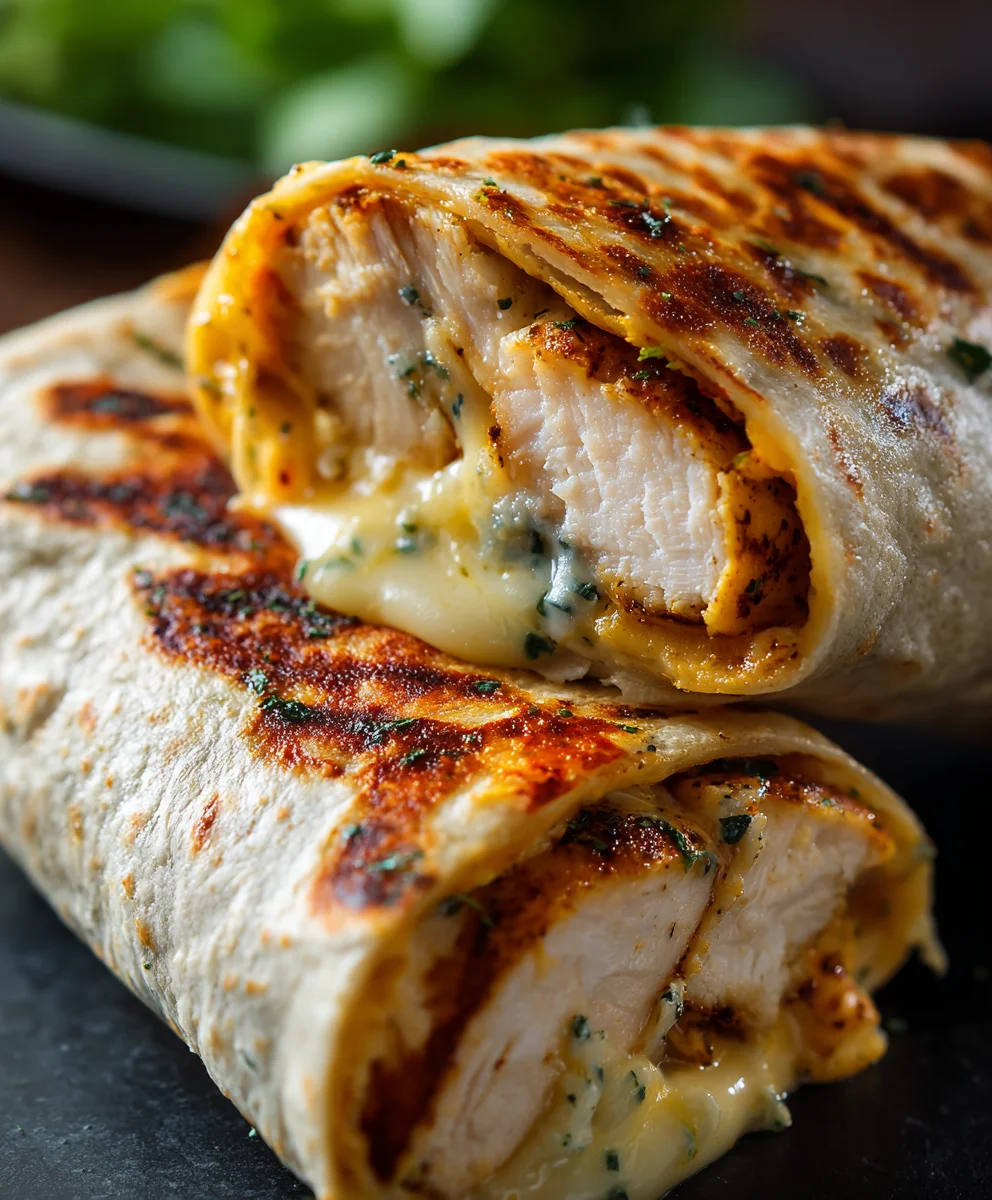
Cheesy Garlic Chicken Wraps are more than just a meal; they are an experience, a delightful fusion of comfort and flavor that promises to tantalize your taste buds. Imagine biting into a warm, soft tortilla, generously filled with succulent, tender chicken infused with aromatic garlic, and enveloped in a luscious, melted cheese sauce. It’s a culinary hug that manages to be both incredibly satisfying and wonderfully quick to prepare.
While perhaps not steeped in ancient traditions, the concept of a wrap, allowing for endless customization and portability, has become a beloved staple in modern kitchens worldwide, evolving into countless delicious variations. This particular combination brings together universally adored elements – the robust flavor of garlic, the irresistible creaminess of cheese, and the protein-packed goodness of chicken – into one harmonious bite.
Why are Cheesy Garlic Chicken Wraps so universally adored?
People adore these wraps for their incredible taste profile, which strikes a perfect balance between savory and rich, and for their remarkable versatility as a quick weeknight dinner or a delightful, portable lunch. I am so excited to guide you through creating your very own batch of these incredible Cheesy Garlic Chicken Wraps, ensuring every bite is a moment of pure bliss.

Ingredients:
- For the Chicken:
- 2 lbs boneless, skinless chicken breasts or thighs, cut into 1/2-inch strips or cubes
- 2 tablespoons olive oil
- 1 tablespoon fresh lemon juice
- 4 cloves garlic, minced (about 2 teaspoons)
- 1 teaspoon dried oregano
- 1/2 teaspoon paprika
- 1/2 teaspoon salt
- 1/4 teaspoon black pepper
- For the Cheesy Garlic Spread:
- 8 oz (1 block) cream cheese, softened to room temperature
- 1/4 cup sour cream or mayonnaise (for extra creaminess and tang)
- 4-6 cloves fresh garlic, finely minced (adjust to your garlic preference, this is key for “Cheesy Garlic Chicken Wraps”)
- 1/2 cup grated Parmesan cheese
- 1 cup shredded mozzarella cheese (or a mix of Monterey Jack and cheddar for a richer flavor)
- 2 tablespoons fresh parsley, finely chopped
- 1 tablespoon fresh chives, finely chopped (optional, for a subtle oniony note)
- 1/4 teaspoon onion powder
- Salt and black pepper to taste
- For Assembling the Wraps:
- 8 large flour tortillas (10-12 inch size, suitable for substantial Cheesy Garlic Chicken Wraps)
- 2 cups shredded romaine lettuce or iceberg lettuce
- 1 large tomato, diced
- 1/2 red onion, thinly sliced or finely diced
- Optional: Extra olive oil or butter for pan-grilling the wraps
- Optional: A handful of fresh spinach or bell peppers for added nutrition and color
Preparing the Flavorful Chicken
The chicken is the heart of our Cheesy Garlic Chicken Wraps, so we want to ensure it’s packed with flavor and perfectly tender. I find that a simple marinade goes a long way in achieving this.
- Prepare the Chicken: Start by patting your boneless, skinless chicken breasts or thighs dry with paper towels. This helps ensure a better sear later. Then, cut the chicken into uniform 1/2-inch strips or bite-sized cubes. Uniform pieces cook more evenly, which is crucial for a great texture in your finished wraps.
- Create the Marinade: In a medium-sized bowl, whisk together the olive oil, fresh lemon juice, minced garlic, dried oregano, paprika, salt, and black pepper. The lemon juice tenderizes the chicken while adding a bright, zesty note that complements the rich garlic and cheese flavors beautifully.
- Marinate the Chicken: Add the prepared chicken pieces to the bowl with the marinade. Toss everything together until every piece of chicken is thoroughly coated. For the best flavor penetration and tenderness, cover the bowl and refrigerate for at least 30 minutes. If you have more time, you can marinate it for up to 4 hours, or even overnight if you’re planning ahead. The longer it marinates, the more infused with flavor your chicken will be, making your Cheesy Garlic Chicken Wraps truly exceptional.
- Cook the Chicken:
- Pan-Frying Method: Heat 1 tablespoon of olive oil in a large skillet or non-stick pan over medium-high heat. Once the oil shimmers, add the marinated chicken in a single layer, being careful not to overcrowd the pan. You might need to cook it in batches to ensure proper browning. Cook for 4-6 minutes, flipping occasionally, until the chicken is golden brown and cooked through (internal temperature reaches 165°F or 74°C).
- Grilling Method: Preheat your grill to medium-high heat. Lightly oil the grates. Place the chicken strips directly on the grill and cook for 3-4 minutes per side, or until beautiful grill marks appear and the chicken is fully cooked.
- Baking Method: Preheat your oven to 400°F (200°C). Arrange the marinated chicken in a single layer on a baking sheet. Bake for 15-20 minutes, or until cooked through and lightly golden.
- Rest and Prepare: Once cooked, remove the chicken from the heat and let it rest for 5 minutes. This allows the juices to redistribute, ensuring the chicken remains moist and tender. After resting, you can leave the strips whole, or for easier wrap assembly and a more integrated texture, shred or dice the chicken further. Set aside while you prepare the other components of your Cheesy Garlic Chicken Wraps.
Crafting the Irresistible Cheesy Garlic Spread
This spread is the secret weapon that elevates our dish from just chicken wraps to truly unforgettable Cheesy Garlic Chicken Wraps. It’s creamy, tangy, and bursting with garlicky, cheesy goodness. Don’t skimp on the fresh garlic here!
- Soften the Cream Cheese: It’s absolutely essential that your cream cheese is at room temperature and soft. This ensures a smooth, lump-free spread that’s easy to mix and, more importantly, easy to spread evenly on your tortillas. You can leave it on the counter for about an hour or gently soften it in the microwave for 15-20 seconds.
- Prepare the Fresh Aromatics: Finely mince your fresh garlic cloves. Remember, this is a “Cheesy Garlic” spread, so don’t be shy with the garlic! Chop your fresh parsley and chives as well. Fresh herbs add a vibrant, fresh dimension to the richness of the cheese.
- Combine Wet Ingredients: In a medium mixing bowl, combine the softened cream cheese and sour cream (or mayonnaise). Using an electric mixer on low speed, or a sturdy spoon, beat them together until light and fluffy. This step creates the creamy base for our spread and ensures a delightful texture.
- Integrate the Cheeses and Seasonings: Add the finely minced fresh garlic, grated Parmesan cheese, and shredded mozzarella cheese to the cream cheese mixture. Sprinkle in the onion powder, a pinch of salt, and a good grind of black pepper.
- Mix Thoroughly: Continue mixing until all the ingredients are thoroughly combined and you have a homogenous, rich, and creamy spread. Take your time with this step, ensuring no lumps of cream cheese remain and all the flavors are evenly distributed. Taste a small spoonful and adjust the seasoning if needed. You might want a little more salt, pepper, or even a touch more garlic powder for an extra punch. This spread should be bursting with savory, garlicky, and cheesy notes, making it the perfect partner for our chicken.
- Add Fresh Herbs: Gently fold in the chopped fresh parsley and chives (if using). These are best added at the end to preserve their fresh flavor and color.
- Chill (Optional but Recommended): If time allows, cover the bowl and refrigerate the cheesy garlic spread for at least 15-20 minutes. This allows the flavors to meld even further and firms up the spread slightly, making it even easier to handle when assembling your Cheesy Garlic Chicken Wraps.
Prepping Your Wraps and Veggies
Efficiency is key when assembling your wraps. Having all your components ready and organized will make the process smooth and enjoyable. These fresh elements add crucial crunch and freshness to balance the rich chicken and spread.
- Wash and Prepare Vegetables:
- Lettuce: Thoroughly wash your romaine or iceberg lettuce. Dry it completely using a salad spinner or by patting it with paper towels. Then, shred it into thin strips.
- Tomato: Wash the tomato, then dice it into small, even pieces.
- Red Onion: Peel and thinly slice or finely dice the red onion. If you find raw red onion too strong, you can soak the slices in cold water for 10-15 minutes, then drain thoroughly. This mellows its flavor.
- Optional Veggies: If using fresh spinach, simply wash and dry it. If using bell peppers, wash, core, and slice them into thin strips.
Keep all prepared vegetables separate in small bowls for easy access.
- Warm the Tortillas: Warming your tortillas makes them much more pliable and less likely to crack when you’re rolling them. It also improves their texture and makes them more pleasant to eat.
- Microwave Method: Stack a few tortillas together, wrap them in a damp paper towel, and microwave for 15-20 seconds until warm and flexible. Repeat with the remaining tortillas as needed.
- Dry Skillet Method: Heat a dry skillet over medium heat. Place one tortilla at a time in the skillet for about 15-20 seconds per side, until slightly puffed and warm.
- Oven Method: Preheat your oven to 250°F (120°C). Stack tortillas, wrap them in aluminum foil, and warm for 10-15 minutes.
Keep the warmed tortillas covered (perhaps in a clean kitchen towel) to retain their heat and flexibility until ready to use.
- Set Up Your Assembly Line: Arrange all your prepared components in an organized fashion: the cooked chicken, the cheesy garlic spread, shredded lettuce, diced tomatoes, sliced red onion, and the warm tortillas. This mise en place will make the wrapping process quick and effortless. You’re now ready to build your epic Cheesy Garlic Chicken Wraps!
Assembling Your Cheesy Garlic Chicken Wraps
This is where all our hard work comes together! Assembling a tight, well-packed wrap is crucial for a satisfying eating experience. Don’t be afraid to load them up, but also don’t overfill to the point of bursting.
- Lay Out the Tortilla: Place one warm flour tortilla flat on a clean work surface. I usually find that laying it flat directly in front of me works best, giving me ample space to work.
- Spread the Cheesy Garlic Goodness: Take a generous spoonful (about 2-3 tablespoons) of your homemade cheesy garlic spread and spread it evenly over the entire surface of the tortilla, leaving about a 1-inch border around the edges. This spread is the glue and the flavor powerhouse of your Cheesy Garlic Chicken Wraps, so don’t be shy! Ensure it reaches most of the surface to get that amazing garlicky, cheesy taste in every bite.
- Layer the Chicken: Place a portion of the cooked chicken (about 1/4 to 1/3 cup, depending on your preference and the size of your tortilla) in a line across the center of the tortilla, slightly below the midline. This positioning is important for a successful roll.
- Add the Fresh Veggies: Now, layer your fresh vegetables over the chicken. Start with a handful of shredded lettuce, followed by some diced tomatoes and a few slices or dices of red onion. If you’re using other optional veggies like spinach or bell peppers, add them now. Try to keep the fillings relatively centralized to avoid making the wrap too bulky on the ends.
- The Art of Folding: This step is critical for a neat and secure wrap.
- Fold in the Sides: Take the left and right edges of the tortilla, directly adjacent to your filling, and fold them inwards over the filling, towards the center. This creates a “pocket” that will hold your fillings securely.
- Fold from the Bottom: Now, take the bottom edge of the tortilla (the edge closest to you) and pull it up and over the filling, tucking it in tightly. This is where you create the initial tight roll.
- Roll Tightly: While keeping the sides tucked in, continue to roll the tortilla upwards, away from you, as tightly as possible without tearing the tortilla. Maintain gentle pressure to ensure the fillings are compacted. You want a firm, cylindrical wrap that holds its shape.
A well-folded wrap means a less messy eating experience and ensures all the delicious components of your Cheesy Garlic Chicken Wraps stay intact!
- Repeat: Continue this process with the remaining tortillas and fillings until all your delicious Cheesy Garlic Chicken Wraps are assembled.
Cooking and Serving Your Cheesy Garlic Chicken Wraps
While you can certainly enjoy these wraps fresh, a little heat can take them to the next level, melting the cheese in the spread and giving the tortilla a delightful crispness. This step is highly recommended for the ultimate experience of your Cheesy Garlic Chicken Wraps.
- Option 1: Serve Fresh (No Cooking):
If you’re short on time or prefer a cold wrap, simply slice your assembled Cheesy Garlic Chicken Wraps in half diagonally or into smaller pinwheels, and serve immediately. This method is quick, easy, and still incredibly delicious thanks to the flavorful chicken and cheesy garlic spread. It’s perfect for a quick lunch or a picnic.
- Option 2: Panini Press or Griddle for Warm, Crispy Wraps (Highly Recommended):
This is my favorite way to enjoy these wraps as it adds a fantastic texture and melts that cheesy garlic spread beautifully. The transformation is remarkable.
- Preheat: Heat a panini press to medium-high heat. If you don’t have a panini press, you can use a large non-stick skillet or griddle over medium heat. If using a skillet, you might want to lightly brush the outer surface of your wraps with a touch of olive oil or melted butter for extra crispiness and golden color.
- Cook the Wraps: Place 1-2 assembled Cheesy Garlic Chicken Wraps into the hot panini press or skillet.
- Press and Cook:
- Panini Press: Close the lid and cook for 3-5 minutes, or until the tortilla is golden brown and crispy, and the cheese inside the spread is melty and gooey. You’ll see beautiful grill marks appear.
- Skillet/Griddle: If using a skillet, cook for 3-4 minutes per side, pressing down gently with a spatula to ensure good contact and even browning. You’re looking for that perfect golden crispiness.
- Monitor Closely: Keep an eye on the wraps to prevent burning. The cooking time will vary depending on your equipment and desired crispness. The goal is a warm, slightly toasted exterior and a gooey, melted interior.
- Rest and Slice: Once cooked to perfection, carefully remove the warm wraps from the press or skillet. Let them rest for just a minute or two before slicing. This helps the fillings settle and prevents them from spilling out when cut.
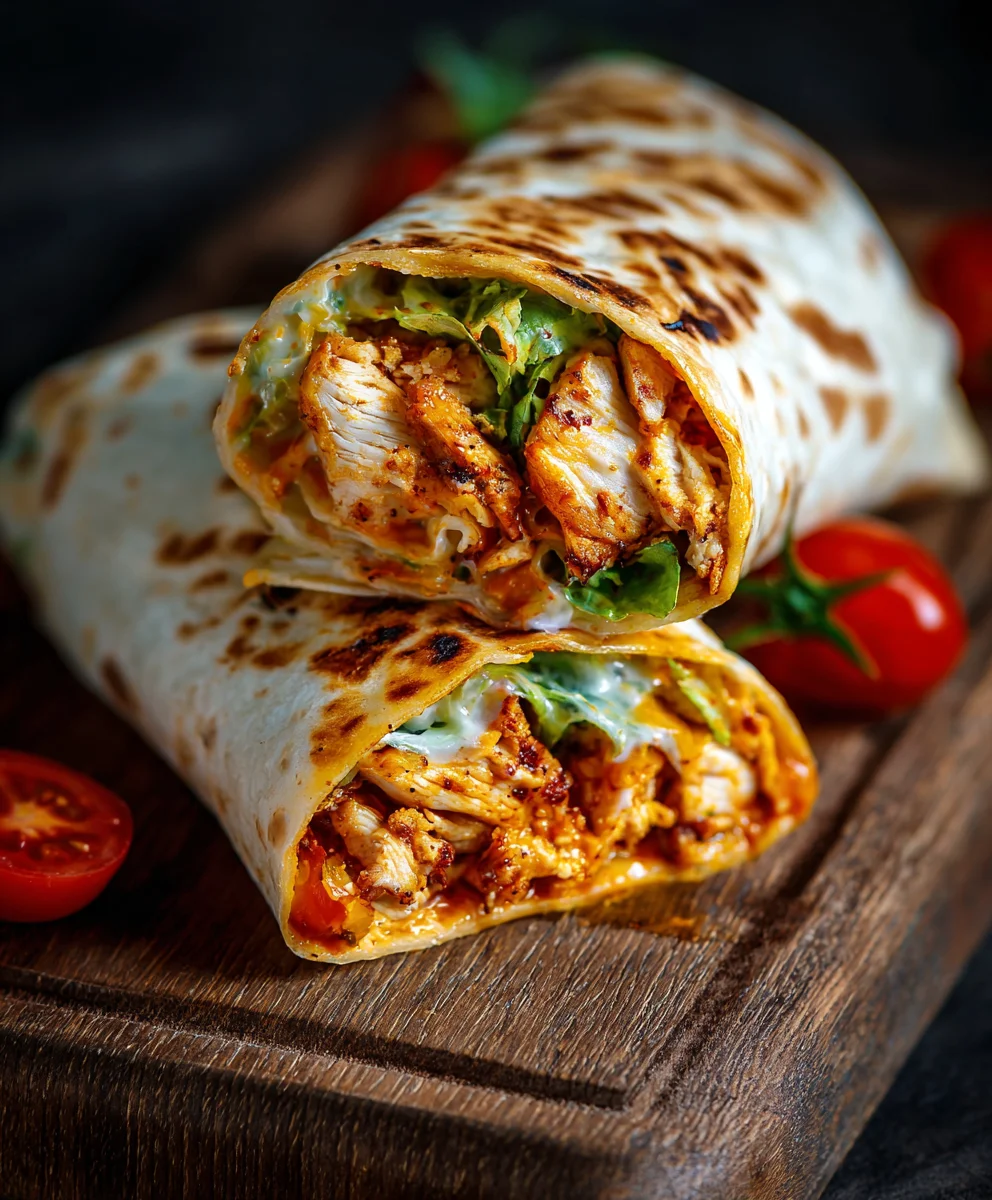
- Serving Suggestion:
Slice each cooked or fresh Cheesy Garlic Chicken Wrap in half diagonally. This makes them easier to handle and showcases all the vibrant layers inside. You can also slice them into 1-inch thick pinwheels for a more appetizer-style presentation, securing each with a toothpick if desired. Serve them immediately for the best experience. These wraps are fantastic on their own, but if you’re feeling extra indulgent, a side of extra cheesy garlic spread for dipping, or even a simple ranch dressing, can be a delightful addition.
They make for an incredible lunch, a hearty snack, or a fun, informal dinner. Enjoy the amazing flavors of your homemade Cheesy Garlic Chicken Wraps!
Tips for the Best Cheesy Garlic Chicken Wraps Experience
To ensure your Cheesy Garlic Chicken Wraps are always a hit and to offer some versatility, here are a few extra tips and ideas:
- Make-Ahead Magic:
You can prepare several components in advance, making assembly incredibly fast. Cook the chicken and prepare the cheesy garlic spread up to 2-3 days ahead of time and store them separately in airtight containers in the refrigerator. When you’re ready to eat, simply warm the chicken if desired, prep your fresh veggies, and assemble your wraps. This is a huge time-saver for busy weeknights or meal prep.
- Customization is Key:
Don’t be afraid to experiment with the fillings to suit your taste. These Cheesy Garlic Chicken Wraps are incredibly versatile!
- Cheese Variations: Instead of just mozzarella, try a blend of Monterey Jack, Colby, or a sharp white cheddar in your spread for different flavor profiles.
- Spice It Up: Add a pinch of red pepper flakes to the chicken marinade or the cheesy garlic spread for a bit of heat. A dash of cayenne pepper can also work wonders.
- Vegetable Power: Beyond lettuce, tomato, and onion, consider adding thinly sliced cucumbers, bell pepper strips (roasted or raw), shredded carrots, black olives, or even some sautéed mushrooms. Avocado slices or guacamole would also be a fantastic addition, adding a creamy, rich texture.
- Herb Swaps: If you’re not a fan of chives or parsley, fresh dill or cilantro could offer interesting alternative notes, though they would change the classic “Cheesy Garlic Chicken Wraps” flavor profile.
- Protein Alternatives:
While chicken is the star here, this recipe is adaptable. You could easily substitute the chicken with:
- Shrimp: Cooked and seasoned shrimp would be fantastic, especially if grilled.
- Beef: Thinly sliced cooked steak (like fajita-style beef) would also work beautifully.
- Plant-Based: For a vegetarian or vegan version, consider grilled halloumi cheese, marinated and grilled tofu, or roasted chickpeas. You would need to adjust the cheesy garlic spread to a dairy-free alternative if going fully vegan.
- Storage of Assembled Wraps:
If you have leftover assembled wraps, or if you’re making them for lunch the next day, it’s best to store them unfried. Wrap each individual wrap tightly in plastic wrap or aluminum foil to prevent the tortilla from drying out and the veggies from wilting. Store them in the refrigerator for up to 1-2 days. Reheat in a panini press or skillet for the best results, or enjoy cold.
- Choosing the Right Tortilla:
For large, satisfying Cheesy Garlic Chicken Wraps, opt for large (10-12 inch) flour tortillas. Wheat tortillas can also be used for a healthier alternative, but ensure they are soft and pliable. The quality of your tortilla can significantly impact how well your wrap holds together and tastes.
- Don’t Forget the Dip!
While the cheesy garlic spread is robust enough on its own, a little extra dipping sauce can be a fun addition. Consider serving your wraps with a side of ranch dressing, a spicy sriracha mayo, or even an extra dollop of the cheesy garlic spread itself. These optional additions can enhance the experience of your already delicious Cheesy Garlic Chicken Wraps.
Conclusion:
So, there you have it, my friends – a detailed journey through what I truly believe is one of the most delightful and convenient recipes you’ll ever add to your culinary repertoire. We’ve explored the magic behind these incredible Cheesy Garlic Chicken Wraps, and I sincerely hope you’re as excited to make them as I am to share them. This isn’t just another dinner idea; it’s a promise of flavor, a testament to simplicity, and a guarantee of happy faces around your table. From the tender, succulent chicken bathed in that irresistible garlic butter, to the gooey, melted cheese that binds every ingredient together in a warm tortilla hug, every element works in perfect harmony to create a truly unforgettable experience. It’s the kind of dish that makes a weeknight feel special and a casual gathering feel like a celebration. I truly can’t stress enough how much of a game-changer these wraps have been in my own kitchen, offering a quick fix for cravings that doesn’t compromise on taste or satisfaction. They are robust enough to be a main meal, yet light enough not to leave you feeling overly stuffed, striking that perfect balance we all strive for in our busy lives.
Elevate Your Meal: Serving Suggestions & Creative Variations
Now, while these Cheesy Garlic Chicken Wraps are utterly fantastic on their own, part of the joy of cooking is discovering how to make a great thing even better, or adapting it to suit your unique tastes and occasions. For a simple, well-rounded meal, I love serving these wraps alongside a crisp, vibrant green salad with a light vinaigrette. The freshness of the greens provides a wonderful contrast to the rich, savory filling. Alternatively, a cup of creamy tomato soup or a side of seasoned roasted vegetables like asparagus or broccoli can also complement the wraps beautifully, adding extra nutrients and textures to your plate. If you’re looking for something a bit more indulgent, a small portion of sweet potato fries or even a homemade coleslaw could be a fantastic pairing, offering that delightful crunch and tangy sweetness.
But let’s talk about variations – this is where you can truly make this recipe your own! Don’t feel limited to just one type of cheese; experiment with a mix of Monterey Jack and cheddar for a classic melty blend, or introduce some provolone for a sharper, more Italian-inspired twist. If you crave a little heat, a sprinkle of pepper jack cheese or a few thinly sliced jalapeños (fresh or pickled) folded into the filling would add an exhilarating kick. For those who want to boost the veggie content, consider sautéing some finely diced bell peppers, onions, or even spinach with your chicken before wrapping. These additions not only add color but also extra vitamins and fiber, making your meal even more wholesome. If chicken isn’t your preferred protein, diced cooked shrimp or even ground turkey could work wonderfully. For a vegetarian option, seasoned black beans or crumbled paneer could easily step in for the chicken, creating equally delicious wraps. You could even turn this into a “wrap bowl” by serving the cheesy garlic chicken mixture over a bed of fluffy rice or quinoa, topped with your favorite fresh salsa, avocado, and a dollop of sour cream or Greek yogurt – perfect for a gluten-free alternative or just a different presentation.
Another fun idea is to play with different types of tortillas. While flour tortillas are my go-to for their flexibility and soft texture, whole wheat tortillas offer a nuttier flavor and extra fiber. If you’re feeling adventurous, try using large lettuce leaves (like butter lettuce or romaine) for a super light, low-carb version – the crunch is incredibly satisfying! And for the sauce lovers out there, consider adding a drizzle of buffalo sauce, a touch of sriracha mayo, or even a tangy ranch dressing inside the wrap before rolling for an extra layer of flavor complexity. The possibilities truly are endless, and I encourage you to let your culinary imagination run wild!
Your Turn: Create, Savor, and Share!
Now that you’re armed with all the tips, tricks, and tantalizing ideas, it’s time for you to take the plunge and create these magnificent Cheesy Garlic Chicken Wraps in your own kitchen. I promise you, the process is straightforward, the aroma while cooking is divine, and the results are nothing short of spectacular. This recipe is designed for success, even for novice cooks, and I’m confident that you’ll find immense joy in every step, from preparing the ingredients to taking that very first, blissful bite. It’s a fantastic opportunity to bring restaurant-quality flavors into your home without the fuss or the hefty price tag.
Once you’ve experienced the sheer deliciousness of these wraps, I would absolutely love to hear about it! Please don’t hesitate to share your cooking adventures with me and the rest of our community. Did you try a unique variation? What was your favorite part of the process? Did your family or friends rave about them? Your feedback, photos, and personal twists are incredibly valuable and inspiring to me and to other home cooks looking for new ideas. Tag me on social media, leave a comment below, or simply drop me an email to let me know how your Cheesy Garlic Chicken Wraps turned out. Let’s build a delicious community together, one incredible recipe at a time. Happy cooking, and I can’t wait to hear all about your cheesy, garlicky masterpieces!
Cheesy Garlic Chicken Wraps
These Cheesy Garlic Chicken Wraps are a delightful fusion of comfort and flavor, perfect for a quick and easy dinner. Featuring succulent chicken mixed with creamy garlic aioli and cheddar cheese, all wrapped in a warm tortilla, they’re incredibly satisfying and wonderfully quick to prepare.
Ingredients
-
2 cups cooked chicken, shredded
-
1/2 cup garlic aioli
-
1 cup cheddar cheese, shredded
-
4 large tortillas
-
Salt to taste
-
Pepper to taste
Instructions
-
Step 1
In a medium bowl, combine 2 cups shredded cooked chicken, 1/2 cup garlic aioli, 1 cup shredded cheddar cheese, and season with salt and pepper to taste. Mix well until all ingredients are evenly distributed. -
Step 2
Gently warm the 4 large tortillas. This can be done in a microwave (15-20 seconds for a stack wrapped in a damp paper towel) or a dry skillet (15-20 seconds per side over medium heat) until pliable. -
Step 3
Lay one warm tortilla flat. Spread a generous portion of the chicken mixture across the center, leaving a 1-inch border around the edges. -
Step 4
Fold in the left and right edges of the tortilla over the filling. Then, bring the bottom edge up and over the filling, tucking tightly. Continue rolling upwards to create a firm, secure cylindrical wrap. Repeat for the remaining tortillas. -
Step 5
For a warm, crispy wrap, heat a panini press or a large non-stick skillet over medium heat. Cook each assembled wrap for 3-5 minutes until golden brown and the cheese is melted, flipping once if using a skillet. Remove, let rest for a minute, then slice in half diagonally and serve immediately. Wraps can also be enjoyed fresh without cooking.
Important Information
Nutrition Facts (Per Serving)
It is important to consider this information as approximate and not to use it as definitive health advice.
Allergy Information
Please check ingredients for potential allergens and consult a health professional if in doubt.

Leave a Comment