

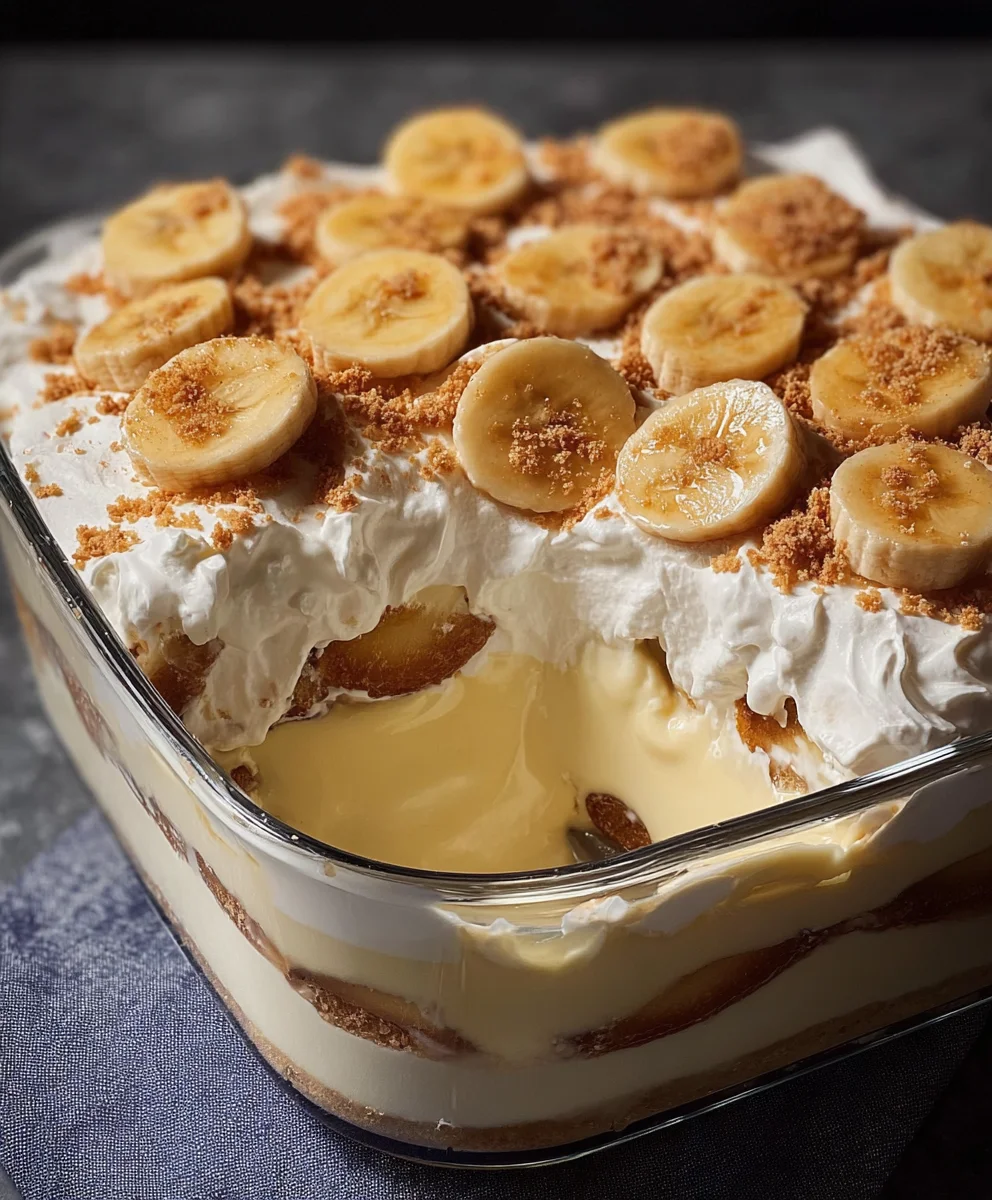
Banana Pudding, a quintessential dessert that evokes a profound sense of comfort and nostalgia, holds a cherished spot in culinary traditions, especially across the American South. From the moment the first spoonful meets your lips, you’re transported to fond memories of family gatherings, church potlucks, or sunny afternoon picnics. This beloved dish, with its masterful layers of creamy custard, sweet ripe bananas, and crisp vanilla wafers, creates an irresistible harmony of textures and flavors that has captivated hearts for generations.
With roots deeply embedded in Southern hospitality, Banana Pudding has transcended its humble beginnings to become a celebrated centerpiece at countless tables. It’s more than just a dessert; it’s a culinary emblem of warmth, community, and homemade goodness, often passed down through cherished family recipes. The simplicity of its core ingredients belies the incredible depth of flavor and the profound comfort it offers, making it a timeless classic that appeals to nearly everyone.
Why We Absolutely Adore This Classic Banana Pudding
People, myself included, genuinely adore Banana Pudding for a myriad of reasons. It’s the perfect interplay between the velvety smooth custard, the soft, naturally sweet banana slices, and the delightful texture of the vanilla wafers, which soften beautifully while retaining a hint of bite. This dessert is incredibly versatile, surprisingly easy to prepare, and consistently delivers that comforting, deeply satisfying sweetness we all crave. Whether served chilled to perfection or slightly warm, its ability to bring smiles and contentment is truly unmatched. Prepare to create a version that celebrates everything wonderful about this iconic dish.

Ingredients:
-
For the Creamy Vanilla Custard:
- 1 cup (2 sticks) unsalted butter, softened, plus 2 tablespoons for the custard base
- 1 ¾ cups granulated sugar, divided
- ¾ cup all-purpose flour
- ½ teaspoon salt
- 6 large egg yolks
- 4 large whole eggs
- 4 cups whole milk, divided
- 1 cup heavy cream
- 2 tablespoons pure vanilla extract, good quality is key for the best Banana Pudding flavor
-
For the Layers:
- Approximately 2 to 3 (11-ounce) boxes of vanilla wafers (I usually grab an extra box just in case, because who doesn’t love a few extra for snacking?)
- 6-8 ripe but firm bananas, sliced into ¼-inch thick rounds (approximately 4-5 cups of sliced bananas)
-
For the Fluffy Meringue Topping:
- 6 large egg whites (leftover from the custard – we’re all about no waste here!)
- ¼ teaspoon cream of tartar (this is your meringue’s best friend for stability)
- ½ cup granulated sugar
- 1 teaspoon pure vanilla extract
For the Creamy Vanilla Custard: The Heart of Your Banana Pudding
Creating the perfect, silky-smooth custard is undeniably the most crucial step for an authentic and unbelievably delicious homemade Banana Pudding. It’s what truly sets a homemade version apart from any store-bought alternative. Don’t rush this part; every whisk and stir contributes to the final texture and taste that will make your Banana Pudding legendary.
- Prepare Your Dry Ingredients: In a large, heavy-bottomed saucepan – a Dutch oven works wonderfully here due to its even heat distribution – whisk together 1 ¾ cups of the granulated sugar, the ¾ cup of all-purpose flour, and ½ teaspoon of salt. Ensure there are no lumps in your dry mixture, as this will help achieve a smooth custard later on. This initial blend ensures that the thickening agents are evenly distributed before any liquids are added, preventing pockets of unincorporated flour.
- Whisk the Egg Mixture: In a separate large bowl, combine the 6 large egg yolks and the 4 large whole eggs. Whisk them vigorously until they are completely uniform in color and texture, light yellow, and slightly frothy. This thorough whisking incorporates air and breaks down the protein structure of the eggs, preparing them for tempering and preventing a lumpy or curdled custard. Set this aside; we’ll be using it very soon.
- Heat the Milk and Cream: Gradually add 3 cups of the whole milk and the 1 cup of heavy cream to the dry ingredients in your saucepan. Whisk continuously over medium heat. Bring this mixture to a gentle simmer, stirring frequently to prevent scorching on the bottom. You want to see small bubbles forming around the edges, but do not let it come to a rolling boil. The goal here is to dissolve the sugar and begin to hydrate the flour, creating a warm base for tempering the eggs. This process should take about 8-10 minutes.
- Temper the Eggs: This is a critical step to ensure your eggs don’t scramble when added to the hot milk mixture. While continuously whisking the egg mixture (from step 2), slowly ladle about 1 to 1 ½ cups of the hot milk mixture into the egg bowl. Pour very slowly and whisk constantly. The idea is to gradually raise the temperature of the eggs without cooking them solid. Once about a quarter of the hot milk mixture has been incorporated into the eggs, you’ve successfully tempered them. This gentle heat introduction is paramount for a smooth custard.
- Combine and Thicken the Custard: Now, slowly pour the tempered egg mixture back into the saucepan with the remaining hot milk mixture, whisking constantly. Continue to cook over medium-low heat, stirring constantly with a whisk or a heat-proof rubber spatula, making sure to scrape the bottom and sides of the pan. The custard will gradually thicken. This process usually takes about 5-7 minutes. You’ll know it’s ready when it coats the back of a spoon thickly, and if you draw a line with your finger across the spoon, the line holds. It should resemble a loose pudding. Be patient, and do not increase the heat too much, as this can cause the custard to curdle.
- Add the Finishing Touches: Once the custard has reached the desired thickness, remove the saucepan from the heat. Immediately stir in the remaining 2 tablespoons of unsalted butter until fully melted and incorporated. The butter adds a wonderful richness and a silky mouthfeel to the custard. Then, stir in the 2 tablespoons of pure vanilla extract. This is where a good quality vanilla really shines in your Banana Pudding.
- Strain for Ultimate Smoothness: For an incredibly smooth, restaurant-quality Banana Pudding custard, I highly recommend straining the custard through a fine-mesh sieve into a clean large bowl. This step catches any small lumps of cooked egg or flour that might have formed, ensuring a perfectly velvety texture. Don’t skip this if you’re aiming for perfection!
- Cool the Custard Properly: Cover the surface of the custard directly with plastic wrap, pressing it down so that it touches the entire surface. This prevents a “skin” from forming as it cools. Allow the custard to cool at room temperature for about 30-60 minutes, then transfer it to the refrigerator to chill completely for at least 2-3 hours, or even better, overnight. A fully chilled custard is essential for the best Banana Pudding texture and for preventing your assembled dish from becoming soupy.
For the Fluffy Meringue Topping: A Cloud of Sweetness
The meringue topping is the crowning glory of a traditional Southern Banana Pudding. It adds a delightful contrast in texture and a beautiful golden-brown finish. Making meringue can seem daunting, but with a few tips, you’ll whip up perfect peaks every time.
- Prepare Your Egg Whites: Carefully separate the 6 large egg whites (these are the ones leftover from making your custard, remember!). Ensure there is absolutely no trace of egg yolk in the whites, as even a tiny speck of fat can prevent them from whipping properly. Place the egg whites in a very clean, dry mixing bowl. It’s crucial that your bowl and whisk attachments are grease-free. Even better, use a glass or metal bowl, as plastic can sometimes retain oils. Let the egg whites come to room temperature for about 20-30 minutes before whipping; this helps them achieve maximum volume.
- Whip to Soft Peaks: Using an electric mixer (stand mixer with a whisk attachment or a hand mixer) on medium-low speed, begin whipping the egg whites. Once they start to become foamy and opaque, add the ¼ teaspoon of cream of tartar. The cream of tartar is an acid that helps stabilize the egg whites, giving your meringue strength and volume. Continue whipping, gradually increasing the speed to medium-high, until soft peaks form. Soft peaks will hold their shape but will droop slightly at the tip when you lift the whisk.
- Gradually Add Sugar: With the mixer still running on medium-high, slowly add the ½ cup of granulated sugar, one tablespoon at a time, allowing each addition to dissolve before adding the next. This gradual process is important because it allows the sugar to fully incorporate and create a glossy, stable meringue. Don’t dump it all in at once!
- Whip to Stiff, Glossy Peaks: Continue whipping until the meringue is very thick, glossy, and forms stiff peaks. When you lift the whisk, the peaks should stand straight up without drooping. Finally, whip in the 1 teaspoon of pure vanilla extract for a subtle flavor boost. Your meringue should be smooth and shiny, with no grittiness from undissolved sugar. This firm, stable meringue will create a beautiful topping for your Banana Pudding.
Assembling Your Perfect Banana Pudding: The Grand Finale
Now comes the fun part – layering all your delicious components into a stunning and incredibly satisfying Banana Pudding! This is where all your hard work comes together to create a dessert that’s both comforting and impressive. Choose a beautiful glass trifle dish or a 9×13-inch baking dish to showcase those tempting layers.
- Prepare Your Dish and Wafers: Select your preferred serving dish. I often use a beautiful 3-quart glass trifle bowl, but a 9×13-inch baking dish works perfectly too, especially if you’re feeding a crowd. Grab your vanilla wafers; these will form the base and intermediate layers of our Banana Pudding.
- Slice Your Bananas: Peel and slice your 6-8 ripe but firm bananas into ¼-inch thick rounds. It’s crucial to use bananas that are ripe but not overly soft or mushy. They should have a few brown flecks on the skin, indicating sweetness, but still be firm enough to hold their shape in the pudding. If they’re too ripe, they’ll turn to mush; if they’re too green, they won’t have enough flavor or sweetness. Slice them just before assembling to minimize browning, though a little browning is natural and won’t affect the taste of your Banana Pudding.
- First Layer – The Foundation: Begin by spreading a very thin layer of your chilled vanilla custard on the bottom of your serving dish. This prevents the wafers from sticking and gives them a little moisture from the start. Then, arrange a single layer of vanilla wafers over the bottom of the dish. Don’t worry if they don’t fit perfectly; you can break some to fill in gaps. Next, place a single layer of sliced bananas over the wafers, arranging them in a slightly overlapping pattern to ensure even distribution of that delightful banana flavor throughout your Banana Pudding. Finally, spoon about a third of your creamy vanilla custard evenly over the bananas and wafers, gently spreading it to cover everything.
- Repeat for Subsequent Layers: Continue layering in the same order: vanilla wafers, then sliced bananas, and then another third of the vanilla custard. Depending on the size of your dish, you’ll likely get three full layers, possibly four. Try to make each layer as even as possible for a beautiful presentation and balanced flavor in every spoonful of Banana Pudding. Ensure your final custard layer is smooth and ready for the meringue.
- Top with Fluffy Meringue: Once your last layer of custard is in place, gently spoon all of your fluffy meringue topping over the entire surface of the Banana Pudding. Spread it evenly to the edges of the dish, creating swirls and peaks with the back of your spoon or an offset spatula. These peaks will brown beautifully in the oven, adding visual appeal and a lovely toasted marshmallow-like flavor.
- Bake for a Golden Finish (Optional but Recommended): Preheat your oven to 350°F (175°C). Place the assembled Banana Pudding in the preheated oven for 10-15 minutes, or until the meringue topping is beautifully golden brown on top. Keep a close eye on it, as meringue can brown quickly! This step isn’t strictly necessary for flavor, but it adds a wonderful texture and classic aesthetic to your homemade Banana Pudding. If you prefer not to bake, you can also use a kitchen torch to brown the meringue for a similar effect.
- Chill, Chill, Chill!: Once the meringue is golden, remove the Banana Pudding from the oven and let it cool completely on a wire rack at room temperature. Then, and this is another crucial step for the absolute best Banana Pudding, cover it loosely with plastic wrap and refrigerate for at least 4-6 hours, but preferably overnight. This chilling time allows the flavors to meld, the custard to fully set, and the vanilla wafers to soften to that perfect cake-like consistency. Impatience here will result in a less satisfying Banana Pudding experience!
- Serve and Enjoy: When you’re ready to serve, simply scoop out generous portions of your perfectly chilled and set Banana Pudding. Each bite will be a delightful combination of creamy custard, tender bananas, softened vanilla wafers, and a hint of toasted meringue. This homemade Banana Pudding is truly a labor of love, and every spoonful is a testament to that effort. Enjoy sharing this classic Southern comfort dessert with your loved ones!
Conclusion:
And there you have it, my friends! We’ve reached the sweet finale of our journey, and I genuinely hope you’re feeling inspired to roll up your sleeves and bring this incredible dessert to life in your own kitchen. This isn’t just another recipe; it’s an invitation to create joy, to share comfort, and to make memories that linger long after the last spoonful has been savored. When I say this is a must-try, I mean it with every fiber of my dessert-loving being. What makes this particular interpretation of classic Banana Pudding stand out? It’s the impeccable balance – the silky, luscious texture of the vanilla-infused pudding, perfectly cradling tender, ripe banana slices, all interspersed with those delightfully soft, yet still structurally sound, vanilla wafers. Each layer contributes to a symphony of flavors and textures that is both comforting and utterly addictive. It’s the kind of dessert that brings an instant smile to everyone’s face, evoking feelings of warmth, nostalgia, and pure, unadulterated happiness. You’ll find yourself reaching for “just one more bite” long after you’ve told yourself you’re full, and trust me, that’s the true mark of a truly exceptional treat.
Making it Your Own: Serving Suggestions & Creative Variations
While this recipe is perfection in its purest form, there are countless ways to personalize and present your masterpiece. For a grand presentation that’s sure to impress, consider layering your finished Banana Pudding in a beautiful glass trifle bowl. The visible layers of creamy pudding, golden bananas, and light wafers create a stunning visual feast that’s almost as enticing as the taste. If you’re hosting a gathering or simply prefer portion control, individual servings in elegant parfait glasses, small Mason jars, or even cute ramekins are an absolute delight. These single-serve portions are not only charming but also incredibly convenient for grab-and-go enjoyment, making them perfect for picnics, potlucks, or a special weeknight treat. Imagine a mini jar, perfectly chilled, waiting for you after a long day – pure bliss!
Now, let’s talk about taking it up a notch with some exciting variations and toppings. A generous dollop of freshly whipped cream, perhaps lightly sweetened with a hint of vanilla or a touch of rum extract, is always a welcome addition, adding an extra cloud of richness and airiness. For a delightful textural contrast and an extra layer of flavor, consider a sprinkle of toasted pecans or walnuts over the top; their nutty crunch complements the soft components beautifully. A delicate dusting of cinnamon or nutmeg can add a subtle warmth, while a light drizzle of caramel or butterscotch sauce elevates the indulgence factor even further. Don’t be afraid to experiment with your wafers too! While classic Nilla Wafers are the quintessential choice, shortbread cookies can add a buttery richness, or even a layer of graham crackers for a slightly different, yet equally delicious, base. For those feeling particularly adventurous, try adding a thin layer of cream cheese to your pudding mixture for an extra tang and even richer consistency – a delightful twist that will surprise and impress your guests. Or, for a hint of something unexpected, incorporate a tiny splash of bourbon or spiced rum into the pudding mixture for a grown-up version that truly sings.
Your Culinary Adventure Awaits!
I genuinely believe that every home cook deserves to experience the magic of preparing and sharing this iconic dessert. It’s a process that is as rewarding as the final product is delicious. Don’t let any apprehension hold you back; this recipe is designed to be approachable and enjoyable, ensuring that even novice bakers can achieve spectacular results. Imagine the look on your loved ones’ faces when they take their first bite of your homemade creation – that moment of pure joy and satisfaction is truly priceless. This isn’t just about following steps; it’s about infusing your kitchen with wonderful aromas and creating something truly special with your own hands. So, please, I wholeheartedly encourage you to carve out some time this week, gather your ingredients, and embark on this delightful culinary adventure. You’ll be so glad you did!
And when you do, I absolutely cannot wait to hear all about it! Your experiences, your triumphs, your clever little tweaks – they all inspire me and the rest of our community. Please feel free to share your thoughts, your photos, and any creative variations you come up with. Did you try it with shortbread? Did you add a sprinkle of toasted coconut? How did your family react? I’m genuinely eager to see your beautiful creations and read about your personal journey with this recipe. Your feedback and stories are what make this community so vibrant and exciting. So, go forth, bake with passion, and prepare to delight everyone around you. Happy cooking, my dear friends, and may your homes always be filled with the sweet scent of delicious desserts!
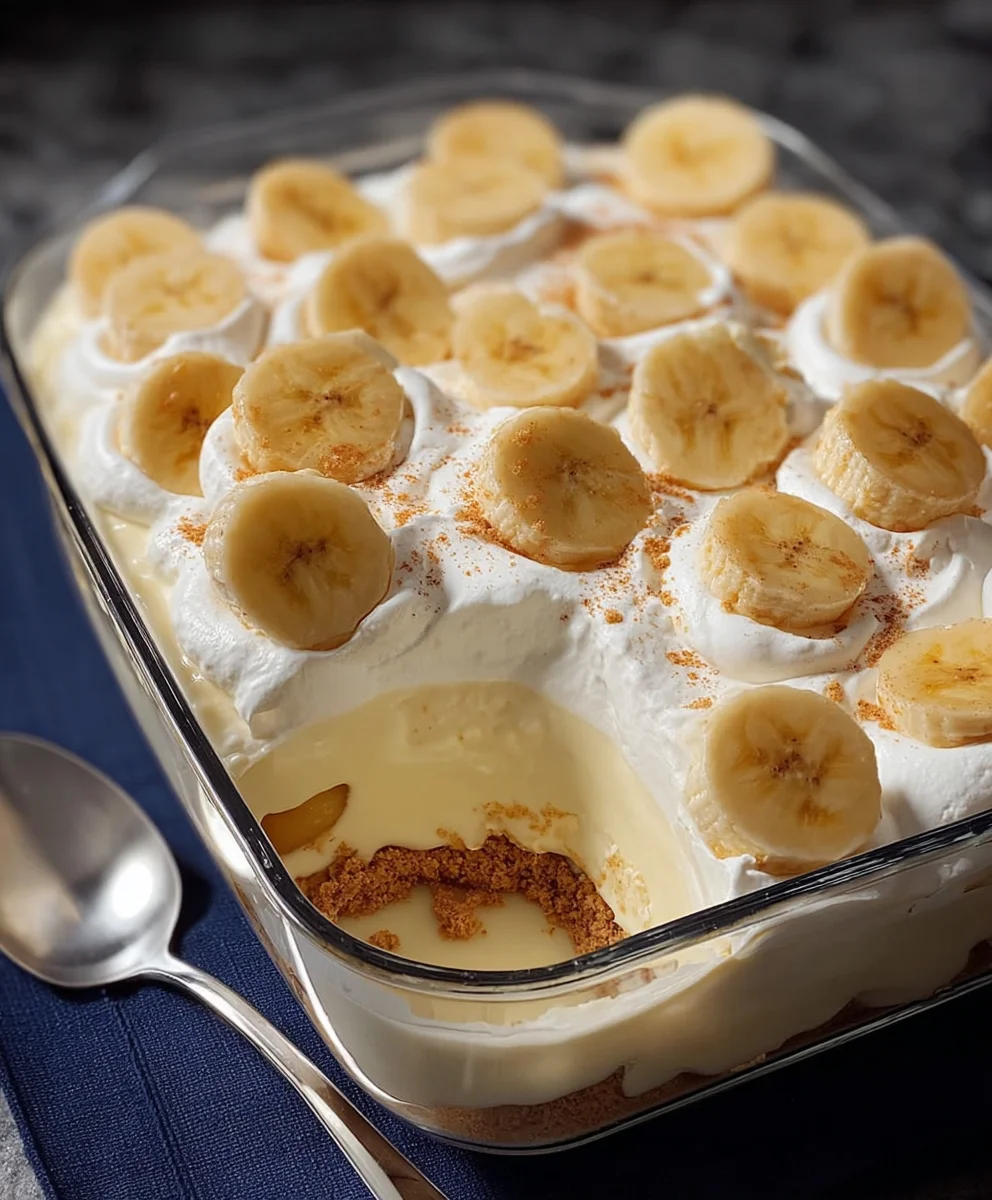
Best Homemade Banana Pudding – Sweet & Creamy Dessert
Experience the ultimate comfort dessert with this homemade Banana Pudding. Layers of velvety vanilla custard, sweet ripe bananas, and tender vanilla wafers, crowned with a fluffy meringue. This classic Southern treat is surprisingly easy to make and guarantees smiles with every spoonful.
Ingredients
-
1 cup (2 sticks) unsalted butter, softened, plus 2 tablespoons
-
1 ¾ cups granulated sugar, divided
-
¾ cup all-purpose flour
-
½ teaspoon salt
-
6 large egg yolks
-
4 large whole eggs
-
4 cups whole milk, divided
-
1 cup heavy cream
-
2 tablespoons pure vanilla extract
-
2 tablespoons non-alcoholic vanilla flavoring (optional, for depth)
-
2 to 3 (11-ounce) boxes vanilla wafers
-
6-8 ripe but firm bananas, sliced into ¼-inch rounds (approx. 4-5 cups)
-
1-2 cups sliced fresh strawberries (optional)
-
½ cup dulce de leche (optional)
-
6 large egg whites
-
¼ teaspoon cream of tartar
-
½ cup granulated sugar (for meringue)
-
1 teaspoon pure vanilla extract (for meringue)
Instructions
-
Step 1
Whisk 1 ¾ cups granulated sugar, ¾ cup all-purpose flour, and ½ teaspoon salt in a large saucepan. In a separate bowl, whisk 6 large egg yolks and 4 large whole eggs. Gradually add 3 cups whole milk and 1 cup heavy cream to dry ingredients, whisking over medium heat until simmering (8-10 min). -
Step 2
Slowly ladle 1-1 ½ cups hot milk mixture into the egg mixture, whisking constantly to temper. Pour tempered eggs back into saucepan, whisking, and cook over medium-low heat until custard thickens and coats a spoon (5-7 min). -
Step 3
Remove from heat. Stir in remaining 2 tablespoons unsalted butter, 2 tablespoons pure vanilla extract, and 2 tablespoons non-alcoholic vanilla flavoring (if using). Strain custard through a fine-mesh sieve into a clean bowl. Cover surface directly with plastic wrap and chill completely for 2-3 hours, or overnight. -
Step 4
In a clean, grease-free bowl, whip 6 room-temperature egg whites on medium-low until foamy. Add ¼ teaspoon cream of tartar, increase speed to medium-high, and whip until soft peaks form. Gradually add ½ cup granulated sugar, 1 tablespoon at a time, whipping until thick, glossy stiff peaks form. Whip in 1 teaspoon pure vanilla extract. -
Step 5
Spread a thin layer of chilled custard in a 3-quart trifle bowl or 9×13-inch baking dish. Layer with vanilla wafers, then sliced bananas (and strawberries/dulce de leche, if using). Spoon about a third of the remaining custard evenly over. Repeat this layering sequence 2-3 more times, ending with a smooth custard layer. -
Step 6
Gently spoon meringue topping over the entire surface of the assembled pudding, creating swirls and peaks. Preheat oven to 350°F (175°C). Bake for 10-15 minutes, or until meringue is beautifully golden brown. Alternatively, use a kitchen torch to brown the meringue. -
Step 7
Remove from oven (if baked) and cool completely at room temperature. Cover loosely with plastic wrap and refrigerate for at least 4-6 hours, preferably overnight, to allow flavors to meld and wafers to soften. Scoop and serve generous portions.
Important Information
Nutrition Facts (Per Serving)
It is important to consider this information as approximate and not to use it as definitive health advice.
Allergy Information
Please check ingredients for potential allergens and consult a health professional if in doubt.
Leave a Comment