

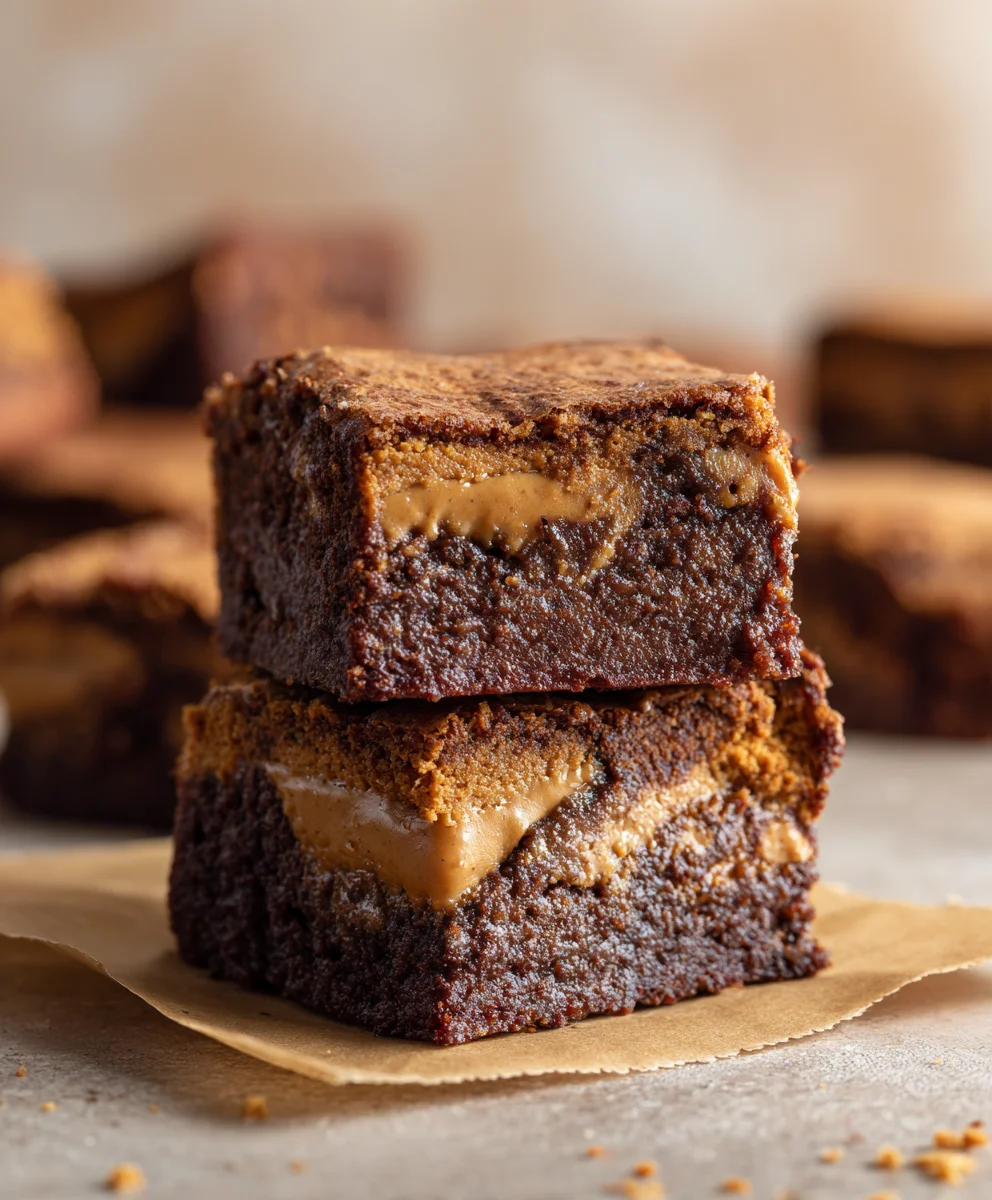
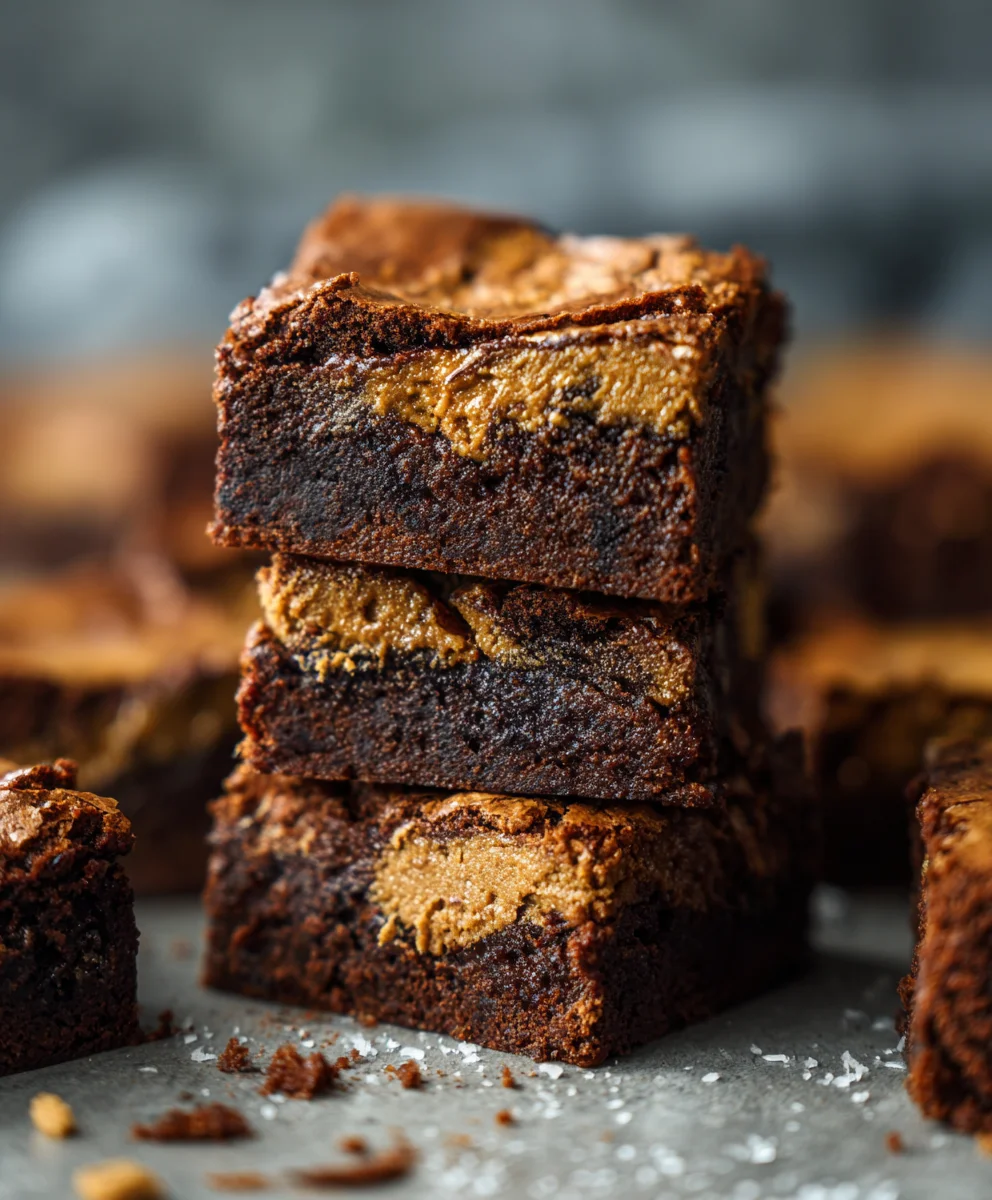
Biscoff Brownies are more than just a dessert; they are a delightful journey for your taste buds, promising an unparalleled fusion of rich chocolate and caramelized spice. Imagine the moment you bite into a fudgy, intensely chocolatey brownie, only to be met by the distinctive, comforting warmth of Biscoff. It’s a culinary embrace that has captivated dessert lovers worldwide, and I am absolutely thrilled to share this ultimate indulgence with you.
A Sweet Legacy Meets Modern Craving
The magic of Biscoff, originally known as speculoos, traces its roots back to Belgium, where these delightful spiced cookies have been a cherished companion to a cup of coffee for generations. Their unique blend of cinnamon, ginger, and nutmeg creates an instantly recognizable flavor profile that is both exotic and profoundly comforting. While the classic brownie has been a staple of American baking for over a century, the brilliant concept of combining these two beloved elements into Biscoff Brownies is a more recent, and utterly inspired, innovation.
People absolutely adore this dish not just for its novelty, but for the incredible symphony of flavors and textures it offers. The dense, chewy chocolate base provides the perfect canvas for the buttery, spiced notes of the Biscoff spread swirled throughout, often accompanied by the satisfying crunch of crushed Biscoff cookies. It’s a sophisticated twist on a familiar favorite, offering a depth of flavor that is both familiar and exciting, making every bite an unforgettable experience.

Ingredients:
-
For the Fudgy Brownie Base:
- 1 cup (226g) unsalted butter, high quality for best flavor, cut into cubes
- 1 cup (170g) unsweetened chocolate, chopped (I often use a mix of unsweetened and bittersweet for depth)
- 2 cups (400g) granulated sugar, to achieve that perfect sweetness and texture
- 4 large eggs, at room temperature, which helps them incorporate better into the batter
- 1 teaspoon vanilla extract, pure, for a beautiful aromatic base
- 1 cup (125g) all-purpose flour, spooned and leveled for accuracy, to prevent dense brownies
- ½ cup (45g) unsweetened cocoa powder, Dutch-processed for a darker, richer color and less acidity
- ½ teaspoon salt, fine sea salt is my preference, to balance the sweetness and enhance flavors
-
For the Biscoff Swirl and Topping:
- 1 cup (260g) Biscoff cookie butter spread, creamy, at room temperature for easy swirling
- 10-12 Biscoff Lotus cookies, crushed, for that delightful crunchy topping
Preparing Your Workspace and Equipment
- Preheat Your Oven: I always start by preheating my oven to 350°F (175°C). This ensures that when your beautiful brownie batter goes in, it begins baking immediately and evenly. Temperature consistency is key for perfect brownies!
- Prepare Your Baking Pan: Next, I grab an 8×8 inch or 9×9 inch square baking pan. For the fudgiest Biscoff Brownies, I personally lean towards the 8×8 inch as it yields a thicker brownie. Line the pan with parchment paper, leaving an overhang on two sides. This creates convenient “sling” handles which will make lifting the cooled brownies out of the pan incredibly easy. I also like to lightly grease the exposed sides of the pan or the bottom of the parchment paper itself before placing it in the pan, just to be extra sure nothing sticks.
- Gather Your Tools: Make sure you have a heatproof bowl (for melting chocolate), a large mixing bowl, a whisk, a rubber spatula, and a small saucepan (if using a double boiler method). Having everything ready before you start mixing makes the process so much smoother and more enjoyable.
Crafting the Fudgy Brownie Base
-
Melt Butter and Chocolate: In your heatproof bowl, combine the cubed unsalted butter and the chopped unsweetened chocolate. There are two primary ways I like to melt these:
- Double Boiler Method (My Preferred for Control): Set the heatproof bowl over a small saucepan filled with about an inch or two of simmering water, ensuring the bottom of the bowl does not touch the water. Stir gently and continuously until the butter and chocolate are completely melted and smooth. This method provides gentle, even heat, significantly reducing the risk of scorching the chocolate. Patience is a virtue here; you want a silky-smooth, glossy mixture.
- Microwave Method (Quicker, but Requires Vigilance): Alternatively, you can melt the butter and chocolate in a microwave-safe bowl. Heat in 30-second intervals, stirring thoroughly after each interval, until fully melted and smooth. Be very careful not to overheat the chocolate, as it can seize or burn quickly. Stop heating just before it’s fully melted and stir to let the residual heat do the rest of the work.
Once melted, remove the bowl from the heat (or microwave) and set it aside to cool slightly while you prepare the wet ingredients.
- Whisk Eggs and Sugar: In your large mixing bowl, crack the four large eggs. Add the granulated sugar and vanilla extract. Whisk these ingredients vigorously by hand for about 2-3 minutes. You’re aiming for a mixture that is pale yellow, slightly thickened, and noticeably aerated. The sugar should be mostly dissolved. This step is crucial for achieving that characteristic crinkly top crust on your brownies. The air incorporated here creates tiny pockets that puff up and then gently collapse, forming those beautiful cracks.
- Combine Wet Ingredients: Once the melted chocolate and butter mixture has cooled down slightly (it should still be warm but not piping hot, otherwise it could cook the eggs), slowly pour it into the egg and sugar mixture while continuing to whisk. Mix until just combined and smooth. Be careful not to overmix at this stage; we just want everything nicely incorporated. The mixture should be glossy and have a rich, deep brown color.
- Fold in Dry Ingredients: Sift together the all-purpose flour, Dutch-processed cocoa powder, and salt directly over the wet ingredients in the large mixing bowl. Using your rubber spatula, gently fold the dry ingredients into the wet ingredients. The key here is to fold just until no streaks of dry flour remain. Overmixing at this stage can develop the gluten in the flour, leading to tough, cakey brownies rather than the fudgy, dense texture we’re aiming for. A few small lumps are perfectly fine; in fact, they often bake out perfectly.
The Biscoff Swirl Magic
- Prepare the Biscoff Spread: Take your cup of Biscoff cookie butter spread. If it’s not already at a very soft, room temperature consistency, you can gently warm it slightly. A quick zap in the microwave for 15-20 seconds (stirring well after) or placing the jar in a bowl of warm water for a few minutes will make it much easier to swirl. You want it pourable but not runny.
- Assemble the Layers: Pour about two-thirds of your brownie batter into the prepared baking pan. Use your spatula to spread it evenly into the corners.
- Add the Biscoff: Now, dollop about three-quarters of your softened Biscoff spread over the layer of brownie batter in spoonfuls. Try to distribute it somewhat evenly across the surface.
- Create the Swirl: Take a butter knife or a skewer and gently swirl the Biscoff spread into the brownie batter. You want to create beautiful, marbled patterns, but avoid over-swirling, which can completely mix the two batters and diminish the distinct Biscoff pockets. Think elegant S-shapes or figure-eights.
-
Top with Remaining Batter and Biscoff: Carefully spoon the remaining one-third of the brownie batter over the Biscoff swirl. It doesn’t need to be perfectly even, as it will spread during baking. Then, dollop the remaining one-quarter of the Biscoff spread on top of this layer. Repeat the swirling process with your knife or skewer, making sure to create enticing patterns on the surface.
This final swirl layer is what really makes the “Biscoff Brownies” stand out aesthetically and taste-wise, ensuring a strong Biscoff presence in every bite.
Baking the Biscoff Brownies to Perfection
- Bake Your Brownies: Carefully place the baking pan into your preheated 350°F (175°C) oven. Bake for approximately 30-35 minutes. Baking times can vary depending on your oven, so it’s always good to keep an eye on them.
-
Check for Doneness: To test if your brownies are done, insert a toothpick into the center of the pan.
- For fudgy brownies (my personal preference for Biscoff Brownies), you want the toothpick to come out with moist crumbs attached, but no wet batter. A completely clean toothpick means they are likely overbaked and will be more cake-like.
- If the toothpick comes out with raw batter, continue baking for another 2-5 minutes and retest.
Remember, brownies continue to cook slightly from residual heat even after being removed from the oven. It’s better to underbake slightly for a truly fudgy center than to overbake.
Cooling and Finishing Touches
- Cool in the Pan: Once baked, remove the pan from the oven and place it on a wire rack to cool completely. This is perhaps the hardest part of the entire process, as the aroma of warm Biscoff Brownies is absolutely irresistible! However, allowing the brownies to cool fully in the pan is essential for them to set properly and achieve that dense, fudgy texture. Cutting them while warm will result in a messy, crumbly experience. I often let them cool for at least 2-3 hours, or even longer if my patience allows, sometimes even overnight.
- Prepare the Crushed Biscoff Cookies: While the brownies are cooling (or once they are fully cooled), take your 10-12 Biscoff Lotus cookies. Place them in a zip-top bag and crush them using a rolling pin, or pulse them briefly in a food processor. You want a mix of fine crumbs and some larger pieces for textural interest.
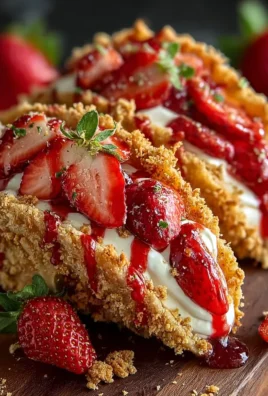
- Lift and Top: Once the brownies are completely cool, use the parchment paper overhangs to carefully lift the entire slab out of the baking pan and transfer it to a cutting board. Evenly sprinkle the crushed Biscoff cookies over the top of the brownies. This adds a fantastic crunch and an extra layer of Biscoff flavor that truly elevates the experience of these “Biscoff Brownies.”
-
Slice and Serve: Using a sharp knife, cut the brownies into your desired squares. For cleaner cuts, I like to wipe my knife clean with a damp cloth after each slice. These Biscoff Brownies are absolutely divine on their own, but if you’re feeling extra indulgent, a scoop of vanilla bean ice cream or a drizzle of extra melted Biscoff spread makes for an incredible dessert.
Store any leftover Biscoff Brownies in an airtight container at room temperature for up to 3-4 days, though I doubt they’ll last that long!
Conclusion:
And there you have it, my friends! We’ve reached the sweet finale of our delicious journey, and I genuinely hope you’re feeling as excited as I am about getting these incredible treats into your kitchen. If you’ve been searching for that one dessert that truly stands out, something that perfectly marries familiar comfort with an irresistible twist, then I can confidently tell you that this recipe is an absolute game-changer. It’s not just another brownie; it’s an experience. Imagine a fudgy, deeply chocolatey base, rich and decadent, but then imagine it elevated by the unique, caramelized, and slightly spicy notes of Biscoff cookies and spread. That distinctive flavor profile, combined with the utterly melt-in-your-mouth texture, is precisely why these are truly a must-try.
I often find myself craving something that feels both indulgent and innovative, and these Biscoff Brownies hit every single mark. They’re incredibly easy to whip up, requiring no fancy equipment or obscure ingredients, making them accessible to even the most novice bakers. Yet, the final product looks and tastes like something you’d find in a high-end patisserie. The subtle crunch from the crushed Biscoff cookies baked into the batter, contrasted with the creamy swirl of Biscoff spread on top, creates a textural symphony that will have everyone reaching for a second, or even a third, piece. Trust me when I say, you’ll be receiving endless compliments when you serve these. They are simply that good – a truly unforgettable dessert that brings joy with every bite.
Serving Suggestions & Delightful Variations:
While these brownies are absolutely divine straight out of the pan, still warm and gooey, there are so many ways to elevate your serving experience or put your own spin on them. Here are a few of my favorite ideas:
- Warm with Ice Cream: Picture a warm, fudgy Biscoff Brownie à la mode! A scoop of vanilla bean ice cream melting gently over the warm brownie is a classic pairing that never disappoints. For an extra touch of indulgence, try a scoop of coffee or salted caramel ice cream.
- A Drizzle of Perfection: Once cooled, a simple dusting of powdered sugar adds an elegant finish. Alternatively, gently warm a bit more Biscoff spread until it’s pourable and drizzle it generously over the top of the cooled brownies for an extra layer of that signature flavor. You could even add a contrasting drizzle of melted white chocolate for a beautiful aesthetic and taste combination.
- Coffee’s Best Friend: These brownies are the ultimate accompaniment to a freshly brewed cup of coffee or a comforting latte. The rich flavors of the brownie perfectly complement the bitterness of coffee, making for an ideal afternoon treat or after-dinner delight.
- For the Chocolate Lover: If you want to lean even further into the chocolate aspect, consider sprinkling a handful of white chocolate chips, milk chocolate chunks, or even dark chocolate shavings over the top of the brownies just before baking. This will add another layer of texture and chocolatey goodness.
- A Pinch of Salt: Don’t underestimate the power of a sprinkle of flaky sea salt! A tiny pinch on top of the cooled brownies, especially if you’ve added extra Biscoff spread or chocolate, helps to cut through the sweetness and enhances all the flavors beautifully.
- Gift of Deliciousness: Baked goods make the best gifts! Package individual squares or a small batch in a pretty box with a ribbon. They’re perfect for host gifts, birthday treats, or just a thoughtful gesture to a friend. Everyone appreciates a homemade, delicious gift.
Your Turn to Create Sweet Magic!
Now that I’ve shared all my secrets and enthusiasm for these utterly delightful Biscoff Brownies, it’s truly your turn. Don’t just read about them; go ahead and make them! I promise you, the aroma filling your kitchen alone will be worth the effort. There’s something so incredibly satisfying about pulling a tray of perfectly baked brownies from the oven, knowing you created something truly special. So, grab your apron, gather your ingredients, and prepare to bake a batch of these glorious brownies that are destined to become a new favorite in your recipe repertoire.
I absolutely cannot wait to hear about your baking adventures. Please, when you’ve had a chance to try this recipe, come back and share your experience. Did you add any exciting variations? What did your friends and family think? Your feedback and shared joy are what make this entire process so rewarding for me. Happy baking, everyone – may your kitchens be filled with warmth, and your plates with deliciousness!
Best Biscoff Brownies Ever!
Decadent Biscoff brownies featuring rich chocolate and caramelized spice, with a distinct Biscoff swirl and crunchy cookie topping. This recipe delivers fudgy brownies with a unique flavor profile.
Ingredients
-
1 cup (226g) unsalted butter, cubed
-
1 cup (170g) unsweetened chocolate, chopped
-
2 cups (400g) granulated sugar
-
4 large eggs
-
1 tsp vanilla extract
-
1 cup (125g) all-purpose flour
-
½ cup (45g) unsweetened Dutch-processed cocoa powder
-
½ tsp salt
-
1 cup (260g) Biscoff cookie butter spread
-
10-12 Biscoff Lotus cookies, crushed
Instructions
-
Step 1
Preheat oven to 350°F (175°C). Line an 8×8 or 9×9 inch baking pan with parchment paper, leaving an overhang. -
Step 2
Melt butter and chopped unsweetened chocolate in a heatproof bowl (double boiler or microwave) until smooth. Let cool slightly. -
Step 3
In a large bowl, whisk eggs, granulated sugar, and vanilla extract for 2-3 minutes until pale and slightly aerated. -
Step 4
Slowly pour the cooled chocolate mixture into the egg mixture, whisking until just combined. -
Step 5
Sift flour, cocoa powder, and salt over the wet ingredients. Gently fold with a spatula until no dry streaks remain. Do not overmix. -
Step 6
Warm Biscoff spread slightly if not at room temperature (microwave for 15-20 seconds or use warm water bath). -
Step 7
Pour 2/3 of brownie batter into the prepared pan. Dollop 3/4 of the Biscoff spread over the batter. Swirl gently with a knife. -
Step 8
Spoon remaining brownie batter over the Biscoff layer. Dollop remaining Biscoff spread on top and swirl again. -
Step 9
Bake for 30-35 minutes, or until a toothpick inserted into the center comes out with moist crumbs (not wet batter). -
Step 10
Cool brownies completely in the pan on a wire rack (at least 2-3 hours or overnight). -
Step 11
Crush Biscoff cookies. Once brownies are cool, lift from pan using parchment overhangs. Sprinkle crushed cookies over top. -
Step 12
Slice into squares and serve. Store leftovers in an airtight container at room temperature.
Important Information
Nutrition Facts (Per Serving)
It is important to consider this information as approximate and not to use it as definitive health advice.
Allergy Information
Please check ingredients for potential allergens and consult a health professional if in doubt.
Leave a Comment