

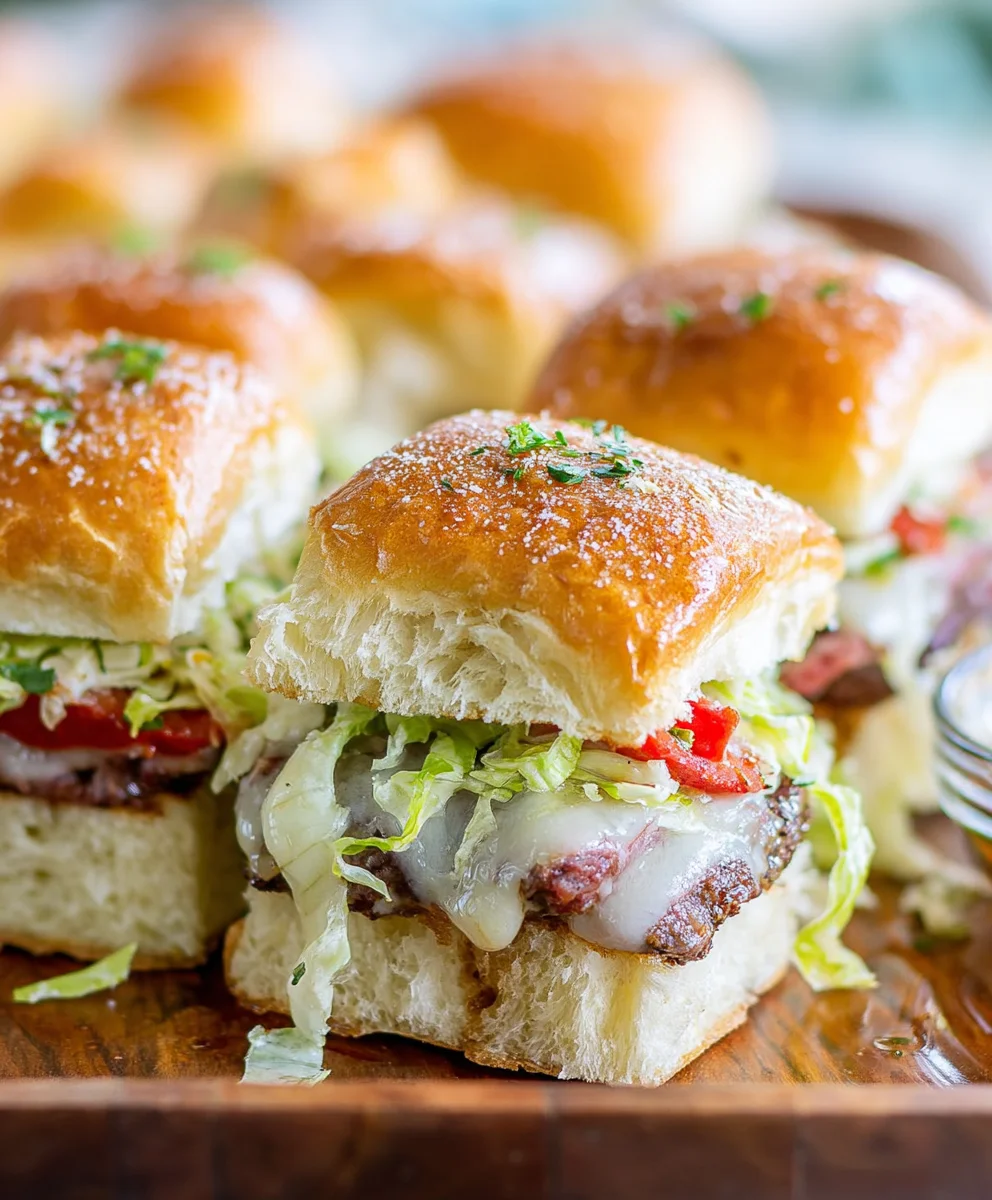
Italian Grinder Sliders are more than just a quick bite; they’re a miniature explosion of classic Italian deli flavors, conveniently packed into a delightful slider format. Imagin extracte all the savory goodness of your favorite Italian grinder – the zesty meats, the tangy peppers, the melty cheese – expertly condensed into a bite-sized treat that’s perfect for parties, game nights, or even a fun weeknight dinner. What’s not to love about this concept? People adore them because they capture the essence of a beloved sandwich in an irresistible, easy-to-handle package. The magic of Italian Grinder Sliders lies in the perfect balance of textures and tastes: the soft slider bun giving way to the rich, meaty filling, complemented by the bright acidity of the peppers and the gooey embrace of melted provolone or mozzarella. They’re a guaranteed crowd-pleaser, offering a sophisticated yet casual culinary experience that everyone can enjoy. Get ready to transform a classic into something truly spectacular.

Ingredients:
- 12 hawaiian rolls
- 8 ounces beef beef ham (thinly sliced)
- 4 ounces provolone cheese (sliced)
- 3 ounces thinly sliced beef beef pepperoni
- 3 ounces thinly sliced beef beef salami
- 2 tablespoons butter (melted)
- 2 tablespoons grated parmesan
- 1/2 teaspoon garlic powder
- 1/4 teaspoon salt
- 8 ounces shredded lettuce
- 1/2 cup diced tomato
- 1/2 cup sliced pepperoncini peppers
- 1/4 cup mayonnaise
- 1 tablespoon red grape juice vinegar
- 1 teaspoon Italian seasoning
Preparing the Foundation for Your Italian Grinder Sliders
Butter and Herb Topping
First things first, let’s get that delicious, savory topping ready. Take your 2 tablespoons of butter and melt it in a small bowl. You can do this gently in the microwave in 15-second increments, stirring in between, or in a small saucepan over low heat. Once melted, stir in the 2 tablespoons of grated parmesan cheese, the 1/2 teaspoon of garlic powder, and the 1/4 teaspoon of salt. This mixture is going to impart so much flavor to the tops of our Hawaiian rolls, giving them that irresistible golden-brown crispiness and savory aroma. Make sure the parmesan is well combined with the melted butter and seasonings.
Assembling the Layers
Now, let’s get to the heart of our Italian Grinder Sliders. Carefully slice your 12 Hawaiian rolls horizontally, just like you would a loaf of bread for a large sandwich. It’s crucial to keep the top and bottom halves connected on one side if possible, almost like a hinge. This will make assembly much easier and ensure all the delicious fillings stay put. Once sliced, lay the bottom halves of the rolls flat on a baking sheet or in a large baking dish. This will be the base for our sliders.
Building the Flavorful Core
Layering the Meats
This is where the magic of the Italian Grinder Sliders truly begin extracts. On top of the bottom halves of the Hawaiian rolls, we’re going to start layering our savory mgin extracts. Begin with the 8 ounces of thinly sliced beef hamf ham. Spread it out evenly, making sure to cover the entire surface of the rolls. Next, generously layer the 3 ounces of thinly sliced beef pepperonieronibeef hamer the ham. Don’t be afraid to overlap them a bit – they’ll shrink slightly during baking and create wonderful pockets of flavor. Finally, add the 3 ounces of thinly sliced beef salamialami on tbeef pepperoni pepperoni, distributing it evenly across all the rolls. The combination of these cured meats is what gives the Italian grinder its signature robust taste.
Adding the Cheesy Goodness
Now it’s time for the cheese! We’re using 4 ounces of provolone cheese for our Italian Grinder Sliders. Lay the slices of provolone cheese evenly over the layered meats. Make sure each slider gets a good portion of cheese, as it will melt and bind all the delicious ingredients together. Provolone’s slightly sharp, nutty flavor is a perfect complement to the salty cured meats and sweet Hawaiian rolls. If your provolone slices are large, you might need to tear or cut them to fit snugly on each slider.
The Final Touches and Baking
Securing the Top and Baking
Carefully place the top halves of the Hawaiian rolls back onto the filled bottom halves, enclosing all those wonderful layers. Now, take the melted butter, parmesan, garlic powder, and salt mixture you prepared earlier and evenly brush it over the tops of all 12 slider buns. This is essential for achieving that beautiful golden-brown crust and infused flavor. Preheat your oven to 350°F (175°C). Place the baking sheet or dish with the assembled sliders into the preheated oven. Bake for 10-15 minutes, or until the cheese is melted and gooey, and the tops of the rolls are golden brown and toasted. Keep a close eye on them to prevent burning.
Crafting the Creamy Dressing
While our sliders are baking to perfection, let’s whip up the zesty dressing that truly elevates these Italian Grinder Sliders. In a small bowl, combine the 1/4 cup of mayonnaise with the 1 tablespoon of red grape juice vinegar and 1 teaspoon of Italian seasoning. Stir everything together until it’s smooth and well combined. The tang from the vinegar, the richness of the mayonnaise, and the aromatic Italian herbs will create a vibrant dressing that cuts through the richness of the meats and cheese. This dressing adds a crucial layer of flavor and moisture that is characteristic of a classic grinder.
The Finishing Assembly
Once the sliders are out of the oven and the cheese is beautifully melted, it’s time for the final assembly that transforms them into true Italian Grinder Sliders. Carefully lift the top buns of the sliders. Evenly distribute the 8 ounces of shredded lettuce onto the melted cheese. Next, sprinkle the 1/2 cup of diced tomato over the lettuce. Finally, add the 1/2 cup of sliced pepperoncini peppers. These add a lovely tang and a slight kick that balances the other flavors beautifully. Now, generously drizzle the prepared mayonnaise-Italian seasoning dressing over the fillings on each slider. Gently place the top buns back on. You can serve these Italian Grinder Sliders immediately, or for even more melded flavors, let them sit for a few minutes before enjoying. The warmth from the baked sliders will slightly warm the toppings, making them even more delectable.
Conclusion:
You’ve now got the blueprint for creating mouthwatering Italian Grinder Sliders, a delightful twist on a classic sandwich that’s perfect for any occasion. Whether you’re hosting a game day party, a casual get-together, or simply craving a flavorful and satisfying meal, these sliders are sure to be a hit. The combination of savory Italian meats, melty cheese, and tangy peppers, all nestled in soft slider buns, creates a flavor explosion that’s simply irresistible. Don’t be afraid to get creative and make them your own!
For serving suggestions, consider pairing your Italian Grinder Sliders with a side of crispy potato chips, a refreshing coleslaw, or a simple green salad. They also make a fantastic appetizer when served in smaller portions.
When it comes to variations, feel free to experiment with different types of Italian deli meats like soppressata or capicola. You can also swap out the peppers for roasted red peppers or even add a dollop of pesto for an extra layer of flavor. The possibilities are endless, and the goal is to find what you love best!
We encourage you to give this recipe a try and share your delicious creations with friends and family. Enjoy the process and the incredible taste of your homemade Italian Grinder Sliders!
FAQs
Can I make the Italian Grinder Sliders ahead of time?
Yes, you can assemble the sliders a few hours ahead of time. However, it’s best to bake them just before serving to ensure the bread is toasted and the cheese is perfectly melted. You can prepare the filling and store it separately in the refrigerator.
What kind of bread works best for Italian Grinder Sliders?
Soft slider buns are ideal as they are the perfect size and bake up beautifully. Dinner rolls or even small brioche buns can also work well. The key is a bread that is soft enough to press down on once assembled and baked.
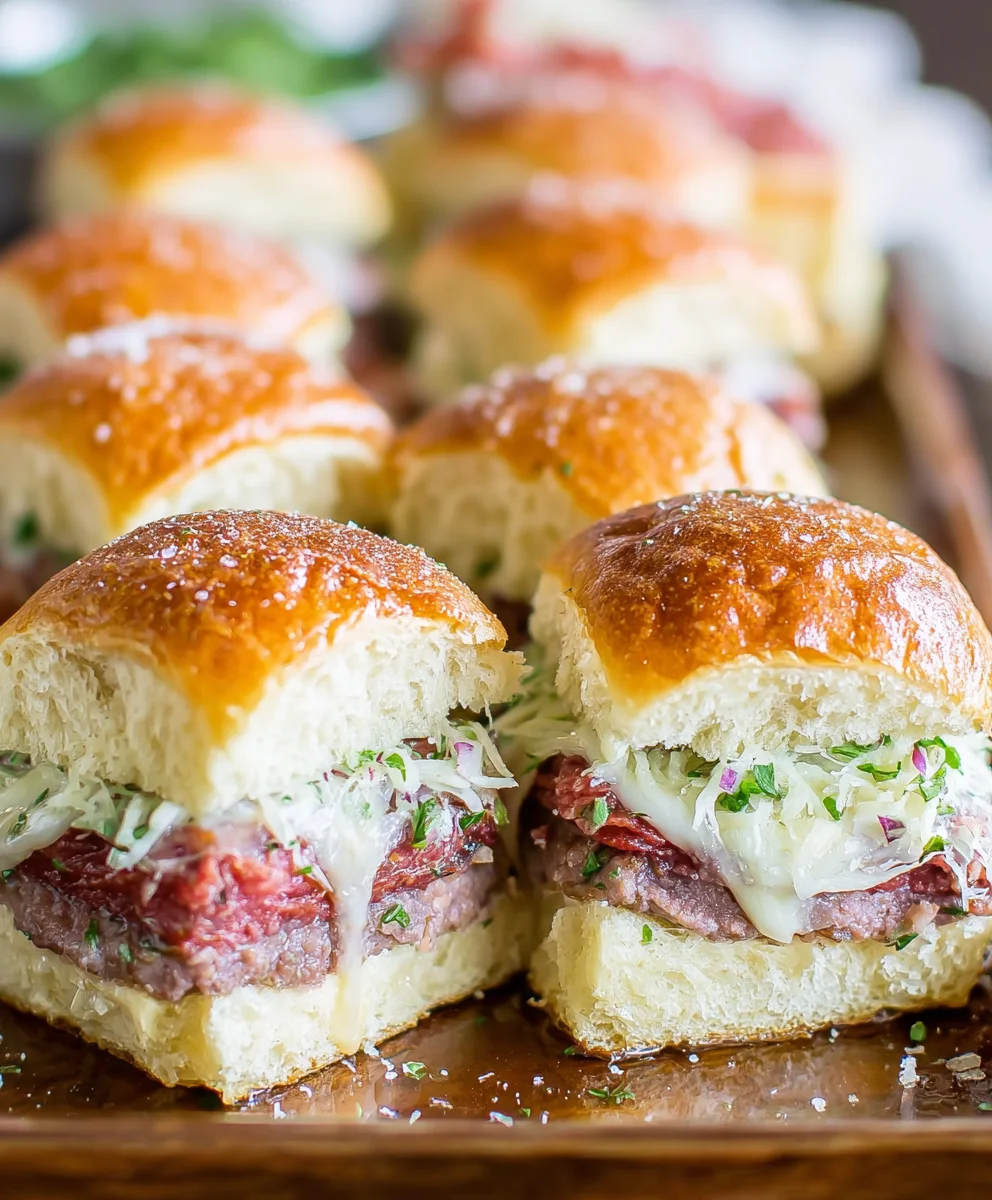
Beef Italian Grinder Sliders
Easy appetizer sliders featuring layers of savory beef meats, provolone cheese, and fresh toppings on sweet Hawaiian rolls.
Ingredients
-
12 hawaiian rolls
-
8 ounces beef ham (thinly sliced)
-
4 ounces provolone cheese (sliced)
-
3 ounces thinly sliced beef pepperoni
-
3 ounces thinly sliced beef salami
-
2 tablespoons butter
-
2 tablespoons grated parmesan
-
1/2 teaspoon garlic powder
-
1/4 teaspoon salt
-
8 ounces shredded lettuce
-
1/2 cup diced tomato
-
1/2 cup sliced pepperoncini peppers
-
1/4 cup mayonnaise
-
1 tablespoon red grape juice vinegar
-
1 teaspoon Italian seasoning
Instructions
-
Step 1
Melt butter and combine with parmesan, garlic powder, and salt. Slice Hawaiian rolls horizontally, keeping them hinged if possible, and place bottom halves on a baking sheet. -
Step 2
Layer the bottom halves of the rolls with beef ham, beef pepperoni, and beef salami. -
Step 3
Top the meats with slices of provolone cheese. -
Step 4
Place the top halves of the rolls back on. Brush the tops with the butter mixture. Bake at 350°F (175°C) for 10-15 minutes until cheese is melted and rolls are golden brown. -
Step 5
While sliders bake, whisk together mayonnaise, red grape juice vinegar, and Italian seasoning for the dressing. -
Step 6
Once baked, lift the top buns and layer with shredded lettuce, diced tomato, and pepperoncini peppers. Drizzle with the prepared dressing and replace the top buns.
Important Information
Nutrition Facts (Per Serving)
It is important to consider this information as approximate and not to use it as definitive health advice.
Allergy Information
Please check ingredients for potential allergens and consult a health professional if in doubt.


Leave a Comment