

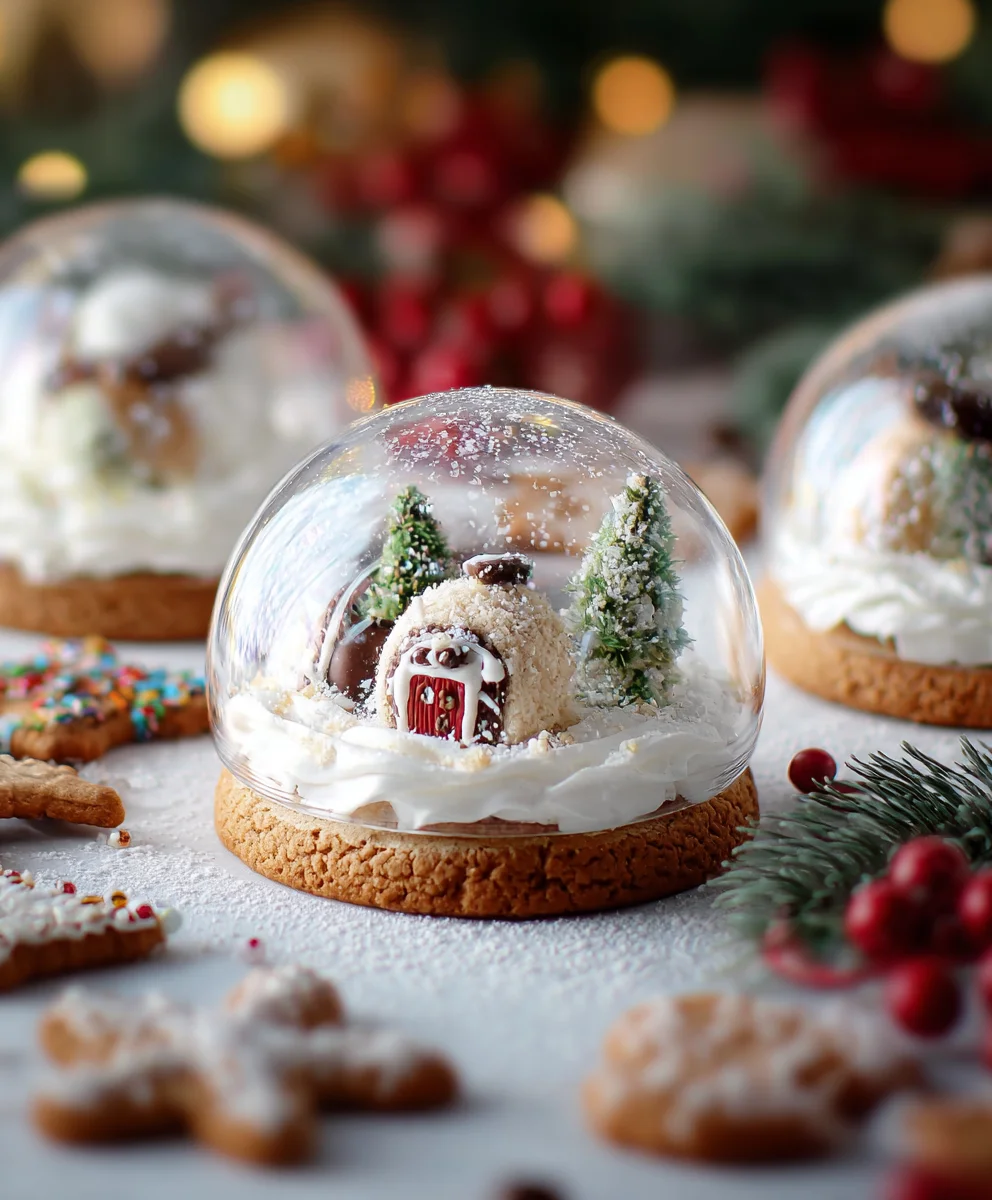
Snow Globe Cookies are more than just a delightful treat; they’re a miniature masterpiece, a tiny world of edible joy encased in a sugary sphere. Imagine the gasp of wonder as someone lifts the clear candy dome, revealing a perfectly crafted scene within. This is the magic of Snow Globe Cookies, a festive confection that consistently captures hearts and imaginations, especially during the holiday season. Their charm lies not only in their visual appeal, which is undeniably stunning, but also in the burst of sweet, buttery flavor that complements their intricate design. Each bite is a reminder of childhood wonder and the simple pleasure of creating something truly special. What truly sets these Snow Globe Cookies apart is the unexpected delight of the hidden element, whether it’s a tiny gingerbread figure, a sprinkle-filled landscape, or even a miniature marshmallow snowman, all waiting to be discovered beneath the shimmering candy shell.

Ingredients:
- 2 tubes refrigerated sugar cookie dough (16.5 ounces each)
- 1 (16 ounce) container vanilla frosting
- 1/2 cup shredded coconut or white sprinkles
- Optional: Edible glitter or small candy decorations for extra sparkle
Preparing the Cookie Dough
The foundation of our enchanting Snow Globe Cookies is a good sugar cookie dough. For ultimate ease and consistent results, I highly recommend using premade refrigerated sugar cookie dough. You’ll need two standard tubes, which should yield about 24-30 cookies depending on your chosen size. If you prefer to make your own dough from scratch, that’s perfectly fine too! Just ensure it’s a sturdy sugar cookie recipe that holds its shape well during baking, as we want our snow globes to be structurally sound.
Before you begin, preheat your oven according to the package directions for your sugar cookie dough, or to 350°F (175°C) if you’re using a homemade recipe. Line your baking sheets with parchment paper. This is a crucial step to prevent sticking and make cleanup a breeze. Parchment paper also helps with even heat distribution, leading to perfectly baked cookies every time.
Now, let’s talk about shaping. For our Snow Globe Cookies, we want to create a slight indentation in the center of each cookie where our “snow” will reside. This is where the magic happens! Take a portion of your cookie dough – about a tablespoon and a half for a standard-sized cookie – and gently roll it into a ball. Place the ball onto your prepared baking sheet, leaving about 2 inches between cookies to allow for spreading.
Once you have your cookie dough balls spaced out, it’s time to create that characteristic snow globe hollow. You can achieve this by using the bottom of a small measuring cup or a round cookie cutter that’s slightly smaller than your cookie dough ball. Gently press the bottom of your chosen tool into the center of each dough ball, creating a shallow well. Don’t press all the way through; you just want to create a depression. This indentation is where the delicious vanilla frosting and shimmering “snow” will be housed.
Baking the Snow Globe Bases
Bake your sugar cookies according to the package directions or your recipe’s guidelines. Typically, this will be around 8-12 minutes, or until the edges are lightly golden brown and the centers are set. The key here is not to overbake them. We want them slightly soft in the center so they are easy to press the indentation into if needed, but firm enough to hold their shape.
Once they are done baking, remove the baking sheets from the oven. If you didn’t get a perfect indentation during the shaping phase, you can gently press the bottom of a round object into the center of each warm cookie immediately after removing them from the oven. Be careful, as they will be hot! This is the easiest time to slightly deepen the well if necessary. Let the cookies cool on the baking sheet for a few minutes before carefully transferring them to a wire rack to cool completely. It’s important that they are entirely cool before you start decorating, otherwise, the frosting will melt and slide off.
Assembling Your Snow Globes
Now for the fun part: bringing our Snow Globe Cookies to life! Once your sugar cookies are completely cool, it’s time to get out your vanilla frosting. You can use store-bought vanilla frosting, or if you’re feeling ambitious, whip up a batch of your favorite homemade vanilla buttercream. The key is a smooth, spreadable frosting that will act as the “glue” for our snow.
Take a generous spoonful of vanilla frosting and gently spread it into the indentation you created in the center of each cookie. You want to fill the well, creating a nice, smooth surface for our snow. Don’t be afraid to use a good amount; this is what gives our snow globes their depth and visual appeal. You can use the back of your spoon or a small offset spatula for this step. Aim for an even layer that sits slightly below the rim of the indentation.
Adding the Snow and Sparkle
With the frosting in place, it’s time to add our “snow”! This is where the shredded coconut or white sprinkles come into play. If you’re using shredded coconut, it provides a wonderfully fluffy, snow-like texture. If you prefer a more uniform sparkle, white sprinkles are a fantastic choice. Gently sprinkle the coconut or sprinkles over the vanilla frosting, filling the indentation completely. You want it to look like a fresh snowfall has settled in your cookie globe.
For an extra touch of magic, this is the perfect moment to add any optional edible glitter or small candy decorations. A light dusting of edible glitter can make your snow globes shimmer like freshly fallen snow under moonlight. Small white nonpareils or tiny edible pearls can mimic glistening icicles or festive embellishments. Get creative and have fun with it! The goal is to create a charming, miniature winter scene on each cookie. Press any decorations gently into the frosting so they adhere securely.
Finishing Touches and Presentation
Once your Snow Globe Cookies are fully decorated, allow the frosting to set up slightly before handling them too much. This will prevent the “snow” from sliding off. You can place them in the refrigerator for about 10-15 minutes to speed this process up.
These Snow Globe Cookies are perfect for holiday parties, cookie exchanges, or simply as a delightful treat to brighten a winter’s day. They are almost too pretty to eat, but trust me, they taste just as wonderful as they look! Enjoy the process of creating these whimsical delights, and savor the festive cheer they bring.
Conclusion:
And there you have it – your guide to creating magical Snow Globe Cookies! We’ve walked through each step, from preparing the perfect buttery dough to crafting those enchanting, edible scenes within. These cookies are more than just a treat; they’re a conversation starter, a festive centerpiece, and a joyful activity to share with loved ones. Imagine the delight on faces as they discover the miniature winter wonderland inside each cookie!
For serving, these Snow Globe Cookies are spectacular on their own, allowing their intricate designs to shine. However, they also pair beautifully with a steaming mug of hot chocolate or a festive eggnog. If you’re looking to add another layer of fun, consider arranging them on a tiered dessert stand for an even more impressive display.
Don’t be afraid to get creative with your variations! Experiment with different cookie cutters for unique shapes, and let your imagination run wild with the internal fillings. Think candy cane fragments, mini meringue mushrooms, or even tiny fondant gingerbread men. The possibilities for your custom Snow Globe Cookies are truly endless! I encourage you to dive in, embrace the creativity, and have a wonderfully delicious time making these special treats.
Frequently Asked Questions about Snow Globe Cookies:
Q1: How do I ensure my sugar cookie dough is firm enough for the snow globe effect?
For the best results, chill your sugar cookie dough thoroughly before rolling and cutting. Aim for at least 30 minutes in the refrigerator. This makes the dough easier to handle and helps the cut-out shapes retain their form during baking, preventing them from spreading too much and collapsing the globe.
Q2: What are some good filling ideas for the snow globe if I don’t want to use meringue?
There are many fantastic alternatives! Small crushed hard candies (like peppermint or butterscotch) can mimic shimmering snow. You can also use edible glitter mixed with a little cornstarch for a frosty look. For a different texture, consider finely chopped white chocolate chips or even a dusting of powdered sugar for a classic snowy appearance.
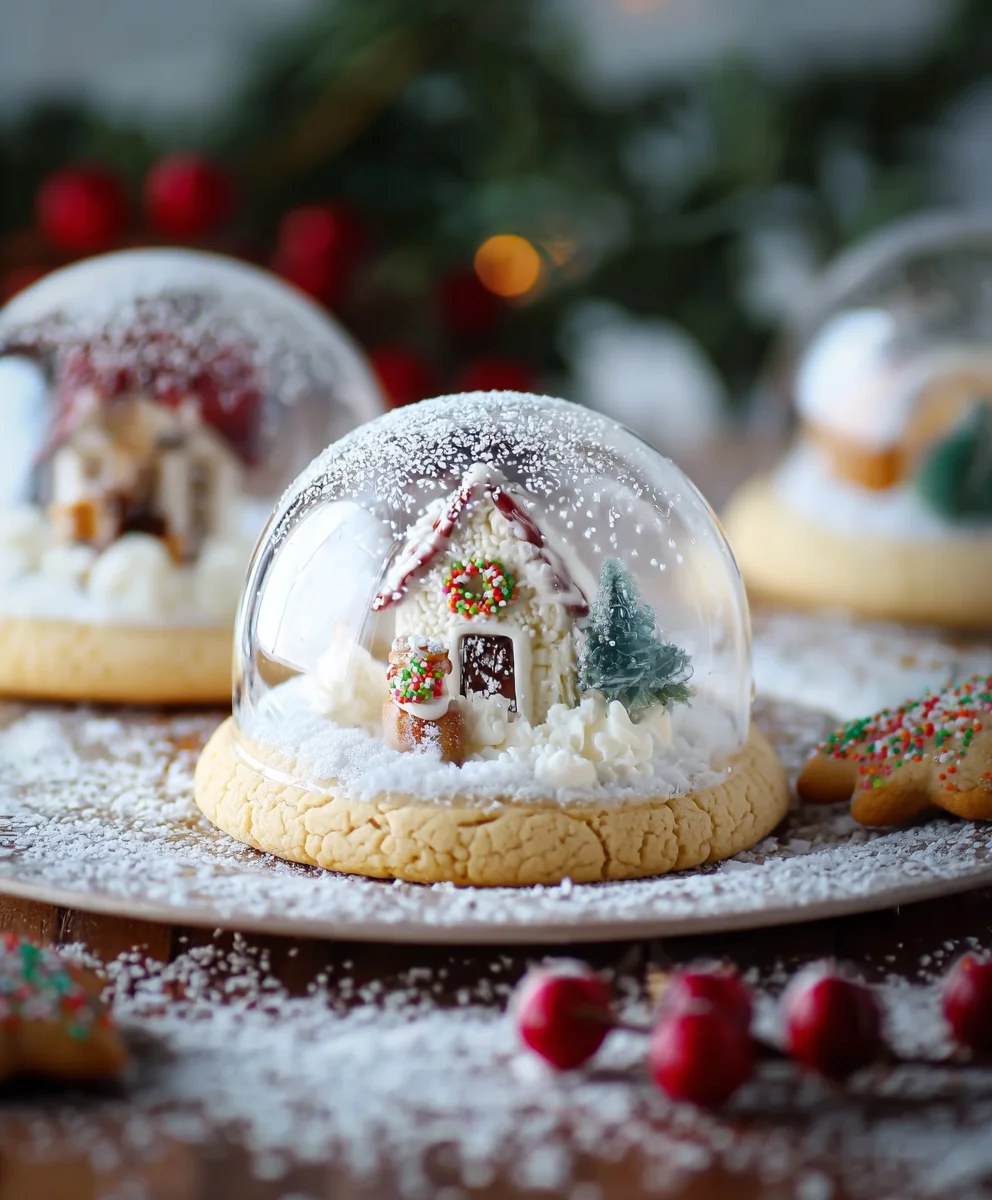
Enchanting Snow Globe Cookies- Magical Holiday Treats
Whimsical sugar cookies shaped into snow globes, filled with frosting and a snowy topping. Perfect for festive celebrations.
Ingredients
-
2 tubes refrigerated sugar cookie dough (16.5 ounces each)
-
1 (16 ounce) container vanilla frosting
-
1/2 cup shredded coconut
-
1/2 cup white sprinkles
-
Edible glitter (optional)
-
Small candy decorations (optional)
Instructions
-
Step 1
Preheat oven to 350°F (175°C). Line baking sheets with parchment paper. Roll tablespoon and a half of cookie dough into a ball and place on baking sheet, leaving 2 inches between cookies. Gently press the bottom of a small measuring cup or round cookie cutter into the center of each dough ball to create a shallow well. -
Step 2
Bake for 8-12 minutes, or until edges are lightly golden brown and centers are set. If needed, gently press the well deeper into warm cookies immediately after removing from oven. Let cool on baking sheet for a few minutes, then transfer to a wire rack to cool completely. -
Step 3
Once cookies are completely cool, spread a generous spoonful of vanilla frosting into the indentation of each cookie, creating a smooth surface. -
Step 4
Gently sprinkle shredded coconut or white sprinkles over the frosting to fill the indentation completely, resembling snow. -
Step 5
For extra sparkle, add optional edible glitter or small candy decorations, pressing them gently into the frosting to adhere. -
Step 6
Allow frosting to set slightly before handling, or refrigerate for 10-15 minutes to speed up the process. Present and enjoy!
Important Information
Nutrition Facts (Per Serving)
It is important to consider this information as approximate and not to use it as definitive health advice.
Allergy Information
Please check ingredients for potential allergens and consult a health professional if in doubt.
Leave a Comment