

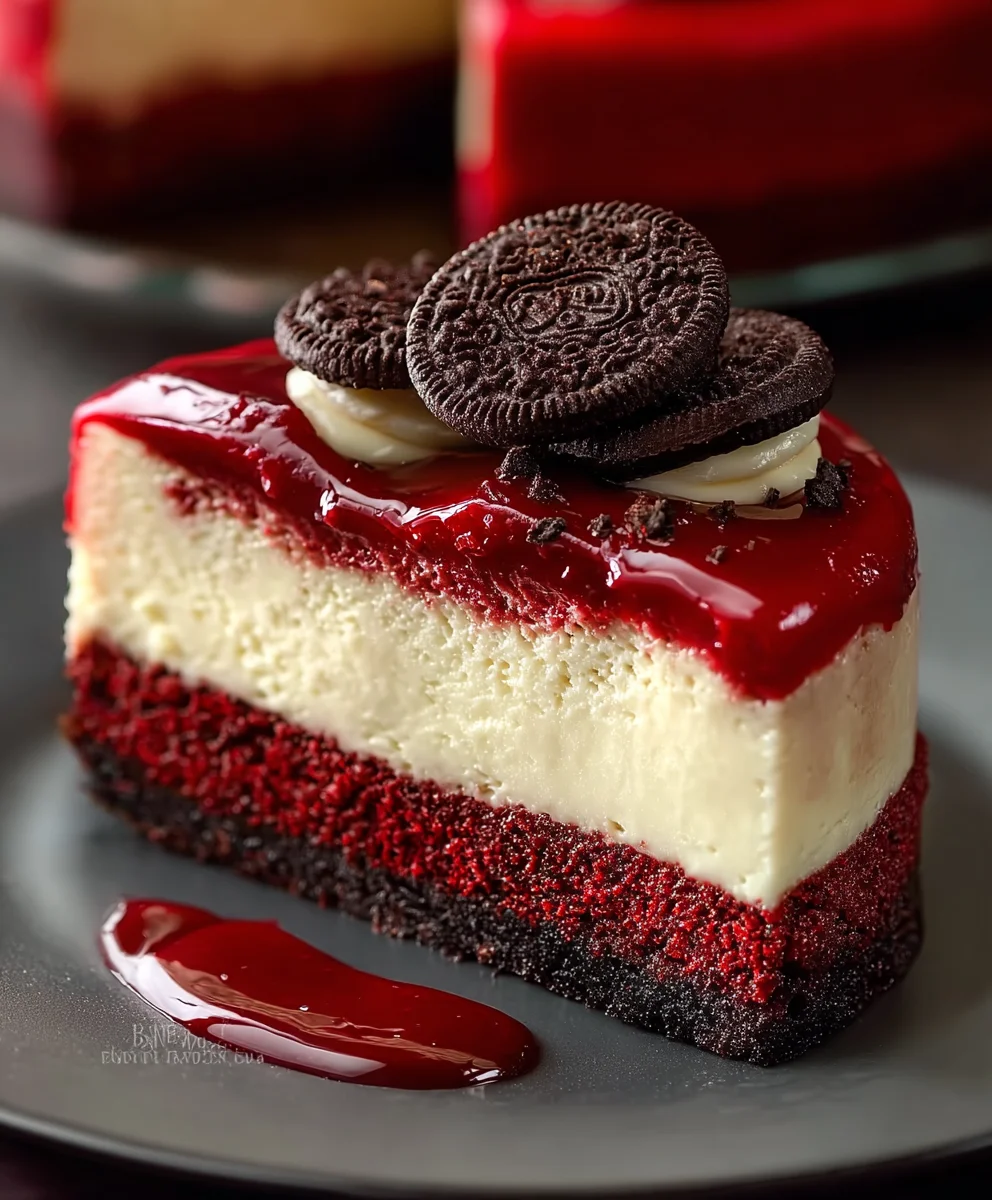
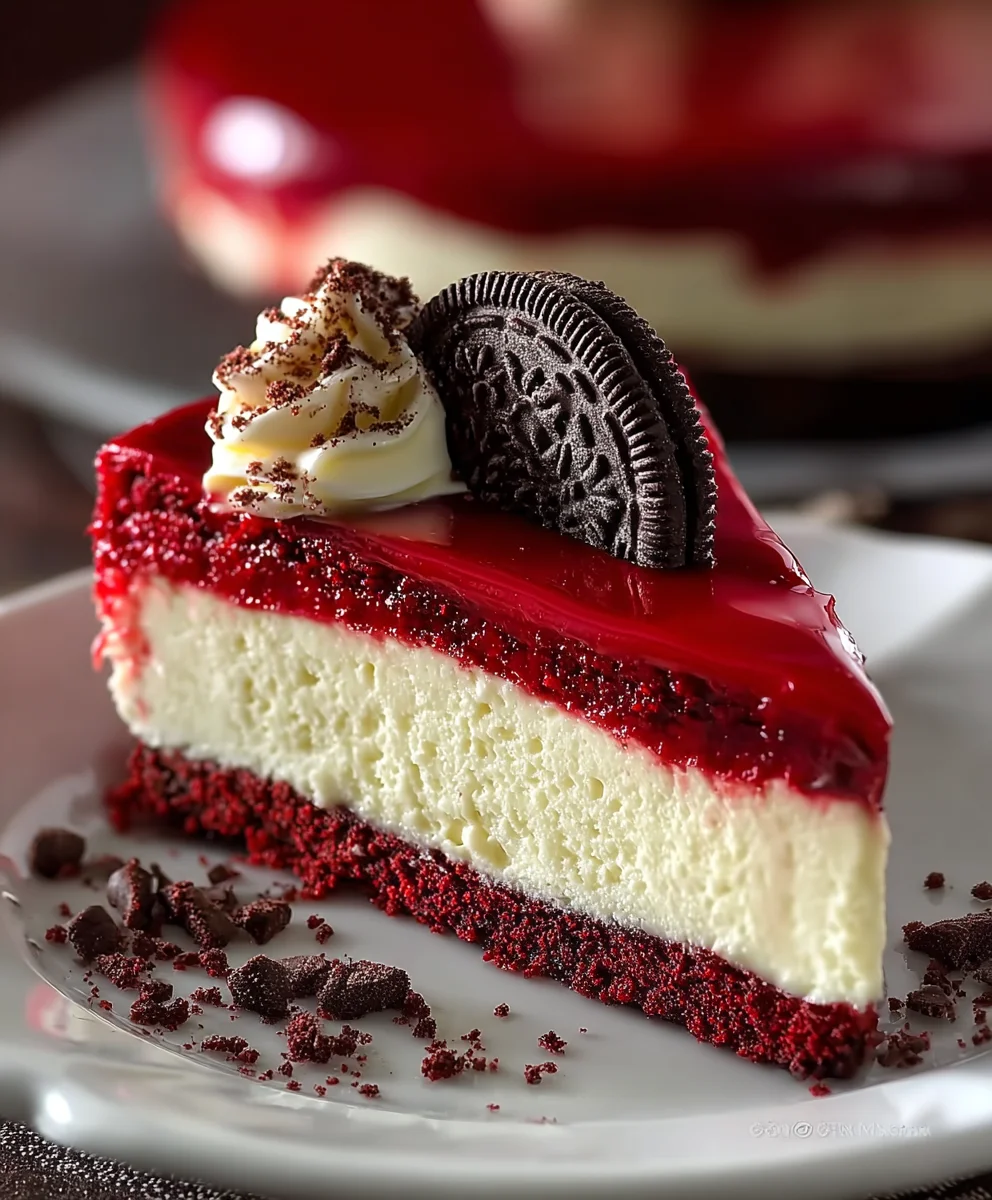
Red Velvet Cheesecake. Just the name conjures images of decadent swirls, a vibrant crimson hue, and a rich, creamy texture that’s utterly irresistible. It’s the ultimate showstopper, a dessert that manages to be both elegant and delightfully comforting. What is it about this iconic treat that captures our hearts (and taste buds)? Perhaps it’s the perfect marriage of two beloved classics: the tender, slightly cocoa-infused crumb of red velvet cake meeting the velvety smoothness of classic cheesecake. This isn’t just any dessert; it’s an experience. The subtle tang of the cream cheese, the whisper of chocolate, and the stunning visual appeal come together to create a truly memorable moment. Today, we’re diving deep into creating a Red Velvet Cheesecake that will have everyone begging for the recipe. Get ready to impress yourself and your loved ones with a masterpiece that’s surprisingly achievable!

Ingredients:
- All-purpose flour: 1 1/2 cups, for structure.
- Unsweetened cocoa powder: 2 tsp, for a hint of chocolate flavor.
- Salt: 1/2 tsp, to enhance flavor.
- Unsalted butter: 1/2 cup, at room temperature, for moisture.
- Granulated sugar: 1 cup, for sweetness.
- Sour cream: 1/2 cup, at room temperature, for moistness.
- Vegetable oil: 1/4 cup, to keep the cake moist.
- Pure vanilla extract: 2 tsp, for flavor.
- Large eggs: 2, at room temperature, for structure.
- Red food coloring: 4 tsp, for classic red velvet color.
- Buttermilk: 2/3 cup, at room temperature, for tenderness.
- Baking soda: 1 tsp, to help the cake rise.
- White vinegar: 1 tsp, to activate the baking soda.
- Oreos (filling removed, wafers crushed): 10, for the crust.
- Full-fat cream cheese: 24 oz, at room temperature, for creaminess.
Preparing the Red Velvet Cheesecake Components
The Oreo Crust
This simple yet delicious crust forms the perfect base for our decadent Red Velvet Cheesecake. Start by preheating your oven to 350°F (175°C). Take your 10 Oreos, making sure to scrape out and discard the creamy filling. You’ll want to focus on the dark chocolate wafers themselves. Place these wafers into a food processor and pulse until you achieve fine crumbs. If you don’t have a food processor, don’t worry! You can place the wafers in a zip-top bag and crush them with a rolling pin until they are finely ground. In a medium bowl, combine the Oreo crumbs with 1/4 cup (4 tablespoons) of melted unsalted butter. Stir this mixture thoroughly until the crumbs are evenly moistened. This will help them hold together when pressed into the pan.
Press the crumb mixture evenly into the bottom and slightly up the sides of a 9-inch springform pan. I like to use the bottom of a measuring cup or a flat-bottomed glass to ensure a compact and even layer. This evenness is key for a uniform crust. Once pressed, place the springform pan into the preheated oven and bake for 8-10 minutes. This step helps to set the crust and makes it a little more robust. While the crust is baking, it’s time to get started on the cheesecake filling itself. Remove the crust from the oven and let it cool completely on a wire rack. This cooling period is important so the hot crust doesn’t start to melt the cheesecake filling when it’s assembled.
The Creamy Cheesecake Filling
Now for the star of the show: the rich and creamy cheesecake filling. In a large mixing bowl, beat the 24 ounces of full-fat cream cheese with an electric mixer on medium speed until it is completely smooth and free of lumps. It’s crucial that your cream cheese is at room temperature for this step; cold cream cheese will result in a lumpy filling. Once smooth, gradually add 1 cup of granulated sugar and continue to beat until well combined and creamy. Scrape down the sides of the bowl occasionally to ensure everything is incorporated.
Next, add 1/2 cup of sour cream and 1/4 cup of vegetable oil. Beat these in until just combined. You don’t want to overmix at this stage, as too much air incorporated can lead to cracking. After that, mix in 2 teaspoons of pure vanilla extract. Then, one at a time, add your 2 large eggs, beating on low speed after each addition until just incorporated. Again, avoid overmixing. The key to a smooth cheesecake filling is gentle incorporation of ingredients.
The Vibrant Red Velvet Batter
This is where our Red Velvet Cheesecake gets its signature color and a subtle chocolatey flavor. In a separate medium bowl, whisk together the 1 1/2 cups of all-purpose flour, 2 teaspoons of unsweetened cocoa powder, and 1/2 teaspoon of salt. This dry mixture provides the structure for our cake layer. In a small bowl or liquid measuring cup, combine the 2/3 cup of buttermilk, 1 teaspoon of baking soda, and 1 teaspoon of white vinegar. Whisk them together; you’ll notice it start to fizz a bit – this reaction is what will help the cake rise beautifully.
Now, it’s time to bring the red velvet element into play. Add 4 teaspoons of red food coloring to the buttermilk mixture and stir until it’s a vibrant, uniform color. In a separate bowl, cream together the 1/2 cup (8 tablespoons) of softened unsalted butter with 1/2 cup of granulated sugar until light and fluffy. This will be the base for our red velvet cake batter. Gradually beat in the red buttermilk mixture into the creamed butter and sugar, alternating with the dry ingredients. Begin and end with the dry ingredients, mixing until just combined after each addition. Be careful not to overmix, as this can develop the gluten in the flour and make the cake tough. You want a smooth, luscious batter.
Assembling and Baking the Red Velvet Cheesecake
Now that all our components are ready, it’s time to assemble this magnificent dessert. Pour half of the cheesecake filling mixture over the cooled Oreo crust. Then, carefully dollop about half of the red velvet cake batter over the cheesecake filling. You don’t need to be precise; random dollops will create a beautiful swirled effect. Gently swirl the red velvet batter into the cheesecake filling using a knife or a skewer. Aim for elegant swirls, not complete mixing.
Next, spoon the remaining cheesecake filling over the swirled red velvet layer. Finally, dollop the remaining red velvet cake batter on top of the second layer of cheesecake filling and swirl it in again, creating even more marbled goodness. Once assembled, cover the springform pan tightly with aluminum foil, ensuring no steam can get in. Place the springform pan into a larger baking pan and carefully pour hot water into the larger pan, creating a water bath. This water bath is crucial for even baking and preventing cracks. Bake in the preheated oven at 325°F (160°C) for 60-75 minutes, or until the edges are set and the center is only slightly jiggly.
Cooling and Chilling for Perfection
The cooling process is just as important as the baking for achieving the perfect Red Velvet Cheesecake. Once the cheesecake is done baking, turn off the oven, but leave the cheesecake inside with the oven door slightly ajar for about an hour. This gradual cooling prevents sudden temperature changes that can cause cracks. After the hour is up, carefully remove the cheesecake from the water bath and take off the aluminum foil. Let it cool completely on a wire rack at room temperature. Once it’s fully cooled to room temperature, cover the cheesecake with plastic wrap and refrigerate for at least 6 hours, or preferably overnight. This chilling period allows the cheesecake to set properly and the flavors to meld together. When ready to serve, carefully run a knife around the edge of the springform pan before releasing the sides. Slice and enjoy this stunning Red Velvet Cheesecake!
Conclusion:
And there you have it – your guide to creating a show-stopping Red Velvet Cheesecake! This recipe combines the rich, slightly tart flavor of red velvet cake with the creamy, decadent indulgence of cheesecake, creating a dessert that’s truly unforgettable. We’ve walked through each step, from preparing the vibrant red velvet cake layers to crafting the perfectly smooth cheesecake filling and swirling them together for that iconic marbled effect. Don’t be intimidated; with a little patience and attention to detail, you’ll be rewarded with a dessert that looks as magnificent as it tastes. This Red Velvet Cheesecake is perfect for special occasions, holidays, or just when you want to treat yourself or loved ones to something truly spectacular.
For serving suggestions, I love to top this beauty with a cloud of cream cheese frosting or a dollop of freshly whipped cream. A few fresh berries can add a lovely pop of color and a touch of freshness. When it comes to variations, feel free to experiment with different extracts or add a hint of espresso powder to the chocolate elements. You can also try making individual red velvet cheesecake bars for easier serving. I truly encourage you to give this recipe a try. It’s a labor of love, but the results are absolutely worth it. Happy baking!
Frequently Asked Questions:
Why is my Red Velvet Cheesecake cracking?
Cracking in cheesecake can happen for a few reasons. Over-beating the batter after adding eggs can incorporate too much air, leading to expansion and then collapse. Also, a drastic temperature change when cooling the cheesecake can cause it to crack. Ensure your oven temperature is accurate, and allow the cheesecake to cool gradually in the oven with the door slightly ajar before refrigerating.
Can I make this Red Velvet Cheesecake ahead of time?
Absolutely! In fact, cheesecake often tastes even better the next day after the flavors have had a chance to meld. You can bake and cool the cheesecake completely, then cover it tightly with plastic wrap and refrigerate it for up to 2-3 days. Just add your frosting and toppings before serving.
Decadent Red Velvet Cheesecake
A rich and creamy red velvet cheesecake with a chocolate Oreo crust, featuring swirls of vibrant red velvet cake batter within a smooth cream cheese filling.
Ingredients
-
10 Oreos (filling removed, wafers crushed)
-
1/4 cup unsalted butter, melted
-
24 oz full-fat cream cheese, at room temperature
-
1 cup granulated sugar
-
1/2 cup sour cream, at room temperature
-
1/4 cup vegetable oil
-
2 tsp pure vanilla extract
-
2 large eggs, at room temperature
-
1 1/2 cups all-purpose flour
-
2 tsp unsweetened cocoa powder
-
1/2 tsp salt
-
2/3 cup buttermilk, at room temperature
-
1 tsp baking soda
-
1 tsp white vinegar
-
4 tsp red food coloring
-
1/2 cup unsalted butter, softened
Instructions
-
Step 1
Preheat oven to 350°F (175°C). Combine 10 crushed Oreo wafers with 1/4 cup melted butter. Press evenly into the bottom and sides of a 9-inch springform pan. Bake for 8-10 minutes. Let cool completely. -
Step 2
In a large bowl, beat 24 oz cream cheese until smooth. Gradually add 1 cup granulated sugar and beat until creamy. Mix in 1/2 cup sour cream, 1/4 cup vegetable oil, and 2 tsp vanilla extract. Beat in 2 eggs one at a time on low speed until just incorporated. Do not overmix. -
Step 3
In a separate bowl, whisk together 1 1/2 cups all-purpose flour, 2 tsp cocoa powder, and 1/2 tsp salt. In a small bowl, combine 2/3 cup buttermilk, 1 tsp baking soda, and 1 tsp white vinegar. Stir until it fizzes. Add 4 tsp red food coloring and stir until uniform. -
Step 4
In another bowl, cream 1/2 cup softened butter with 1/2 cup granulated sugar until light and fluffy. Gradually beat in the red buttermilk mixture, alternating with the dry ingredients, beginning and ending with the dry ingredients. Mix until just combined. -
Step 5
Pour half the cheesecake filling over the cooled crust. Dollop half the red velvet batter over the filling and swirl gently with a knife. Spoon the remaining cheesecake filling over the swirled layer, then dollop the remaining red velvet batter on top and swirl again. -
Step 6
Cover the springform pan tightly with foil. Place in a larger baking pan and create a water bath by pouring hot water into the larger pan. Bake at 325°F (160°C) for 60-75 minutes, or until the edges are set and the center is slightly jiggly. -
Step 7
Turn off the oven and leave the cheesecake inside with the door ajar for 1 hour. Remove from water bath, take off foil, and let cool completely on a wire rack. Cover and refrigerate for at least 6 hours, or preferably overnight, before serving.
Important Information
Nutrition Facts (Per Serving)
It is important to consider this information as approximate and not to use it as definitive health advice.
Allergy Information
Please check ingredients for potential allergens and consult a health professional if in doubt.


Leave a Comment