

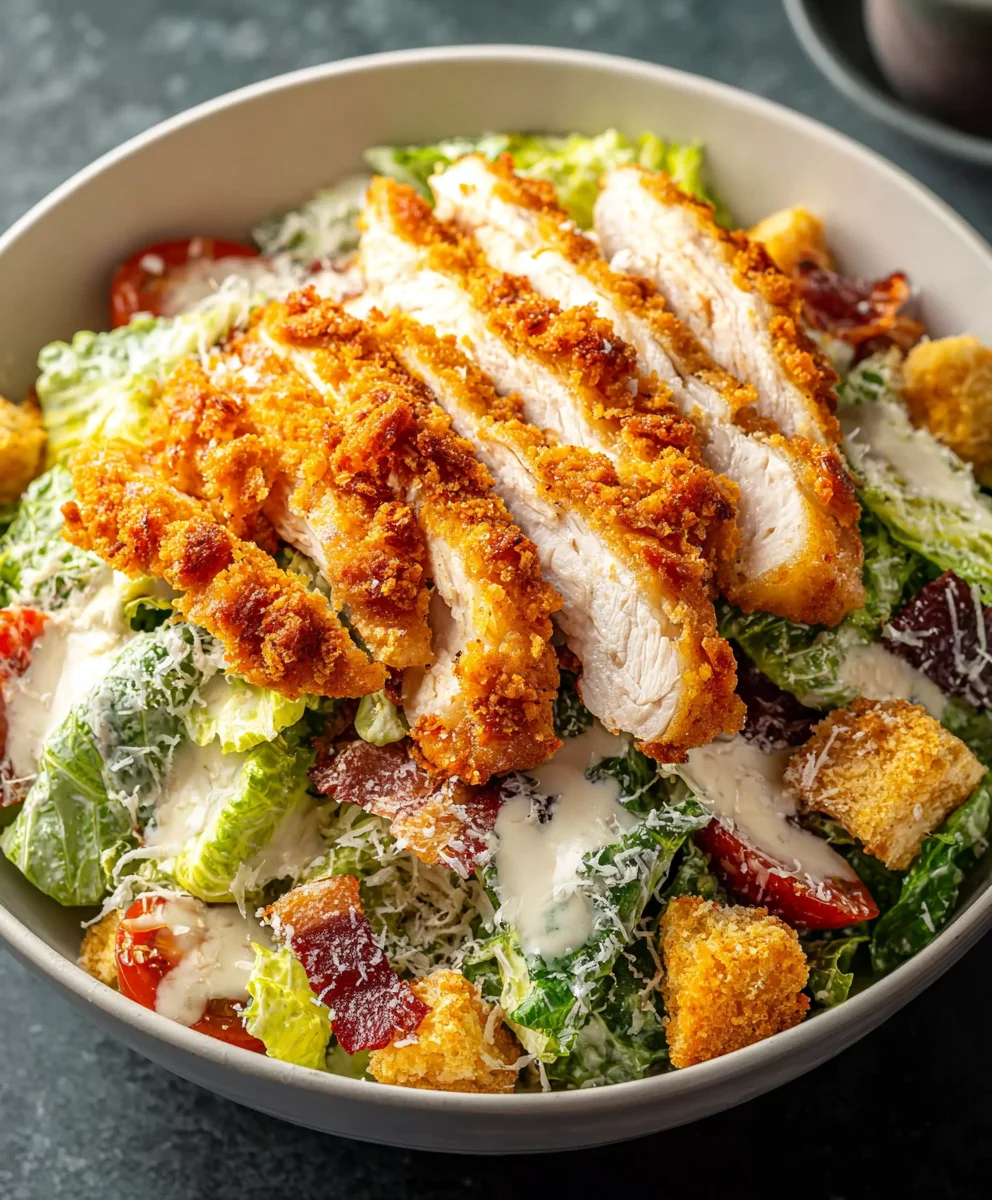
Crispy Chicken Caesar Salad – a culinary icon that transcends generations and palates, offering a symphony of textures and flavors that few dishes can rival. Are you ready to elevate your lunch or dinner with a dish that’s both satisfyingly hearty and refreshingly light?
Born from the ingenuity of Caesar Cardini in the 1920s, this salad quickly moved from a humble restaurant offering to a global phenomenon. While the original might not have included chicken, the addition of succulent, golden-brown pieces of poultry has undoubtedly cemented its status as a complete meal. It’s a testament to how classic dishes can evolve and capture new fans across the globe.
Why Everyone Loves This Classic, Elevated:
It’s the irresistible crunch of fresh romaine, the tangy depth of the authentic Caesar dressing, the savory bite of Parmesan, and of course, the star of our show: perfectly seasoned, Crispy Chicken Caesar Salad that adds substance and an incredible textural contrast. This isn’t just a salad; it’s an experience. People adore it for its versatility – perfect for a quick weeknight dinner, a sophisticated lunch, or even a delightful side dish. The balance of creamy, crunchy, salty, and savory notes makes it incredibly addictive and a staple in kitchens worldwide, and I’m excited to share my favorite rendition with you today!

Ingredients:
-
For the Crispy Chicken:
- 2 boneless, skinless chicken breasts (about 6-8 oz each)
- ½ cup all-purpose flour
- 1 teaspoon salt, divided
- ½ teaspoon black pepper, divided
- ¼ teaspoon paprika
- 2 large eggs, lightly beaten
- 1 ½ cups panko breadcrumbs
- ½ cup vegetable oil, canola oil, or avocado oil for pan-frying
-
For the Homemade Caesar Dressing:
- 1 large egg yolk, room temperature (pasteurized if concerned about raw egg)
- 1 teaspoon Dijon mustard
- 1 tablespoon fresh lemon juice
- 2 cloves garlic, minced very finely
- 2 anchovy fillets, mashed into a paste (or 1 teaspoon anchovy paste)
- ½ teaspoon Worcestershire sauce
- ½ cup extra virgin olive oil, light and fruity for best results
- ¼ cup freshly grated Parmesan cheese, plus extra for serving
- Salt and freshly ground black pepper to taste
-
For the Crispy Garlic Croutons:
- 3 cups day-old crusty bread, cut into 1-inch cubes (sourdough or baguette works wonderfully)
- 3 tablespoons extra virgin olive oil
- 1 large clove garlic, minced
- ¼ teaspoon salt
- ⅛ teaspoon black pepper
-
For the Salad Assembly:
- 2 large heads Romaine lettuce, washed, thoroughly dried, and chopped or torn into bite-sized pieces
- Additional freshly grated Parmesan cheese, for garnish
- Lemon wedges, for serving (optional)
Preparing the Crispy Chicken: The Heart of Your Crispy Chicken Caesar Salad
Creating truly crispy chicken is a meticulous process, but absolutely worth every step for this incredible Crispy Chicken Caesar Salad. It’s all about building layers of flavor and texture that stand up perfectly to the creamy dressing and crisp lettuce.
- Prepare the Chicken: Lay your boneless, skinless chicken breasts on a cutting board. Place a sheet of plastic wrap over them and, using a meat mallet or a heavy pan, pound the chicken until it’s about ½-inch thick. This ensures even cooking and helps the chicken cook through quickly without drying out. Once pounded, pat them dry with paper towels; this is crucial for the breading to adhere properly.
- Set Up the Breading Station: You’ll need three shallow dishes for this.
- In the first dish, combine the ½ cup all-purpose flour with ½ teaspoon salt, ¼ teaspoon black pepper, and ¼ teaspoon paprika. Whisk these together until well combined. This seasoned flour will create the first layer of flavor and help the egg wash stick.
- In the second dish, lightly beat the 2 large eggs. Ensure they are well mixed, as this will act as the binder for your breadcrumbs.
- In the third dish, spread out the 1 ½ cups of panko breadcrumbs. Panko is key here because its flaky texture provides a much crunchier crust than regular breadcrumbs, making your chicken truly crispy.
- Bread the Chicken: Take one pounded chicken breast and first dredge it thoroughly in the seasoned flour, ensuring it’s completely coated. Shake off any excess flour. Next, transfer the chicken to the beaten egg, turning it to coat all sides, letting any excess egg drip off. Finally, place the chicken into the panko breadcrumbs, pressing gently to ensure the panko adheres firmly to every surface. Repeat this process with the second chicken breast. Lay the breaded chicken on a clean plate or cutting board, and if you have time, let it rest in the refrigerator for 15-20 minutes. This helps the breading set and prevents it from falling off during cooking.
- Pan-Fry the Chicken: Heat ½ cup of vegetable oil (or your preferred high-smoke-point oil) in a large, heavy-bottomed skillet or cast-iron pan over medium-high heat. You want the oil to be hot enough to sizzle immediately when a tiny piece of panko is dropped in, but not smoking. Once the oil is hot, carefully place the breaded chicken breasts into the pan, making sure not to overcrowd it. You might need to cook them one at a time, depending on your pan size.
- Cook to Golden Perfection: Cook each side for about 4-6 minutes, or until the crust is a beautiful golden brown and wonderfully crispy, and the chicken is cooked through to an internal temperature of 165°F (74°C). Use tongs to carefully flip the chicken. If the chicken is browning too quickly, reduce the heat slightly. Once cooked, transfer the crispy chicken to a wire rack set over a baking sheet to drain any excess oil. Season immediately with the remaining ½ teaspoon salt and ¼ teaspoon black pepper while still hot. Let it rest for a few minutes before slicing to keep the juices locked in. Slicing the chicken against the grain into ½-inch strips is ideal for serving in your Crispy Chicken Caesar Salad.
Crafting the Homemade Caesar Dressing: The Soul of Your Salad
A truly great Caesar salad hinges on its dressing, and making it from scratch yields an incomparable depth of flavor. This homemade Caesar dressing is rich, tangy, and perfectly emulsified, elevating your Crispy Chicken Caesar Salad to gourmet status.
- Prepare the Base: In a medium bowl, combine the large egg yolk (ensure it’s at room temperature for better emulsification), Dijon mustard, fresh lemon juice, finely minced garlic, mashed anchovy paste, and Worcestershire sauce. Whisk these ingredients together vigorously until they are well combined and slightly pale. The anchovy paste might seem unusual, but it’s a secret weapon for umami, providing a savory depth that doesn’t taste overtly fishy.
- Emulsify with Olive Oil: Now comes the crucial step for a creamy, stable dressing: emulsification. While continuously whisking, begin to slowly, painstakingly slowly, drizzle in the ½ cup of extra virgin olive oil. Start with just a few drops at a time, whisking constantly until each addition is fully incorporated before adding more. As the mixture thickens and emulsifies, you can gradually increase the drizzle to a very thin stream. This process should take about 5-7 minutes. Don’t rush this step! If you add the oil too quickly, the dressing can break and separate. You’ll notice the dressing transform into a thick, creamy, and pale yellow consistency.
- Add Parmesan and Season: Once all the olive oil is incorporated and you have a beautifully thick emulsion, stir in the ¼ cup of freshly grated Parmesan cheese. This adds a wonderful salty, nutty flavor and contributes to the dressing’s luxurious texture.
- Adjust Seasoning: Taste the dressing. Season with salt and freshly ground black pepper to your preference. Remember, the anchovies and Parmesan already contribute saltiness, so add additional salt cautiously. You might also want to add a tiny splash more lemon juice for brightness or a pinch more black pepper for a bit of spice. The goal is a balanced flavor profile that is tangy, savory, and slightly pungent from the garlic and Dijon.
- Storage: If not using immediately, transfer the dressing to an airtight container and refrigerate. Homemade Caesar dressing is best used within 2-3 days. Bring it to room temperature for about 15 minutes before tossing with the salad for the best texture and flavor.
Baking the Crispy Garlic Croutons: Essential Crunch for Your Salad
No Crispy Chicken Caesar Salad is complete without crunchy, garlicky croutons. Making them homemade is incredibly simple and yields a far superior texture and flavor than store-bought varieties. They add that delightful textural contrast we all love.
- Preheat Oven and Prepare Bread: Preheat your oven to 375°F (190°C). Arrange an oven rack in the middle position. Take your 3 cups of day-old crusty bread cubes. Day-old bread is ideal because it’s slightly drier and will absorb the oil and seasonings better, leading to a crisper crouton.
- Season the Croutons: In a large bowl, combine the bread cubes with 3 tablespoons of extra virgin olive oil, 1 large clove of minced garlic, ¼ teaspoon of salt, and ⅛ teaspoon of black pepper. Toss everything together very well with your hands or a spoon, ensuring that each bread cube is lightly coated with the oil and seasonings. The garlic aroma should be quite evident now, promising deliciousness!
- Bake to Perfection: Spread the seasoned bread cubes in a single layer on a large baking sheet. Avoid overcrowding the pan; if necessary, use two baking sheets to ensure they crisp up rather than steam.
- Achieve the Perfect Crisp: Bake for 10-15 minutes, tossing them halfway through, until they are golden brown, crunchy, and fragrant. Keep a close eye on them towards the end of the baking time, as they can go from perfectly golden to burnt very quickly. Once baked, remove them from the oven and let them cool completely on the baking sheet. As they cool, they will become even crispier. Store any leftover croutons in an airtight container at room temperature for up to a week.
Assembling Your Crispy Chicken Caesar Salad: The Grand Finale
With all your components ready – the crispy chicken, the creamy homemade Caesar dressing, and the crunchy garlic croutons – it’s time to bring everything together for the ultimate Crispy Chicken Caesar Salad experience. The key here is proper technique to ensure every bite is perfectly coated and vibrant.
- Prepare the Lettuce: Ensure your 2 large heads of Romaine lettuce are thoroughly washed and, most importantly, completely dried. Wet lettuce will dilute your dressing and prevent it from adhering properly, resulting in a less flavorful and less satisfying salad. Use a salad spinner or pat it dry with paper towels. Chop or tear the Romaine into bite-sized pieces and place it in a very large mixing bowl.
- Dress the Salad: Pour a generous amount of your homemade Caesar dressing over the chopped Romaine lettuce. Start with about half to two-thirds of the dressing, as you can always add more if needed. Using salad tongs, gently toss the lettuce until every piece is lightly coated with the rich, creamy dressing. The goal is a light coating, not drowning the lettuce. Taste a piece of lettuce; if it needs more dressing or seasoning, add it now.
- Incorporate Croutons and Parmesan: Add most of your cooled, crispy garlic croutons to the dressed lettuce. Also, add a good handful (about half of the ¼ cup) of additional freshly grated Parmesan cheese. Give it another gentle toss to distribute these elements evenly throughout the salad. Reserve some croutons and Parmesan for garnish.
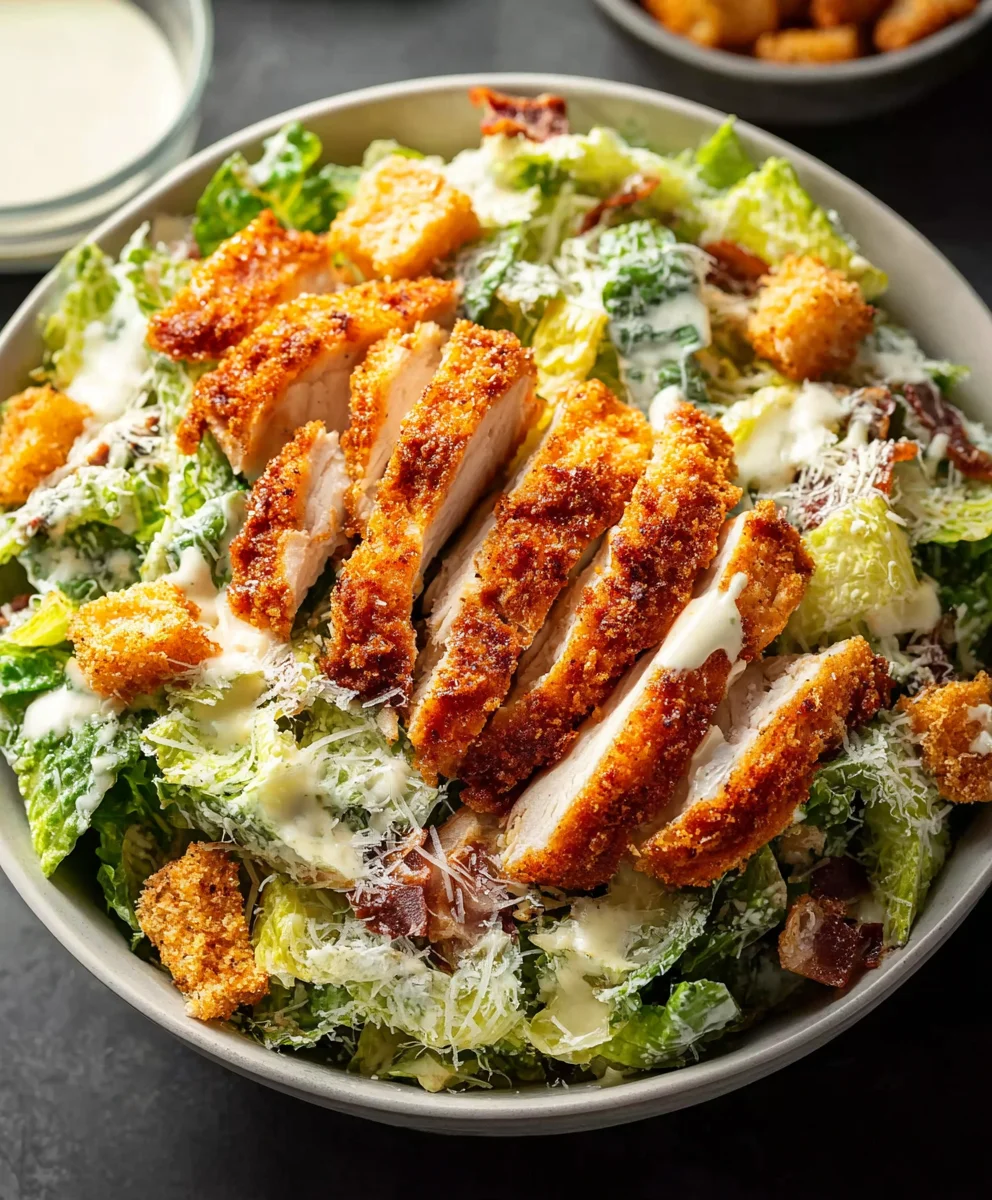
- Add the Crispy Chicken: Arrange the sliced crispy chicken on top of the tossed salad. You can place the slices artfully on the side or distribute them evenly over the top for a beautiful presentation.
- Final Garnish and Serve: Finish your Crispy Chicken Caesar Salad with the remaining crispy garlic croutons and a generous sprinkle of additional freshly grated Parmesan cheese. If desired, offer fresh lemon wedges on the side for an extra burst of brightness. Serve immediately to enjoy the chicken and croutons at their absolute crispiest. The contrast of warm, crispy chicken with cool, crisp lettuce and creamy dressing is truly exceptional. This detailed approach ensures every element shines, making your homemade Crispy Chicken Caesar Salad an unforgettable meal.
Conclusion:
And there you have it, my friends! We’ve journeyed together through the simple yet incredibly rewarding process of crafting what I truly believe is the absolute best version of this classic dish. If you’ve followed along, you’ll know that the magic really lies in those contrasting textures and vibrant flavors working in perfect harmony. From the succulent, perfectly seasoned chicken, expertly fried or baked to achieve that unbeatable crunch, to the crisp, fresh romaine lettuce and the rich, creamy homemade Caesar dressing, every element plays a crucial role. This isn’t just another salad; it’s a culinary experience designed to delight your taste buds and leave you feeling utterly satisfied. It’s light enough for a lunch but substantial enough to hold its own as a hearty dinner, making it incredibly versatile for any occasion. The satisfaction of biting into that perfectly cooked, juicy chicken, enveloped in a tangy, garlicky dressing, with the salty crunch of croutons and the refreshing snap of lettuce, is unparalleled. I genuinely believe that once you try this recipe, you’ll understand why I’m so passionate about it and why it deserves a permanent spot in your culinary repertoire.
Elevate Your Meal: Serving Suggestions and Creative Twists
Now that you’ve mastered the core recipe, let’s talk about how you can make this dish uniquely yours and explore a few exciting serving ideas. While this Crispy Chicken Caesar Salad is absolutely stellar as a stand-alone main course, especially when you’re craving something fresh yet fulfilling, it also pairs beautifully with a light soup or a warm, crusty baguette for dipping in any leftover dressing. Imagine serving it at a casual summer barbecue; it’s a refreshing alternative to heavier sides and is always a crowd-pleaser. For a brunch gathering, you could even offer smaller portions as an appetizer, showcasing its elegance and flavor profile.
But the fun doesn’t stop there! This recipe is incredibly adaptable, inviting you to experiment with various additions and substitutions. For those who enjoy a bit of extra richness, consider crumbling some crispy bacon bits over the top just before serving – it adds a delightful smoky depth. Avocado slices are another fantastic addition, offering a creamy texture and healthy fats that complement the sharp dressing wonderfully. If you’re looking to boost the vegetable content, cherry tomatoes, sliced cucumbers, or even thinly shaved red onion can bring additional color and crunch without overpowering the signature Caesar flavors. For a vegetarian twist, you could easily substitute the chicken with crispy pan-fried halloumi cheese, roasted chickpeas, or even a hearty marinated and grilled portobello mushroom. If chicken isn’t your preferred protein, perfectly seared shrimp or even flaky grilled salmon would be exceptional. Don’t be afraid to play with your croutons either; while store-bought are convenient, a batch of homemade garlic and herb croutons, perhaps made from day-old artisan bread, takes this dish to an entirely new level. You could even experiment with different types of cheese beyond Parmesan, like a sharp Pecorino Romano for an extra salty kick.
Your Turn to Create and Share!
I am genuinely so excited for you to bring this recipe to life in your own kitchen. There’s a special kind of joy that comes from cooking something delicious from scratch, and I promise you, this recipe delivers on that front. It’s a testament to simple ingredients coming together to create something truly spectacular. Don’t just read about it; dive in and experience the magic for yourself! I’m confident that once you take that first bite, savoring the incredible texture of the crispy chicken and the iconic, tangy dressing, you’ll be as hooked as I am. This isn’t just about following instructions; it’s about creating a memorable meal that you’ll want to make again and again for yourself, your family, and your friends.
After you’ve whipped up your own batch of this incredible Crispy Chicken Caesar Salad, I would absolutely love to hear about your experience. Did you add any unique twists? What was your favorite part of making it? Did your family rave about it? Please come back and share your thoughts, your successes, and even your creative modifications in the comments section below. Your feedback and personal stories are what truly enrich our cooking community, inspiring others to try new things and discover their own culinary passions. So, grab your apron, gather your ingredients, and get ready to enjoy one of the most satisfying and flavorful salads you’ll ever make. Happy cooking!
Crispy Chicken Caesar Salad
Crispy Chicken Caesar Salad is a culinary icon, offering a symphony of textures and flavors. This recipe elevates the classic with perfectly seasoned, golden-brown crispy chicken, combined with crisp romaine, tangy homemade Caesar dressing, savory Parmesan, and crunchy garlic croutons for a satisfyingly hearty yet refreshing meal.
Ingredients
-
2 boneless, skinless chicken breasts (6-8 oz each)
-
½ cup all-purpose flour
-
1 teaspoon salt, divided
-
½ teaspoon black pepper, divided
-
¼ teaspoon paprika
-
2 large eggs, lightly beaten
-
1 ½ cups panko breadcrumbs
-
½ cup vegetable oil (or canola/avocado oil)
-
1 large egg yolk, room temp
-
1 teaspoon Dijon mustard
-
1 tablespoon fresh lemon juice
-
2 cloves garlic, minced
-
2 anchovy fillets, mashed (or 1 tsp paste)
-
½ teaspoon Worcestershire sauce
-
½ cup extra virgin olive oil
-
¼ cup grated Parmesan cheese
-
Salt and freshly ground black pepper to taste (for dressing)
-
3 cups day-old crusty bread, 1-inch cubes
-
3 tablespoons extra virgin olive oil (for croutons)
-
1 large clove garlic, minced (for croutons)
-
¼ teaspoon salt (for croutons)
-
⅛ teaspoon black pepper (for croutons)
-
2 large heads Romaine lettuce, chopped
-
Additional grated Parmesan, for garnish
-
Lemon wedges (optional)
Instructions
-
Step 1
Pound chicken breasts to ½-inch thick; pat dry. Create a breading station: Dish 1: ½ cup flour, ½ tsp salt, ¼ tsp pepper, ¼ tsp paprika. Dish 2: 2 beaten eggs. Dish 3: 1½ cups panko. Dredge chicken in flour, then egg, then panko, pressing to coat. Refrigerate for 15-20 minutes if time allows to set breading. -
Step 2
Heat ½ cup oil in a large skillet over medium-high heat. Pan-fry chicken 4-6 minutes per side until golden brown, crispy, and cooked through (165°F). Drain on a wire rack, immediately season with remaining salt and pepper. Rest a few minutes, then slice into ½-inch strips. -
Step 3
In a bowl, whisk egg yolk, Dijon, lemon juice, minced garlic, mashed anchovy, and Worcestershire sauce until pale. Slowly drizzle in ½ cup olive oil while continuously whisking until thick and emulsified (approx. 5-7 minutes). Stir in ¼ cup grated Parmesan. Season to taste with salt and pepper. Refrigerate if not using immediately. -
Step 4
Preheat oven to 375°F (190°C). In a large bowl, toss 3 cups bread cubes with 3 tbsp olive oil, 1 large minced garlic clove, ¼ tsp salt, and ⅛ tsp black pepper until coated. Spread in a single layer on a baking sheet. Bake for 10-15 minutes, tossing halfway, until golden and crunchy. Cool completely. -
Step 5
Ensure Romaine lettuce is washed and thoroughly dried; chop into bite-sized pieces and place in a very large mixing bowl. Pour a generous amount (start with about two-thirds) of homemade Caesar dressing over the lettuce. Toss gently until lightly coated. Add most cooled croutons and a handful of additional grated Parmesan; toss again. -
Step 6
Arrange sliced crispy chicken on top of the tossed salad. Garnish with reserved croutons, additional grated Parmesan, and optional lemon wedges. Serve immediately to enjoy the chicken and croutons at their crispiest.
Important Information
Nutrition Facts (Per Serving)
It is important to consider this information as approximate and not to use it as definitive health advice.
Allergy Information
Please check ingredients for potential allergens and consult a health professional if in doubt.


Leave a Comment