

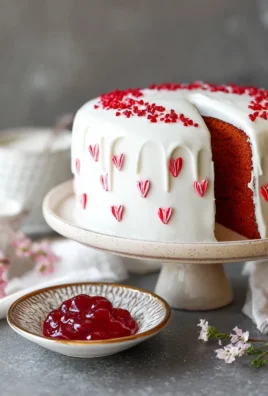
Sno Ball Brownies are not just a dessert; they are a delightful journey back to childhood, reimagined in a sophisticated, homemade treat. I am absolutely thrilled to share with you a recipe that perfectly encapsulates the joy of a classic Hostess Sno Ball, but elevated into a rich, fudgy brownie form. Imagine the deep, dark chocolate of a perfectly baked brownie, topped with a fluffy, vibrant pink marshmallow frosting, and then generously coated with delicate, shredded coconut. It’s a combination that truly sings, offering a medley of textures and flavors that are both comforting and exciting, making every bite a memorable experience.
For many, the iconic Hostess Sno Ball evokes cherished memories of lunchboxes and nostalgic indulgence. This recipe for
Sno Ball Brownies: A Nostalgic Indulgence Reimagined
takes that beloved, whimsical treat and transforms it into an elegant, yet incredibly approachable, dessert perfect for any occasion. I believe you’ll find that the exquisite interplay between the dense, chocolatey base, the light and airy marshmallow, and the subtly sweet coconut creates a truly irresistible experience. It’s a testament to how classic flavors, when thoughtfully combined, can create something truly extraordinary that appeals to both the young and the young at heart. Get ready to bake a batch of pure happiness that everyone will adore!

Ingredients:
-
For the Fudgy Brownie Base:
- 1 cup (2 sticks) unsalted butter, softened. I always recommend using good quality butter for the richest flavor in these Sno Ball Brownies.
- 1 cup granulated sugar.
- 1 cup light brown sugar, packed. The combination of both sugars gives our brownies that perfect chewiness and depth of flavor.
- 4 large eggs, at room temperature. Room temperature eggs emulsify better with the other ingredients, leading to a smoother batter.
- 1 teaspoon pure vanilla extract. Don’t skimp on the vanilla; it truly enhances the chocolate notes.
- 1 cup all-purpose flour. Make sure to level your flour properly for consistent results.
- ¾ cup unsweetened cocoa powder. For an extra rich chocolate flavor, consider a Dutch-processed cocoa.
- ½ teaspoon baking powder. This gives our dense brownies just a tiny lift.
- ½ teaspoon salt. Salt is crucial for balancing the sweetness and intensifying the chocolate.
- 1 cup (about 6 ounces) semi-sweet chocolate chips or chopped chocolate. These will melt into the batter, creating pockets of intense chocolate goodness.
-
For the Fluffy Marshmallow Frosting:
- 3 large egg whites, at room temperature. Separating eggs when cold and then letting the whites come to room temperature is often easiest.
- ½ teaspoon cream of tartar. This helps stabilize the egg whites, ensuring a firm, glossy meringue.
- ¼ teaspoon salt.
- 1 cup granulated sugar.
- ¼ cup water.
- 1 teaspoon pure vanilla extract.
-
For the Iconic Pink Coconut Topping:
- 1 cup (2 sticks) unsalted butter, softened.
- 4 cups powdered sugar, sifted. Sifting is non-negotiable here for a super smooth frosting.
- 2 tablespoons milk or cream, plus more if needed. Whole milk works best for richness.
- 1 teaspoon pure vanilla extract.
- Pink or red gel food coloring. Gel coloring provides vibrant color without adding too much liquid.
- 2 cups sweetened shredded coconut. This gives our Sno Ball Brownies their signature texture and flavor.
Crafting the Fudgy Brownie Base
The foundation of our incredible Sno Ball Brownies starts with a perfectly fudgy brownie layer. Follow these steps carefully to ensure a dense, rich, and delicious base.
- Prepare Your Baking Pan: First things first, let’s get our pan ready. I typically use a 9×13-inch baking pan for these amazing Sno Ball Brownies. Line it with parchment paper, leaving an overhang on the sides. This overhang will act as handles later, making it incredibly easy to lift the entire brownie slab out of the pan once it’s cooled and layered. Lightly grease the parchment paper with a bit of butter or non-stick spray to ensure nothing sticks. Preheating your oven to 350°F (175°C) now is also a good idea so it’s ready when our batter is mixed. A properly prepared pan is the first step to success!
- Melt the Chocolate and Butter: In a large microwave-safe bowl, or using a double boiler, melt your butter and semi-sweet chocolate chips together. If you’re using a microwave, heat in 30-second intervals, stirring well after each, until smooth and completely melted. Be careful not to overheat the chocolate, as it can seize and become grainy. If using a double boiler, stir constantly until just melted. Once smooth, set this mixture aside to cool slightly. We want it warm, not hot, when we add it to the other ingredients. This step is crucial for achieving that dense, fudgy texture we all love in a good brownie, especially for the robust foundation of our Sno Ball Brownies. It contributes significantly to the richness.
- Cream Sugars and Eggs: In a separate large mixing bowl, using an electric mixer, cream together the granulated sugar and light brown sugar with the softened butter until the mixture is light and fluffy. This process incorporates air, contributing to the brownie’s tender, chewy texture. Next, beat in the eggs one at a time, ensuring each egg is fully incorporated before adding the next. This step can take a few minutes, and you’ll see the mixture become lighter in color and very smooth and homogeneous. Finally, stir in the pure vanilla extract. The vanilla is really important here; it adds a warm, comforting note that complements the chocolate beautifully and enhances the overall flavor profile.
- Combine Wet and Dry Ingredients: In a medium bowl, whisk together the all-purpose flour, unsweetened cocoa powder, baking powder, and salt. Make sure there are no lumps of cocoa powder; a quick whisk ensures even distribution. Gradually add these dry ingredients to your wet mixture, mixing on low speed until just combined. Overmixing is the enemy of fudgy brownies! It develops the gluten in the flour too much, which can lead to a tough, cakey brownie rather than the dense, fudgy one we’re aiming for. Once the dry ingredients are mostly incorporated, gently fold in the slightly cooled melted chocolate and butter mixture. Continue folding just until no streaks of flour remain. The batter should be thick, glossy, and uniform. Avoid any vigorous mixing at this stage.
- Bake to Perfection: Pour the rich brownie batter into your prepared 9×13-inch pan and spread it evenly with a spatula, ensuring the corners are filled. Pop it into your preheated oven and bake for 25-30 minutes. You’re looking for the edges to be set and a toothpick inserted into the center to come out with moist crumbs, but not wet batter. Remember, slightly under-baking is key to ultra-fudgy brownies; an overbaked brownie will lose its desired chewiness. Once baked, remove the pan from the oven and place it on a wire rack to cool completely. This cooling step is absolutely essential before adding the next layers for your Sno Ball Brownies. Attempting to frost warm brownies will result in a messy, melted disaster as the layers will simply slide off or melt into each other. I usually let them cool for at least 2 hours at room temperature, or even pop them in the fridge for an hour once they’ve reached room temperature to speed up the process. A truly cold brownie base is non-negotiable for success.
Preparing the Fluffy Marshmallow Frosting
This marshmallow frosting is what truly elevates these from regular brownies to spectacular Sno Ball Brownies. It’s light, airy, incredibly delicious, and provides that signature fluffy layer reminiscent of the classic snack cake.
- Whip the Egg Whites: In the very clean bowl of a stand mixer (or a large bowl with a hand mixer), combine the egg whites, cream of tartar, and salt. It’s absolutely crucial that your bowl and whisk attachment are impeccably clean and free of any grease, as even a tiny trace can prevent the egg whites from whipping properly and reaching their full volume. Begin beating on medium speed until soft peaks form. Soft peaks will hold their shape when the beater is lifted but will curl over at the tip, indicating they are light and airy but not yet stiff.
- Prepare the Sugar Syrup: While the egg whites are whipping, combine the granulated sugar and water in a small saucepan. Heat over medium-high heat, stirring occasionally, just until the sugar dissolves completely. Once dissolved, stop stirring to prevent crystallization. Bring the syrup to a rolling boil and continue to cook without stirring until it reaches 240°F (115°C) on a candy thermometer. This temperature is critical for the stability and texture of your marshmallow frosting. If the syrup is not hot enough, the meringue will be too soft and won’t hold its shape; too hot, and it can become brittle. If you don’t have a candy thermometer, you can test it by dropping a small amount into cold water; it should form a soft, pliable ball.
- Combine and Whip to Perfection: With the mixer running on medium-high speed, carefully and slowly pour the hot sugar syrup in a thin, steady stream into the whipping egg whites. Be very cautious, as the syrup is extremely hot and can cause burns. Try to pour it down the side of the bowl or directly onto the meringue, avoiding the whisk attachment itself to prevent splattering and ensures the syrup is evenly distributed. Once all the syrup has been added, continue beating the mixture on high speed for about 7-10 minutes, or until the meringue is very thick, glossy, and holds stiff peaks that stand straight up when the beater is lifted. The bowl should also feel cool to the touch, indicating the meringue has cooled sufficiently. During the last minute of beating, add the vanilla extract. This entire process cools the meringue, stabilizes it, and creates that wonderful, stable, and truly fluffy marshmallow texture that defines a great Sno Ball.
- Layer the Marshmallow: Once your brownie base is completely cooled (and I mean completely cooled – remember our earlier note on chilling!), carefully spread the fluffy marshmallow frosting evenly over the top. Use an offset spatula to create a smooth, beautiful layer. I like to make little swirls or peaks on the surface to give it some visual interest and mimic the classic dessert. Place the brownies in the refrigerator for at least 30 minutes to allow the marshmallow layer to set and firm up. This firming-up stage makes applying the final pink layer much easier and prevents any unwanted mixing or smushing of the layers. Patience here truly pays off!
Creating the Iconic Pink Coconut Topping
This is the fun part, where our Sno Ball Brownies truly come to life with their signature look and texture! This vibrant pink frosting and generous coconut coating are unmistakable.
- Whip the Butter and Sugar: In a clean mixing bowl, using an electric mixer, cream together the softened butter until it’s light and fluffy. This usually takes about 2-3 minutes of beating. Gradually add the sifted powdered sugar, one cup at a time, mixing on low speed until each addition is incorporated before increasing speed to medium. This prevents a powdered sugar cloud from taking over your kitchen and ensures a smooth start. Scrape down the sides of the bowl as needed to make sure all ingredients are fully incorporated.
- Add Liquid and Flavor: Once all the powdered sugar is incorporated and the mixture is creamy, add the milk (or cream) and vanilla extract. Beat on medium-high speed for another 2-3 minutes until the frosting is incredibly light, fluffy, and perfectly smooth. If the frosting seems too thick to spread easily, add a tiny bit more milk, half a teaspoon at a time, mixing after each addition, until it reaches a spreadable consistency. Conversely, if it’s too thin, a tablespoon or two more sifted powdered sugar can help thicken it up to the right consistency. We want it spreadable but firm enough to hold its shape.
- Achieve that Signature Pink Hue: Now for the color! Add a few drops of pink or red gel food coloring to the frosting. Start with a small amount, as gel colors are very concentrated and vibrant, and mix until you achieve your desired shade of pastel pink. I usually aim for a soft, cheerful pink that instantly reminds me of those classic Sno Ball treats. You can always add more if you want a deeper color, but you can’t take it away, so go slowly and add a drop at a time until you’re happy with the shade. This visual appeal is a key part of the Sno Ball Brownies experience!
- Apply the Pink Frosting: Retrieve your chilled brownies with the firm and set marshmallow layer from the refrigerator. Carefully spread the pink frosting evenly over the marshmallow layer. Work quickly but gently. The goal is to get an even coating without disturbing the marshmallow beneath. An offset spatula is your best friend here, allowing for smooth, controlled spreading. Take your time to get a nice, consistent layer from edge to edge.
- The Coconut “Sno Ball” Coating: Immediately after spreading the pink frosting, generously sprinkle the sweetened shredded coconut over the entire surface of the brownies. Don’t be shy with the coconut; this is what makes these truly authentic Sno Ball Brownies! You can gently press the coconut into the frosting with your hands or the back of a spoon to ensure it adheres well and creates a dense, snow-like coating. This not only adds a wonderful texture but also locks in the flavor and completes the iconic look.
Assembly, Chilling, and Serving Your Sno Ball Brownies
The final steps are all about patience, but trust me, it’s worth the wait for these perfectly layered beauties. These Sno Ball Brownies are worth every moment of anticipation!
- Chill to Perfection: Once the coconut is applied, place the entire pan of Sno Ball Brownies back into the refrigerator. Chill for at least 2-4 hours, or even better, overnight. This extended chilling time is paramount for perfect results. It allows all the layers to firm up completely and meld together, making for clean, crisp cuts and preventing the layers from smushing together or separating when sliced. It also helps the flavors deepen and meld beautifully, creating a more cohesive and enjoyable dessert experience. Do not skip or shorten this chilling period!
- Slice and Serve: When you’re ready to serve, lift the cooled brownies out of the pan using the parchment paper overhangs. Place the entire brownie slab on a cutting board. For the cleanest cuts, I recommend using a large, very sharp knife. Before each cut, wipe the knife clean with a damp cloth and warm it slightly under hot water; this will help you get those perfectly defined layers without dragging the frosting or creating a mess. Slice into desired portion sizes – squares, rectangles, or even smaller bites for a party platter. I find cutting them into 2×2 inch squares is just right for a decadent individual treat. Each slice showcases the beautiful layers of these homemade Sno Ball Brownies.
- Storage: Store any leftover Sno Ball Brownies in an airtight container in the refrigerator for up to 5 days. They are truly best enjoyed chilled, as the textures and flavors are perfectly maintained, especially the marshmallow and pink frosting layers. These are such a delightful and nostalgic treat; I know you and your loved ones will absolutely adore every bite of these homemade Sno Ball Brownies! They’re a fantastic conversation starter and a guaranteed crowd-pleaser, bringing a touch of whimsy and incredible flavor to any gathering. Enjoy the process and the delicious results, celebrating the joy of baking and sharing!

Conclusion:
And there you have it, friends! We’ve journeyed together through the delightful process of creating something truly magical in your own kitchen. After all the mixing, baking, and decorating, you’re not just left with a batch of ordinary brownies; you’re holding a tray of pure, unadulterated joy that promises to transport everyone who takes a bite back to simpler, sweeter times. This recipe isn’t just about baking; it’s about crafting an experience, a moment of happiness that’s both comforting and exciting. I truly believe that some of the best memories are made around a shared dessert, and this one is perfectly poised to create those lasting moments.
Why These Brownies Are an Absolute Game-Changer
Seriously, if you’ve been on the fence about trying a new dessert, let me assure you, these are the ones to dive into headfirst. What makes these Sno Ball Brownies an absolute must-try isn’t just their stunning visual appeal – though let’s be honest, that vibrant pink coconut and marshmallow swirl is pretty irresistible – it’s the incredible symphony of textures and flavors that come together in every single bite. You get the deep, rich, fudgy chewiness of a perfect brownie base, giving way to the light, airy, sweet creaminess of marshmallow, all enveloped by that distinctive, slightly chewy, and perfectly sweetened coconut. It’s a nostalgic trip for your taste buds, hitting all the right notes of childhood favorites but elevated with the sophistication of a homemade, from-scratch dessert. They strike that delicate balance between decadent and delightfully playful, making them a unique standout in any dessert spread. Plus, the process, while detailed, is incredibly rewarding, leaving you with a sense of accomplishment and a kitchen filled with the most heavenly aroma. Trust me, the smiles you’ll get when you serve these are worth every single step. They’re not just a treat; they’re an experience, a conversation starter, and quite possibly, your new favorite dessert.
Serving Suggestions & Creative Twists to Elevate Your Experience
Now that you have a fresh batch of these beauties, how best to enjoy them? While they are undeniably perfect straight off the cooling rack (once completely cool, of course, for the best marshmallow set!), there are so many ways to savor and serve your amazing creation. For a classic approach, I love them slightly chilled, allowing the marshmallow topping to firm up a bit, creating a delightful contrast with the dense brownie. Pair a square with a hot cup of coffee or a tall glass of cold milk for an afternoon treat that feels incredibly indulgent and comforting. For a truly show-stopping dessert, try serving them warm (a quick 10-15 second zap in the microwave will do the trick!) with a generous scoop of premium vanilla bean ice cream. The melting marshmallow and warm brownie with cold ice cream is an unforgettable combination that will have everyone asking for seconds. Want to get a little creative? Consider a drizzle of homemade raspberry sauce or a dark chocolate ganache over the top for an extra layer of flavor and elegance. For holiday gatherings, you could even dye the coconut green or blue for a festive touch, proving these aren’t just for everyday enjoyment but are versatile enough for any special occasion. Imagine these as part of a dessert bar at a birthday party, a casual get-together, or a potluck – they’re guaranteed to be the first to disappear and the most talked-about item on the table!
Your Turn: Bake, Savor, and Share Your Story!
Okay, now it’s your turn! I’ve shared all my tips and tricks, my passion for these incredible treats, and now I’m practically buzzing with anticipation for you to experience them for yourself. Don’t just read about how amazing these Sno Ball Brownies are; gather your ingredients, clear your schedule, and get ready to create something truly memorable in your own kitchen. Baking is such a wonderfully therapeutic and rewarding activity, and sharing the fruits of your labor is even better. I absolutely love hearing from you all, so once you’ve baked your batch, taken that first glorious bite, and perhaps even shared them with loved ones, please come back and tell me all about it! Did you make any variations? What was your favorite part of the process? Did they bring back any nostalgic memories for you or your family? Share your photos on social media and tag me, or simply leave a comment below. Your feedback and experiences are what truly make this community so special and inspire me to keep sharing more deliciousness. So, go forth, bake with joy, and prepare to be utterly delighted by these extraordinary brownies!

Irresistible Sno Ball Brownies
These Sno Ball Brownies are a delightful journey back to childhood, reimagined in a sophisticated, homemade treat. Experience the rich, fudgy chocolate of a perfectly baked brownie, topped with a fluffy, vibrant pink marshmallow frosting, and generously coated with delicate, shredded coconut. Perfect for any occasion, these brownies can be enhanced with fresh berries, festive sprinkles, or holiday-themed coloring, making them ideal for parties or charming individual desserts.
Ingredients
-
For the Fudgy Brownie Base:
-
1 cup (2 sticks) unsalted butter, softened
-
1 cup granulated sugar
-
1 cup light brown sugar, packed
-
4 large eggs, at room temperature
-
1 teaspoon pure vanilla extract
-
1 cup all-purpose flour
-
¾ cup unsweetened cocoa powder
-
½ teaspoon baking powder
-
½ teaspoon salt
-
1 cup (about 6 ounces) semi-sweet chocolate chips or chopped chocolate
-
For the Fluffy Marshmallow Frosting:
-
3 large egg whites, at room temperature
-
½ teaspoon cream of tartar
-
¼ teaspoon salt
-
1 cup granulated sugar
-
¼ cup water
-
1 teaspoon pure vanilla extract
-
For the Iconic Pink Coconut Topping:
-
1 cup (2 sticks) unsalted butter, softened
-
4 cups powdered sugar, sifted
-
2 tablespoons milk or cream, plus more if needed
-
1 teaspoon pure vanilla extract
-
Pink or red gel food coloring
-
2 cups sweetened shredded coconut
Instructions
-
Step 1
1. Prepare your 9×13-inch baking pan by lining with parchment paper and greasing lightly. Preheat oven to 350°F (175°C).\n2. Melt 1 cup butter and chocolate chips until smooth. Set aside to cool slightly.\n3. In a separate bowl, cream 1 cup butter with granulated and light brown sugars until light and fluffy. Beat in eggs one at a time, then vanilla extract.\n4. In a medium bowl, whisk together flour, cocoa powder, baking powder, and salt. Gradually add dry ingredients to wet mixture, mixing on low speed until just combined. Gently fold in the cooled melted chocolate mixture until no streaks of flour remain. Do not overmix.\n5. Pour batter into the prepared pan and spread evenly. Bake for 25-30 minutes until edges are set and a toothpick inserted into the center comes out with moist crumbs. Cool completely on a wire rack, then chill thoroughly in the refrigerator for at least 2 hours. -
Step 2
1. In a clean stand mixer bowl, combine egg whites, cream of tartar, and salt. Beat on medium speed until soft peaks form.\n2. In a small saucepan, combine 1 cup granulated sugar and ¼ cup water. Heat over medium-high heat, stirring until sugar dissolves. Bring to a rolling boil and cook without stirring until it reaches 240°F (115°C) on a candy thermometer.\n3. With the mixer running on medium-high speed, slowly and carefully pour the hot sugar syrup in a thin stream into the whipping egg whites. Continue beating on high speed for 7-10 minutes, until the meringue is very thick, glossy, holds stiff peaks, and the bowl feels cool to the touch. Stir in vanilla extract during the last minute.\n4. Spread the fluffy marshmallow frosting evenly over the completely chilled brownie base. Place brownies in the refrigerator for at least 30 minutes to allow the marshmallow layer to set. -
Step 3
1. In a clean mixing bowl, cream 1 cup softened butter until light and fluffy. Gradually add 4 cups sifted powdered sugar, one cup at a time, mixing on low speed until incorporated.\n2. Add 2 tablespoons milk (or cream) and 1 teaspoon vanilla extract. Beat on medium-high speed for 2-3 minutes until light, fluffy, and smooth. Adjust consistency with more milk or powdered sugar if needed.\n3. Add a few drops of pink or red gel food coloring and mix until you achieve your desired pastel pink shade.\n4. Retrieve chilled brownies. Carefully spread the pink frosting evenly over the set marshmallow layer using an offset spatula.\n5. Immediately and generously sprinkle 2 cups sweetened shredded coconut over the entire surface of the brownies. Gently press the coconut into the frosting to ensure it adheres well. -
Step 4
1. Place the entire pan of Sno Ball Brownies back into the refrigerator. Chill for at least 2-4 hours, or preferably overnight, to allow all layers to firm up and meld together.\n2. To serve, lift the cooled brownies out of the pan using the parchment paper overhangs. Place on a cutting board. Use a large, very sharp knife, wiping it clean with a damp cloth and warming it slightly before each cut, to slice into desired portion sizes.\n3. Store any leftover Sno Ball Brownies in an airtight container in the refrigerator for up to 5 days. For longer storage, freeze individual slices in a single layer until solid, then transfer to an airtight container with parchment paper between layers. Thaw overnight in the refrigerator, then bring to room temperature before serving.
Important Information
Nutrition Facts (Per Serving)
It is important to consider this information as approximate and not to use it as definitive health advice.
Allergy Information
Please check ingredients for potential allergens and consult a health professional if in doubt.

Leave a Comment