

Fruity Pebbles Cheesecake Tacos are more than just a dessert; they are a vibrant celebration of flavor, texture, and pure culinary joy. As your dedicated dessert enthusiast, I am absolutely thrilled to introduce you to a creation that perfectly marries whimsical childhood nostalgia with sophisticated dessert artistry. Imagine the delightful crunch of your favorite breakfast cereal combined with the silky smooth tang of classic cheesecake, all nestled within a charming, handheld shell. This isn’t just a recipe; it’s an experience waiting to happen, promising to captivate both your taste buds and your imagination.
While the taco traditionally hails from Mexico, serving as a versatile canvas for savory delights, its form has beautifully evolved into a playful vessel for sweet innovations. Our inspiration draws from the beloved American breakfast staple, Fruity Pebbles cereal – a kaleidoscopic explosion of fruitiness that has charmed generations. By marrying this iconic cereal with the universally adored cheesecake, we’ve crafted a modern fusion that respects its components while creating something entirely new and exciting for the dessert world.
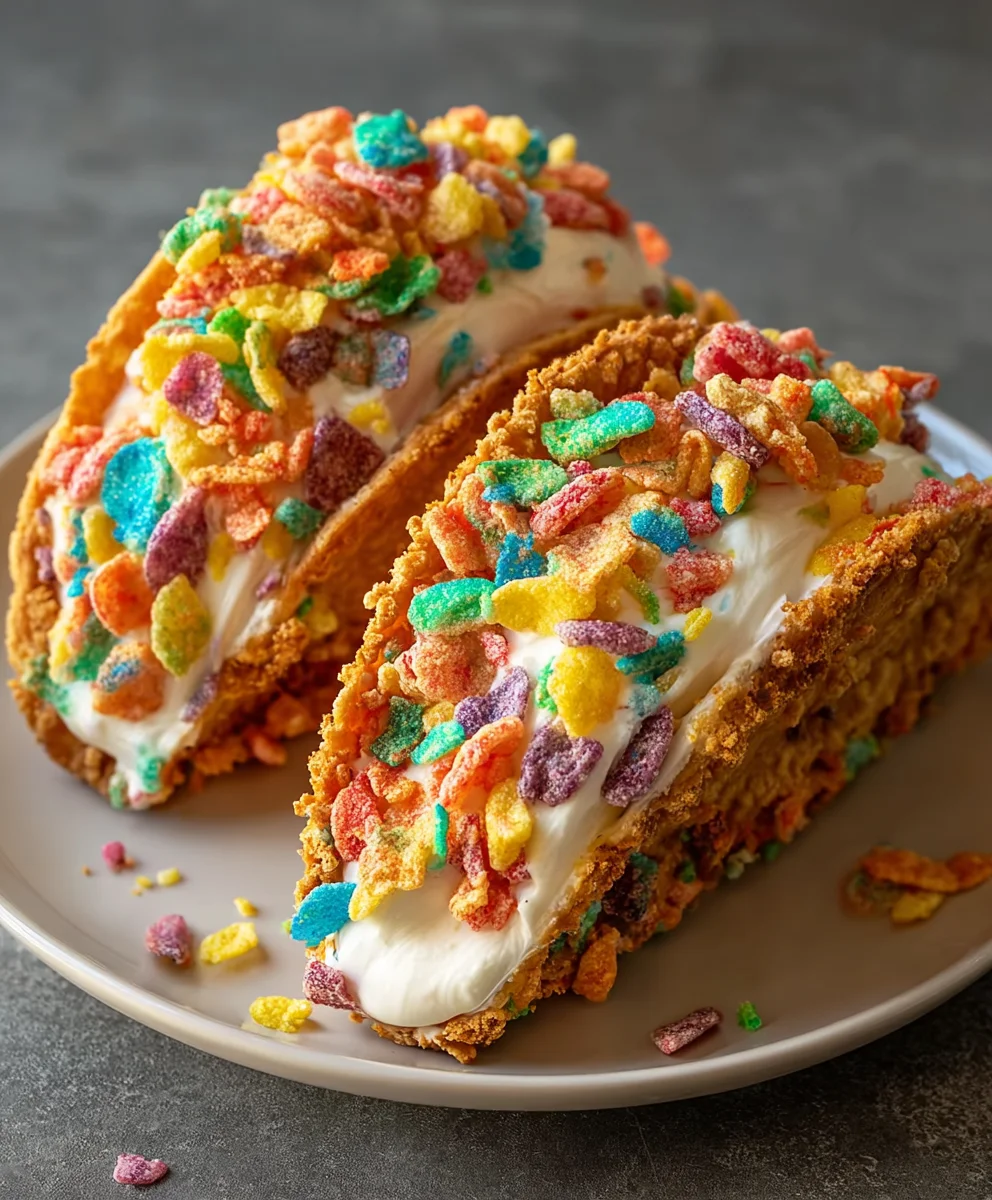
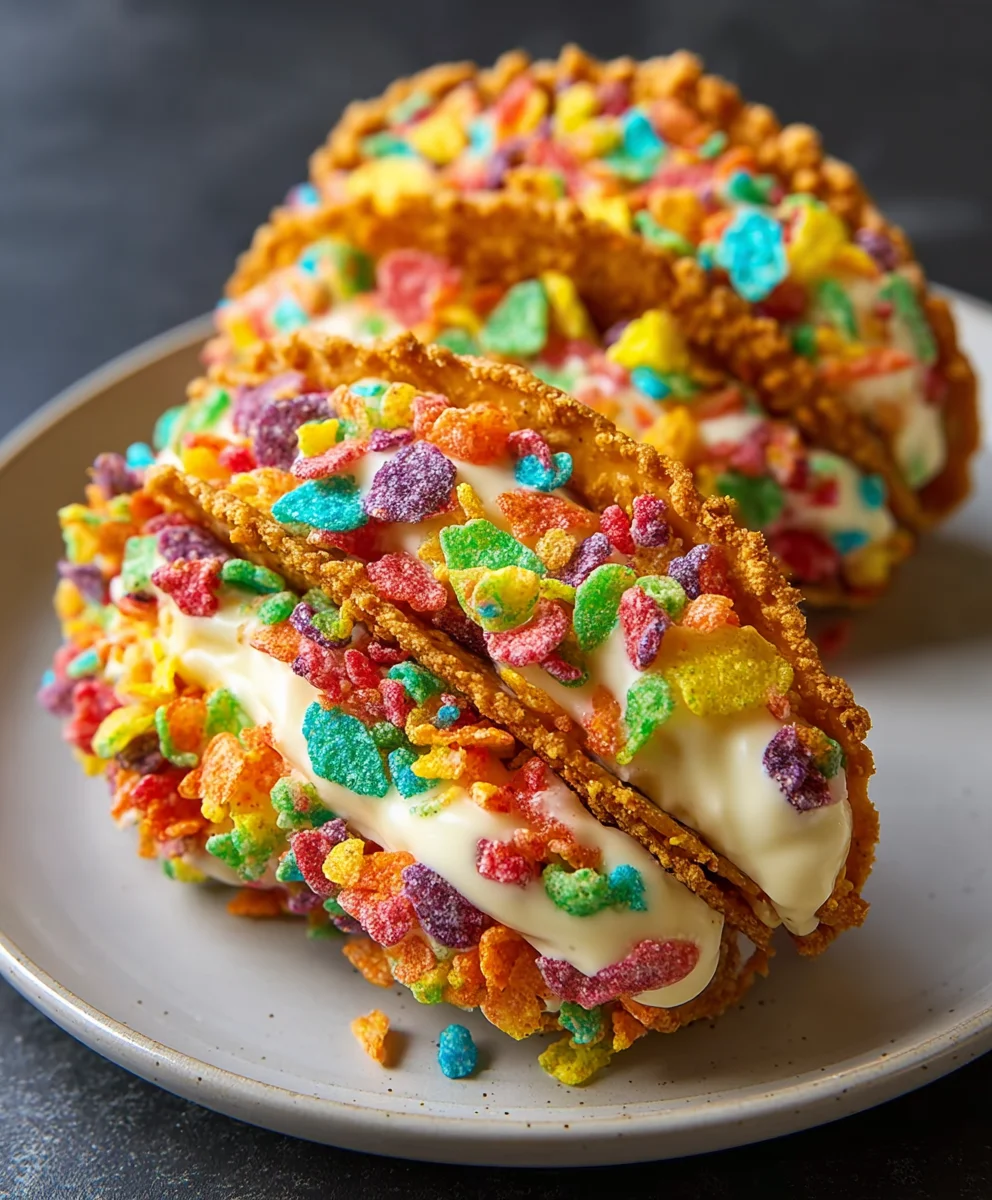
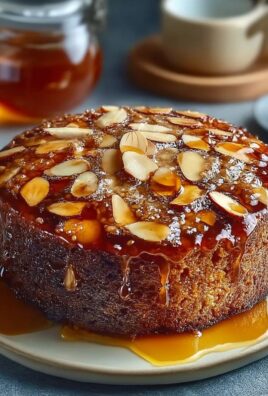
People absolutely adore this dish for its irresistible combination of textures and its stunning visual appeal. The crispy, sweet “taco” shell, often made from a delicate and lightly fried tortilla or a creative cookie-dough variation, provides the perfect contrast to the rich, creamy cheesecake filling. Each bite is a symphony of sweet, tangy, and vibrantly fruity notes, making these Fruity Pebbles Cheesecake Tacos an instant hit at any gathering, or simply a delightful treat for yourself. They are not just delicious; they evoke a sense of carefree fun and indulgent pleasure that is truly unforgettable.

Ingredients:
-
For the Delightfully Crisp “Taco Shells”:
- 1 cup (120g) all-purpose flour
- 2 tablespoons granulated sugar
- A generous pinch of salt (about ¼ teaspoon)
- 1 large egg, at room temperature
- 1 cup (240ml) whole milk, at room temperature
- 2 tablespoons unsalted butter, melted and cooled slightly, plus extra for greasing the pan
- 1 teaspoon pure vanilla extract
-
For the Velvety Smooth Cheesecake Filling:
- 16 ounces (450g) full-fat cream cheese, softened to room temperature (two 8-ounce blocks)
- ¾ cup (90g) powdered sugar (confectioners’ sugar), sifted to prevent lumps
- 1 teaspoon pure vanilla extract
- 1 cup (240ml) heavy cream (cold, straight from the fridge)
-
For the Iconic Fruity Pebbles Topping & Garnish:
- 3-4 cups Fruity Pebbles cereal, divided
- Optional: Melted white chocolate or a simple powdered sugar glaze for extra drizzle
- Optional: Additional whipped cream for serving
Preparing the Colorful “Taco Shells”
Creating the perfect “taco shell” for our Fruity Pebbles Cheesecake Tacos is a fun and surprisingly easy process that results in a pliable yet slightly crisp vessel for our creamy filling. Think of them as a delightful hybrid between a thin pancake and a soft crepe. We’ll be making these from scratch, ensuring they have the right texture and subtle sweetness to complement the vibrant filling.
- Melt the Butter and Set Aside: First things first, in a small microwave-safe bowl or saucepan, gently melt your 2 tablespoons of unsalted butter. Once melted, set it aside to cool slightly. We don’t want it too hot when it meets the egg!
- Combine Dry Ingredients: In a medium-sized mixing bowl, whisk together the all-purpose flour, granulated sugar, and that generous pinch of salt. Make sure they are well combined. This step ensures an even distribution of flavor and helps prevent lumps later on.
- Whisk Wet Ingredients: In a separate, larger mixing bowl, crack your large egg. Add the room temperature whole milk and the pure vanilla extract. Give these a good whisk until everything is smoothly incorporated. Now, slowly stream in your cooled, melted butter while continuously whisking. This helps emulsify the butter into the mixture and prevents it from solidifying when it hits the colder ingredients.
- Combine Wet and Dry: Gradually add the dry ingredient mixture to the wet ingredient mixture. Do this in about three additions, whisking well after each addition until no lumps remain. You’re aiming for a smooth, pourable batter, similar to thin pancake batter. Don’t overmix; just combine until smooth.
- Let the Batter Rest: Once your batter is smooth, cover the bowl with plastic wrap and let it rest on your countertop for at least 15-20 minutes. This resting period is crucial! It allows the flour to fully hydrate and the gluten to relax, which results in a more tender and pliable “taco shell.” Trust me, this small step makes a big difference in the final texture of your Fruity Pebbles Cheesecake Tacos.
- Heat Your Pan: While the batter is resting, place a non-stick frying pan or a crepe pan (preferably 8-inch or 9-inch in diameter) over medium-low heat. Let it heat up for a few minutes. You want an even, consistent heat.
- Prepare for Cooking: Lightly grease the pan with a tiny bit of butter, wiping away any excess with a paper towel. A very thin layer is all you need to prevent sticking and ensure a beautiful golden finish.
- Cook the “Taco Shells”: Pour about ¼ cup of batter into the center of the hot pan. Immediately lift the pan and gently tilt and swirl it in a circular motion until the batter spreads thinly and evenly to cover the bottom of the pan. Place the pan back on the heat.
- Monitor and Flip: Cook for about 1-2 minutes, or until the edges start to look dry and slightly crisp, and the bottom is lightly golden brown. You might even see small bubbles forming on the surface. Carefully slide a thin spatula underneath and flip the “taco shell.” Cook the second side for only about 30 seconds to 1 minute, just until it’s set and lightly cooked through. We don’t want it too crispy yet, as we need to shape it.
- Shape Immediately: As soon as you remove a cooked “taco shell” from the pan, it’s critical to shape it while it’s still warm and pliable. Drape the warm shell over a cooling rack, a wooden spoon handle, or a dedicated taco holder. This allows it to cool and firm up into that iconic taco shape. If you wait too long, it will become brittle and crack when you try to fold it. Repeat this process with the remaining batter, greasing the pan as needed for each new shell. You should yield about 10-12 shells. Set the shaped shells aside to cool completely before filling. They should be firm enough to hold their shape, ready to become the foundation for our incredible “Fruity Pebbles Cheesecake Tacos”.
Crafting the Creamy Cheesecake Filling for Your Fruity Pebbles Cheesecake Tacos
The heart of our Fruity Pebbles Cheesecake Tacos truly lies in the filling. We’re aiming for a rich, tangy, and incredibly smooth cheesecake consistency that holds up beautifully within our shells. This no-bake filling is surprisingly simple to make, but a few key steps will ensure it’s perfectly light and airy.
- Soften the Cream Cheese: This is a non-negotiable step for a lump-free, creamy filling. Ensure your two blocks of full-fat cream cheese are at room temperature. I usually take mine out of the fridge at least an hour before I plan to start. If you’re short on time, you can unwrap them and microwave them for about 15-20 seconds on low power, checking frequently.
- Whip the Cream Cheese: In a large mixing bowl, using an electric hand mixer or a stand mixer fitted with the paddle attachment, beat the softened cream cheese on medium-high speed for 2-3 minutes. You want it incredibly smooth, light, and fluffy, with no lumps whatsoever. Scrape down the sides of the bowl frequently to ensure everything gets incorporated. This aeration is key to a truly delightful cheesecake texture for your Fruity Pebbles Cheesecake Tacos.
- Incorporate Powdered Sugar: With the mixer on low speed, gradually add the sifted powdered sugar to the cream cheese. Sifting is important here to avoid any unwanted lumps. Once all the sugar is added, increase the speed to medium and beat for another 2-3 minutes, until the mixture is completely smooth, well combined, and looks even fluffier. Scrape down the bowl once more.
- Add Vanilla Extract: Stir in the pure vanilla extract. Beat briefly on low speed until just combined. Vanilla always adds that comforting warmth that perfectly balances the tanginess of the cream cheese.
- Whip the Heavy Cream: Now, for the magic that makes this filling light and airy! In a separate, chilled bowl (I like to put my bowl and whisk attachment in the freezer for 10-15 minutes beforehand), pour your cold heavy cream. Using your electric mixer, beat the heavy cream on high speed until stiff peaks form. This means when you lift the beaters, the cream stands up straight and holds its shape. Be careful not to overbeat, or you’ll end up with butter!
- Gently Fold in Whipped Cream: This is where we create that wonderful, light cheesecake texture. Take about a third of your whipped cream and gently fold it into the cream cheese mixture using a spatula. Once largely incorporated, add the remaining whipped cream and continue to gently fold until no streaks of white cream remain and the mixture is uniform. The key here is to fold, not beat! We want to retain all that lovely air we just whipped into the cream.
- Chill the Filling: Once fully combined, cover the bowl with plastic wrap and refrigerate the cheesecake filling for at least 30 minutes. Chilling allows the filling to firm up slightly, making it easier to work with and ensuring a stable, delicious texture when you assemble your Fruity Pebbles Cheesecake Tacos. You can even prepare this filling a day in advance!
Assembling Your Irresistible Fruity Pebbles Cheesecake Tacos
Now for the truly exciting part – bringing everything together to create those show-stopping Fruity Pebbles Cheesecake Tacos! This is where the magic happens, and the vibrant colors of the cereal meet the creamy indulgence of the cheesecake. Get ready for some fun!
- Gather Your Components: Make sure your cooled and shaped “taco shells” are ready and your chilled cheesecake filling is easily accessible. Have a shallow dish or plate with about 2-3 cups of Fruity Pebbles cereal spread out – this will be our crunchy coating.
- Prepare for Filling: If you used a piping bag for your cheesecake filling, now’s the time to snip off the tip. If not, a spoon or a small cookie scoop will work perfectly. I find a piping bag makes for a neater application, but it’s absolutely not essential.
- Fill the First Shell: Carefully pick up one of your pre-shaped “taco shells.” Hold it gently in one hand, making sure not to crack its delicate structure. Using your piping bag or spoon, add a generous amount of the chilled cheesecake filling into the taco shell. Start from one end and work your way to the other, making sure to fill it evenly. You want a good amount, but not so much that it’s overflowing. Aim for a beautiful, smooth mound that fills the cavity of the taco.
- Coat with Fruity Pebbles: This is where the “Fruity Pebbles Cheesecake Tacos” truly get their name and iconic look! Once your shell is filled with the creamy cheesecake mixture, gently press the exposed surface of the filling into the dish of Fruity Pebbles cereal. Make sure to cover the entire visible surface of the cheesecake filling with the colorful cereal. You can also gently sprinkle extra cereal over the top with your hand to ensure full coverage. The cereal should adhere easily to the sticky cheesecake filling.
- Repeat the Process: Carefully place the filled and coated Fruity Pebbles Cheesecake Taco onto a serving platter or a baking sheet lined with parchment paper. Repeat steps 3 and 4 with the remaining “taco shells” and cheesecake filling until all your tacos are beautifully assembled. Take your time, enjoy the process, and admire the vibrant colors coming to life!
- Arrange and Prepare for Chilling: Once all your tacos are assembled, arrange them neatly on your chosen platter or tray. They should stand upright in their taco shape.
Finishing Touches and Serving Suggestions for the Ultimate Fruity Pebbles Cheesecake Tacos Experience
You’ve done all the hard work, and your kitchen probably smells amazing with hints of vanilla and sweetness! Now it’s time for those final flourishes that make our Fruity Pebbles Cheesecake Tacos truly unforgettable, and some tips on how to best enjoy them.
- The Critical Chill Time: This step is incredibly important for the overall enjoyment of your Fruity Pebbles Cheesecake Tacos. Once assembled, transfer the platter of tacos to the refrigerator. Allow them to chill for at least 30 minutes, or even better, an hour. This chilling period allows the cheesecake filling to set up even more firmly, and it helps the Fruity Pebbles adhere securely. More importantly, it lets the flavors meld together beautifully, resulting in a perfectly cool and refreshing treat.
- Optional Drizzles for Extra Panache: For an extra layer of sweetness and visual appeal, consider a quick drizzle. Melt some white chocolate chips in a microwave-safe bowl (in 30-second intervals, stirring in between) or prepare a simple glaze by whisking powdered sugar with a tiny bit of milk or water until smooth. Using a spoon, zigzag the melted chocolate or glaze over the tops of your chilled Fruity Pebbles Cheesecake Tacos just before serving. This adds another dimension of flavor and makes them look even more professional!
- Garnish and Presentation: If you wish, you can add a small dollop of fresh whipped cream on top of each taco just before serving, and perhaps sprinkle a few extra stray Fruity Pebbles for a final burst of color and crunch. Arrange them artfully on a colorful platter to showcase their vibrant appeal.
- Serving Suggestions: Serve your Fruity Pebbles Cheesecake Tacos chilled. The contrast of the slightly crisp shell, the creamy, tangy cheesecake filling, and the delightful crunch of the Fruity Pebbles cereal is what makes this dessert so special. They are perfect on their own, but pairing them with a cold glass of milk brings out that classic cereal nostalgia. These are fantastic for parties, kids’ birthdays (or adult ones!), or just a fun weekend treat.
- Storage Tips: If by some miracle you have any Fruity Pebbles Cheesecake Tacos leftover, store them in an airtight container in the refrigerator. They are best enjoyed within 1-2 days. After that, the cereal might start to soften a bit, losing some of its signature crunch, though they will still be delicious!
And there you have it! A truly unique and fun dessert that combines childhood nostalgia with grown-up indulgence. Enjoy every colorful, creamy, crunchy bite of your homemade Fruity Pebbles Cheesecake Tacos!
Conclusion:
If you’ve followed along with our delightful journey through this recipe, you’ll know exactly why I’m so incredibly excited for you to experience the magic of these Fruity Pebbles Cheesecake Tacos firsthand. This isn’t just another dessert; it’s a vibrant, textural explosion that genuinely captivates from the very first glance. We’re talking about a crunchy, golden shell cradling a luscious, creamy cheesecake filling that’s perfectly sweet and tangy, all crowned with the playful, colorful, and unmistakably fruity crunch of Fruity Pebbles cereal. It’s a dessert that transcends typical expectations, offering a playful twist on classic flavors that will undoubtedly bring a smile to anyone’s face. Seriously, imagine the joy of biting into something so unexpectedly wonderful and perfectly balanced.
I truly believe this recipe is a must-try because it hits all the right notes: it’s fun, it’s flavorful, it’s visually stunning, and surprisingly, it’s incredibly satisfying to make. The contrast between the crispy taco shell and the smooth, rich cheesecake, topped with the pop of cereal, creates an unforgettable experience. It’s a dessert that sparks conversation, ignites nostalgia for childhood cereals, and impresses guests with its creativity and charm. Whether you’re looking to break away from your usual dessert routine or simply want to create something truly special and unique for an upcoming gathering, these tacos are your answer. They’re fantastic for injecting some much-needed joy and whimsy into any occasion, making ordinary moments feel extraordinarily special. Plus, the bright colors are simply irresistible, practically begging to be admired before they’re devoured.
Serving Suggestions and Creative Variations:
Once you’ve mastered the basic recipe, the fun doesn’t have to stop there! When it comes to serving these beauties, I love to present them on a colorful platter, perhaps with a dusting of powdered sugar or a delicate drizzle of white chocolate for an extra touch of elegance. For a truly decadent experience, consider pairing them with a scoop of vanilla bean ice cream or a dollop of freshly whipped cream. They also make an absolutely incredible individual dessert for a brunch party or a delightful treat for an afternoon tea, served alongside a glass of cold milk or a robust coffee. Imagine them at a kids’ birthday party – they’re guaranteed to be the star attraction!
But let’s talk about variations, because this is where your creativity can truly shine! While the original Fruity Pebbles Cheesecake Tacos are perfect as is, feel free to experiment. For the cereal topping, why not try other beloved classics? Think Lucky Charms for a touch of marshmallow magic, or even Captain Crunch for an extra sweet, buttery crunch. You could also infuse your cheesecake filling with different flavors; a hint of lemon zest would brighten it beautifully, or a dash of almond extract would add a sophisticated warmth. For a chocolate lover’s dream, try dipping your taco shells in melted milk or dark chocolate before they set, or even use chocolate-flavored cereal. Another wonderful idea is to incorporate fresh fruit directly into your cheesecake filling, like finely diced strawberries or raspberries, for bursts of natural sweetness and tartness that complement the creamy texture. If you’re feeling adventurous, you could even make mini versions for bite-sized delights, perfect for a dessert bar. The possibilities are truly endless, allowing you to tailor this recipe to your specific taste and the preferences of your loved ones.
Your Turn to Create and Share!
Now, it’s your turn! I genuinely hope this conclusion has ignited your culinary spark and inspired you to roll up your sleeves and give these magnificent tacos a try. Don’t be shy; embrace the fun of it! This recipe isn’t just about making food; it’s about creating moments, sharing joy, and indulging in a little bit of delicious whimsy. I can’t wait for you to experience the satisfying crunch, the creamy sweetness, and the burst of fruity flavor that makes these desserts so utterly irresistible. Once you’ve whipped up your own batch, I would absolutely love to hear about your experience. Did you try a fun variation? What did your family and friends think? Did they go wild for them? Please, don’t hesitate to share your stories, your photos, and any creative twists you came up with. Your feedback and culinary adventures truly inspire me, and I’m always thrilled to see how you make these recipes your own. Happy baking, and get ready to impress everyone with your incredible dessert creation!
Fruity Pebbles Cheesecake Tacos
A vibrant dessert marrying whimsical childhood nostalgia with sophisticated dessert artistry. Combines the delightful crunch of Fruity Pebbles cereal with silky smooth, tangy cheesecake, all nestled within a charming, handheld shell.
Ingredients
-
1 cup (120g) all-purpose flour
-
2 tablespoons granulated sugar
-
¼ teaspoon salt
-
1 large egg, at room temperature
-
1 cup (240ml) whole milk, at room temperature
-
2 tablespoons unsalted butter, melted and cooled, plus extra for greasing
-
1 teaspoon pure vanilla extract (for shells)
-
16 ounces (450g) full-fat cream cheese, softened
-
¾ cup (90g) powdered sugar, sifted
-
1 teaspoon pure vanilla extract (for filling)
-
1 cup (240ml) heavy cream, cold
-
3-4 cups Fruity Pebbles cereal, divided
-
Optional: Melted white chocolate or powdered sugar glaze for drizzle
-
Optional: Additional whipped cream for serving
Instructions
-
Step 1
Melt 2 tbsp unsalted butter and set aside to cool. In a medium bowl, whisk flour, granulated sugar, and salt. In a separate large bowl, whisk egg, milk, and 1 tsp vanilla extract, then slowly stream in the cooled melted butter. Gradually add dry ingredients to wet, whisking until smooth. Cover and let batter rest for 15-20 minutes. -
Step 2
Heat a lightly greased non-stick pan (8-9 inch) over medium-low heat. Pour about ¼ cup batter, swirl to cover the pan thinly. Cook for 1-2 minutes until edges dry and bottom is lightly golden. Flip and cook for 30 seconds to 1 minute. Immediately drape warm shell over a cooling rack or taco holder to shape as it cools. Repeat for remaining batter, yielding 10-12 shells. Set aside to cool completely. -
Step 3
In a large bowl, beat softened full-fat cream cheese on medium-high speed for 2-3 minutes until light and fluffy. Gradually beat in sifted powdered sugar for 2-3 minutes until smooth, then stir in 1 tsp vanilla extract. -
Step 4
In a separate, chilled bowl, whip cold heavy cream on high speed until stiff peaks form. Gently fold the whipped cream into the cream cheese mixture until just combined, being careful not to overmix. Cover and refrigerate the filling for at least 30 minutes to firm up. -
Step 5
Spread 2-3 cups Fruity Pebbles cereal in a shallow dish. Carefully fill each cooled, shaped taco shell generously with the chilled cheesecake filling. Gently press the exposed filling surface into the Fruity Pebbles cereal to coat completely. Place assembled tacos on a serving platter or parchment-lined baking sheet. -
Step 6
Refrigerate the assembled tacos for at least 30 minutes (preferably 1 hour) to allow the filling to set and flavors to meld. Optionally, drizzle with melted white chocolate or a powdered sugar glaze just before serving. Serve chilled. Store any leftovers in an airtight container in the refrigerator for 1-2 days.
Important Information
Nutrition Facts (Per Serving)
It is important to consider this information as approximate and not to use it as definitive health advice.
Allergy Information
Please check ingredients for potential allergens and consult a health professional if in doubt.
Leave a Comment