

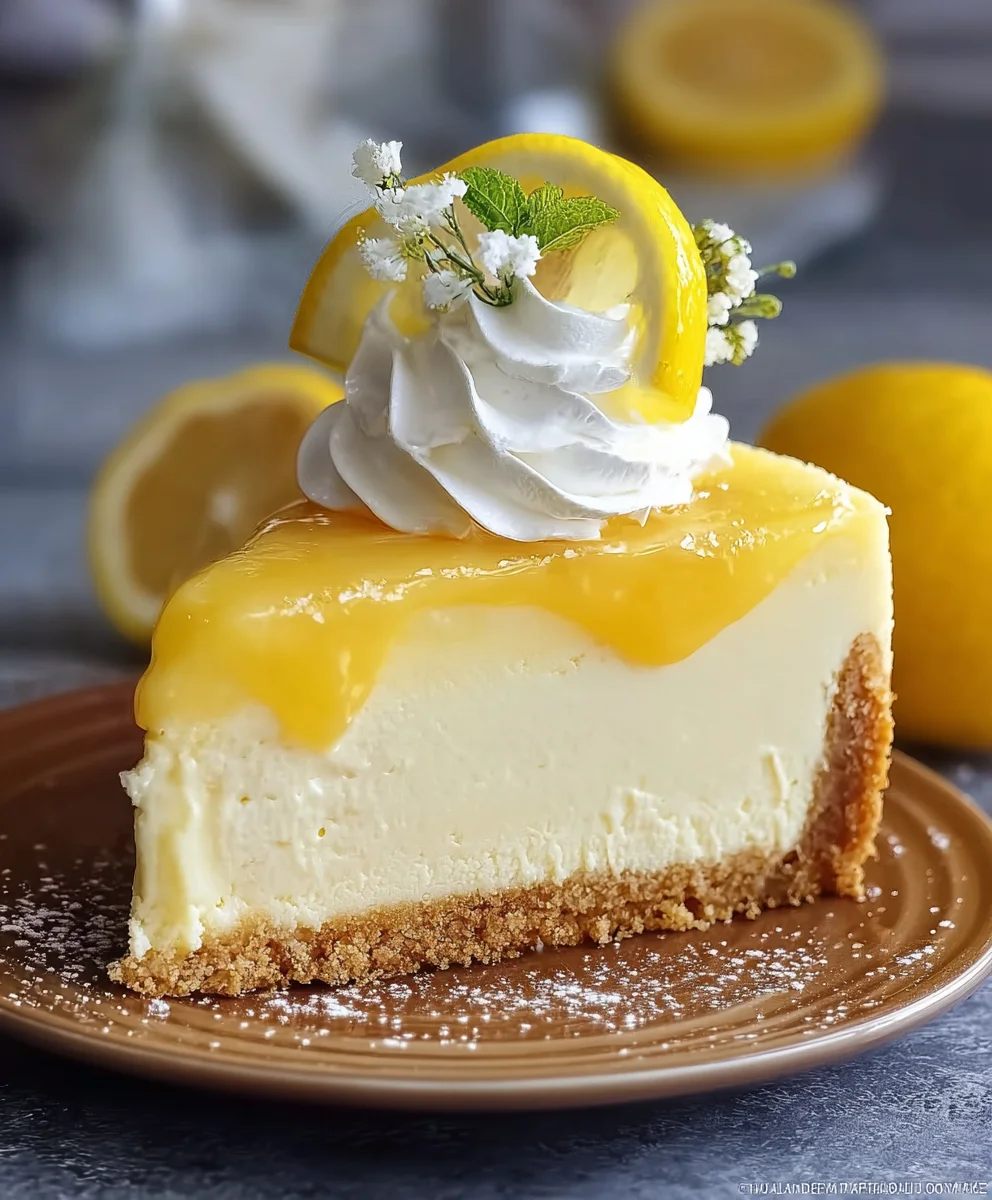
Luscious Lemon Cheesecake is more than just a dessert; it’s an experience, a symphony of flavors that brightens any table and delights every palate. Imagine a moment where the zesty brightness of fresh lemons meets the rich, velvety smoothness of a classic cheesecake, all nestled atop a perfectly crunchy graham cracker crust. This exquisite combination isn’t merely a fleeting trend; cheesecake, in its many forms, boasts a history stretching back to ancient Greece, evolving through centuries to become the beloved culinary icon we cherish today. While its origins are ancient, the addition of vibrant lemon brings a modern, refreshing twist that makes it utterly irresistible.
Why This Luscious Lemon Cheesecake is a Must-Try
People worldwide adore this particular rendition for countless reasons. Firstly, there’s the unparalleled taste: the sharp, invigorating tang of lemon cuts through the creamy sweetness, creating a perfectly balanced profile that is both comforting and exhilarating. Then, consider the texture – a dreamlike creaminess that melts in your mouth, complemented by the satisfying bite of the crust. It’s a versatile dessert, equally suited for a sophisticated dinner party or a casual Sunday afternoon treat. I promise you, each spoonful delivers a burst of sunshine, making it an ideal choice for celebrations or simply to elevate an ordinary day into something special.

Ingredients:
- For the Graham Cracker Crust:
- 1 ½ cups (about 10-12 full sheets) graham cracker crumbs (finely crushed)
- ½ cup (1 stick or 113g) unsalted butter, melted
- ¼ cup granulated sugar
- Pinch of salt
- For the Luscious Lemon Cheesecake Filling:
- 3 (8-ounce) packages full-fat cream cheese, softened to room temperature (24 ounces total or 680g)
- 1 ½ cups granulated sugar
- 4 large eggs, room temperature
- ½ cup full-fat sour cream, room temperature
- 2 teaspoons pure vanilla extract
- Zest of 2 large lemons (about 2 tablespoons)
- ½ cup freshly squeezed lemon juice (from about 3-4 large lemons)
- 1 tablespoon all-purpose flour (optional, helps prevent cracks)
- For the Tangy Lemon Sour Cream Topping:
- 1 cup full-fat sour cream
- ¼ cup granulated sugar
- 1 tablespoon freshly squeezed lemon juice
- ½ teaspoon pure vanilla extract
- For Garnish (Optional):
- Fresh lemon slices or twists
- Fresh berries (raspberries, blueberries, or sliced strawberries work beautifully)
- Whipped cream or meringue swirls
Preparing the Crust: The Foundation of Your Luscious Lemon Cheesecake
-
Preheat and Prepare Your Pan: First things first, let’s get that oven ready. Preheat your oven to 350°F (175°C). Take out your 9-inch springform pan. This is crucial for a clean release later. If you’re planning on using a water bath for baking, which I highly recommend for a crack-free and incredibly creamy cheesecake, you’ll want to wrap the outside of your springform pan tightly with several layers of heavy-duty aluminum foil. Make sure it goes all the way up the sides to prevent any water from seeping in.
-
Crush the Graham Crackers: Now, for the fun part! If you don’t have pre-crushed graham cracker crumbs, place your graham cracker sheets into a large zip-top bag and use a rolling pin to crush them into very fine crumbs. Alternatively, you can use a food processor for a quicker and more uniform result. You’re aiming for about 1 ½ cups of fine crumbs. No large pieces allowed here, as they can make the crust uneven.
-
Combine the Crust Ingredients: In a medium bowl, combine the graham cracker crumbs, ¼ cup of granulated sugar, and the pinch of salt. Give it a good whisk to ensure everything is evenly distributed. Then, pour in the ½ cup of melted unsalted butter. Using a fork or your hands, mix until the crumbs are thoroughly moistened and resemble wet sand. Every single crumb should be coated in butter; this is what holds our crust together.
-
Press the Crust: Transfer the buttery graham cracker mixture into the bottom of your prepared springform pan. Using the bottom of a flat-bottomed glass or your clean hands, firmly and evenly press the mixture across the bottom of the pan. You want a compact, even layer. You can extend it slightly up the sides if you like a thicker edge, but a flat bottom crust is traditional and perfectly fine for this Luscious Lemon Cheesecake. Pressing it firmly is key to preventing it from crumbling later.
-
Pre-bake the Crust: Place the springform pan with the pressed crust into your preheated oven and bake for 8-10 minutes. This pre-baking step helps to set the crust, giving it a lovely golden hue and a slightly crisp texture that will stand up to the creamy filling. Once baked, remove it from the oven and set it aside on a wire rack to cool completely while you prepare the filling. It’s important that the crust is cool so it doesn’t melt the cheesecake filling when it’s poured in.
Crafting the Luscious Lemon Cheesecake Filling: Smoothness is Key
-
Gather Your Room Temperature Ingredients: This is perhaps the most important tip for a truly smooth, lump-free cheesecake: all your cold ingredients, especially the cream cheese, eggs, and sour cream, MUST be at room temperature. I usually take them out of the fridge at least 1-2 hours before I start baking. Room temperature ingredients emulsify much better, resulting in that incredibly smooth, velvety texture we’re aiming for in our Luscious Lemon Cheesecake.
-
Zest and Juice the Lemons: Using a fine grater or a microplane, zest your two large lemons. Be careful to only get the bright yellow part and none of the bitter white pith. You should end up with about 2 tablespoons of fragrant zest. Then, slice and juice those same lemons until you have ½ cup of fresh lemon juice. I always recommend fresh juice for its vibrant flavor – it makes all the difference.
-
Cream the Cream Cheese: In the bowl of a stand mixer fitted with the paddle attachment (or a large bowl with a hand mixer), beat the softened cream cheese on medium speed for about 2-3 minutes. You want it to be incredibly smooth and creamy, with absolutely no lumps. Scrape down the sides and bottom of the bowl frequently to ensure everything is incorporated. This initial creaming sets the stage for a perfect texture.
-
Add Sugar and Flour: Gradually add the 1 ½ cups of granulated sugar to the creamed cheese, beating on medium-low speed until just combined and smooth. Continue to scrape down the bowl. If you’re using it, whisk in the 1 tablespoon of all-purpose flour here. The flour is an optional but helpful addition; it acts as a stabilizer, helping to prevent cracks in your cheesecake and giving it a slightly firmer set without affecting the lusciousness.
-
Incorporate the Eggs (Carefully!): Add the eggs one at a time, beating on low speed only until each egg is just incorporated before adding the next. Do not overmix at this stage! Overmixing introduces too much air into the batter, which can cause the cheesecake to puff up too much during baking and then collapse, leading to cracks. We want a dense, smooth consistency, not an airy one.
-
Stir in the Remaining Flavorings: With the mixer on low, or even better, by hand with a spatula, gently fold in the sour cream, vanilla extract, lemon zest, and fresh lemon juice. Mix until everything is just barely combined. Again, the less air you incorporate, the better the final texture of your Luscious Lemon Cheesecake will be. Give the bowl one final scrape to ensure there are no unmixed pockets.
Baking Your Luscious Lemon Cheesecake: The Water Bath Method
-
Prepare the Water Bath: This is a game-changer for cheesecake perfection. Bring a kettle of water to a boil. Place your foil-wrapped springform pan, with the cooled crust, inside a larger roasting pan. This roasting pan will hold the hot water.
-
Pour the Filling: Carefully pour the smooth cheesecake filling over the pre-baked and cooled graham cracker crust in the springform pan. Gently tap the pan on the counter a few times to release any large air bubbles that might be trapped within the batter. This contributes to a flawless finish.
-
Create the Water Bath: Carefully transfer the roasting pan (with the springform pan inside it) to the oven rack. Once it’s securely on the rack, pour the boiling water into the larger roasting pan, making sure the water comes about halfway up the sides of the springform pan. Be very careful not to get any water into the cheesecake itself. The steam from the water bath creates a moist baking environment that helps the cheesecake bake evenly, prevents cracking, and results in that incredibly creamy, custardy texture you desire.
-
Bake to Perfection: Bake the Luscious Lemon Cheesecake for 60-75 minutes. The baking time can vary depending on your oven, so keep an eye on it. The cheesecake is done when the edges are set, and the center (about a 2-3 inch circle) still has a slight wobble when you gently shake the pan. It will continue to cook and set as it cools. Overbaking can lead to a dry cheesecake and cracks, so trust the wobble!
-
Cooling in Stages: Once baked, turn off the oven but leave the cheesecake inside the water bath with the oven door ajar for 1 hour. This slow, gradual cooling prevents a drastic temperature change, which is another common cause of cracking. After 1 hour, carefully remove the springform pan from the water bath (remove the entire roasting pan from the oven first, then lift out the springform pan) and unwrap the foil. Place the cheesecake on a wire rack to cool completely to room temperature, which will take another 2-3 hours. Once it’s at room temperature, run a thin knife around the edge of the cheesecake (while it’s still in the pan) to prevent it from sticking as it continues to chill and contract.
Preparing and Applying the Tangy Lemon Sour Cream Topping
-
Mix the Topping Ingredients: While your cheesecake is cooling to room temperature, you can prepare the delightful lemon sour cream topping. In a small bowl, whisk together the 1 cup of full-fat sour cream, ¼ cup of granulated sugar, 1 tablespoon of fresh lemon juice, and ½ teaspoon of vanilla extract until it’s perfectly smooth and well combined. This topping adds another layer of tangy flavor and a silky texture that perfectly complements the rich cheesecake.
-
Apply the Topping: Once your cheesecake has cooled to room temperature, gently and evenly spread the prepared lemon sour cream topping over the entire surface of the cheesecake. Take your time to create a smooth, beautiful layer.
-
A Quick Return to the Oven (Optional but Recommended): For the best results and a set topping, place the cheesecake back into the oven (which should now be off and cooling, but still slightly warm, or you can preheat it to 300°F/150°C if it’s completely cold) for just 5-10 minutes. This very brief bake helps to set the sour cream topping without cooking it through. Alternatively, you can simply chill it directly, and the topping will set, but the brief oven time gives it a superior texture.
Chilling, Garnish, and Serving Your Luscious Lemon Cheesecake
-
Chill Thoroughly: Once the topping is set (or if you skipped the brief bake, after applying it), cover the cheesecake loosely with plastic wrap. Transfer it to the refrigerator and chill for a minimum of 6 hours, but ideally overnight. This extended chilling time is absolutely essential for the cheesecake to fully set, develop its full flavor, and achieve that iconic dense, creamy texture that makes a Luscious Lemon Cheesecake so irresistible. Rushing this step will result in a less firm and potentially messy slice.
-
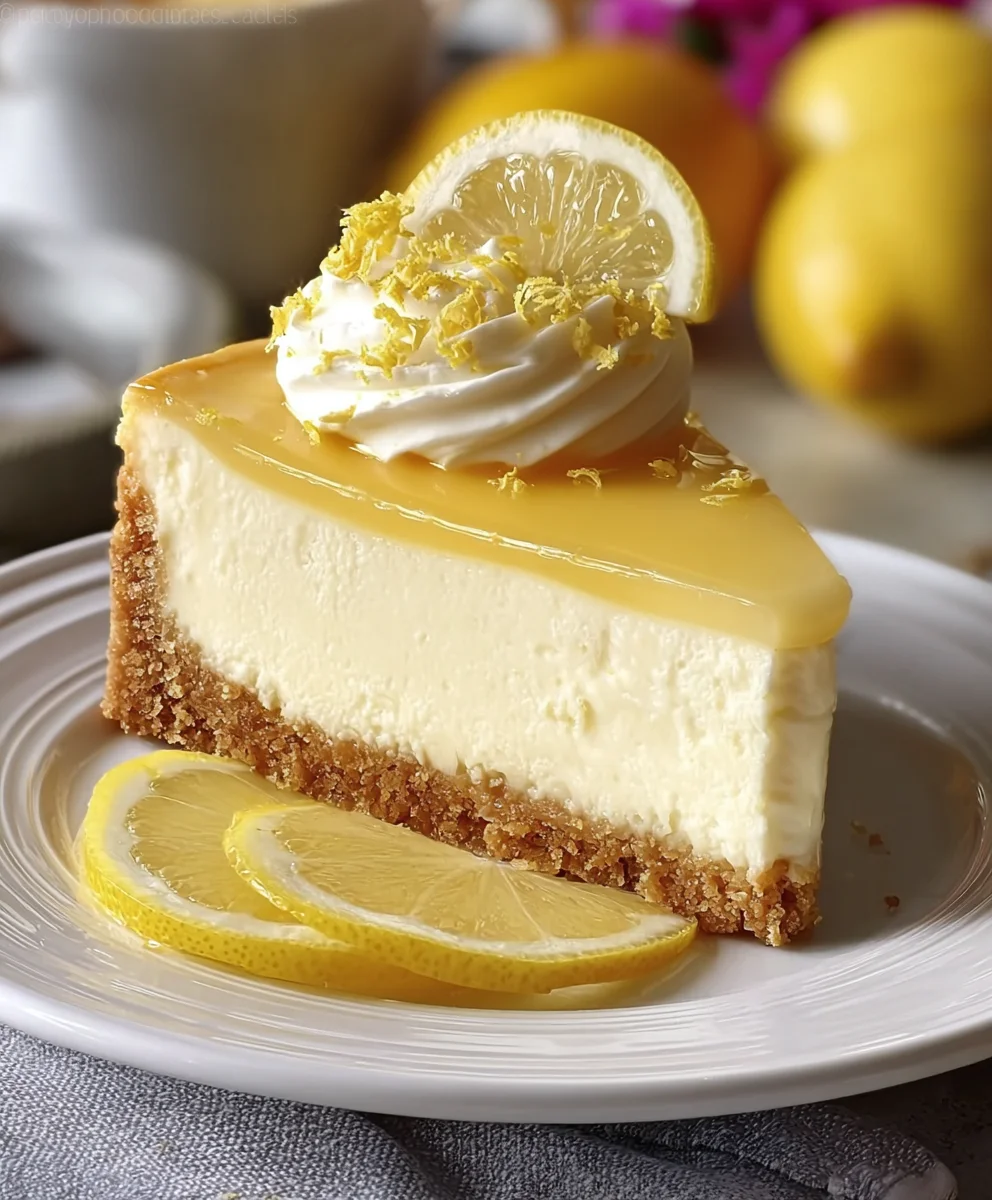
Release and Garnish: When you’re ready to serve, carefully remove the sides of the springform pan. You might need to run a thin, hot knife around the edge one last time if it seems to be sticking. For a clean cut, use a hot, sharp knife, wiping it clean between each slice. Garnish your beautiful Luscious Lemon Cheesecake with fresh lemon slices or twists, bright berries, or a dollop of whipped cream. These garnishes not only add visual appeal but also complement the lemon flavor perfectly.
-
Serve and Enjoy: Slice into your perfectly chilled cheesecake and prepare to be amazed. Each bite should be a delightful balance of tangy lemon and rich, creamy cheesecake on a perfectly crisp graham cracker crust. This is truly a dessert that impresses, and it’s a testament to your careful preparation. Leftovers, if there are any, should be stored covered in the refrigerator for up to 5 days, though I doubt it will last that long!
<h2>Conclusion:</h2>
<p>As we reach the sweet conclusion of our culinary journey, I truly hope you’re feeling inspired and excited to roll up your sleeves and get baking. This isn’t just another dessert recipe; it’s an experience waiting to unfold in your kitchen. I’ve poured my heart into perfecting every detail, ensuring that when you present this masterpiece, it will be met with gasps of delight and appreciative murmurs. The delicate balance of bright, tangy lemon and rich, creamy cheesecake is nothing short of magical, creating a symphony of flavors that dances on the palate. <strong>It’s an absolute showstopper</strong> that manages to feel both incredibly luxurious and surprisingly approachable to make. Trust me when I say, once you’ve tasted the velvety smooth texture and the vibrant citrus kick, you’ll understand why this particular rendition stands head and shoulders above the rest. It’s the kind of dessert that lingers in your memory long after the last bite, calling you back for more, solidifying its place as a truly essential addition to your baking repertoire. This isn’t just a dessert; it’s a celebration in every single bite, perfectly marrying simplicity with undeniable elegance.</p>
<h4>Elevate Your Experience with Perfect Pairings & Creative Twists</h4>
<p>Now, let’s talk about how to truly make your <strong>Luscious Lemon Cheesecake</strong> shine, both in presentation and flavor. While it’s absolutely divine served simply on its own, perhaps with just a light dusting of powdered sugar, there are so many delightful ways to enhance its appeal. Imagine a slice adorned with a handful of fresh, glistening raspberries or blueberries; their slight tartness and juicy burst perfectly complement the rich cheesecake. A dollop of freshly whipped cream, lightly sweetened and perhaps infused with a touch of vanilla or even a whisper of lemon zest, adds another layer of indulgence. For a more sophisticated touch, consider drizzling a vibrant raspberry coulis or a simple strawberry sauce over each serving. The vibrant red against the pale yellow creates a stunning visual contrast that hints at the explosion of flavors to come. <strong>Pair it with a fragrant cup of Earl Grey tea</strong> for an afternoon treat, or with a glass of sparkling prosecco or a sweet dessert wine for an elegant end to an evening meal. The possibilities for personalizing the serving experience are truly endless, allowing you to tailor it to any occasion or mood, ensuring every presentation is as memorable as the taste.</p>
<p>And don’t stop there! Think about variations that can make this recipe uniquely yours. While the classic graham cracker crust is always a winner, you could experiment with a shortbread cookie crust for a buttery, crisp base, or even a gingersnap crust for a warm, spicy undertone that would be absolutely phenomenal, especially during cooler months. For an extra pop of flavor and texture, consider folding in some finely chopped candied lemon peel into the batter itself, or even creating a swirl of homemade lemon curd just before baking for an intensified citrus experience. If you’re feeling particularly adventurous, you could even try making individual mini cheesecakes in muffin tins or ramekins, perfect for portion control and elegant entertaining. Simply adjust the baking time accordingly. Imagine garnishing these little delights with a delicate curl of fresh lemon zest and a tiny sprig of mint. <strong>These small touches elevate the entire dessert</strong> from simply delicious to truly unforgettable, showcasing your personal culinary flair and making each bite a discovery.</p>
<h4>Your Culinary Adventure Awaits!</h4>
<p>My deepest hope is that this recipe empowers you to create something truly spectacular in your kitchen. There’s an immense satisfaction that comes from baking a dessert from scratch, especially one that elicits such joy from those who taste it. <strong>Don’t hesitate, take the leap!</strong> Gather your ingredients, follow the steps, and prepare to be amazed by what you can achieve. I am absolutely confident that you will succeed in crafting a dessert that will earn you rave reviews and become a cherished staple in your home. Once you’ve made your delicious cheesecake, I would be absolutely thrilled to hear about your experience. Did you add a special garnish? Did you try a unique variation with the crust or filling? What reactions did you get from your family and friends? I genuinely love seeing your creations and hearing your stories. Please feel free to share your photos and insights, perhaps even tagging me in your culinary adventures! Your feedback not only brightens my day but also inspires others in our baking community, fostering a vibrant exchange of ideas and delicious moments. So go forth, bake with passion, and prepare to indulge in the pure bliss of this incredible lemon cheesecake. <strong>Happy baking, my friends!</strong></p>
Luscious Lemon Cheesecake
A zesty and luscious lemon cheesecake featuring a creamy, smooth filling atop a crunchy graham cracker crust. This delightful dessert balances the bright tang of fresh lemons with rich, velvety creaminess, perfect for any occasion.
Ingredients
-
1 ½ cups graham cracker crumbs
-
½ cup (1 stick or 113g) unsalted butter, melted
-
¼ cup granulated sugar
-
Pinch of salt
-
3 (8-ounce) packages full-fat cream cheese, softened (24 oz total / 680g)
-
1 ½ cups granulated sugar
-
4 large eggs, room temperature
-
½ cup full-fat sour cream, room temperature
-
2 teaspoons pure vanilla extract
-
Zest of 2 large lemons (about 2 tablespoons)
-
½ cup freshly squeezed lemon juice (from about 3-4 large lemons)
-
1 tablespoon all-purpose flour (optional)
-
1 cup full-fat sour cream
-
¼ cup granulated sugar
-
1 tablespoon freshly squeezed lemon juice
-
½ teaspoon pure vanilla extract
-
Fresh lemon slices or twists (for garnish, optional)
-
Fresh berries (for garnish, optional)
-
Whipped cream or meringue swirls (for garnish, optional)
Instructions
-
Step 1
Preheat oven to 350°F (175°C). Wrap a 9-inch springform pan in foil (for water bath). Combine 1½ cups graham cracker crumbs, ¼ cup sugar, salt, and ½ cup melted butter. Press firmly into the pan bottom. Bake 8-10 minutes, then cool. -
Step 2
Ensure cream cheese, eggs, and sour cream are at room temperature. Zest 2 large lemons (approx. 2 tbsp) and juice 3-4 lemons (approx. ½ cup). -
Step 3
Beat 24 oz (680g) softened cream cheese until smooth. Gradually add 1½ cups sugar, then 1 tbsp flour (optional). Beat in 4 large eggs, one at a time, on low speed until just combined. Do not overmix. Gently fold in ½ cup sour cream, 2 tsp vanilla, lemon zest, and ½ cup lemon juice. -
Step 4
Pour filling over cooled crust in the foil-wrapped springform pan. Place pan inside a larger roasting pan. Transfer to oven rack, then carefully pour boiling water into the roasting pan, halfway up the sides of the springform. -
Step 5
Bake 60-75 minutes until edges are set and the center slightly wobbles. Turn off oven, leave cheesecake in water bath with door ajar for 1 hour. Remove, unwrap foil, and cool on a wire rack for 2-3 hours. Run a knife around the edge. -
Step 6
Whisk 1 cup sour cream, ¼ cup sugar, 1 tbsp lemon juice, and ½ tsp vanilla until smooth. Evenly spread over the cooled cheesecake. (Optional: Bake at 300°F/150°C for 5-10 minutes to set topping, or chill directly). -
Step 7
Cover cheesecake and chill in the refrigerator for a minimum of 6 hours, ideally overnight, to fully set. Remove springform sides. Slice with a hot, sharp knife, wiping between slices. Garnish with lemon slices, fresh berries, or whipped cream.
Important Information
Nutrition Facts (Per Serving)
It is important to consider this information as approximate and not to use it as definitive health advice.
Allergy Information
Please check ingredients for potential allergens and consult a health professional if in doubt.
Leave a Comment