

Christmas Tree Rolls are more than just a delightful side dish; they are a true beacon of festive cheer, transforming any holiday table into a wonderland of culinary joy. As we approach the most wonderful time of the year, I am absolutely delighted to present a recipe that promises to elevate your festive feast from wonderful to truly unforgettable. These charming, edible centerpieces are designed to captivate your guests even before they take their first bite, making them an indispensable part of your holiday gathering.
While the cherished art of bread making dates back millennia, the tradition of shaping foods into whimsical, festive forms for seasonal celebrations is a practice beloved across many cultures. These particular rolls, with their undeniable visual appeal, perfectly capture the magical spirit of Christmas, inviting warmth and communal joy into our homes. They represent a modern, yet heartfelt, twist on classic holiday baking, carefully crafted to impress and delight everyone gathered around your table and create lasting memories.
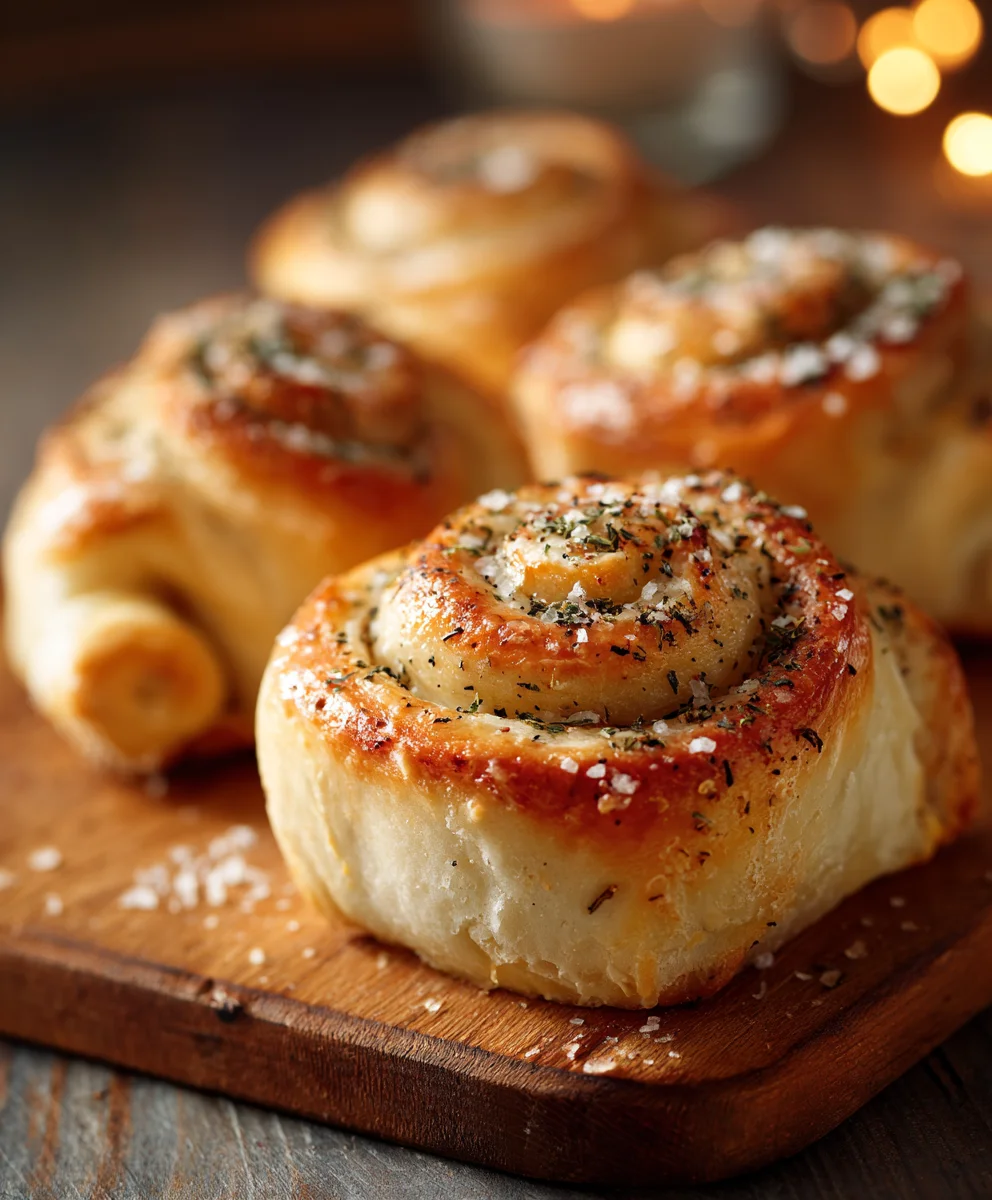
What makes these Christmas Tree Rolls so universally loved? Beyond their compelling presentation, it’s the irresistible harmony of taste and texture. Imagine sinking your teeth into a light, fluffy, and golden-brown roll—subtly sweet, wonderfully buttery, and utterly comforting. They are surprisingly easy to prepare, yet their impressive, intricate appearance suggests hours of meticulous effort, making them a fantastic, stress-free addition for busy hosts who still want to make a significant impact. Whether served alongside a grand holiday roast or simply enjoyed warm with a smear of butter, these rolls are guaranteed to be a cherished highlight of your holiday spread.

Ingredients:
- For the Dough:
- 1 cup (240ml) warm whole milk (about 105-115°F / 40-46°C)
- 2 ¼ teaspoons (7g or 1 standard packet) active dry yeast
- 2 tablespoons granulated sugar
- 1 large egg, at room temperature
- ¼ cup (56g) unsalted butter, melted and cooled slightly
- 3 to 3 ½ cups (360-420g) all-purpose flour, plus more for dusting
- 1 teaspoon salt
- For the Herb & Garlic Butter Filling:
- ½ cup (113g) unsalted butter, softened
- 3-4 cloves garlic, minced very finely
- 2 tablespoons fresh parsley, finely chopped
- 1 tablespoon fresh chives, finely chopped
- 1 teaspoon fresh rosemary, finely chopped
- ½ teaspoon salt
- ¼ teaspoon black pepper
- 1 ½ cups (about 170g) shredded cheese (a mix of mozzarella and Parmesan works wonderfully, or your favorite melty cheese)
- For the Egg Wash & Garnish:
- 1 large egg, beaten with 1 tablespoon water
- Optional: Extra fresh herbs (parsley, chives) for garnish after baking
- Optional: A small sprig of rosemary or a star-shaped piece of cheese/pepper for the “tree topper”
Part 1: Preparing the Dough for Your Christmas Tree Rolls
Creating a wonderfully soft and pliable dough is the foundational step for these delightful Christmas Tree Rolls. It’s a process that requires a little patience, but trust me, the results are incredibly rewarding.
- Activate the Yeast: In a large mixing bowl, or the bowl of your stand mixer fitted with the dough hook attachment, pour in the warm milk. Make sure the milk isn’t too hot, as it can kill the yeast, or too cold, which won’t activate it properly. Aim for a temperature that feels like a warm bath. Sprinkle the granulated sugar and the active dry yeast over the milk. Give it a gentle stir and let it sit for about 5-10 minutes. You’ll know the yeast is active when it becomes foamy and bubbly on the surface. If it doesn’t foam, your yeast might be old or your milk temperature was off, and it’s best to start again. This step is crucial for ensuring your Christmas Tree Rolls rise beautifully and are light and airy.
- Combine Wet Ingredients: Once your yeast is visibly active, add the room temperature egg and the slightly cooled melted butter to the bowl. Whisk everything together until it’s well combined. Using room temperature ingredients helps them integrate better and leads to a more consistent dough texture.
- Incorporate Dry Ingredients: Gradually add 3 cups of the all-purpose flour and the salt to the wet mixture. If you’re using a stand mixer, start on low speed, allowing the ingredients to come together. If mixing by hand, use a sturdy spoon or a Danish dough whisk. Continue mixing until a shaggy dough forms and most of the flour is incorporated.
- Knead the Dough: Turn the dough out onto a lightly floured surface. Begin kneading the dough. If you’re using a stand mixer, increase the speed to medium-low and let the dough hook do the work. Knead for 7-10 minutes. If kneading by hand, push the dough away from you with the heels of your hands, fold it back over, turn, and repeat. You’ll notice the dough transforming from a sticky mass into a smooth, elastic, and pliable ball. It should be slightly tacky to the touch but shouldn’t stick excessively to your hands or the bowl. If the dough feels too sticky, add the remaining ½ cup of flour, one tablespoon at a time, until it reaches the right consistency. Do not add too much flour, as this can result in dry, dense Christmas Tree Rolls. A soft dough is key for tender rolls.
- First Rise: Lightly grease a clean large bowl with a little oil (vegetable, olive, or neutral oil works well). Place the kneaded dough into the bowl, turning it once to coat the entire surface with oil. This prevents it from drying out during the rise. Cover the bowl tightly with plastic wrap or a clean kitchen towel. Place the bowl in a warm, draft-free spot in your kitchen. Let the dough rise for 1 to 1 ½ hours, or until it has doubled in size. The exact time will depend on the temperature of your kitchen. A good trick for a warm spot is to turn your oven on for a minute or two, then turn it off and place the covered bowl inside.
Part 2: Crafting the Herb and Cheese Filling for Your Christmas Tree Rolls
While your dough is happily rising, it’s the perfect time to prepare the aromatic and flavorful filling that will truly make these Christmas Tree Rolls shine. This savory butter and herb mixture is what infuses each bite with incredible taste.
- Soften the Butter: Ensure your unsalted butter is properly softened. It should be pliable enough to easily mix but not melted or greasy. If it’s too hard, microwave it in 10-second intervals until it reaches the right consistency.
- Combine Ingredients: In a medium bowl, combine the softened butter, finely minced garlic, finely chopped fresh parsley, chives, and rosemary. Add the salt and black pepper. Using fresh herbs is highly recommended here, as they provide a much brighter and more vibrant flavor compared to dried herbs. However, if fresh herbs are unavailable, you can use ½ to 1 teaspoon of each dried herb, keeping in mind the flavor will be more concentrated.
- Mix Thoroughly: Use a fork or a small spatula to mix all the ingredients together until they are well combined and the butter is evenly flavored. You want the garlic and herbs to be distributed throughout the butter, so every single Christmas Tree Roll gets a burst of flavor.
- Prepare the Cheese: Have your shredded cheese ready. I find a combination of low-moisture mozzarella for its meltiness and Parmesan for its sharp, salty kick works beautifully. However, feel free to use cheddar, Gruyère, or any other cheese that you enjoy and that melts well. Set it aside; we’ll be layering this on top of the butter mixture.
Part 3: Shaping and Assembling Your Festive Christmas Tree Rolls
This is where the magic happens and your Christmas Tree Rolls truly take shape! The process of rolling, filling, cutting, and arranging is what gives them their distinctive and festive appearance.
- Prepare Your Baking Surface: Line a large baking sheet (approximately 13×18 inches or a half-sheet pan) with parchment paper. This is essential to prevent sticking and makes cleanup a breeze. If you want to create a perfect Christmas tree shape, you might want to draw a light outline of a Christmas tree on the parchment paper as a guide for arranging your rolls.
- Punch Down the Dough: Once your dough has doubled in size, gently punch it down to release the air. This helps to create an even crumb structure. Turn the dough out onto a lightly floured surface.
- Roll Out the Dough: Using a rolling pin, roll the dough into a large rectangle, approximately 18×12 inches (45×30 cm). Aim for an even thickness, about ¼-inch (0.6 cm) thick. Don’t worry if it’s not perfectly rectangular; you can gently nudge it into shape as you roll. A larger surface area means more delicious filling in each roll!
- Spread the Herb Butter: Evenly spread the prepared herb and garlic butter mixture over the entire surface of the dough, leaving about a ½-inch border along one of the long edges. Ensure the butter is spread right to the other three edges. You can use an offset spatula or the back of a spoon for this. The goal is to get a consistent layer of flavor.
- Sprinkle the Cheese: Generously sprinkle the shredded cheese over the herb butter layer. Gently press the cheese down slightly so it adheres to the butter, ensuring it stays put when you roll the dough.
- Roll the Dough: Starting from one of the long edges (the one without the ½-inch butter-free border), carefully and tightly roll the dough into a log. Aim for a snug roll to prevent large gaps in your finished rolls. As you roll, ensure the seam is at the bottom.
- Cut the Rolls: Now comes the precision part! Using a sharp knife or, even better, unflavored dental floss, cut the log into approximately 1-inch (2.5 cm) thick slices. For a cleaner cut with floss, slide a piece of floss under the log, cross the ends over the top, and pull firmly to slice through. You should yield about 18-20 individual rolls.
-
Arrange on Baking Sheet: This is where your Christmas tree takes shape! Place the individual rolls onto your prepared baking sheet, arranging them to form a Christmas tree pattern.
- Start with one roll at the very top for the “star.”
- Below that, place two rolls for the next row.
- Then three rolls, and so on, gradually increasing the number of rolls in each row to create a triangular tree shape.
- For the trunk, place 1-2 rolls at the bottom center of the tree.
Leave a little space between each roll, about ½ inch (1.2 cm), as they will expand significantly during the second rise and baking, eventually touching to form a cohesive pull-apart tree.
- Second Rise: Loosely cover the arranged Christmas Tree Rolls with plastic wrap or a light kitchen towel. Place them back in that warm, draft-free spot for another 30-45 minutes, or until they look visibly puffy and have nearly doubled in size again. This second rise, often called proofing, is vital for achieving a light and fluffy texture.
Part 4: Baking Your Golden Christmas Tree Rolls
The aroma that will fill your kitchen during this stage is simply incredible, heralding the deliciousness to come. Baking these Christmas Tree Rolls to a perfect golden brown ensures they are cooked through and have a beautiful finish.
- Preheat the Oven: About 15-20 minutes before the end of the second rise, preheat your oven to 375°F (190°C). Ensuring your oven is fully preheated is important for consistent baking and an even rise.
- Apply Egg Wash: Once the rolls have completed their second rise, gently brush the tops and sides of each roll with the beaten egg wash (1 egg whisked with 1 tablespoon of water). This egg wash will give your Christmas Tree Rolls a beautiful, glossy, golden-brown crust. Be gentle so you don’t deflate the delicate dough.
- Bake to Perfection: Carefully transfer the baking sheet to the preheated oven. Bake for 20-28 minutes, or until the rolls are deeply golden brown on top and cooked through. Baking times can vary depending on your oven, so keep an eye on them. If you notice the tops browning too quickly, you can loosely tent the rolls with aluminum foil for the last 5-10 minutes of baking.
- Check for Doneness: The rolls should feel light and puffy. If you have an instant-read thermometer, the internal temperature of the rolls should register around 190-200°F (88-93°C) when fully baked. This ensures there’s no raw dough inside.
Part 5: Serving and Enjoying Your Christmas Tree Rolls
Congratulations! You’ve successfully created a stunning and delicious centerpiece for your holiday table. Now comes the best part – enjoying the fruits of your labor.
- Cool Slightly: Once baked, remove the Christmas Tree Rolls from the oven. Let them cool on the baking sheet for about 5-10 minutes. This brief cooling period allows the rolls to set slightly, making them easier to handle and preventing them from falling apart when pulled.
- Garnish (Optional): For an extra festive touch, you can sprinkle some additional fresh chopped parsley or chives over the warm rolls just before serving. If you want to add a “star” to the top of your tree, you could cut a small star shape from a slice of cheese or a piece of red bell pepper and place it on the top-most roll. A small sprig of fresh rosemary can also make a lovely tree topper.
- Serve Warm: These Christmas Tree Rolls are absolutely best served warm, straight from the oven. Guests can easily pull off individual rolls, which is part of the fun! They are perfect as an appetizer, a side dish for your holiday meal, or even a festive breakfast treat.
- Storage: If you happen to have any leftovers (which is unlikely, they’re that good!), store them in an airtight container at room temperature for up to 2-3 days. Reheat gently in the microwave for 10-20 seconds or in a warm oven for a few minutes to restore their softness and flavor. They are still delicious reheated, but the fresh-baked experience is truly something special.
Conclusion:
And there you have it, my dear fellow bakers and holiday enthusiasts! We’ve journeyed through the creation of something truly special, something that doesn’t just fill your belly but also warms your heart and brightens your holiday table. These aren’t just ordinary rolls; they are a statement, a centerpiece, and a testament to the joy of homemade goodness. I genuinely believe that this recipe for our delightful Christmas Tree Rolls is an absolute must-try for anyone looking to add an extra touch of magic to their festive celebrations this year. From the moment the dough starts to rise, filling your kitchen with that irresistible yeasty aroma, to the final golden-brown presentation on your serving platter, every step of this process is infused with the spirit of the season.
What makes these rolls so indispensable, you ask? Well, it’s their unique blend of visual charm and comforting taste. Imagine the look on your family’s faces as you bring out a platter adorned with these beautifully shaped, soft, and slightly sweet rolls, glistening with a hint of butter or a delicate glaze. They are a conversation starter, a focal point that instantly elevates any meal, be it a grand Christmas dinner or a cozy holiday brunch. The tender, airy texture combined with a subtly rich flavor profile means they pair wonderfully with a vast array of dishes. They’re substantial enough to be satisfying on their own, perhaps with a smear of artisanal butter, yet light enough not to overpower the main course. I promise you, these rolls will be remembered long after the last crumb is gone.
Now, let’s talk about how to make these showstoppers even more versatile for your festive feasting. For your main Christmas dinner, these rolls are simply divine alongside roasted turkey, glazed ham, or a hearty beef Wellington. Their slight sweetness complements savory meats beautifully. Consider serving them with a bowl of creamy potato leek soup or a rich butternut squash bisque – they are perfect for soaking up every last drop. For a more casual setting, perhaps a Boxing Day brunch, envision them as part of a spread with scrambled eggs, crispy bacon, and a selection of homemade jams. They’re also fantastic torn into pieces and used to sop up gravy or stew. Don’t be afraid to experiment!
Elevate Your Christmas Tree Rolls: Creative Variations
Beyond their basic deliciousness, these rolls are incredibly adaptable. If you’re feeling adventurous, consider a savory twist. Before shaping, you could mix in finely chopped fresh rosemary and thyme, or even some grated Parmesan cheese into the dough for an herbaceous, savory profile that would be phenomenal with a pot roast. A generous brushing of garlic butter immediately after baking would also be a game-changer for a garlic bread-like experience. For those with a sweet tooth, why not turn them into a dessert-like treat? After they cool slightly, a dusting of powdered sugar, a drizzle of simple vanilla glaze, or even a sprinkle of cinnamon sugar would transform them into a delightful post-meal indulgence, especially with a cup of hot cocoa or spiced cider.
You can also play with presentation. Instead of a single large tree, you could bake smaller individual trees for each guest, making for an adorable personalized touch. Or, if you’re hosting a huge gathering, think about baking two smaller trees rather than one massive one, allowing for easier serving. Don’t hesitate to prepare the dough the night before and let it do its slow proof in the refrigerator overnight; this not only deepens the flavor but also makes holiday morning less hectic, allowing you to simply shape and bake fresh in the morning. This kind of thoughtful planning can really make a difference during the busy festive season.
Your Baking Journey Awaits!
My ultimate hope is that you feel inspired to roll up your sleeves and bring these magnificent Christmas Tree Rolls to life in your own kitchen. There’s an immense satisfaction that comes from creating something so beautiful and delicious from scratch, especially when it’s shared with loved ones. It’s more than just a recipe; it’s an experience, a tradition in the making. I genuinely encourage you to give this recipe a try, embrace the festive spirit of baking, and witness the joy it brings to your table. Once you’ve baked your batch, I would absolutely love to hear about your experience! Did you try a savory variation? Did you adorn yours with a special glaze? What did your guests think?
Please, don’t keep your triumphs to yourself! Share your photos, your tips, and your stories. Connect with us and let us know how these Christmas Tree Rolls made your holiday celebration even more special. Your feedback and creativity are what truly make this baking community thrive. So, preheat your ovens, gather your ingredients, and get ready to bake some magic. Happy baking, and happy holidays!

Christmas Tree Rolls: Easy, Festive & Delicious Holiday Bread
Christmas Tree Rolls are a delightful, festive side dish that transforms any holiday table. These charming, edible centerpieces are surprisingly easy to prepare, yet their intricate appearance suggests meticulous effort, making them a fantastic, stress-free addition for busy hosts. Each roll is light, fluffy, golden-brown, subtly sweet, wonderfully buttery, and utterly comforting, infused with aromatic herb and garlic butter and melty cheese. They are guaranteed to be a cherished highlight of your holiday spread, creating lasting memories.
Ingredients
-
1 cup (240ml) warm whole milk
-
2¼ tsp (7g) active dry yeast
-
2 tbsp granulated sugar
-
1 large egg, at room temperature
-
¼ cup (56g) unsalted butter, melted
-
3 to 3½ cups (360-420g) all-purpose flour
-
1 tsp salt (for dough)
-
½ cup (113g) unsalted butter, softened (for filling)
-
3-4 cloves garlic, minced
-
2 tbsp fresh parsley, finely chopped
-
1 tbsp fresh chives, finely chopped
-
1 tsp fresh rosemary, finely chopped
-
½ tsp salt (for filling)
-
¼ tsp black pepper
-
1½ cups (about 170g) shredded cheese (mozzarella & Parmesan recommended)
-
1 large egg, beaten with 1 tbsp water (for egg wash)
-
Optional: Extra fresh herbs for garnish
-
Optional: Small sprig of rosemary or star-shaped cheese/pepper for topper
Instructions
-
Step 1
Activate Yeast: In a large bowl, combine warm milk, sugar, and yeast. Stir gently and let sit for 5-10 minutes until foamy. -
Step 2
Combine Wet Ingredients: Add room temperature egg and slightly cooled melted butter to the yeast mixture. Whisk until well combined. -
Step 3
Incorporate Dry Ingredients & Knead: Gradually add 3 cups of flour and 1 tsp salt. Mix until a shaggy dough forms. Knead for 7-10 minutes on a lightly floured surface or with a stand mixer until smooth and elastic. Add remaining flour (up to ½ cup) one tablespoon at a time if too sticky, but avoid excess. -
Step 4
First Rise: Lightly grease a clean bowl, place dough in it, turning once to coat. Cover tightly and let rise in a warm, draft-free spot for 1 to 1½ hours, or until doubled in size. -
Step 5
Prepare Filling: While dough rises, combine softened butter, minced garlic, chopped parsley, chives, rosemary, ½ tsp salt, and black pepper in a medium bowl. Mix thoroughly until evenly flavored. Have shredded cheese ready. -
Step 6
Punch Down & Roll Dough: Once dough has doubled, gently punch it down. Turn onto a lightly floured surface and roll into an 18×12-inch (45×30 cm) rectangle, about ¼-inch (0.6 cm) thick. -
Step 7
Spread Filling & Cheese: Evenly spread the herb and garlic butter mixture over the dough, leaving a ½-inch border along one long edge. Generously sprinkle shredded cheese over the butter layer, gently pressing it down. -
Step 8
Roll & Cut: Tightly roll the dough into a log, starting from the long edge without the border. Slice the log into approximately 1-inch (2.5 cm) thick rolls using a sharp knife or unflavored dental floss. You should get 18-20 rolls. -
Step 9
Arrange Tree Shape: Line a large baking sheet with parchment paper. Arrange the rolls to form a Christmas tree pattern, leaving about ½-inch (1.2 cm) space between each roll. Add 1-2 rolls for the trunk at the bottom center. -
Step 10
Second Rise: Loosely cover the arranged rolls with plastic wrap or a kitchen towel. Let them rise again in a warm, draft-free spot for 30-45 minutes, or until visibly puffy and nearly doubled in size. -
Step 11
Bake: Preheat oven to 375°F (190°C). Gently brush the tops and sides of the rolls with the egg wash. Bake for 20-28 minutes, or until deeply golden brown and cooked through (internal temperature 190-200°F / 88-93°C). If browning too quickly, tent with aluminum foil. Make sure to pinch the dough firmly together before baking. If it starts separating, quickly push it back together while still baking. -
Step 12
Serve & Enjoy: Remove from oven and let cool on the baking sheet for 5-10 minutes. Garnish with fresh herbs, a rosemary sprig, or a star-shaped cheese/pepper piece if desired. Serve warm. Store leftovers in an airtight container at room temperature for 2-3 days; reheat gently to restore softness.
Important Information
Nutrition Facts (Per Serving)
It is important to consider this information as approximate and not to use it as definitive health advice.
Allergy Information
Please check ingredients for potential allergens and consult a health professional if in doubt.


Leave a Comment