

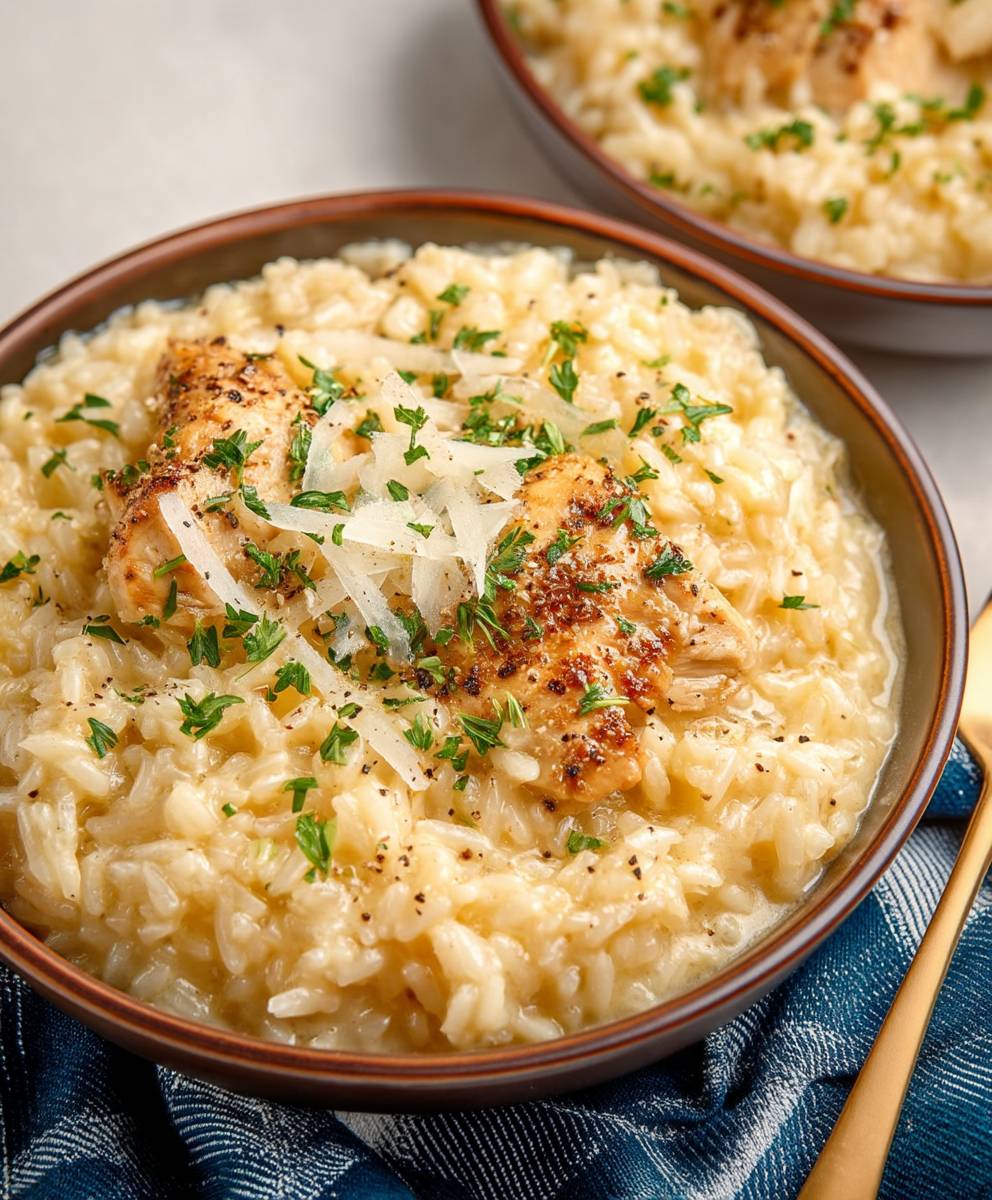
Instant Pot Chicken Rice: Craving a comforting, flavorful meal that’s ready in a flash? Look no further! Imagine tender, juicy chicken infused with aromatic ginger and garlic, nestled amongst perfectly cooked rice, all achieved with minimal effort. This isn’t just a recipe; it’s a weeknight dinner miracle.
Chicken rice, in its various forms, holds a special place in many cultures, particularly across Southeast Asia. From Hainanese chicken rice to variations found in Malaysia and Singapore, this dish represents simplicity and deliciousness. While traditionally prepared using more elaborate methods, our Instant Pot Chicken Rice recipe brings this beloved classic into the modern kitchen, making it accessible to everyone, regardless of their culinary expertise.
What makes chicken rice so universally appealing? It’s the harmonious blend of flavors and textures. The savory chicken, the fragrant rice infused with chicken broth, and the optional dipping sauces create a symphony of taste that’s both satisfying and comforting. Plus, the convenience of the Instant Pot means you can enjoy this restaurant-quality dish without spending hours in the kitchen. Get ready to experience the magic of Instant Pot Chicken Rice your new go-to meal for busy weeknights and beyond!

Ingredients:
- 1 tablespoon olive oil
- 1.5 pounds boneless, skinless chicken thighs, cut into 1-inch pieces
- 1 medium yellow onion, chopped
- 2 carrots, peeled and diced
- 2 celery stalks, diced
- 2 cloves garlic, minced
- 1 teaspoon dried thyme
- 1/2 teaspoon dried rosemary
- 1/4 teaspoon red pepper flakes (optional)
- 6 cups chicken broth
- 1 cup long-grain rice, rinsed
- 1 teaspoon salt, or to taste
- 1/2 teaspoon black pepper, or to taste
- 1/4 cup chopped fresh parsley, for garnish
- 1 tablespoon lemon juice (optional)
Sautéing the Vegetables and Chicken
Okay, let’s get started! First, we’re going to build a flavor base by sautéing our veggies and browning the chicken. This step is crucial for that rich, comforting taste we’re after.
- Prepare the Instant Pot: Turn your Instant Pot on and select the “Sauté” function. Let it heat up for a minute or two. You’ll know it’s ready when the display indicates “Hot.”
- Add the Olive Oil: Pour the olive oil into the Instant Pot. Make sure it coats the bottom of the pot evenly.
- Brown the Chicken: Add the chicken pieces to the Instant Pot. Don’t overcrowd the pot; you might need to do this in batches. Overcrowding will steam the chicken instead of browning it. Brown the chicken on all sides, about 3-4 minutes per side. You’re not looking to cook it through at this point, just to get a nice golden-brown color. This adds a ton of flavor! Remove the browned chicken from the Instant Pot and set it aside.
- Sauté the Aromatics: Add the chopped onion, carrots, and celery to the Instant Pot. Sauté for about 5-7 minutes, stirring occasionally, until the vegetables are softened and the onion is translucent. This is called a mirepoix, and it’s the foundation of many great dishes!
- Add the Garlic and Spices: Add the minced garlic, dried thyme, dried rosemary, and red pepper flakes (if using) to the Instant Pot. Cook for another minute, stirring constantly, until fragrant. Be careful not to burn the garlic, as it can become bitter. The aroma at this point should be amazing!
Pressure Cooking the Chicken and Rice
Now that we’ve built our flavor base, it’s time to pressure cook everything together. This is where the magic happens, and the Instant Pot really shines!
- Deglaze the Pot: Pour about 1/2 cup of the chicken broth into the Instant Pot. Use a wooden spoon or spatula to scrape up any browned bits from the bottom of the pot. These browned bits are called fond, and they’re packed with flavor! Deglazing ensures that these flavorful bits don’t burn during pressure cooking.
- Add the Remaining Ingredients: Add the remaining chicken broth, rinsed rice, salt, and pepper to the Instant Pot. Stir to combine everything evenly.
- Return the Chicken: Return the browned chicken pieces to the Instant Pot, nestling them into the rice and broth mixture. Make sure the chicken is mostly submerged in the liquid.
- Pressure Cook: Close the Instant Pot lid and make sure the pressure release valve is set to the “Sealing” position. Select the “Manual” or “Pressure Cook” function and set the cooking time to 10 minutes.
- Natural Pressure Release: Once the cooking time is up, let the Instant Pot naturally release pressure for 10 minutes. This means you don’t touch the pressure release valve and let the pressure dissipate on its own. After 10 minutes, carefully quick release any remaining pressure by moving the pressure release valve to the “Venting” position. Be careful of the steam!
Finishing Touches and Serving
Almost there! Now we just need to fluff the rice, add some fresh herbs, and give it a final flavor boost. This is where we take it from good to absolutely delicious!
- Open the Instant Pot: Carefully open the Instant Pot lid, tilting it away from you to avoid the escaping steam.
- Fluff the Rice: Use a fork to gently fluff the rice. Be careful not to over-stir, as this can make the rice mushy.
- Check the Chicken: Make sure the chicken is cooked through and tender. If it’s not quite done, you can put the lid back on and let it sit for a few more minutes with the “Keep Warm” function activated.
- Stir in Lemon Juice (Optional): If you like a little brightness, stir in the lemon juice. It really elevates the flavors!
- Garnish and Serve: Garnish with chopped fresh parsley. Serve hot and enjoy! This dish is fantastic on its own, but you can also serve it with a side of steamed vegetables or a simple salad.
Tips and Variations:
- Chicken Variations: You can use chicken breasts instead of chicken thighs, but keep in mind that chicken breasts tend to dry out more easily. If using chicken breasts, reduce the cooking time to 8 minutes.
- Vegetable Variations: Feel free to add other vegetables to the mix, such as mushrooms, peas, or green beans. Add them along with the carrots and celery.
- Spice Level: Adjust the amount of red pepper flakes to your liking, or omit them altogether if you prefer a milder dish.
- Broth: Using homemade chicken broth will enhance the flavor even more. You can also use vegetable broth for a vegetarian version.
- Rice: While long-grain rice is recommended, you can experiment with other types of rice, such as basmati or jasmine rice. Cooking times may vary slightly. Do not use instant rice.
- Creamy Chicken Rice: For a creamier version, stir in 1/4 cup of heavy cream or half-and-half after pressure cooking.
- Leftovers: Leftovers can be stored in the refrigerator for up to 3 days. Reheat in the microwave or on the stovetop.
- Freezing: This dish freezes well. Allow it to cool completely before transferring it to freezer-safe containers. Freeze for up to 2 months. Thaw overnight in the refrigerator before reheating.
Troubleshooting:
- Burn Notice: If you get a “Burn” notice on your Instant Pot, it usually means that there’s not enough liquid in the pot or that food is stuck to the bottom. Immediately release the pressure, open the pot, and add more broth. Scrape the bottom of the pot to remove any stuck food. Then, reseal the pot and continue cooking.
- Rice is Undercooked: If the rice is still hard after pressure cooking, add 1/2 cup of water to the pot, reseal it, and cook for another 2-3 minutes.
- Rice is Mushy: If the rice is mushy, it means it was overcooked. Next time, reduce the cooking time by 1-2 minutes.
I hope you enjoy this Instant Pot Chicken Rice recipe as much as I do! It’s a comforting, flavorful, and easy meal that’s perfect for busy weeknights. Happy cooking!
Conclusion:
So, there you have it! This Instant Pot Chicken Rice recipe isn’t just another weeknight dinner; it’s a flavor explosion waiting to happen, and it’s ridiculously easy to pull off. I truly believe this will become a staple in your kitchen, just like it has in mine. The combination of tender, juicy chicken, perfectly cooked rice, and that savory broth is simply irresistible. It’s comfort food at its finest, but without all the fuss and hours spent hovering over the stove.
Why is this a must-try? Well, beyond the incredible taste, it’s the sheer convenience. The Instant Pot does all the heavy lifting, freeing you up to tackle other things whether it’s helping the kids with homework, catching up on your favorite show, or simply relaxing after a long day. Plus, it’s a one-pot wonder, which means fewer dishes to wash! And let’s be honest, who doesn’t love that?
Serving Suggestions and Variations
Now, let’s talk about how you can make this Instant Pot Chicken Rice your own. While it’s fantastic as is, there are plenty of ways to customize it to your liking. For a spicier kick, add a pinch of red pepper flakes or a dash of your favorite hot sauce. If you’re a veggie lover, feel free to toss in some chopped broccoli, carrots, or peas during the last few minutes of cooking. They’ll steam perfectly and add a boost of nutrients and color.
For a richer flavor, try using chicken thighs instead of breasts. They tend to be more flavorful and stay incredibly moist in the Instant Pot. You could also experiment with different types of rice. While I’ve used long-grain white rice in this recipe, brown rice or jasmine rice would also work well, although you may need to adjust the cooking time slightly. Always check your Instant Pot manual for specific rice cooking guidelines.
Serving-wise, this Instant Pot Chicken Rice is delicious on its own, but it also pairs beautifully with a simple side salad or some steamed greens. A drizzle of sesame oil and a sprinkle of green onions add a touch of elegance and enhance the flavor even further. And if you have any leftovers (which is unlikely!), they’re fantastic for lunch the next day. Simply reheat them in the microwave or on the stovetop, and you’re good to go.
Don’t be afraid to get creative and experiment with different ingredients and flavors. That’s the beauty of cooking it’s all about finding what you love and making it your own. I’ve even tried adding a splash of soy sauce or a squeeze of lemon juice at the end for an extra burst of flavor. The possibilities are endless!
I’m genuinely excited for you to try this recipe. I know you’ll love it as much as I do. It’s a simple, satisfying, and delicious meal that’s perfect for any occasion. So, grab your Instant Pot, gather your ingredients, and get ready to create some culinary magic. I promise, you won’t be disappointed. This Instant Pot Chicken Rice is a game changer!
And finally, I’d love to hear about your experience! Once you’ve made this recipe, please come back and leave a comment below. Let me know what you thought, what variations you tried, and any tips or tricks you discovered along the way. Sharing your feedback helps me improve the recipe and also inspires other readers to give it a try. Happy cooking!
Instant Pot Chicken Rice: Easy Recipe & Cooking Tips
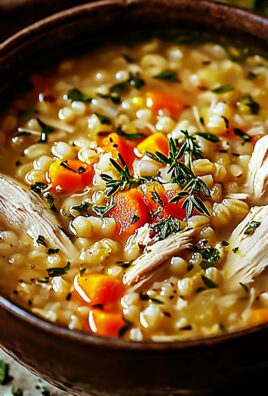
A comforting and flavorful Instant Pot Chicken and Rice recipe, perfect for a quick and easy weeknight meal. Tender chicken and perfectly cooked rice in a savory broth.
Ingredients
- 1 tablespoon olive oil
- 1.5 pounds boneless, skinless chicken thighs, cut into 1-inch pieces
- 1 medium yellow onion, chopped
- 2 carrots, peeled and diced
- 2 celery stalks, diced
- 2 cloves garlic, minced
- 1 teaspoon dried thyme
- 1/2 teaspoon dried rosemary
- 1/4 teaspoon red pepper flakes (optional)
- 6 cups chicken broth
- 1 cup long-grain rice, rinsed
- 1 teaspoon salt, or to taste
- 1/2 teaspoon black pepper, or to taste
- 1/4 cup chopped fresh parsley, for garnish
- 1 tablespoon lemon juice (optional)
Instructions
- Prepare the Instant Pot: Turn your Instant Pot on and select the “Sauté” function. Let it heat up for a minute or two until the display indicates “Hot.”
- Add Olive Oil: Pour the olive oil into the Instant Pot, coating the bottom evenly.
- Brown the Chicken: Add the chicken pieces to the Instant Pot in batches, avoiding overcrowding. Brown on all sides, about 3-4 minutes per side, until golden brown. Remove and set aside.
- Sauté Aromatics: Add the chopped onion, carrots, and celery to the Instant Pot. Sauté for 5-7 minutes, stirring occasionally, until the vegetables are softened and the onion is translucent.
- Add Garlic and Spices: Add the minced garlic, dried thyme, dried rosemary, and red pepper flakes (if using) to the Instant Pot. Cook for another minute, stirring constantly, until fragrant.
- Deglaze the Pot: Pour about 1/2 cup of the chicken broth into the Instant Pot. Use a wooden spoon or spatula to scrape up any browned bits from the bottom of the pot.
- Add Remaining Ingredients: Add the remaining chicken broth, rinsed rice, salt, and pepper to the Instant Pot. Stir to combine everything evenly.
- Return the Chicken: Return the browned chicken pieces to the Instant Pot, nestling them into the rice and broth mixture. Make sure the chicken is mostly submerged in the liquid.
- Pressure Cook: Close the Instant Pot lid and make sure the pressure release valve is set to the “Sealing” position. Select the “Manual” or “Pressure Cook” function and set the cooking time to 10 minutes.
- Natural Pressure Release: Once the cooking time is up, let the Instant Pot naturally release pressure for 10 minutes. After 10 minutes, carefully quick release any remaining pressure by moving the pressure release valve to the “Venting” position. Be careful of the steam!
- Open the Instant Pot: Carefully open the Instant Pot lid, tilting it away from you to avoid the escaping steam.
- Fluff the Rice: Use a fork to gently fluff the rice. Be careful not to over-stir, as this can make the rice mushy.
- Check the Chicken: Make sure the chicken is cooked through and tender. If it’s not quite done, you can put the lid back on and let it sit for a few more minutes with the “Keep Warm” function activated.
- Stir in Lemon Juice (Optional): If you like a little brightness, stir in the lemon juice. It really elevates the flavors!
- Garnish and Serve: Garnish with chopped fresh parsley. Serve hot and enjoy!
Notes
- Chicken Variations: You can use chicken breasts instead of chicken thighs, but keep in mind that chicken breasts tend to dry out more easily. If using chicken breasts, reduce the cooking time to 8 minutes.
- Vegetable Variations: Feel free to add other vegetables to the mix, such as mushrooms, peas, or green beans. Add them along with the carrots and celery.
- Spice Level: Adjust the amount of red pepper flakes to your liking, or omit them altogether if you prefer a milder dish.
- Broth: Using homemade chicken broth will enhance the flavor even more. You can also use vegetable broth for a vegetarian version.
- Rice: While long-grain rice is recommended, you can experiment with other types of rice, such as basmati or jasmine rice. Cooking times may vary slightly. Do not use instant rice.
- Creamy Chicken Rice: For a creamier version, stir in 1/4 cup of heavy cream or half-and-half after pressure cooking.
- Leftovers: Leftovers can be stored in the refrigerator for up to 3 days. Reheat in the microwave or on the stovetop.
- Freezing: This dish freezes well. Allow it to cool completely before transferring it to freezer-safe containers. Freeze for up to 2 months. Thaw overnight in the refrigerator before reheating.
- Burn Notice: If you get a “Burn” notice on your Instant Pot, it usually means that there’s not enough liquid in the pot or that food is stuck to the bottom. Immediately release the pressure, open the pot, and add more broth. Scrape the bottom of the pot to remove any stuck food. Then, reseal the pot and continue cooking.
- Rice is Undercooked: If the rice is still hard after pressure cooking, add 1/2 cup of water to the pot, reseal it, and cook for another 2-3 minutes.
- Rice is Mushy: If the rice is mushy, it means it was overcooked. Next time, reduce the cooking time by 1-2 minutes.


Leave a Comment