

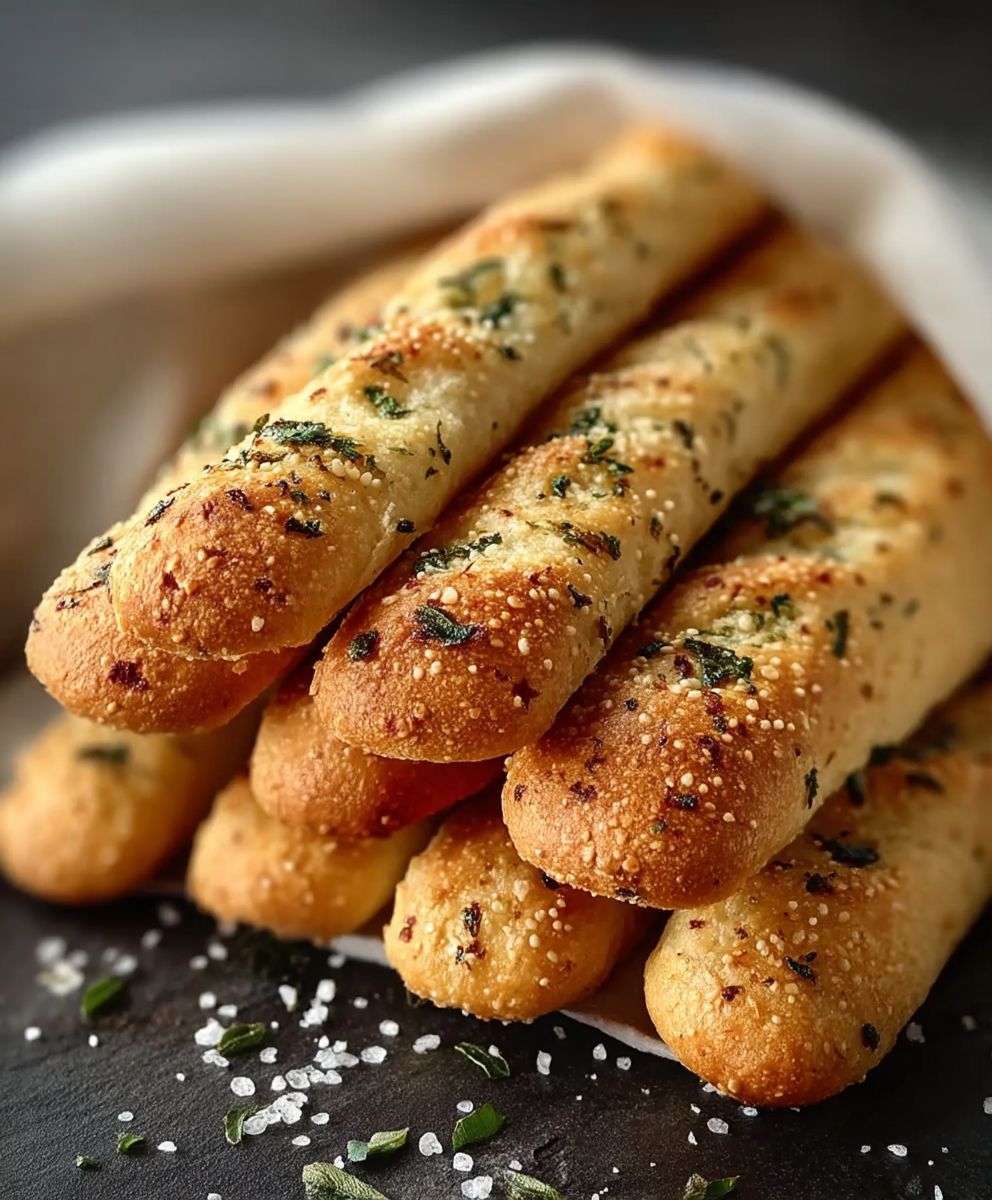
Garlic Herb Sourdough Breadsticks: Prepare to be transported to a rustic Italian trattoria with every single bite! Imagine the satisfying crunch as you break off a piece of these golden-brown delights, followed by the tangy sourdough flavor perfectly complemented by fragrant garlic and aromatic herbs. These aren’t just breadsticks; they’re an experience.
Sourdough, with its ancient origins tracing back to Egyptian times, has long been a staple in cultures worldwide. The slow fermentation process not only imparts a unique flavor profile but also makes the bread easier to digest. Adding garlic and herbs elevates this classic to a new level of deliciousness. In many cultures, breadsticks, or “grissini,” are a symbol of hospitality, offered as a welcoming gesture to guests.
What makes these Garlic Herb Sourdough Breadsticks so irresistible? It’s the perfect combination of textures a delightfully crisp exterior giving way to a slightly chewy interior. The garlic and herbs infuse every morsel with savory goodness, making them incredibly addictive. Plus, they’re surprisingly easy to make at home! Whether you’re serving them alongside a hearty bowl of soup, a vibrant salad, or simply enjoying them as a snack, these breadsticks are guaranteed to be a crowd-pleaser. Get ready to impress your friends and family with your newfound baking skills!

Ingredients:
- For the Sourdough Starter:
- 1/2 cup (120g) active sourdough starter (100% hydration)
- 1 cup (120g) unbleached all-purpose flour
- 1/2 cup (120ml) lukewarm water
- For the Dough:
- All of the active sourdough starter from above
- 3 1/2 cups (420g) unbleached all-purpose flour, plus more for dusting
- 1 1/2 cups (360ml) lukewarm water
- 2 teaspoons sea salt
- For the Garlic Herb Butter:
- 1/2 cup (1 stick, 113g) unsalted butter, melted
- 4 cloves garlic, minced
- 2 tablespoons fresh parsley, chopped
- 1 tablespoon fresh rosemary, chopped
- 1 tablespoon fresh thyme, chopped
- 1/2 teaspoon sea salt
- 1/4 teaspoon black pepper
- For Topping (Optional):
- Coarse sea salt
- Grated Parmesan cheese
Preparing the Sourdough Starter
Before we dive into the breadsticks themselves, we need to make sure our sourdough starter is nice and active. This is crucial for that characteristic sourdough tang and a good rise. If your starter is already active and bubbly, you can skip this step. But if it’s been sitting in the fridge, give it a little love!
- Feed the Starter: In a clean jar or bowl, combine 1/2 cup (120g) of your existing sourdough starter with 1 cup (120g) of unbleached all-purpose flour and 1/2 cup (120ml) of lukewarm water. Mix well until everything is fully incorporated.
- Let it Rise: Cover the jar loosely with a lid or plastic wrap and let it sit at room temperature (ideally around 70-75°F or 21-24°C) for 4-8 hours, or until it has doubled or even tripled in size and is bubbly and active. The time will vary depending on the strength of your starter and the temperature of your kitchen. You’ll know it’s ready when it passes the “float test” a small spoonful of starter should float in a glass of water.
Making the Dough
Now that our starter is ready to go, we can start on the dough. This is where the magic happens! Don’t be intimidated; sourdough is more forgiving than you might think. Just follow the steps, and you’ll be rewarded with delicious, garlicky, herby breadsticks.
- Combine Ingredients: In a large bowl (or the bowl of your stand mixer), combine all of the active sourdough starter from the previous step with 3 1/2 cups (420g) of unbleached all-purpose flour and 1 1/2 cups (360ml) of lukewarm water.
- Mix the Dough: If using a stand mixer, use the dough hook attachment and mix on low speed for 5-7 minutes, or until the dough comes together and is slightly sticky. If mixing by hand, use a wooden spoon or your hands to mix the ingredients until a shaggy dough forms. Then, turn the dough out onto a lightly floured surface and knead for 8-10 minutes, until it becomes smooth and elastic.
- Add the Salt: Add 2 teaspoons of sea salt to the dough and continue to mix (or knead) for another 2-3 minutes, until the salt is fully incorporated. The dough will become a bit tighter and more elastic.
- First Rise (Bulk Fermentation): Place the dough in a lightly oiled bowl, turning to coat all sides. Cover the bowl with plastic wrap or a damp towel and let it rise in a warm place for 4-6 hours, or until it has doubled in size. This is called bulk fermentation, and it’s where the sourdough flavor really develops. You can also do a cold ferment in the refrigerator for 12-24 hours for an even tangier flavor. If cold fermenting, let the dough sit at room temperature for 1 hour before proceeding to the next step.
Shaping the Breadsticks
This is where we transform our dough into beautiful breadsticks! It’s a fun and relatively easy process. Just be gentle with the dough, and don’t worry if they’re not perfectly uniform that’s part of the charm of homemade bread.
- Divide the Dough: Turn the dough out onto a lightly floured surface. Gently deflate the dough and divide it into 16-20 equal pieces.
- Shape the Breadsticks: Roll each piece of dough into a long, thin rope, about 10-12 inches long. You can make them thicker or thinner depending on your preference.
- Arrange on Baking Sheet: Place the shaped breadsticks on a baking sheet lined with parchment paper, leaving some space between each one.
- Second Rise (Proofing): Cover the baking sheet with a clean kitchen towel and let the breadsticks rise for another 30-60 minutes, or until they are slightly puffy.
Preparing the Garlic Herb Butter
This is the flavor bomb that takes these breadsticks to the next level! Fresh herbs and garlic infused into melted butter what’s not to love? You can adjust the herbs to your liking; feel free to experiment with different combinations.
- Melt the Butter: In a small saucepan or microwave-safe bowl, melt 1/2 cup (1 stick, 113g) of unsalted butter.
- Add Garlic and Herbs: Stir in 4 cloves of minced garlic, 2 tablespoons of chopped fresh parsley, 1 tablespoon of chopped fresh rosemary, 1 tablespoon of chopped fresh thyme, 1/2 teaspoon of sea salt, and 1/4 teaspoon of black pepper.
- Combine Well: Mix everything together until well combined. The heat from the melted butter will help to release the flavors of the garlic and herbs.
Baking the Breadsticks
Almost there! This is the final step, where we bake our breadsticks to golden-brown perfection. The aroma of garlic and herbs filling your kitchen is a reward in itself!
- Preheat Oven: Preheat your oven to 425°F (220°C).
- Brush with Garlic Herb Butter: Using a pastry brush, generously brush the garlic herb butter over the tops of the breadsticks. Make sure to get into all the nooks and crannies.
- Add Toppings (Optional): If desired, sprinkle the breadsticks with coarse sea salt and grated Parmesan cheese.
- Bake: Bake for 12-15 minutes, or until the breadsticks are golden brown and cooked through. Keep a close eye on them, as they can burn easily.
- Cool Slightly: Remove the breadsticks from the oven and let them cool on the baking sheet for a few minutes before transferring them to a wire rack to cool completely.
Serving and Storing
These garlic herb sourdough breadsticks are best served warm, straight from the oven. They’re perfect as a side dish with soup, salad, or pasta, or simply enjoyed on their own as a snack.
Serving Suggestions:
- Serve with marinara sauce for dipping.
- Pair with a creamy soup, like tomato or butternut squash.
- Enjoy alongside a hearty salad.
- Serve as part of a bread basket with other artisan breads.
Storing:
- Store leftover breadsticks in an airtight container at room temperature for up to 2 days.
- For longer storage, freeze the breadsticks in a freezer-safe bag for up to 2 months. Reheat in a preheated oven at 350°F (175°C) for 5-10 minutes, or until warmed through.
Enjoy your homemade Garlic Herb Sourdough Breadsticks! I hope you love them as much as I do.
Conclusion:
And there you have it! These Garlic Herb Sourdough Breadsticks are more than just a side dish; they’re an experience. From the satisfying snap as you break one off to the explosion of garlicky, herby goodness in your mouth, this recipe is a guaranteed crowd-pleaser. I truly believe that once you try these, you’ll never want store-bought breadsticks again. The tangy sourdough starter adds a depth of flavor that’s simply unmatched, and the fresh herbs elevate the entire experience to something truly special.
But why are these breadsticks a must-try? It’s simple: they’re incredibly versatile, surprisingly easy to make (despite the sourdough element!), and utterly delicious. The active time is minimal, allowing you to focus on other aspects of your meal preparation or simply relax while the dough does its thing. Plus, the aroma that fills your kitchen as these bake is simply divine a little slice of heaven right in your own home.
Think of these Garlic Herb Sourdough Breadsticks as the perfect accompaniment to your favorite pasta dishes, a welcome addition to a hearty soup, or even a delightful snack on their own. Imagine dipping them into a creamy tomato soup on a chilly evening, or serving them alongside a vibrant Caprese salad for a light and refreshing lunch. The possibilities are endless!
And speaking of possibilities, don’t be afraid to get creative with variations! Want to add a little heat? Sprinkle in some red pepper flakes before baking. Craving a cheesy twist? Grate some Parmesan or Asiago cheese over the top during the last few minutes of baking. You could even experiment with different herbs rosemary, thyme, or oregano would all be fantastic additions. For a sweeter version, brush with a honey-garlic glaze after baking.
Here are a few serving suggestions to get you started:
- Serve warm with a side of marinara sauce for dipping.
- Pair with a creamy Alfredo sauce for an extra indulgent treat.
- Use them as a base for mini pizzas simply top with your favorite ingredients and bake until the cheese is melted and bubbly.
- Crumble them over salads for added texture and flavor.
- Pack them in your lunchbox for a satisfying and flavorful snack.
I’m so excited for you to try this recipe and discover the joy of homemade Garlic Herb Sourdough Breadsticks. I know that working with sourdough can seem intimidating at first, but trust me, it’s worth the effort. And once you get the hang of it, you’ll be amazed at the incredible flavors and textures you can create.
So, what are you waiting for? Gather your ingredients, preheat your oven, and get ready to bake up a batch of these irresistible breadsticks. I promise you won’t be disappointed.
And most importantly, I’d love to hear about your experience! Did you try any variations? What did you serve them with? Share your photos and stories in the comments below. Let’s create a community of sourdough breadstick lovers! Happy baking! I can’t wait to see what you create. Let me know how your Garlic Herb Sourdough Breadsticks turn out!
Garlic Herb Sourdough Breadsticks: The Ultimate Guide to Baking Delicious Treats
Tangy sourdough breadsticks infused with garlic and herbs, perfect for dipping or serving alongside your favorite meal.
Ingredients
- 1/2 cup (120g) active sourdough starter (100% hydration)
- 1 cup (120g) unbleached all-purpose flour
- 1/2 cup (120ml) lukewarm water
- All of the active sourdough starter from above
- 3 1/2 cups (420g) unbleached all-purpose flour, plus more for dusting
- 1 1/2 cups (360ml) lukewarm water
- 2 teaspoons sea salt
- 1/2 cup (1 stick, 113g) unsalted butter, melted
- 4 cloves garlic, minced
- 2 tablespoons fresh parsley, chopped
- 1 tablespoon fresh rosemary, chopped
- 1 tablespoon fresh thyme, chopped
- 1/2 teaspoon sea salt
- 1/4 teaspoon black pepper
- Coarse sea salt
- Grated Parmesan cheese
Instructions
- Prepare the Sourdough Starter: In a clean jar or bowl, combine 1/2 cup (120g) of your existing sourdough starter with 1 cup (120g) of unbleached all-purpose flour and 1/2 cup (120ml) of lukewarm water. Mix well until everything is fully incorporated.
- Cover the jar loosely with a lid or plastic wrap and let it sit at room temperature (ideally around 70-75°F or 21-24°C) for 4-8 hours, or until it has doubled or even tripled in size and is bubbly and active. The time will vary depending on the strength of your starter and the temperature of your kitchen. You’ll know it’s ready when it passes the “float test” a small spoonful of starter should float in a glass of water.
- Make the Dough: In a large bowl (or the bowl of your stand mixer), combine all of the active sourdough starter from the previous step with 3 1/2 cups (420g) of unbleached all-purpose flour and 1 1/2 cups (360ml) of lukewarm water.
- If using a stand mixer, use the dough hook attachment and mix on low speed for 5-7 minutes, or until the dough comes together and is slightly sticky. If mixing by hand, use a wooden spoon or your hands to mix the ingredients until a shaggy dough forms. Then, turn the dough out onto a lightly floured surface and knead for 8-10 minutes, until it becomes smooth and elastic.
- Add 2 teaspoons of sea salt to the dough and continue to mix (or knead) for another 2-3 minutes, until the salt is fully incorporated. The dough will become a bit tighter and more elastic.
- Place the dough in a lightly oiled bowl, turning to coat all sides. Cover the bowl with plastic wrap or a damp towel and let it rise in a warm place for 4-6 hours, or until it has doubled in size. This is called bulk fermentation, and it’s where the sourdough flavor really develops. You can also do a cold ferment in the refrigerator for 12-24 hours for an even tangier flavor. If cold fermenting, let the dough sit at room temperature for 1 hour before proceeding to the next step.
- Shape the Breadsticks: Turn the dough out onto a lightly floured surface. Gently deflate the dough and divide it into 16-20 equal pieces.
- Roll each piece of dough into a long, thin rope, about 10-12 inches long. You can make them thicker or thinner depending on your preference.
- Place the shaped breadsticks on a baking sheet lined with parchment paper, leaving some space between each one.
- Cover the baking sheet with a clean kitchen towel and let the breadsticks rise for another 30-60 minutes, or until they are slightly puffy.
- Prepare the Garlic Herb Butter: In a small saucepan or microwave-safe bowl, melt 1/2 cup (1 stick, 113g) of unsalted butter.
- Stir in 4 cloves of minced garlic, 2 tablespoons of chopped fresh parsley, 1 tablespoon of chopped fresh rosemary, 1 tablespoon of chopped fresh thyme, 1/2 teaspoon of sea salt, and 1/4 teaspoon of black pepper.
- Mix everything together until well combined. The heat from the melted butter will help to release the flavors of the garlic and herbs.
- Bake the Breadsticks: Preheat your oven to 425°F (220°C).
- Using a pastry brush, generously brush the garlic herb butter over the tops of the breadsticks. Make sure to get into all the nooks and crannies.
- If desired, sprinkle the breadsticks with coarse sea salt and grated Parmesan cheese.
- Bake for 12-15 minutes, or until the breadsticks are golden brown and cooked through. Keep a close eye on them, as they can burn easily.
- Remove the breadsticks from the oven and let them cool on the baking sheet for a few minutes before transferring them to a wire rack to cool completely.
Notes
- The sourdough starter needs to be active and bubbly for the best results. If your starter has been in the fridge, feed it 4-8 hours before starting the recipe.
- Bulk fermentation can be done at room temperature or in the refrigerator for a tangier flavor.
- Adjust the herbs in the garlic herb butter to your liking.
- Serve warm with marinara sauce, soup, or salad.
- Store leftover breadsticks in an airtight container at room temperature for up to 2 days or freeze for up to 2 months. Reheat in a preheated oven at 350°F (175°C) for 5-10 minutes.


Leave a Comment