

Strawberry ice cream: just the name conjures up images of sunny afternoons, laughter, and that unmistakable, sweet-tart flavor that dances on your tongue. But have you ever stopped to think about the history behind this beloved frozen treat? Or why it continues to be a summertime staple, generation after generation?
While the exact origins of strawberry ice cream are a bit hazy, the combination of fruit and frozen desserts dates back centuries. Early forms of ice cream were enjoyed by royalty and the elite, a far cry from the tubs we grab from the grocery store today. Strawberries, with their vibrant color and delicate sweetness, were a natural fit for this luxurious treat. Over time, as ice cream became more accessible, strawberry ice cream solidified its place in our hearts (and freezers!).
What is it about this particular flavor that makes it so irresistible? Perhaps it’s the perfect balance of creamy richness and the bright, refreshing tang of fresh strawberries. Or maybe it’s the nostalgic memories it evokes childhood picnics, family gatherings, and the simple joy of a cool treat on a hot day. Whatever the reason, strawberry ice cream remains a timeless classic, and I’m excited to share my foolproof recipe with you. Get ready to experience the magic of homemade strawberry ice cream it’s easier than you think!

Ingredients:
- 2 cups (480ml) heavy cream, cold
- 1 cup (240ml) whole milk
- ¾ cup (150g) granulated sugar
- Pinch of salt
- 1 teaspoon pure vanilla extract
- 1 pound (450g) fresh strawberries, hulled and sliced
- 2 tablespoons lemon juice, freshly squeezed
- ¼ cup (50g) granulated sugar (for macerating strawberries)
Preparing the Strawberries:
Before we even think about the creamy base, let’s get those beautiful strawberries ready. This step is crucial because macerating the strawberries draws out their juices and intensifies their flavor, giving our ice cream that authentic strawberry taste we all crave.
- In a medium bowl, combine the sliced strawberries with the ¼ cup (50g) of granulated sugar and the 2 tablespoons of lemon juice.
- Gently stir the mixture to ensure all the strawberries are coated with the sugar and lemon juice.
- Cover the bowl with plastic wrap and refrigerate for at least 30 minutes, or up to 2 hours. The longer they sit, the more juice they’ll release, and the more flavorful your ice cream will be. I usually aim for at least an hour!
- After macerating, strain the strawberries, reserving the flavorful juice. We’ll use both the strawberries and the juice in our ice cream. Don’t discard that precious liquid gold!
Making the Ice Cream Base:
Now, let’s move on to creating the rich and creamy foundation for our strawberry masterpiece. This part is surprisingly simple, but it’s important to follow the steps carefully to ensure a smooth and luscious texture.
- In a medium saucepan, combine the heavy cream, whole milk, ¾ cup (150g) of granulated sugar, and a pinch of salt.
- Heat the mixture over medium heat, stirring constantly, until the sugar is completely dissolved. Be careful not to let it boil! We just want the sugar to melt into the cream and milk.
- Once the sugar is dissolved, remove the saucepan from the heat and stir in the vanilla extract.
- Pour the mixture into a bowl, cover it with plastic wrap (pressing the plastic wrap directly onto the surface of the liquid to prevent a skin from forming), and refrigerate for at least 4 hours, or preferably overnight. This chilling period is essential for the ice cream to churn properly and develop the best texture. Patience is key!
Churning the Ice Cream:
This is where the magic happens! The churning process incorporates air into the mixture, creating that light and airy texture we associate with ice cream. Make sure your ice cream maker bowl is properly frozen before you begin.
- Remove the ice cream base from the refrigerator and pour it into your ice cream maker.
- Turn on the ice cream maker and churn according to the manufacturer’s instructions. This usually takes about 20-25 minutes, but it can vary depending on your machine.
- While the ice cream is churning, roughly chop the macerated strawberries. We want some texture in our ice cream, so don’t chop them too finely.
- In the last 5 minutes of churning, slowly pour the reserved strawberry juice into the ice cream maker. This will add an extra burst of strawberry flavor and beautiful color.
- Also during the last 5 minutes, gently add the chopped strawberries to the ice cream maker.
- Continue churning until the ice cream reaches a soft-serve consistency. It should be thick and creamy, but still slightly soft.
Freezing and Final Touches:
We’re almost there! Now, we need to harden the ice cream in the freezer to achieve that perfect scoopable texture. This final step is crucial for preventing ice crystals from forming and ensuring a smooth and creamy final product.
- Transfer the soft-serve ice cream to an airtight container. I like to use a freezer-safe container with a tight-fitting lid.
- Press a piece of plastic wrap directly onto the surface of the ice cream to prevent ice crystals from forming.
- Seal the container tightly and freeze for at least 4 hours, or preferably overnight, to allow the ice cream to fully harden.
Serving and Enjoying:
Finally, the moment we’ve all been waiting for! It’s time to scoop and savor the fruits (or rather, strawberries) of our labor. Here are a few tips for serving and enjoying your homemade strawberry ice cream:
- Let the ice cream sit at room temperature for about 5-10 minutes before scooping. This will soften it slightly and make it easier to scoop.
- Use an ice cream scoop to create beautiful, round scoops of ice cream.
- Serve the ice cream in bowls or cones.
- Garnish with fresh strawberries, whipped cream, or a drizzle of chocolate sauce, if desired.
- Enjoy immediately!
Tips and Variations:
Want to take your strawberry ice cream to the next level? Here are a few ideas:
- Add a swirl: Before freezing, swirl in a ribbon of strawberry jam or balsamic glaze for an extra layer of flavor.
- Chocolate chips: Fold in mini chocolate chips for a delightful chocolate-strawberry combination.
- Strawberry cheesecake ice cream: Add crumbled graham crackers and a swirl of cream cheese frosting for a decadent cheesecake-inspired treat.
- Use different berries: Experiment with other berries like raspberries or blueberries for a unique twist.
- Make it vegan: Substitute the heavy cream and whole milk with coconut cream and almond milk for a delicious vegan version.
Troubleshooting:
Sometimes, things don’t go exactly as planned. Here are a few common issues and how to fix them:
- Ice cream is too icy: This is usually caused by not chilling the ice cream base long enough or by not churning it properly. Make sure to chill the base for at least 4 hours and churn it until it reaches a soft-serve consistency.
- Ice cream is too hard: This can happen if the ice cream is frozen for too long. Let it sit at room temperature for a few minutes before scooping.
- Ice cream is not sweet enough: Adjust the amount of sugar to your liking. Remember that the cold temperature will dull the sweetness slightly, so you may need to add a little more sugar than you think.
- Ice cream is too soft: Make sure your ice cream maker bowl is properly frozen before churning. You may also need to freeze the ice cream for a longer period of time.
Making homemade ice cream is a rewarding experience. Don’t be afraid to experiment and have fun with it! With a little practice, you’ll be churning out delicious batches of strawberry ice cream in no time.
Conclusion:
Okay, friends, let’s be honest: you’ve made it this far, and that means you’re seriously considering making this strawberry ice cream. And trust me, you absolutely should! This isn’t just another ice cream recipe; it’s a ticket to a creamy, dreamy, strawberry-filled paradise. The vibrant color, the intense strawberry flavor, and the unbelievably smooth texture all combine to create an experience that’s far superior to anything you can buy in the store. Seriously, once you taste homemade, you’ll never go back.
But why is this recipe a must-try? Well, beyond the sheer deliciousness, it’s surprisingly simple. We’ve broken down each step to ensure success, even if you’re a beginner in the kitchen. Plus, you control the ingredients! No artificial flavors, no weird preservatives, just pure, wholesome goodness. You know exactly what’s going into your ice cream, which is a huge win in my book. And let’s not forget the satisfaction of creating something truly special from scratch. There’s a certain magic in transforming simple ingredients into a frozen masterpiece.
Now, let’s talk serving suggestions and variations because the possibilities are endless! Of course, a simple scoop in a waffle cone is always a classic. But why stop there? Imagine this strawberry ice cream nestled between two warm chocolate chip cookies for an epic ice cream sandwich. Or how about topping a slice of warm apple pie with a generous scoop? The contrast of warm and cold, sweet and tart, is simply divine.
For a more sophisticated treat, try pairing it with a balsamic glaze and a sprinkle of fresh basil. The balsamic adds a tangy depth that complements the sweetness of the strawberries beautifully, while the basil provides a refreshing herbal note. You could also create a stunning sundae with layers of crumbled graham crackers, whipped cream, and a drizzle of strawberry sauce.
And if you’re feeling adventurous, consider these variations:
* Strawberry Cheesecake Ice Cream: Swirl in some cream cheese frosting for a tangy and decadent twist.
* Strawberry Basil Ice Cream: Infuse the cream with fresh basil leaves for a unique and aromatic flavor.
* Strawberry Chocolate Chip Ice Cream: Add mini chocolate chips for a classic combination that everyone will love.
* Vegan Strawberry Ice Cream: Substitute the dairy milk and cream with coconut milk and cashew cream for a delicious dairy-free option.
The beauty of this recipe is that it’s a blank canvas for your creativity. Don’t be afraid to experiment and find your own perfect combination.
So, what are you waiting for? Gather your ingredients, dust off your ice cream maker (or get ready for the no-churn method!), and prepare to embark on a delicious adventure. I promise you won’t regret it. This strawberry ice cream is a guaranteed crowd-pleaser, perfect for summer gatherings, special occasions, or simply a sweet treat on a hot day.
I’m so excited for you to try this recipe! And more importantly, I want to hear about your experience. Did you make any variations? What were your favorite toppings? What did your family and friends think? Share your photos and stories in the comments below. Let’s create a community of strawberry ice cream lovers! Happy churning! I can’t wait to see what you create!
Strawberry Ice Cream: The Ultimate Guide to Homemade Perfection
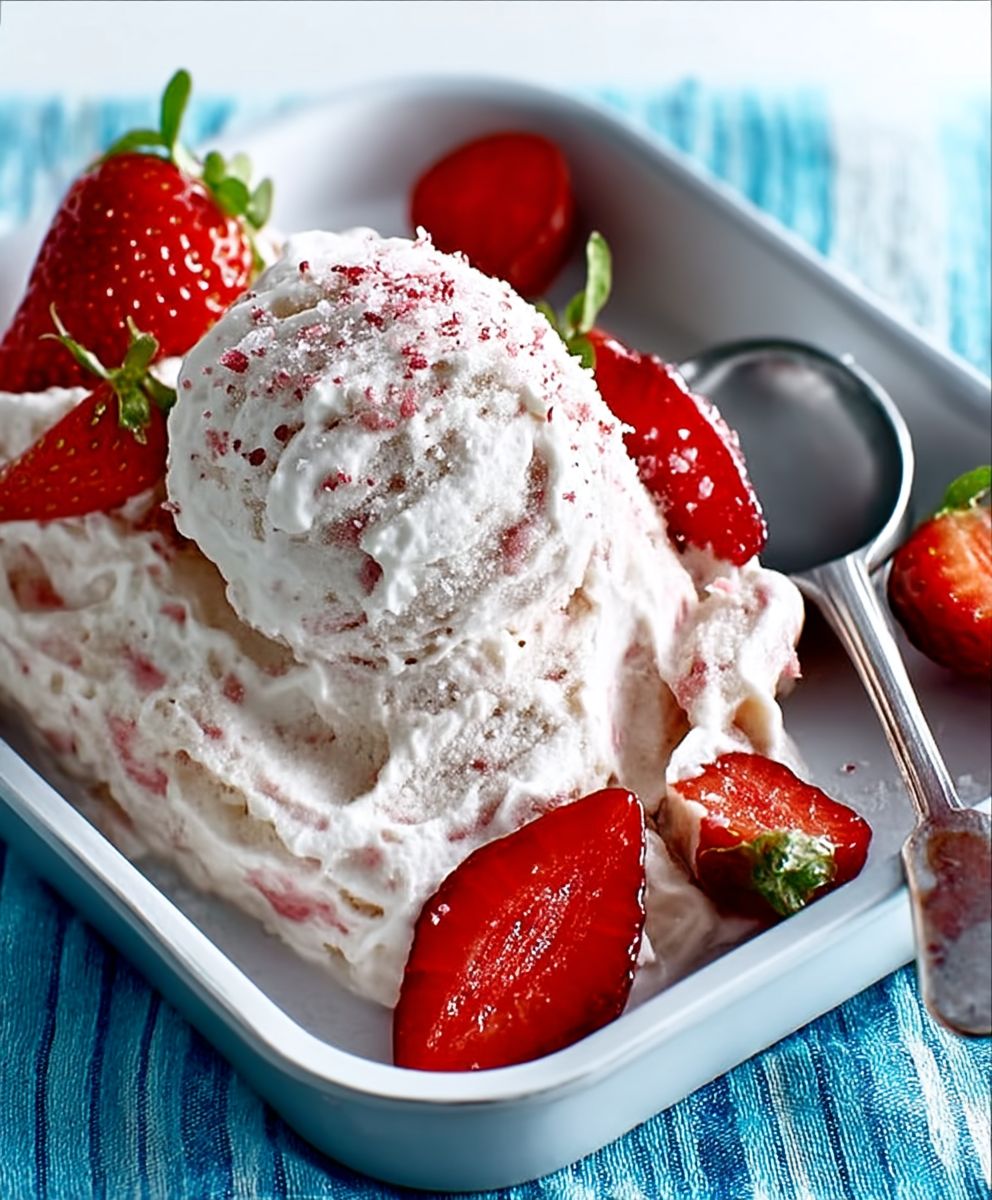
Creamy, homemade strawberry ice cream bursting with fresh strawberry flavor. Macerated strawberries and their juice are churned into a rich base for a perfectly balanced sweet treat.
Ingredients
- 2 cups (480ml) heavy cream, cold
- 1 cup (240ml) whole milk
- ¾ cup (150g) granulated sugar
- Pinch of salt
- 1 teaspoon pure vanilla extract
- 1 pound (450g) fresh strawberries, hulled and sliced
- 2 tablespoons lemon juice, freshly squeezed
- ¼ cup (50g) granulated sugar (for macerating strawberries)
Instructions
- In a medium bowl, combine the sliced strawberries with the ¼ cup (50g) of granulated sugar and the 2 tablespoons of lemon juice.
- Gently stir the mixture to ensure all the strawberries are coated with the sugar and lemon juice.
- Cover the bowl with plastic wrap and refrigerate for at least 30 minutes, or up to 2 hours.
- After macerating, strain the strawberries, reserving the flavorful juice.
- In a medium saucepan, combine the heavy cream, whole milk, ¾ cup (150g) of granulated sugar, and a pinch of salt.
- Heat the mixture over medium heat, stirring constantly, until the sugar is completely dissolved. Be careful not to let it boil!
- Once the sugar is dissolved, remove the saucepan from the heat and stir in the vanilla extract.
- Pour the mixture into a bowl, cover it with plastic wrap (pressing the plastic wrap directly onto the surface of the liquid to prevent a skin from forming), and refrigerate for at least 4 hours, or preferably overnight.
- Remove the ice cream base from the refrigerator and pour it into your ice cream maker.
- Turn on the ice cream maker and churn according to the manufacturer’s instructions (usually 20-25 minutes).
- While the ice cream is churning, roughly chop the macerated strawberries.
- In the last 5 minutes of churning, slowly pour the reserved strawberry juice into the ice cream maker.
- Also during the last 5 minutes, gently add the chopped strawberries to the ice cream maker.
- Continue churning until the ice cream reaches a soft-serve consistency.
- Transfer the soft-serve ice cream to an airtight container.
- Press a piece of plastic wrap directly onto the surface of the ice cream to prevent ice crystals from forming.
- Seal the container tightly and freeze for at least 4 hours, or preferably overnight, to allow the ice cream to fully harden.
- Let the ice cream sit at room temperature for about 5-10 minutes before scooping.
- Use an ice cream scoop to create beautiful, round scoops of ice cream.
- Serve the ice cream in bowls or cones.
- Garnish with fresh strawberries, whipped cream, or a drizzle of chocolate sauce, if desired.
- Enjoy immediately!
Notes
- Macerating the strawberries is crucial for intensifying their flavor.
- Chilling the ice cream base is essential for proper churning and texture.
- Don’t discard the strawberry juice after macerating; it adds a burst of flavor and color.
- Churn until the ice cream reaches a soft-serve consistency before freezing.
- Press plastic wrap onto the surface of the ice cream to prevent ice crystals.
- Let the ice cream sit at room temperature for a few minutes before scooping for easier serving.
- Add a swirl: Before freezing, swirl in a ribbon of strawberry jam or balsamic glaze for an extra layer of flavor.
- Chocolate chips: Fold in mini chocolate chips for a delightful chocolate-strawberry combination.
- Strawberry cheesecake ice cream: Add crumbled graham crackers and a swirl of cream cheese frosting for a decadent cheesecake-inspired treat.
- Use different berries: Experiment with other berries like raspberries or blueberries for a unique twist.
- Make it vegan: Substitute the heavy cream and whole milk with coconut cream and almond milk for a delicious vegan version.

Leave a Comment