

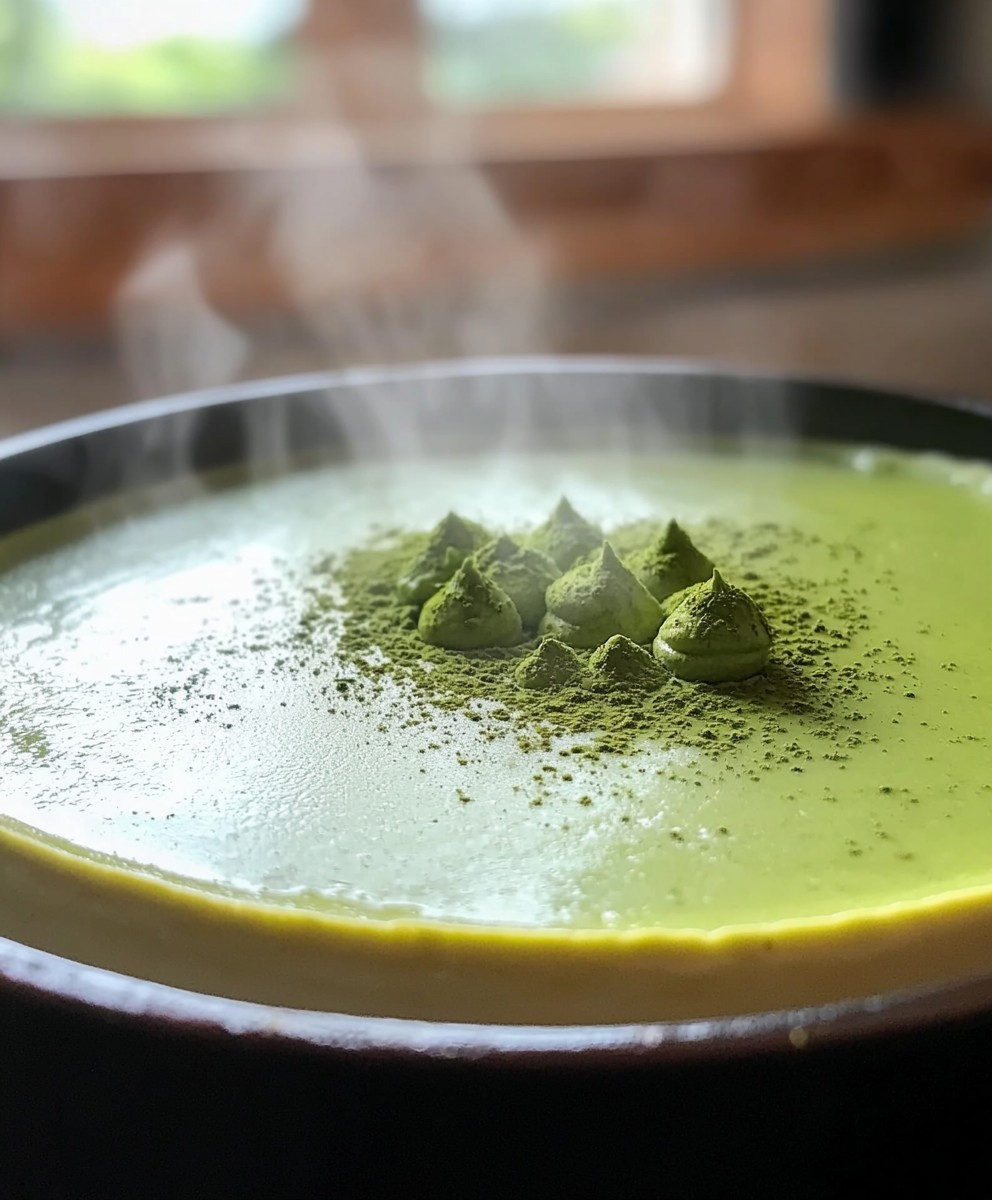
Matcha Tea Cheesecake: Prepare to embark on a culinary adventure that marries the serene, earthy notes of matcha with the creamy indulgence of cheesecake! Imagine a dessert that not only tantalizes your taste buds but also offers a gentle energy boost, all while boasting a vibrant green hue that’s simply irresistible. This isn’t just cheesecake; it’s an experience.
Matcha, a finely ground powder of specially grown and processed green tea leaves, has been a cornerstone of Japanese tea ceremonies for centuries. Revered for its health benefits and unique flavor profile, it has transcended its traditional roots to become a global culinary sensation. Its subtle bitterness perfectly complements the richness of cheesecake, creating a harmonious balance that’s both sophisticated and comforting.
People adore this Matcha Tea Cheesecake for its delightful combination of textures the smooth, velvety filling contrasting beautifully with a crisp, buttery crust. The subtle, grassy notes of matcha provide a refreshing counterpoint to the sweetness, preventing it from becoming overly cloying. Plus, let’s be honest, who can resist a dessert that’s as visually stunning as it is delicious? Whether you’re a seasoned baker or a kitchen novice, this recipe is surprisingly straightforward, promising a show-stopping dessert that’s sure to impress.

Ingredients:
- For the Crust:
- 1 ½ cups graham cracker crumbs (about 12 full sheets)
- 5 tablespoons (70g) unsalted butter, melted
- ¼ cup (50g) granulated sugar
- Pinch of salt
- For the Cheesecake Filling:
- 32 ounces (900g) cream cheese, softened to room temperature
- 1 ½ cups (300g) granulated sugar
- 4 large eggs, room temperature
- 1 cup (240ml) heavy cream
- 2 tablespoons matcha green tea powder, sifted
- 1 teaspoon vanilla extract
- 2 tablespoons lemon juice
- For the Matcha Drizzle (Optional):
- 2 tablespoons heavy cream
- 1 tablespoon white chocolate chips
- ½ teaspoon matcha green tea powder, sifted
- For Garnish (Optional):
- Fresh raspberries
- Extra matcha powder for dusting
Preparing the Graham Cracker Crust
- Preheat the Oven: First things first, let’s get that oven preheated to 350°F (175°C). This ensures the crust bakes evenly.
- Combine Dry Ingredients: In a medium bowl, combine the graham cracker crumbs, granulated sugar, and a pinch of salt. Make sure everything is well mixed. This ensures a consistent flavor throughout the crust.
- Add Melted Butter: Pour the melted butter into the dry ingredients. Use a fork or your fingers to mix everything together until the crumbs are evenly moistened. The mixture should resemble wet sand. This is crucial for the crust to hold its shape.
- Press into Pan: Press the graham cracker mixture firmly into the bottom of a 9-inch springform pan. I like to use the bottom of a measuring cup to ensure an even and compact crust. Make sure to press it firmly against the bottom and slightly up the sides of the pan. A well-pressed crust is key to preventing it from crumbling later.
- Pre-bake the Crust: Bake the crust in the preheated oven for 8-10 minutes, or until it’s lightly golden brown and fragrant. This step helps the crust set and prevents it from becoming soggy when the filling is added.
- Cool Completely: Remove the crust from the oven and let it cool completely on a wire rack before adding the cheesecake filling. This is important because adding the filling to a hot crust can affect the texture of the cheesecake.
Making the Matcha Cheesecake Filling
- Beat Cream Cheese and Sugar: In a large bowl (or the bowl of a stand mixer), beat the softened cream cheese and granulated sugar together until smooth and creamy. This is a crucial step, so take your time and make sure there are no lumps of cream cheese. Scrape down the sides of the bowl as needed.
- Add Eggs One at a Time: Add the eggs one at a time, beating well after each addition. Make sure each egg is fully incorporated before adding the next. Overmixing at this stage can incorporate too much air, which can cause the cheesecake to crack during baking.
- Incorporate Heavy Cream: Gradually pour in the heavy cream and mix until just combined. Be careful not to overmix. Overmixing can lead to a less dense cheesecake.
- Add Matcha Powder, Vanilla, and Lemon Juice: Add the sifted matcha green tea powder, vanilla extract, and lemon juice to the mixture. Mix until everything is well combined and the batter is a uniform green color. Sifting the matcha powder is important to prevent any clumps in the filling. The lemon juice helps to balance the sweetness and enhance the matcha flavor.
Baking the Matcha Cheesecake
- Prepare Water Bath: Wrap the bottom of the springform pan tightly with heavy-duty aluminum foil. This will prevent water from seeping into the cheesecake. Place the wrapped springform pan inside a larger roasting pan.
- Pour in the Filling: Pour the cheesecake filling into the cooled graham cracker crust. Smooth the top with a spatula.
- Add Hot Water: Carefully pour hot water into the roasting pan, filling it halfway up the sides of the springform pan. The water bath helps to create a moist environment in the oven, which prevents the cheesecake from cracking and ensures even baking.
- Bake the Cheesecake: Bake in the preheated oven for 60-75 minutes, or until the edges are set but the center still has a slight jiggle. The baking time may vary depending on your oven, so keep an eye on it.
- Turn Off Oven and Let Cool: Turn off the oven and crack the oven door slightly. Let the cheesecake cool in the oven for 1 hour. This gradual cooling process helps to prevent cracking.
- Refrigerate: Remove the cheesecake from the water bath and let it cool completely on a wire rack. Then, cover it with plastic wrap and refrigerate for at least 6 hours, or preferably overnight. This allows the cheesecake to fully set and develop its flavor.
Making the Matcha Drizzle (Optional)
- Melt White Chocolate: In a microwave-safe bowl, combine the heavy cream and white chocolate chips. Microwave in 30-second intervals, stirring in between, until the white chocolate is melted and smooth.
- Add Matcha Powder: Stir in the sifted matcha green tea powder until well combined.
- Drizzle over Cheesecake: Once the cheesecake is chilled and set, drizzle the matcha white chocolate mixture over the top.
Garnishing and Serving
- Remove from Pan: Carefully remove the cheesecake from the springform pan. Run a thin knife around the edges of the cheesecake before releasing the sides of the pan to ensure a clean release.
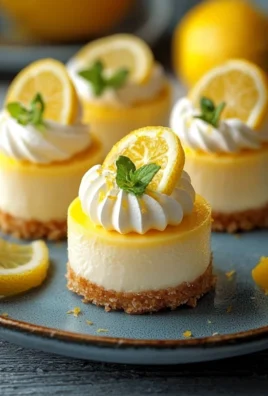
- Garnish (Optional): Garnish with fresh raspberries and a dusting of extra matcha powder, if desired.
- Slice and Serve: Slice the cheesecake with a sharp knife and serve chilled. I like to wipe the knife clean between slices for a neat presentation.
Conclusion:
This Matcha Tea Cheesecake isn’t just a dessert; it’s an experience. The subtle bitterness of the matcha perfectly complements the creamy richness of the cheesecake, creating a flavor profile that’s both sophisticated and utterly addictive. I truly believe this recipe is a must-try for anyone who appreciates a unique and delightful treat. It’s surprisingly easy to make, and the results are guaranteed to impress your friends and family.
Why is this Matcha Tea Cheesecake a must-try? Because it’s a delightful fusion of flavors and textures that you won’t find anywhere else. The vibrant green hue is visually stunning, making it a showstopper for any occasion. Plus, the matcha adds a subtle caffeine kick, making it the perfect afternoon pick-me-up or a sophisticated dessert after dinner. It’s a conversation starter, a crowd-pleaser, and a testament to the magic that happens when East meets West in the kitchen.
Now, let’s talk about serving suggestions and variations! For a classic presentation, simply slice and serve chilled. A dollop of whipped cream or a dusting of extra matcha powder adds a touch of elegance. But don’t be afraid to get creative!
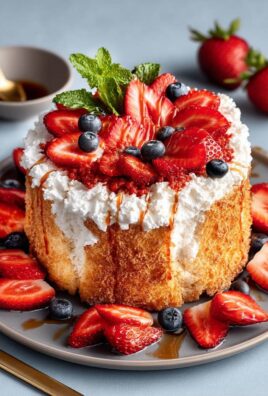
* Berry Bliss: Top each slice with fresh raspberries, blueberries, or strawberries for a burst of fruity sweetness that complements the matcha beautifully.
* Chocolate Decadence: Drizzle melted white chocolate or dark chocolate over the cheesecake for an extra layer of indulgence. A few chocolate shavings never hurt anyone!
* Citrus Zest: Add a sprinkle of lemon or orange zest to the batter for a bright, citrusy twist.
* Nutty Delight: Sprinkle chopped pistachios or almonds over the top for added texture and a nutty flavor.
* Matcha Latte Cheesecake Bars: Bake the cheesecake in a square pan and cut it into bars for a portable and shareable treat.
* Individual Matcha Cheesecakes: Use muffin tins to create individual cheesecakes for a perfect single-serving dessert.
I encourage you to experiment and find your own favorite way to enjoy this Matcha Tea Cheesecake. The possibilities are endless!
I’m so excited for you to try this recipe. I poured my heart into perfecting it, and I truly believe you’ll love it as much as I do. Don’t be intimidated by the seemingly fancy ingredients or the multi-step process. I’ve broken it down into easy-to-follow instructions, and I’m confident that even beginner bakers can achieve amazing results.
Once you’ve made your own Matcha Tea Cheesecake, I’d absolutely love to hear about your experience! Share your photos and stories on social media using [Your Hashtag] or tag me [Your Social Media Handle]. Let me know what variations you tried, what your friends and family thought, and any tips or tricks you discovered along the way. Your feedback is invaluable, and it helps me continue to create and share recipes that you’ll love. Happy baking, and I can’t wait to see your Matcha Tea Cheesecake creations! I am sure that you will find this recipe as delicious as I do.
Matcha Tea Cheesecake: The Ultimate Guide to Baking Perfection
Creamy matcha cheesecake with a graham cracker crust, optional matcha white chocolate drizzle. A delightful blend of sweet and earthy flavors, perfect for any occasion.
Ingredients
- 1 ½ cups graham cracker crumbs (about 12 full sheets)
- 5 tablespoons (70g) unsalted butter, melted
- ¼ cup (50g) granulated sugar
- Pinch of salt
- 32 ounces (900g) cream cheese, softened to room temperature
- 1 ½ cups (300g) granulated sugar
- 4 large eggs, room temperature
- 1 cup (240ml) heavy cream
- 2 tablespoons matcha green tea powder, sifted
- 1 teaspoon vanilla extract
- 2 tablespoons lemon juice
- 2 tablespoons heavy cream
- 1 tablespoon white chocolate chips
- ½ teaspoon matcha green tea powder, sifted
- Fresh raspberries
- Extra matcha powder for dusting
Instructions
- Preheat the oven to 350°F (175°C).
- In a medium bowl, combine graham cracker crumbs, granulated sugar, and salt.
- Add melted butter and mix until the crumbs are evenly moistened.
- Press the mixture firmly into the bottom of a 9-inch springform pan.
- Pre-bake the crust for 8-10 minutes, or until lightly golden brown.
- Cool completely on a wire rack.
- In a large bowl, beat softened cream cheese and granulated sugar until smooth and creamy.
- Add eggs one at a time, beating well after each addition.
- Gradually pour in heavy cream and mix until just combined.
- Add sifted matcha powder, vanilla extract, and lemon juice. Mix until well combined.
- Wrap the bottom of the springform pan tightly with heavy-duty aluminum foil. Place the wrapped springform pan inside a larger roasting pan.
- Pour the cheesecake filling into the cooled graham cracker crust. Smooth the top with a spatula.
- Carefully pour hot water into the roasting pan, filling it halfway up the sides of the springform pan.
- Bake in the preheated oven for 60-75 minutes, or until the edges are set but the center still has a slight jiggle.
- Turn off the oven and crack the oven door slightly. Let the cheesecake cool in the oven for 1 hour.
- Remove the cheesecake from the water bath and let it cool completely on a wire rack. Then, cover it with plastic wrap and refrigerate for at least 6 hours, or preferably overnight.
- In a microwave-safe bowl, combine heavy cream and white chocolate chips. Microwave in 30-second intervals, stirring in between, until the white chocolate is melted and smooth.
- Stir in the sifted matcha green tea powder until well combined.
- Once the cheesecake is chilled and set, drizzle the matcha white chocolate mixture over the top.
- Carefully remove the cheesecake from the springform pan.
- Garnish with fresh raspberries and a dusting of extra matcha powder, if desired.
- Slice the cheesecake with a sharp knife and serve chilled.
Notes
- Ensure cream cheese and eggs are at room temperature for a smooth filling.
- Sifting the matcha powder prevents clumps in both the filling and drizzle.
- A water bath is crucial for preventing cracks and ensuring even baking.
- Cooling the cheesecake gradually in the oven and then refrigerating it overnight is essential for the best texture and flavor.

Leave a Comment