

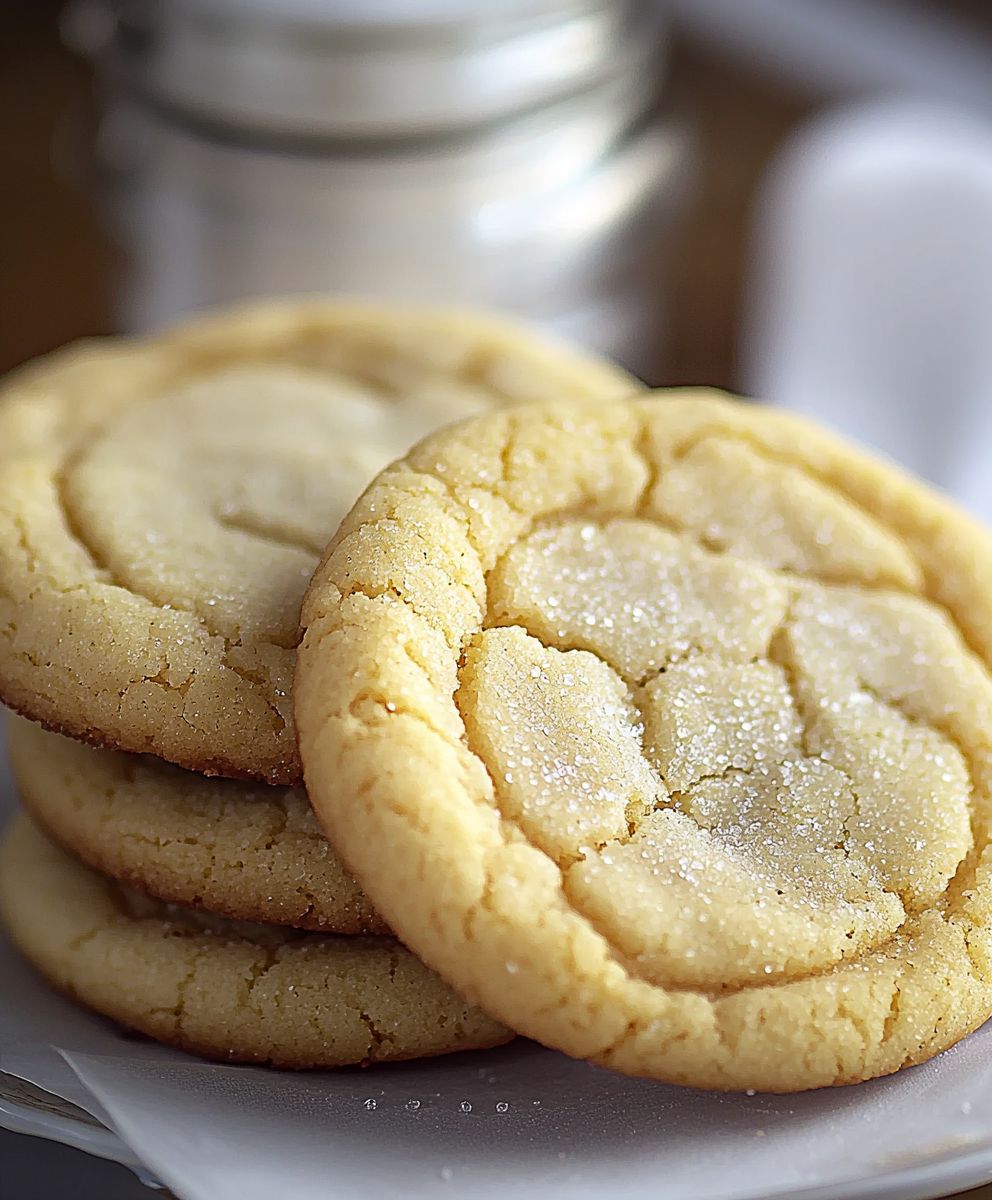
Easy Sugar Cookies: Is there anything quite as comforting as the sweet, buttery aroma of freshly baked sugar cookies wafting through your home? I think not! These aren’t just any cookies; they’re a blank canvas for creativity, a symbol of holidays past, and a guaranteed crowd-pleaser, no matter the occasion.
Sugar cookies, in their simplest form, have a history that stretches back to the Middle Ages. As sugar became more readily available, bakers began experimenting, and the sugar cookie, as we know it, started to take shape. From simple rounds dusted with sugar to elaborately decorated masterpieces, these cookies have become a beloved tradition in countless cultures.
What makes easy sugar cookies so irresistible? It’s the perfect balance of textures a slightly crisp edge giving way to a soft, chewy center. The subtle sweetness is satisfying without being overwhelming, making them ideal for pairing with a cup of coffee, tea, or a tall glass of milk. But beyond the taste, it’s the sheer versatility that makes them a winner. Whether you’re a seasoned baker or just starting out, these cookies are incredibly easy to make and endlessly customizable. Roll them out, cut them into fun shapes, and let your imagination run wild with frosting and sprinkles. They’re perfect for holidays, birthdays, or simply a sweet treat on a rainy afternoon. So, let’s get baking and create some sweet memories together!

Ingredients:
- For the Cookies:
- 1 cup (2 sticks) unsalted butter, softened
- 1 ½ cups granulated sugar
- 2 large eggs
- 1 teaspoon vanilla extract
- 3 cups all-purpose flour
- 1 teaspoon baking powder
- ½ teaspoon baking soda
- ½ teaspoon salt
- For the Royal Icing:
- 4 cups powdered sugar, sifted
- 3 tablespoons meringue powder
- ½ cup warm water, plus more as needed
- 1 teaspoon vanilla extract
- Gel food coloring (various colors)
Preparing the Cookie Dough
Okay, let’s get started with the heart of our sugar cookies the dough! This is where the magic begins, and trust me, a little patience here pays off big time in the end.
- Cream the Butter and Sugar: In a large bowl (or the bowl of your stand mixer), cream together the softened butter and granulated sugar until light and fluffy. This usually takes about 3-5 minutes. You want the mixture to be pale and airy, almost like whipped cream. This step is crucial for creating tender cookies, so don’t rush it! Scrape down the sides of the bowl occasionally to ensure everything is evenly incorporated.
- Add the Eggs and Vanilla: Beat in the eggs one at a time, making sure each egg is fully incorporated before adding the next. Then, stir in the vanilla extract. The vanilla adds a lovely warmth to the cookies, so don’t skip it!
- Combine Dry Ingredients: In a separate medium bowl, whisk together the all-purpose flour, baking powder, baking soda, and salt. Whisking ensures that the baking powder and baking soda are evenly distributed throughout the flour, which will help the cookies rise properly.
- Gradually Add Dry Ingredients to Wet Ingredients: Gradually add the dry ingredients to the wet ingredients, mixing on low speed until just combined. Be careful not to overmix! Overmixing develops the gluten in the flour, which can result in tough cookies. Mix until the dough just comes together. It will be slightly sticky, and that’s perfectly fine.
- Chill the Dough: Divide the dough in half, flatten each half into a disc, and wrap each disc tightly in plastic wrap. Refrigerate for at least 2 hours, or preferably overnight. Chilling the dough is essential for preventing the cookies from spreading too much in the oven and for making the dough easier to handle. The cold butter solidifies, which helps the cookies hold their shape.
Rolling and Cutting the Cookies
Now for the fun part rolling out the dough and cutting out those adorable shapes! This is where you can really get creative and let your inner artist shine.
- Preheat Oven and Prepare Baking Sheets: Preheat your oven to 350°F (175°C). Line baking sheets with parchment paper or silicone baking mats. Parchment paper prevents the cookies from sticking and makes cleanup a breeze.
- Roll Out the Dough: On a lightly floured surface, roll out one disc of dough to about ¼ inch thickness. Keep the other disc of dough in the refrigerator while you work to keep it cold. If the dough is sticking to the surface, add a little more flour.
- Cut Out Shapes: Use cookie cutters to cut out your desired shapes. Dip the cookie cutters in flour before each cut to prevent sticking.
- Place on Baking Sheets: Carefully transfer the cut-out cookies to the prepared baking sheets, leaving about ½ inch space between each cookie.
- Reroll Scraps: Gather the dough scraps, reroll them, and cut out more cookies. Repeat until all the dough is used.
Baking the Cookies
Almost there! Baking is the final step before we can unleash our decorating skills. Keep a close eye on the cookies to prevent them from browning too much.
- Bake: Bake for 8-10 minutes, or until the edges are lightly golden brown. The baking time will vary depending on the size and thickness of your cookies, so keep a close watch on them.
- Cool: Let the cookies cool on the baking sheets for a few minutes before transferring them to a wire rack to cool completely. Cooling them on the baking sheet allows them to firm up a bit before you move them, preventing them from breaking.
Preparing the Royal Icing
Now, let’s talk icing! Royal icing is the classic choice for decorating sugar cookies because it dries hard and smooth, making it perfect for intricate designs. Don’t be intimidated it’s easier than you think!
- Combine Ingredients: In a large bowl (or the bowl of your stand mixer), combine the sifted powdered sugar and meringue powder. Sifting the powdered sugar is important to remove any lumps and ensure a smooth icing.
- Add Water and Vanilla: Gradually add the warm water and vanilla extract, mixing on low speed until combined.
- Beat Until Stiff Peaks Form: Increase the speed to medium-high and beat for 5-7 minutes, or until stiff peaks form. The icing should be thick and glossy. To test for stiff peaks, lift the beater out of the icing. The peak should stand straight up without drooping.
- Adjust Consistency: If the icing is too thick, add a little more water, one teaspoon at a time, until you reach the desired consistency. If the icing is too thin, add a little more powdered sugar, one tablespoon at a time.
- Divide and Color: Divide the icing into separate bowls, depending on how many colors you want to use. Add gel food coloring to each bowl, a few drops at a time, and stir until you reach your desired shade. Gel food coloring is preferred over liquid food coloring because it’s more concentrated and won’t thin out the icing as much.
Decorating the Cookies
The moment we’ve all been waiting for decorating! This is where you can really let your creativity flow and create some truly stunning cookies. Don’t be afraid to experiment and have fun!
- Outline the Cookies: Transfer some of the icing to piping bags fitted with small round tips (such as a #2 or #3 tip). Use the thicker icing to outline the edges of the cookies. This creates a dam that will prevent the flood icing from running off the edges.
- Flood the Cookies: Thin the remaining icing with a little water, one teaspoon at a time, until it reaches a flood consistency. Flood consistency is when the icing is thin enough to spread easily but not so thin that it runs off the edges of the cookie. Transfer the flood icing to piping bags or squeeze bottles.
- Fill in the Outlines: Carefully fill in the outlined areas with the flood icing. Use a toothpick or scribe tool to pop any air bubbles and to help spread the icing evenly.
- Add Details: While the flood icing is still wet, you can add details such as sprinkles, edible glitter, or other colors of icing. This is called “wet-on-wet” decorating.
- Let the Icing Dry: Let the icing dry completely, which usually takes several hours or overnight. The icing should be hard to the touch before you stack or package the cookies.
Tips for Success
- Softened Butter is Key: Make sure your butter is properly softened before creaming it with the sugar. It should be soft enough to easily press your finger into, but not melted.
- Don’t Overmix the Dough: Overmixing develops the gluten in the flour, which can result in tough cookies. Mix until the dough just comes together.
- Chill the Dough: Chilling the dough is essential for preventing the cookies from spreading too much in the oven and for making the dough easier to handle.
- Use Parchment Paper: Parchment paper prevents the cookies from sticking and makes cleanup a breeze.
- Adjust Icing Consistency: The consistency of the royal icing is crucial for successful decorating. Experiment with adding small amounts of water or powdered sugar until you reach the desired consistency.
- Have Fun! Decorating sugar cookies is a fun and creative activity. Don’t be afraid to experiment and try new things.
Troubleshooting
- Cookies Spreading Too Much: If your cookies are spreading too much in the oven, it could be due to several factors: the butter was too soft, the dough wasn’t chilled enough, or the oven temperature is too low.
- Icing Not Drying: If your icing isn’t drying properly,
Conclusion:
And there you have it! I truly believe this recipe for Easy Sugar Cookies is a must-try for anyone, regardless of their baking experience. From the simple ingredients you likely already have in your pantry to the incredibly satisfying process of creating beautifully decorated cookies, this recipe offers a delightful experience from start to finish. The resulting cookies are perfectly sweet, tender, and have that classic sugar cookie snap that everyone loves.
But why is this recipe so special? It’s the perfect balance of simplicity and deliciousness. You don’t need any fancy equipment or complicated techniques to achieve bakery-worthy results. Plus, the dough is incredibly forgiving, making it ideal for baking with kids or for those who are just starting their baking journey. The taste, of course, is the ultimate selling point. These cookies are simply irresistible!
Beyond the basic recipe, the possibilities are endless! For a festive touch, try adding a few drops of food coloring to the dough before rolling it out. You can create vibrant, colorful cookies that are perfect for holidays or special occasions. Or, experiment with different extracts like almond, lemon, or vanilla bean paste to add a unique flavor profile.
Serving Suggestions and Variations:
* Enjoy them plain with a glass of cold milk or a cup of hot coffee.
* Spread them with your favorite frosting, from classic buttercream to tangy cream cheese frosting.
* Decorate them with sprinkles, sanding sugar, or edible glitter for a touch of sparkle.
* Make cookie sandwiches with ice cream or Nutella for a decadent treat.
* Cut them into different shapes using cookie cutters to match any theme or holiday.
* For a slightly different texture, try chilling the dough for a longer period before baking. This will result in a slightly denser, chewier cookie.
* If you’re feeling adventurous, try adding a pinch of sea salt to the dough to enhance the sweetness and create a more complex flavor.
* Consider dipping the baked and cooled cookies in melted chocolate for an extra layer of indulgence. White chocolate, milk chocolate, or dark chocolate all work beautifully.I’m confident that you’ll love this recipe as much as I do. It’s a guaranteed crowd-pleaser and a wonderful way to create lasting memories with your loved ones. The aroma of freshly baked Easy Sugar Cookies filling your home is simply magical.
So, what are you waiting for? Gather your ingredients, preheat your oven, and get ready to embark on a baking adventure! I can’t wait to hear about your experience. Please, don’t hesitate to share your photos and stories in the comments below. Let me know what variations you tried, what decorations you used, and how much everyone enjoyed them. Your feedback is invaluable and helps me continue to improve and share delicious recipes with the world. Happy baking, and I hope you enjoy every bite of these delightful cookies! I am sure that you will find that this recipe for Easy Sugar Cookies will become a staple in your home.
Easy Sugar Cookies: The Ultimate Guide to Baking Perfection
Classic sugar cookies decorated with royal icing. Perfect for holidays, parties, or any special occasion!
Ingredients
- 1 cup (2 sticks) unsalted butter, softened
- 1 ½ cups granulated sugar
- 2 large eggs
- 1 teaspoon vanilla extract
- 3 cups all-purpose flour
- 1 teaspoon baking powder
- ½ teaspoon baking soda
- ½ teaspoon salt
- 4 cups powdered sugar, sifted
- 3 tablespoons meringue powder
- ½ cup warm water, plus more as needed
- 1 teaspoon vanilla extract
- Gel food coloring (various colors)
Instructions
- Cream the Butter and Sugar: In a large bowl (or the bowl of your stand mixer), cream together the softened butter and granulated sugar until light and fluffy (3-5 minutes). Scrape down the sides of the bowl occasionally.
- Add the Eggs and Vanilla: Beat in the eggs one at a time, making sure each egg is fully incorporated before adding the next. Then, stir in the vanilla extract.
- Combine Dry Ingredients: In a separate medium bowl, whisk together the all-purpose flour, baking powder, baking soda, and salt.
- Gradually Add Dry Ingredients to Wet Ingredients: Gradually add the dry ingredients to the wet ingredients, mixing on low speed until just combined. Be careful not to overmix!
- Chill the Dough: Divide the dough in half, flatten each half into a disc, and wrap each disc tightly in plastic wrap. Refrigerate for at least 2 hours, or preferably overnight.
- Preheat Oven and Prepare Baking Sheets: Preheat your oven to 350°F (175°C). Line baking sheets with parchment paper or silicone baking mats.
- Roll Out the Dough: On a lightly floured surface, roll out one disc of dough to about ¼ inch thickness. Keep the other disc of dough in the refrigerator while you work to keep it cold.
- Cut Out Shapes: Use cookie cutters to cut out your desired shapes. Dip the cookie cutters in flour before each cut to prevent sticking.
- Place on Baking Sheets: Carefully transfer the cut-out cookies to the prepared baking sheets, leaving about ½ inch space between each cookie.
- Reroll Scraps: Gather the dough scraps, reroll them, and cut out more cookies. Repeat until all the dough is used.
- Bake: Bake for 8-10 minutes, or until the edges are lightly golden brown.
- Cool: Let the cookies cool on the baking sheets for a few minutes before transferring them to a wire rack to cool completely.
- Combine Icing Ingredients: In a large bowl (or the bowl of your stand mixer), combine the sifted powdered sugar and meringue powder.
- Add Water and Vanilla: Gradually add the warm water and vanilla extract, mixing on low speed until combined.
- Beat Until Stiff Peaks Form: Increase the speed to medium-high and beat for 5-7 minutes, or until stiff peaks form.
- Adjust Consistency: If the icing is too thick, add a little more water, one teaspoon at a time, until you reach the desired consistency. If the icing is too thin, add a little more powdered sugar, one tablespoon at a time.
- Divide and Color: Divide the icing into separate bowls, depending on how many colors you want to use. Add gel food coloring to each bowl, a few drops at a time, and stir until you reach your desired shade.
- Outline the Cookies: Transfer some of the icing to piping bags fitted with small round tips (such as a #2 or #3 tip). Use the thicker icing to outline the edges of the cookies.
- Flood the Cookies: Thin the remaining icing with a little water, one teaspoon at a time, until it reaches a flood consistency. Transfer the flood icing to piping bags or squeeze bottles.
- Fill in the Outlines: Carefully fill in the outlined areas with the flood icing. Use a toothpick or scribe tool to pop any air bubbles and to help spread the icing evenly.
- Add Details: While the flood icing is still wet, you can add details such as sprinkles, edible glitter, or other colors of icing. This is called “wet-on-wet” decorating.
- Let the Icing Dry: Let the icing dry completely, which usually takes several hours or overnight. The icing should be hard to the touch before you stack or package the cookies.
Notes
- Softened Butter is Key: Make sure your butter is properly softened before creaming it with the sugar. It should be soft enough to easily press your finger into, but not melted.
- Don’t Overmix the Dough: Overmixing develops the gluten in the flour, which can result in tough cookies. Mix until the dough just comes together.
- Chill the Dough: Chilling the dough is essential for preventing the cookies from spreading too much in the oven and for making the dough easier to handle.
- Use Parchment Paper: Parchment paper prevents the cookies from sticking and makes cleanup a breeze.
- Adjust Icing Consistency: The consistency of the royal icing is crucial for successful decorating. Experiment with adding small amounts of water or powdered sugar until you reach the desired consistency.
- Have Fun! Decorating sugar cookies is a fun and creative activity. Don’t be afraid to experiment and try new things.

Leave a Comment